Connecting Your Custom P3L Receipt Printer to POS Web
![]() Updated
Updated
Use this guide to install and configure a Custom P3L receipt printer for printing receipts in Cultivera POS Web.
What You’ll Need
- Windows computer
- USB B to A Printer cable
- Admin access to install drivers on PC
- Internet connection
Install the Printer Driver
- Go to the official product page for the Custom P3L
- Open the Support / Downloads section, which can be located near the bottom of the page.
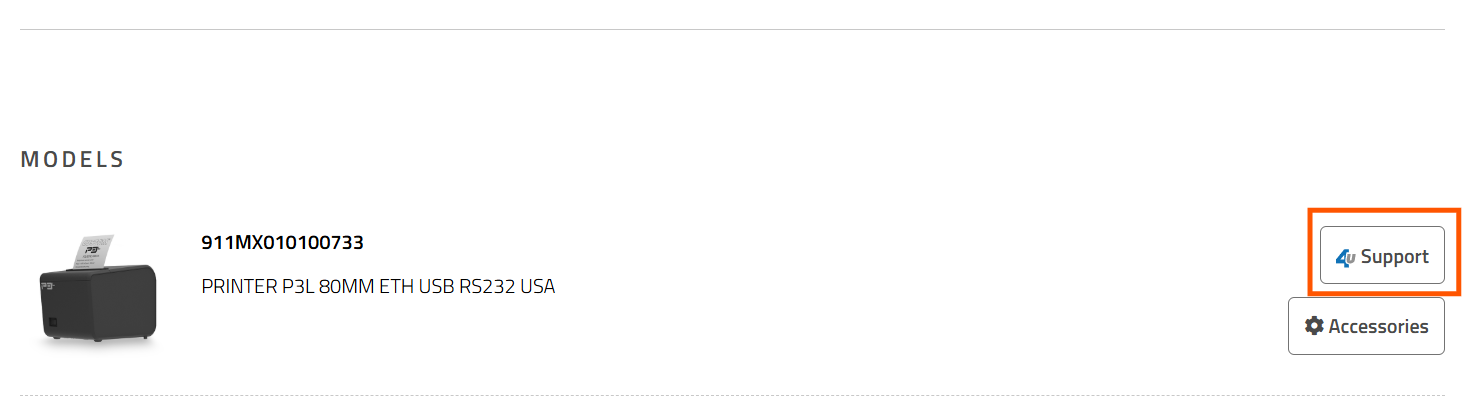
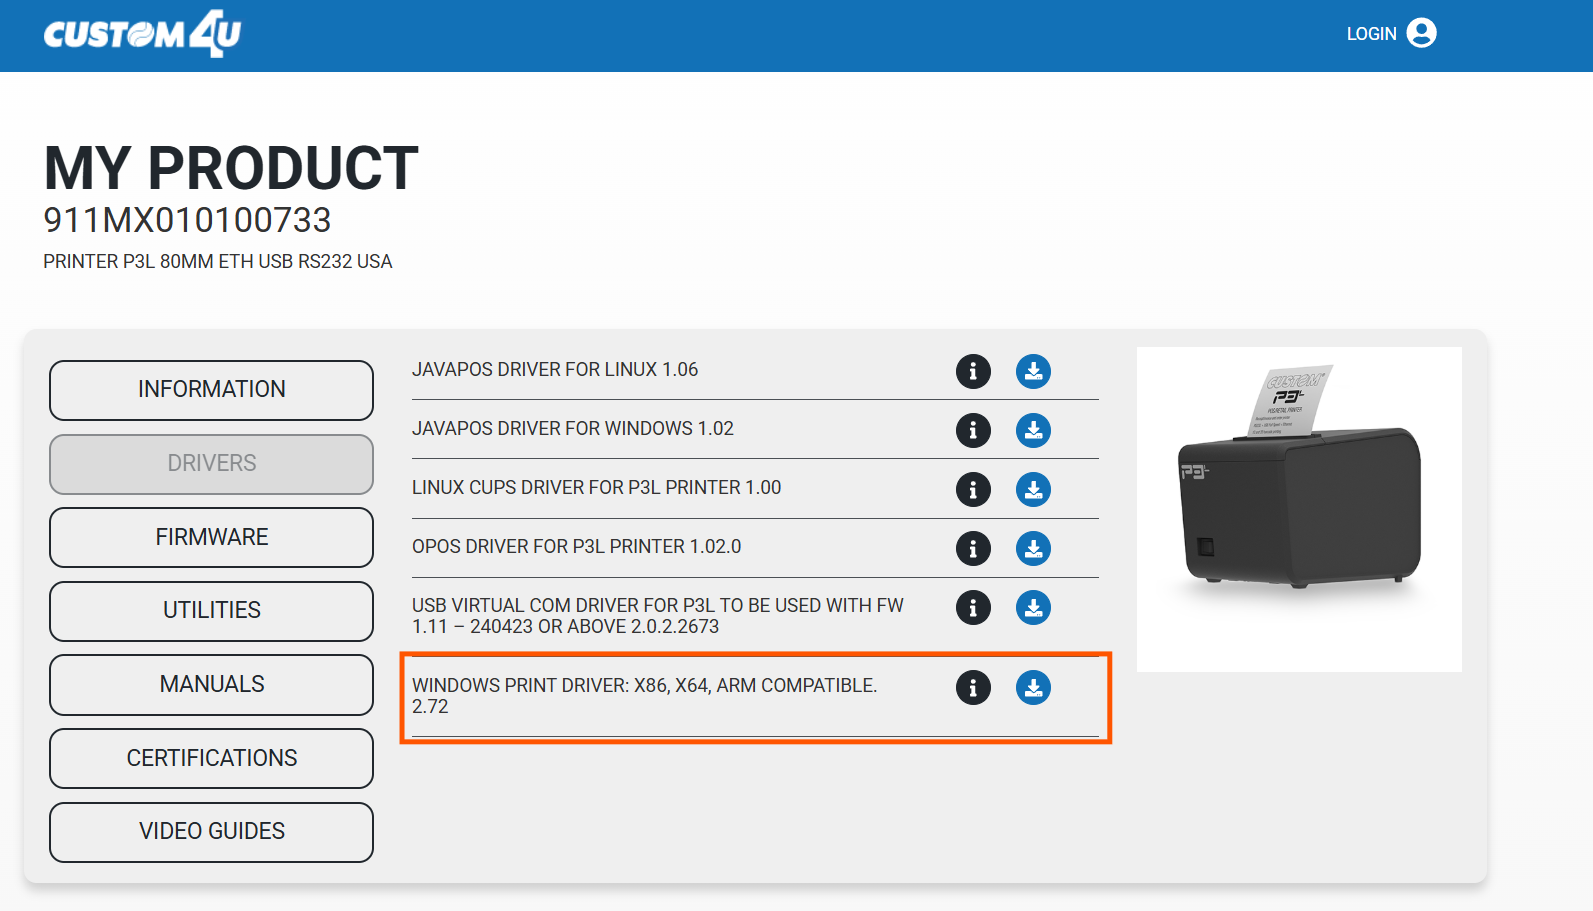
- Download the following:
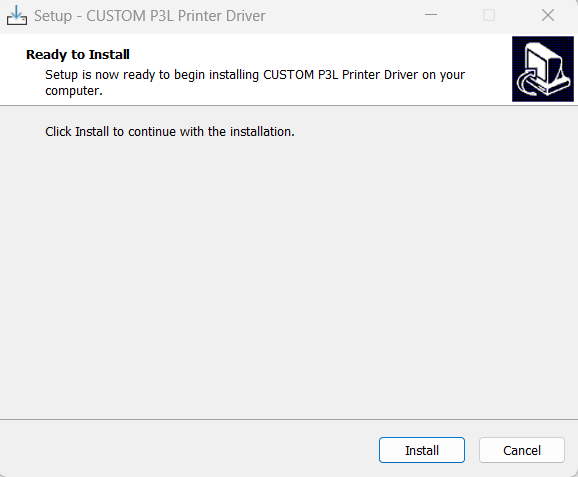
- Run the installer and complete setup
Connect the Printer
- Plug the printer into your computer using USB B to A Cable
- Power on the printer
- Wait for Windows to detect the device
The printer will install automatically once connected.
Confirm the Printer is Installed
- Open Windows Settings
- Go to Bluetooth & Devices > Printers & Scanners
- Look for the Custom P3L in the list

If you see it listed, the printer is ready to use.
Enable Cash Drawer (If Applicable)
If your printer is connected to a cash drawer:
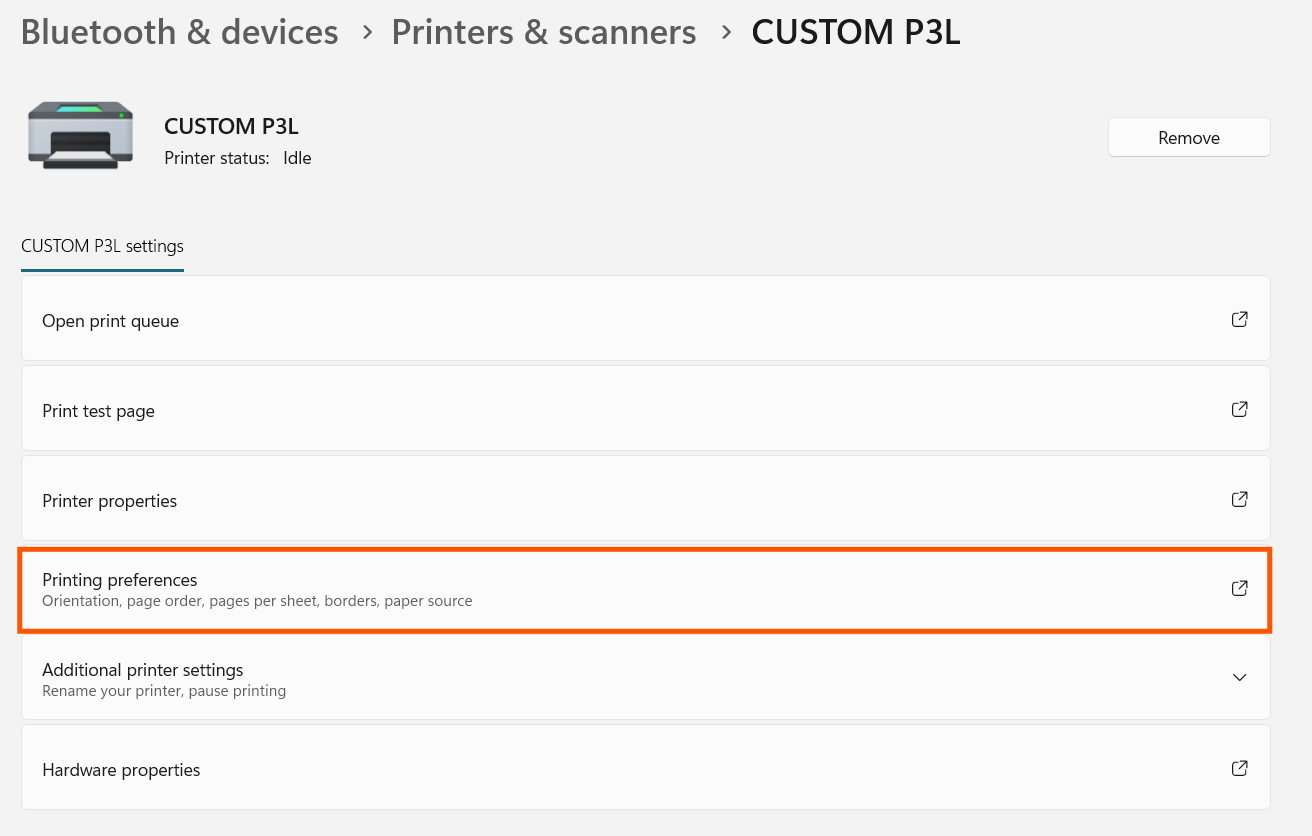
- Open Printers & Scanners
- Select the Custom P3L printer
- Click Printing Preferences
- Select Advanced
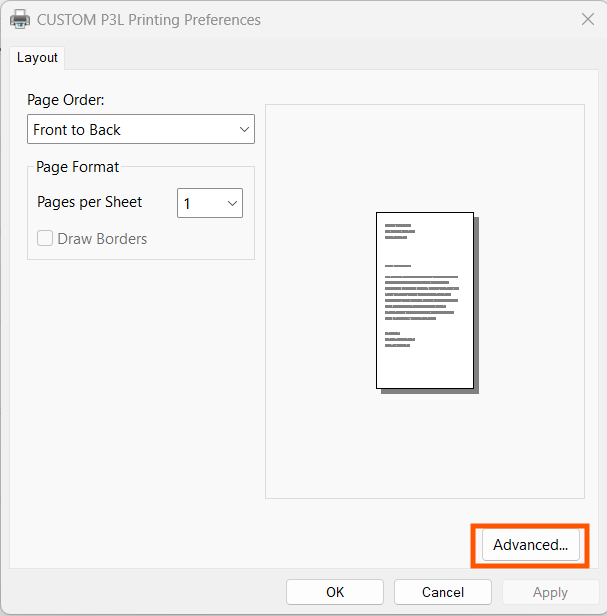
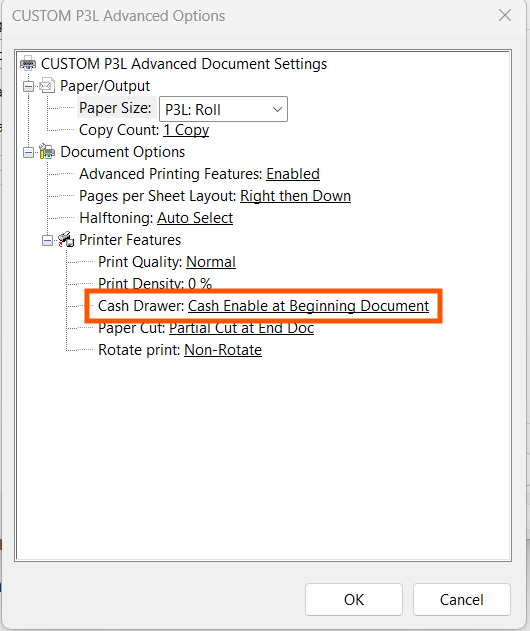
- Under Printer Features, set:
- Cash Drawer > Cash Enable at Beginning of Document
- Cash Drawer > Cash Enable at Beginning of Document
This ensures the drawer opens when printing receipts.
Print a Receipt in Cultivera
- Print X/Z Report from Shifts page
- In the browser print window:
- Select the Custom P3L printer
If you don’t see it:
- Click See more or More printers
- Select it from the full list
Troubleshooting
Printer not showing up
- Make sure it’s powered on
- Check the USB connection
- Try a different USB port or Cable
- Reinstall the driver
Printer installed but not selectable
- Select "See More" in Print Preview
- Restart your browser
- Restart your computer
Cash drawer not opening
- Confirm the cash drawer setting is enabled in printer preferences
Still Need Help?
If you’re unable to complete setup, contact Custom Support by clicking the link below: