POS - Administration: Roles
![]() Updated
Updated
POS Administration: Roles
When creating new users in Cultivera POS, you will need to assign Roles in order to give those individuals access to the necessary functions and features within the POS and Back Office to perform their designated duties. This walkthrough will show you how to create new roles for your users and how to toggle the needed permissions.
- Log in to Cultivera Back Office.
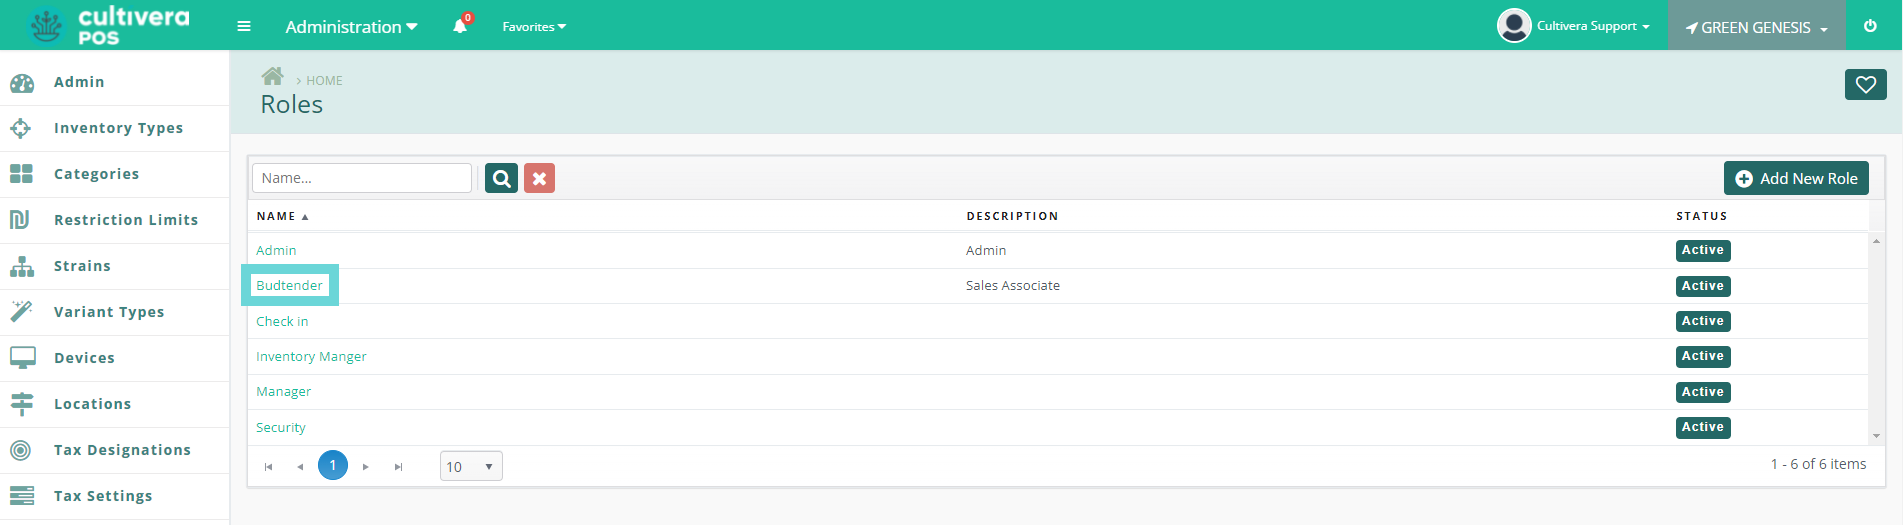
- Navigate to the Roles page in the Administration module.
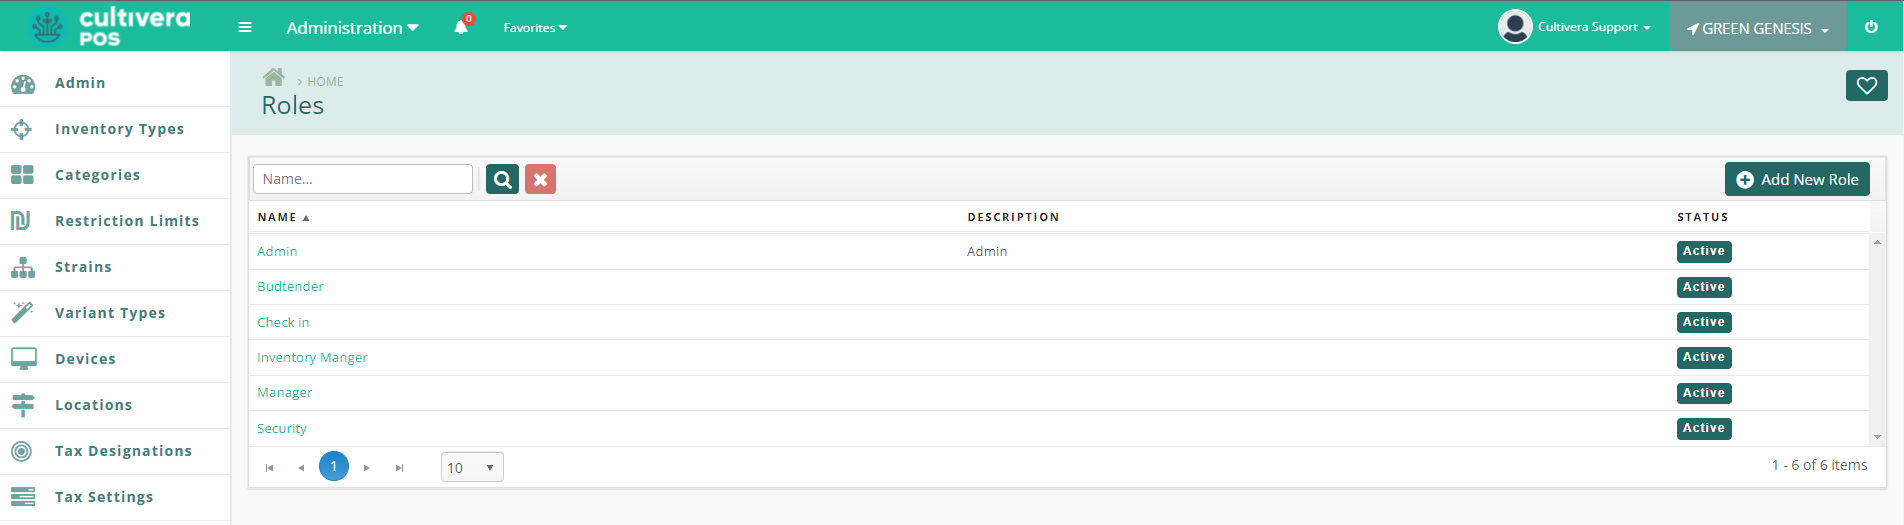
- To add a new role, click the "Add New Role" button.

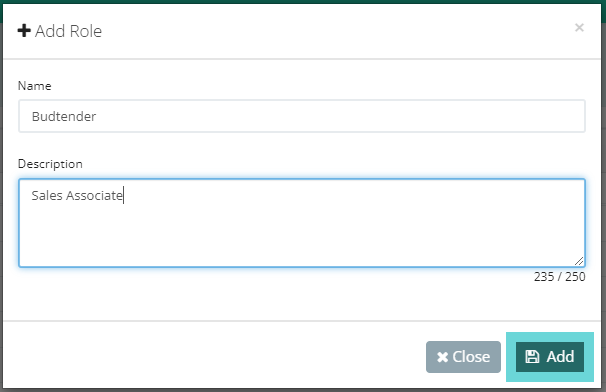
- Enter the name of your new role and an optional description. Once finished, click the "Add" button.
- Once created, you can view the details of each role by clicking the teal Name link.
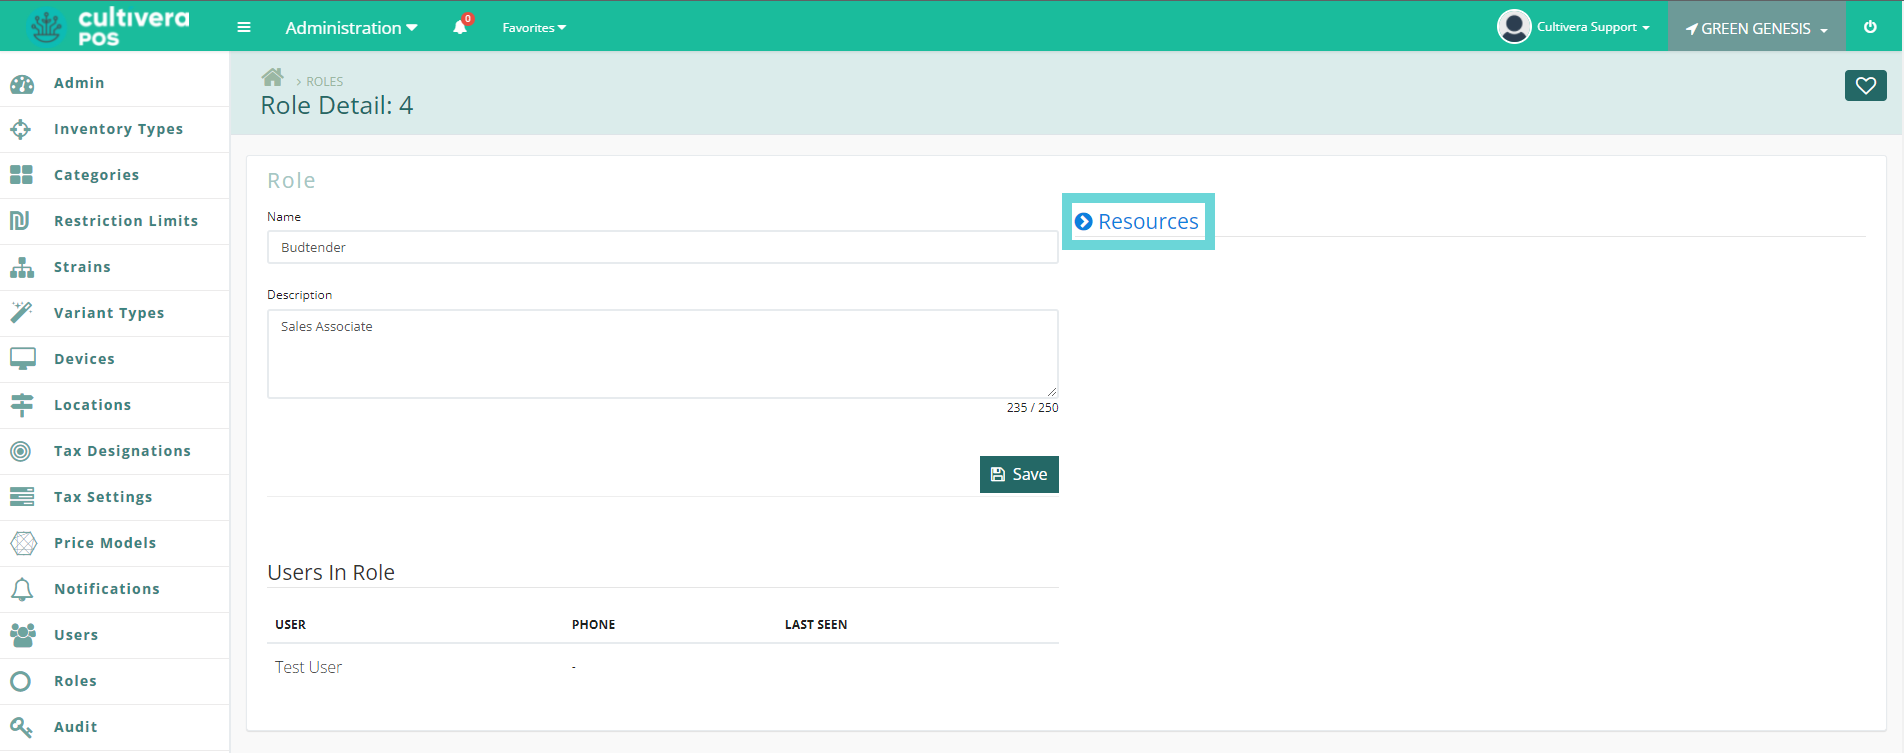
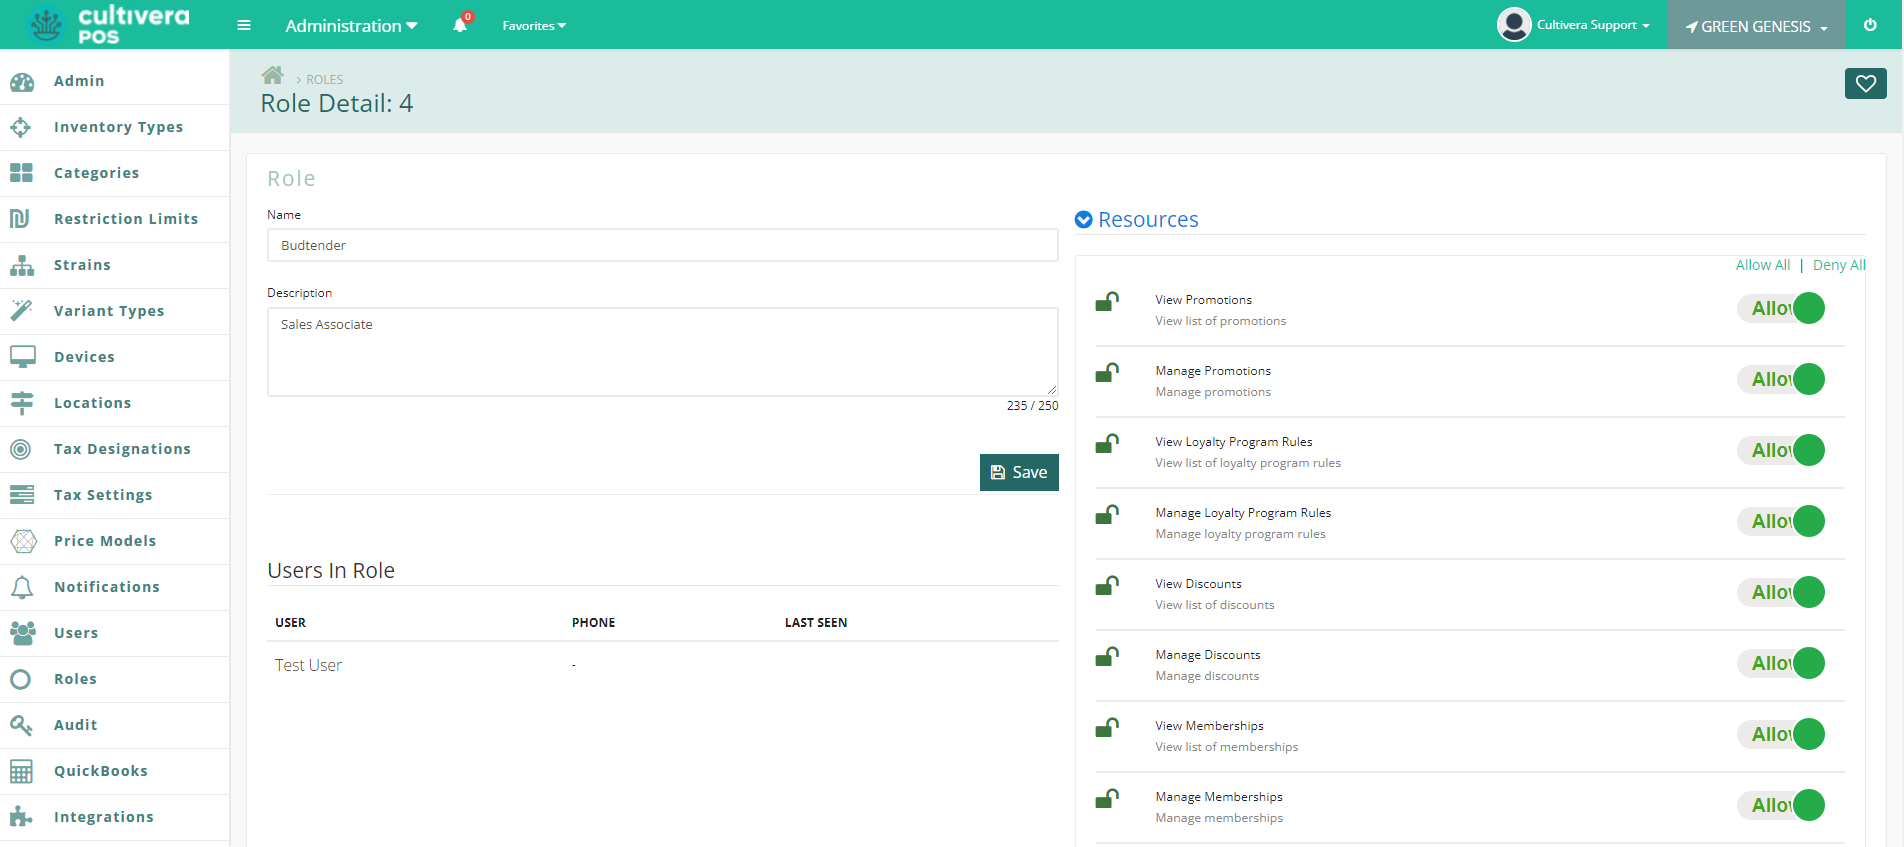
- The Role Details page is where you'll edit the role name and description, view users assigned to the role, and set permissions. To view permissions click on the Resources drop-down menu. This will expand the permissions and allow you to toggle each one to allow or deny.
- When the Resources menu has been expanded, you'll see a variety of permissions to allow or deny. Scroll down and ensure the role has all necessary permissions needed for the users assigned.
- After you've decided which permissions to allow or deny, and are ready to assign the role to users, click the "Save" button.
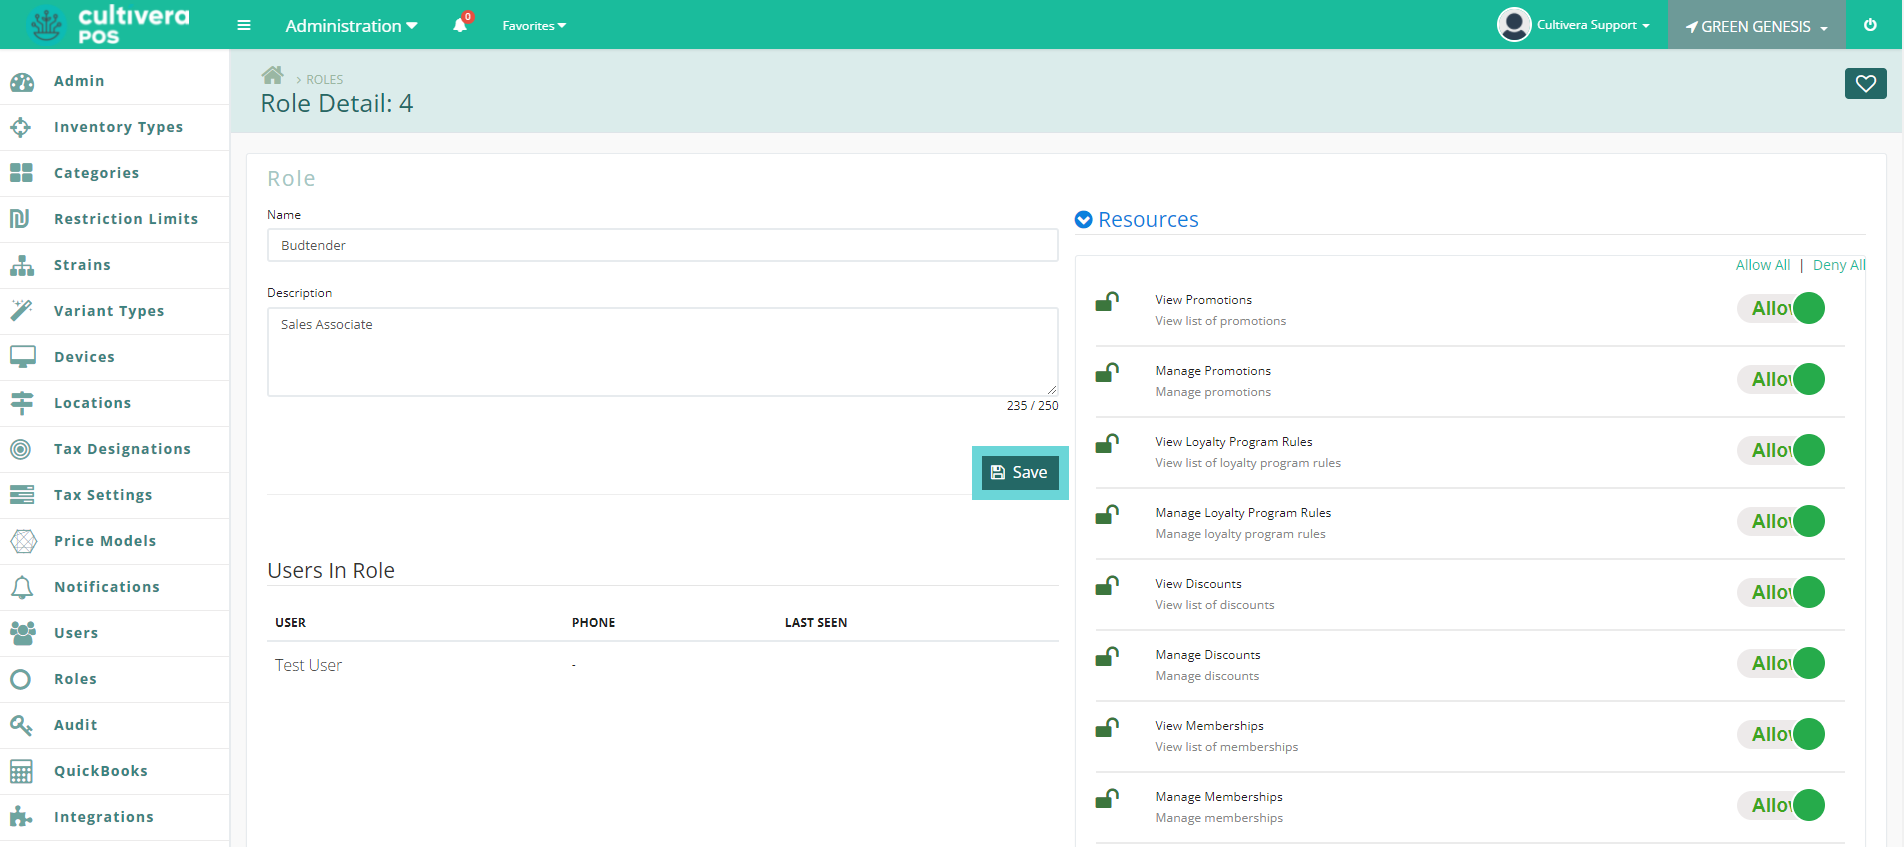
- The Role Details page is where you'll edit the role name and description, view users assigned to the role, and set permissions. To view permissions click on the Resources drop-down menu. This will expand the permissions and allow you to toggle each one to allow or deny.
It is important to consider what needs to be viewable and accessible by each user assigned to roles. For example, a budtender or sales associate does not generally need access to analytics, the Back Office, or most administrative actions; so you can deny those permissions for that role.
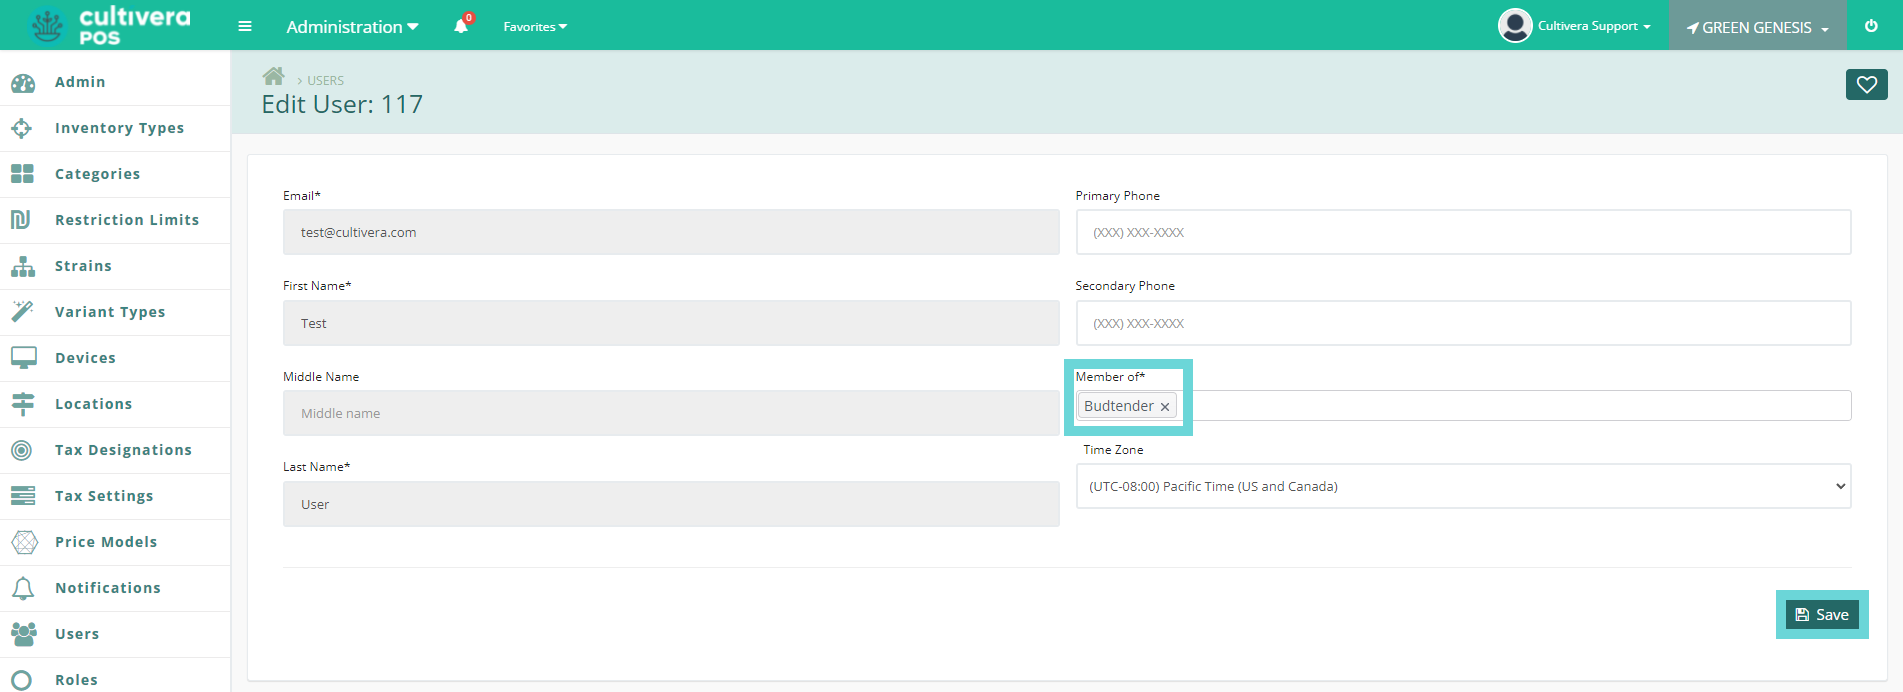
- To assign the new role to a user, navigate to the Users page within the Administration module and click the user's name link. This will bring you to the User Details page where the role can be assigned in the "Member of" field. Input the role for the user and click "Save".