POS - Store Management: Employees
![]() Updated
Updated
POS Back Office: Store Management - Employee Management
To access the Terminal or utilize the time clock, a staff member needs to be created as an Employee.
The Employee profile will provide information on all transactions, notes, activities, and samples created by the employee.
» Creating a User will give staff members access to the Back Office.
» Creating an Employee will allow a staff member access to the Terminal.
Employees will be assigned a 4 digit PIN to access the Terminal or to clock in and out at the Terminal or Back Office. You may retrieve or edit these PINs as shown below.
Follow the steps below to create and edit an Employee profile.
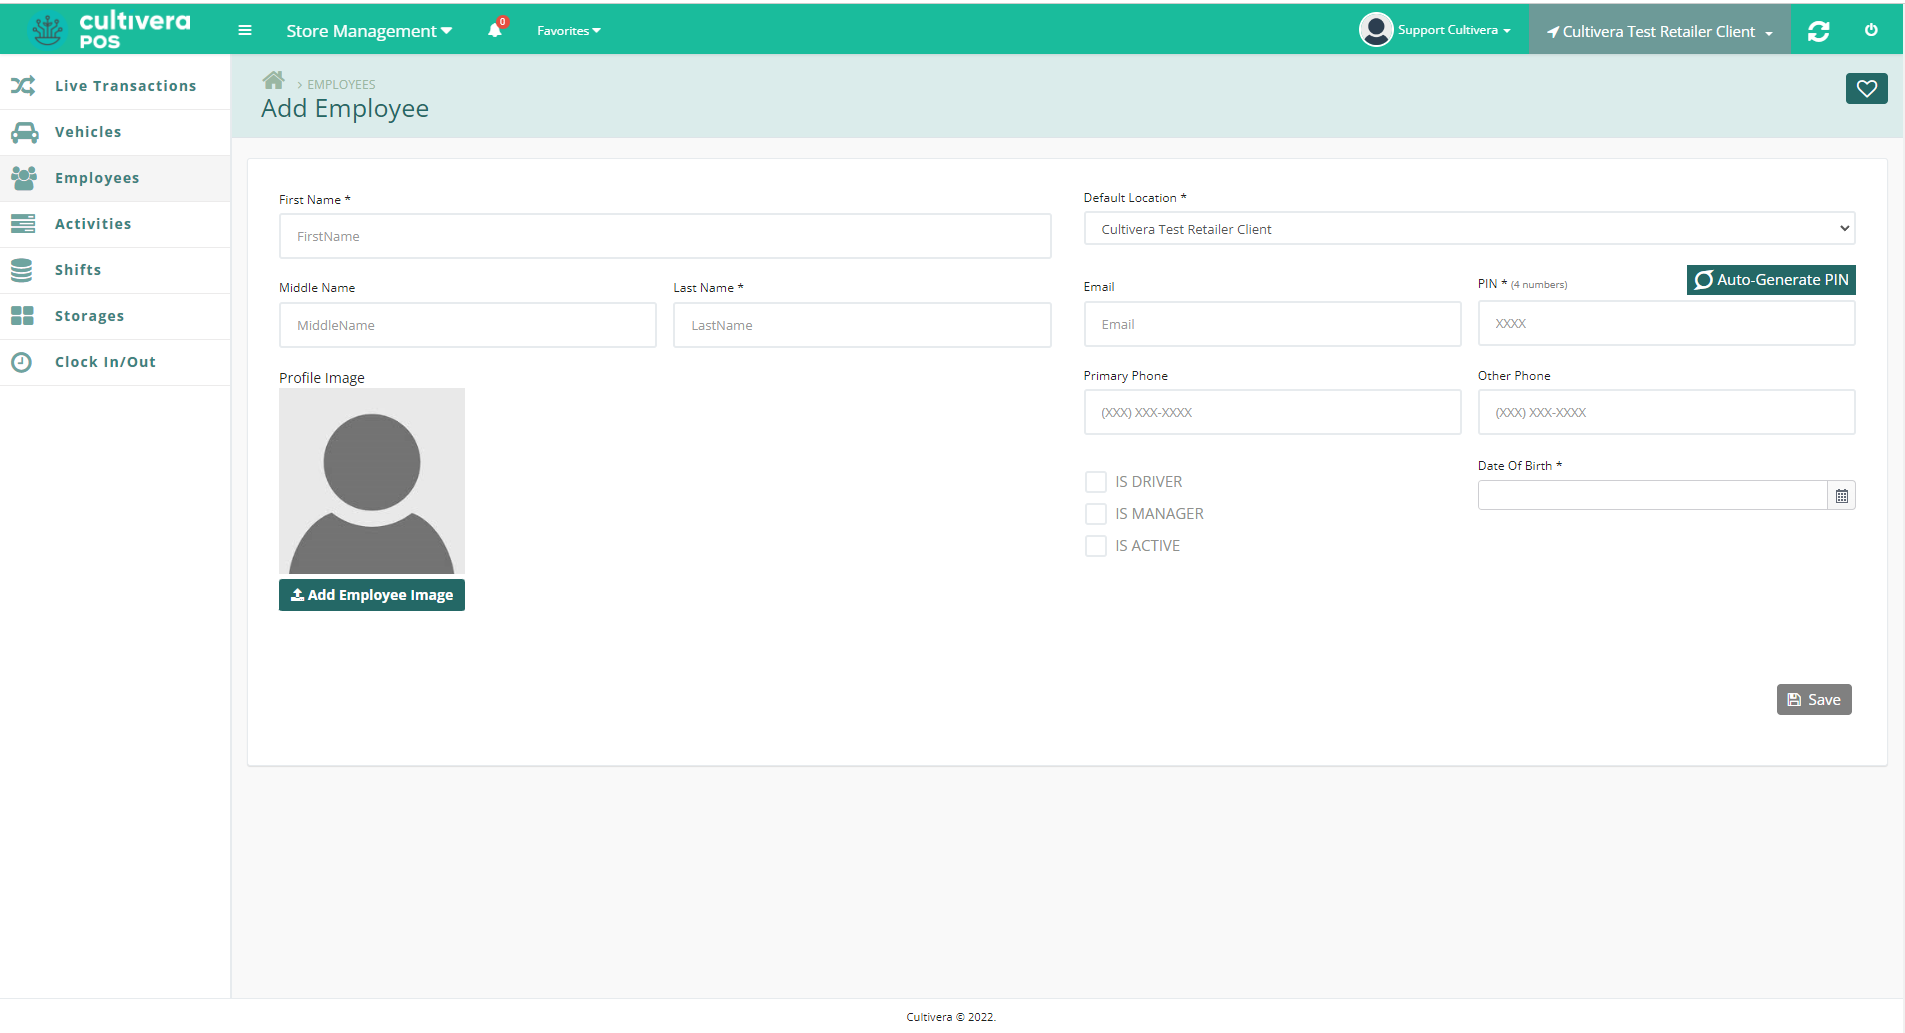
To Create an Employee
- Log into Cultivera POS Back Office.
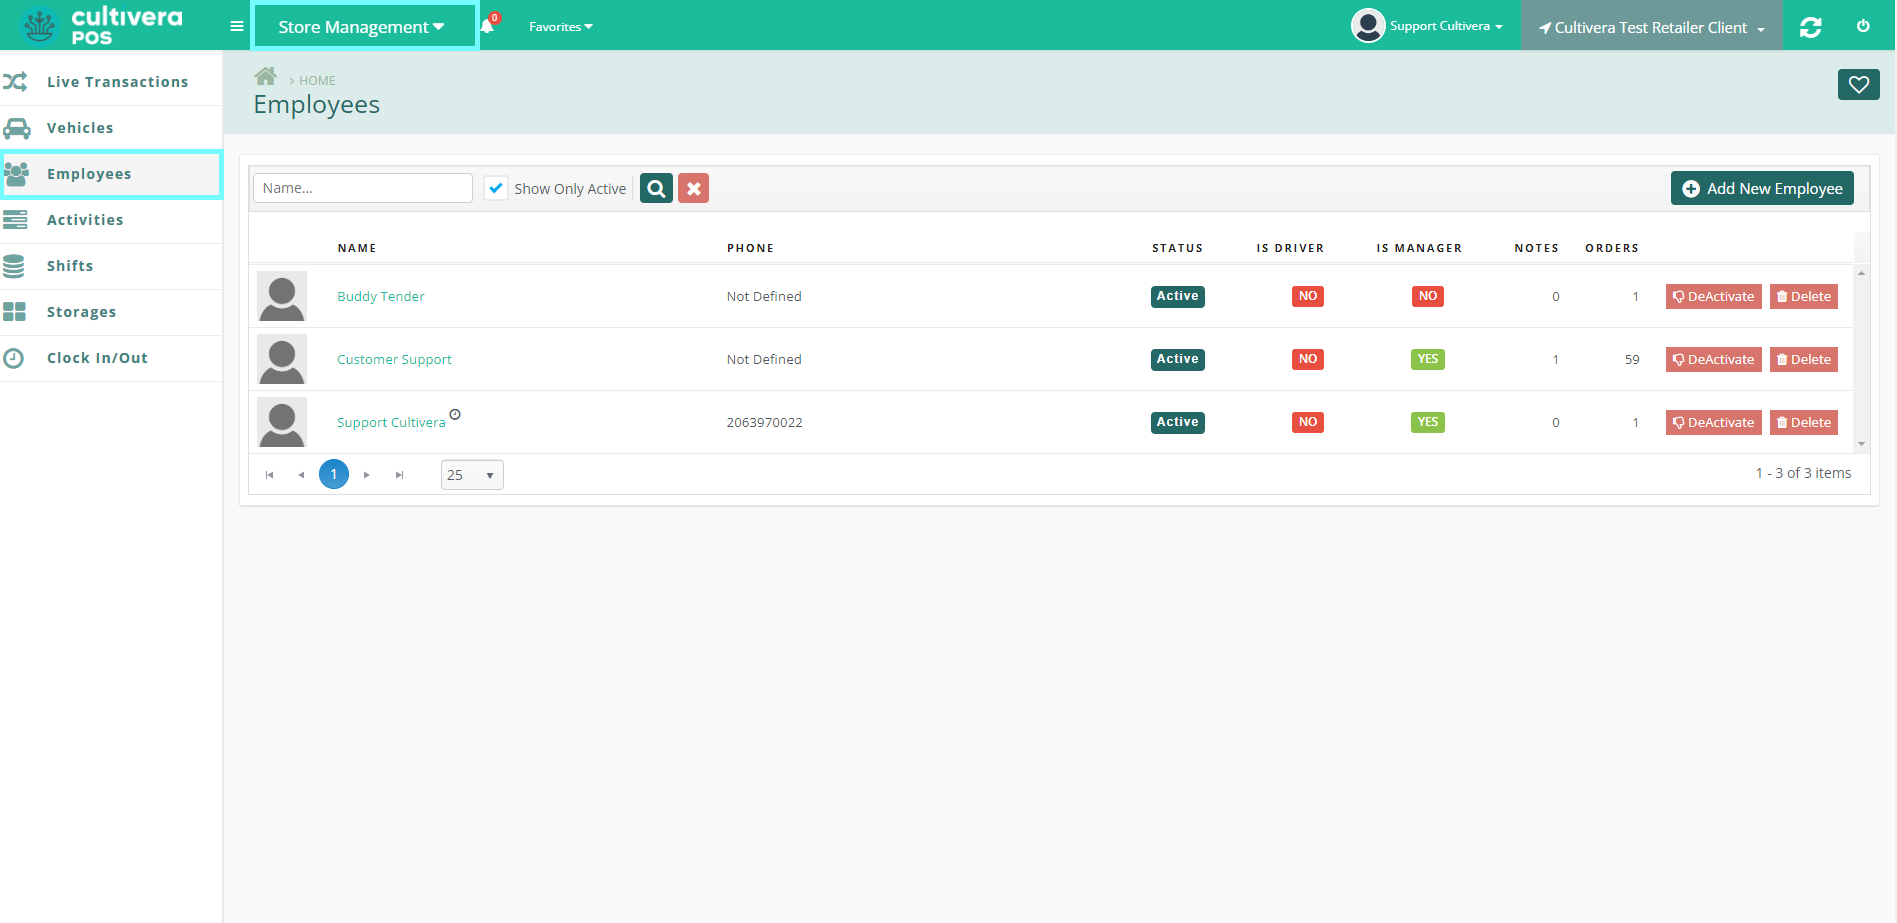
- Navigate to Store Management > Employees.

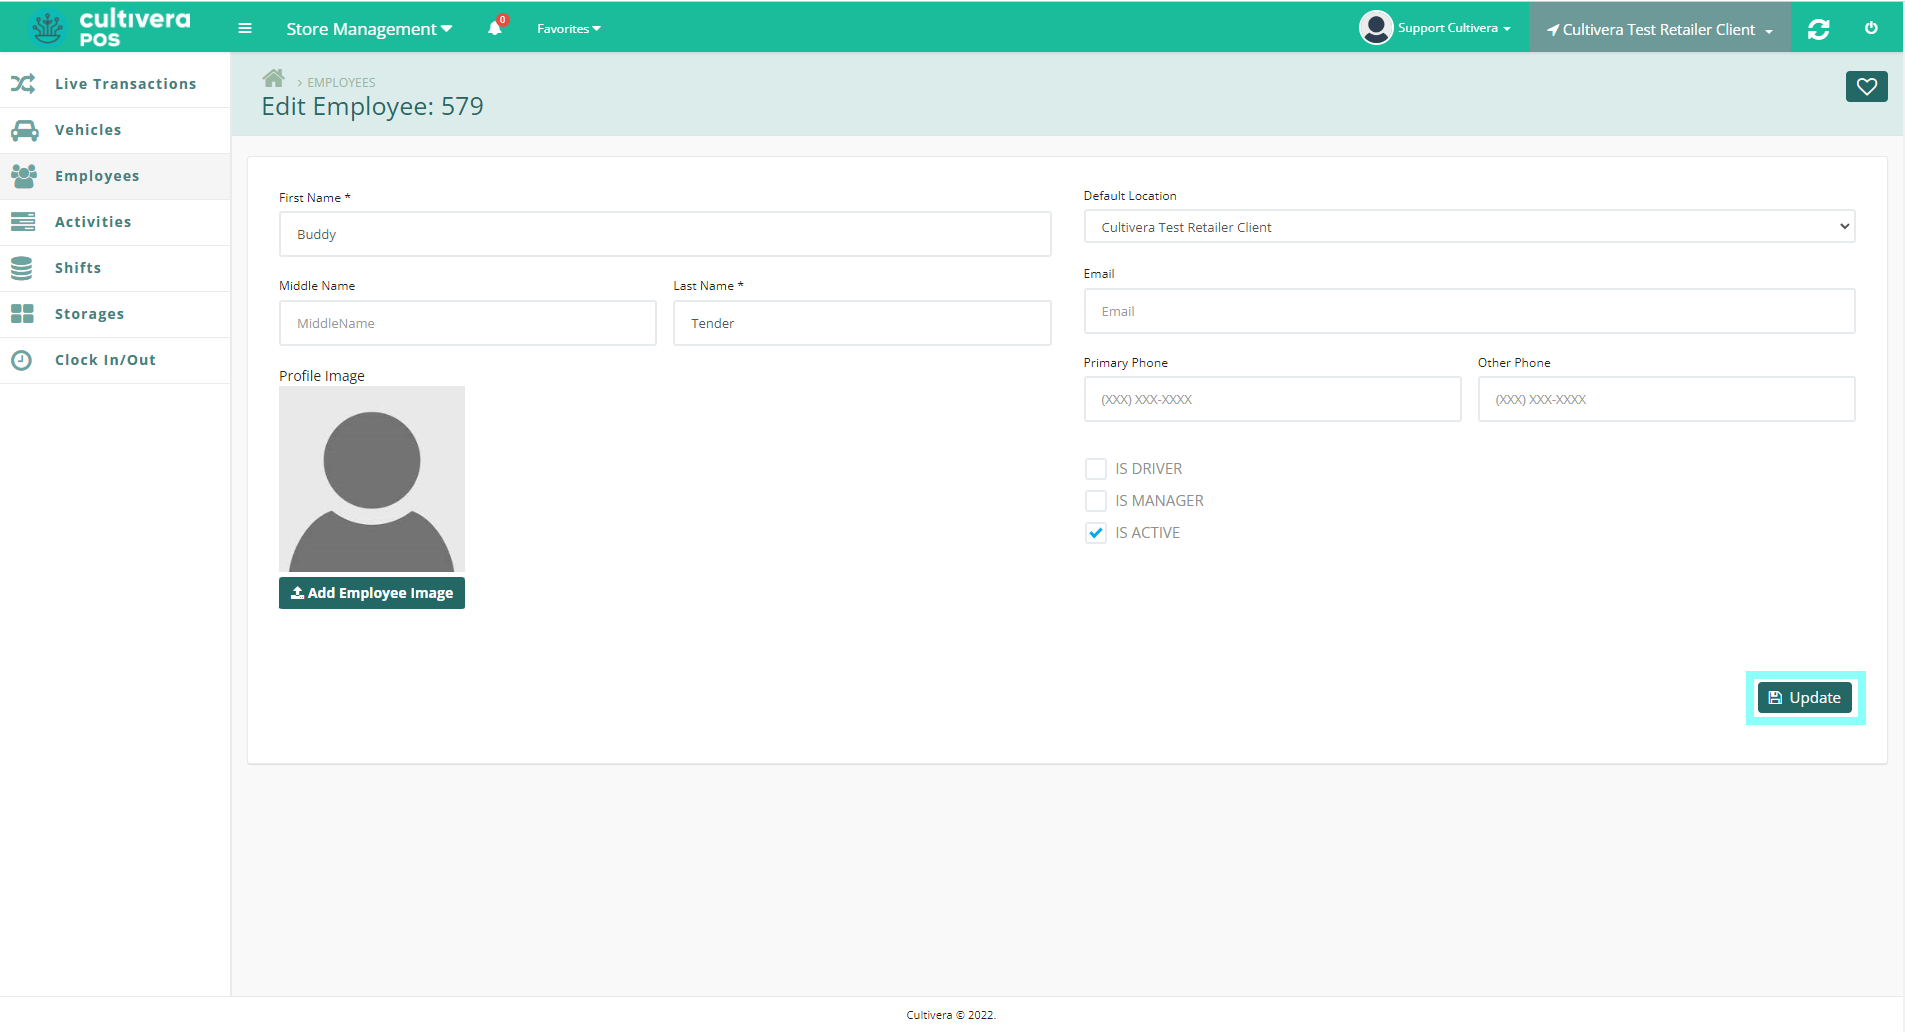
- Complete all required fields that display asterisks (*). These include: First Name, Last Name, 4 digit Pin Number, and Date of Birth.
- If the Employee is a Manager, check the "Is Manager" box. This will allow the Employee to override using their Manager Pin for security features at the Terminal.
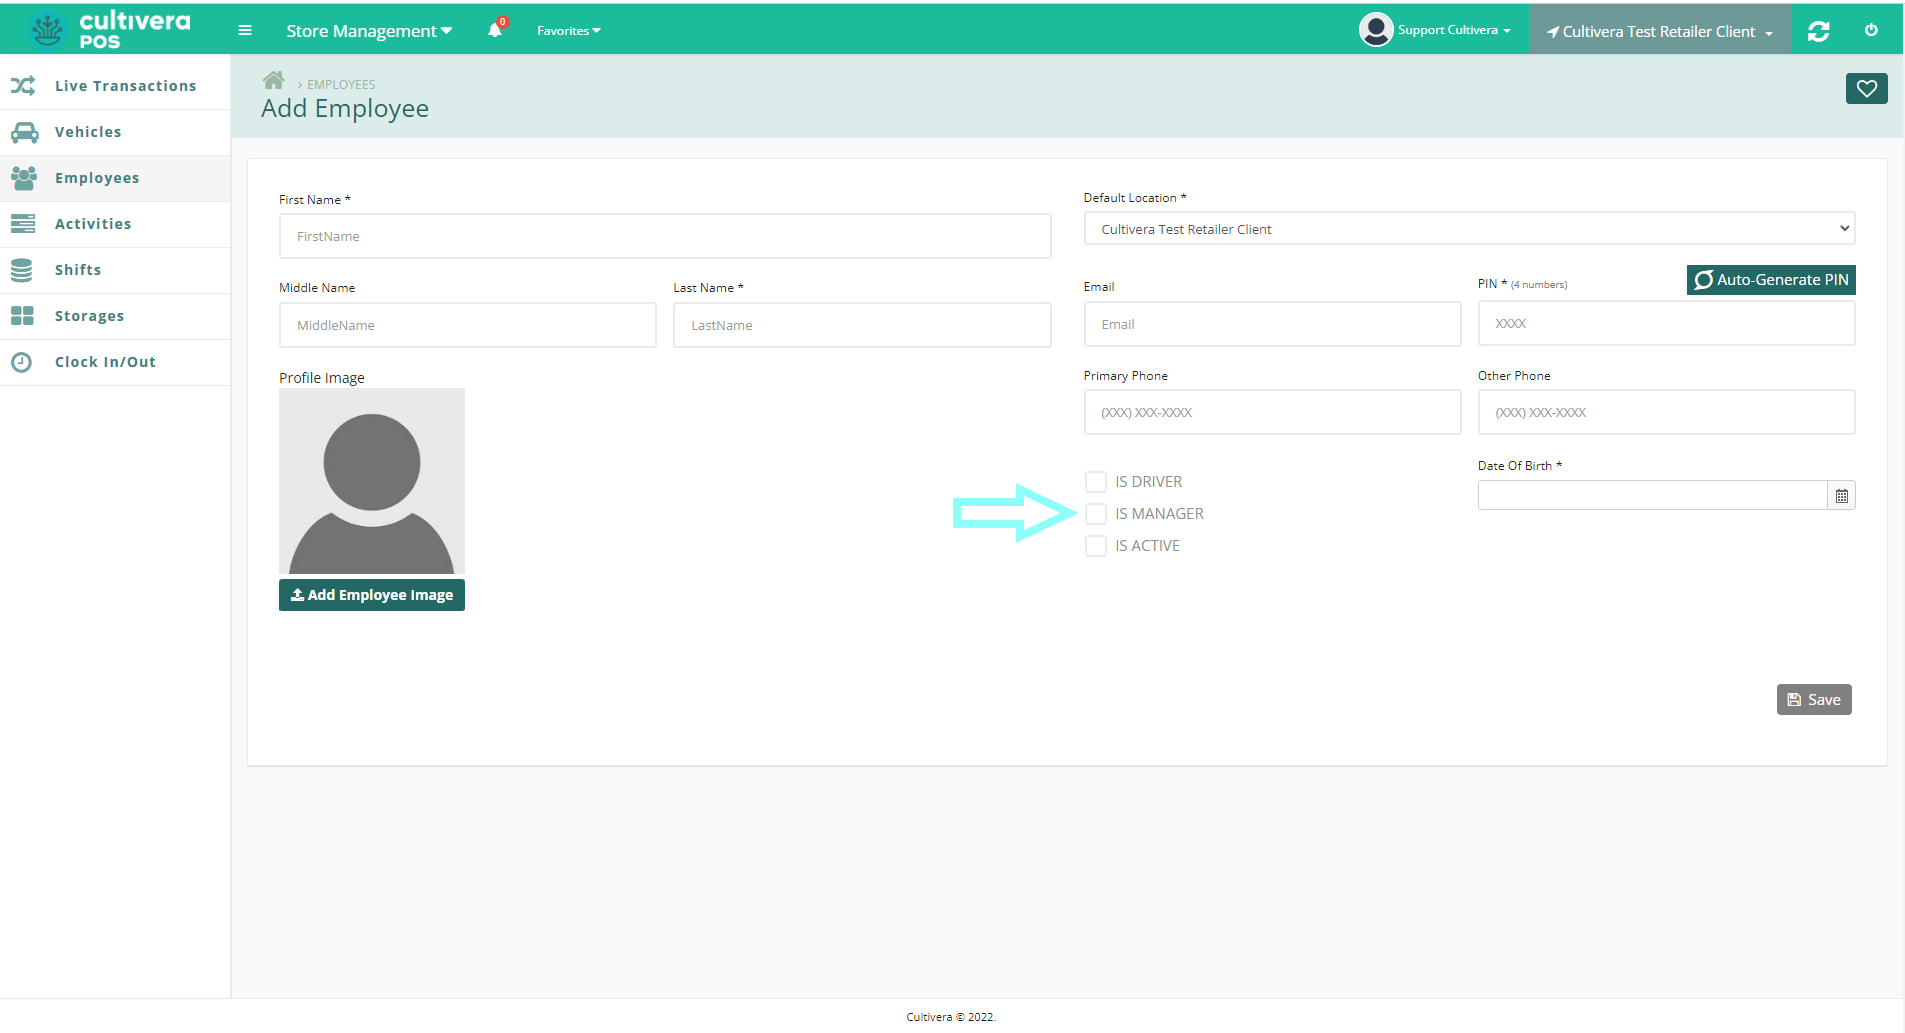
- For Employees that will be delivering product, or need to appear on a Transfer Manifest, check the "Is Driver" box. This will allow the Employee to appear as available for delivery.
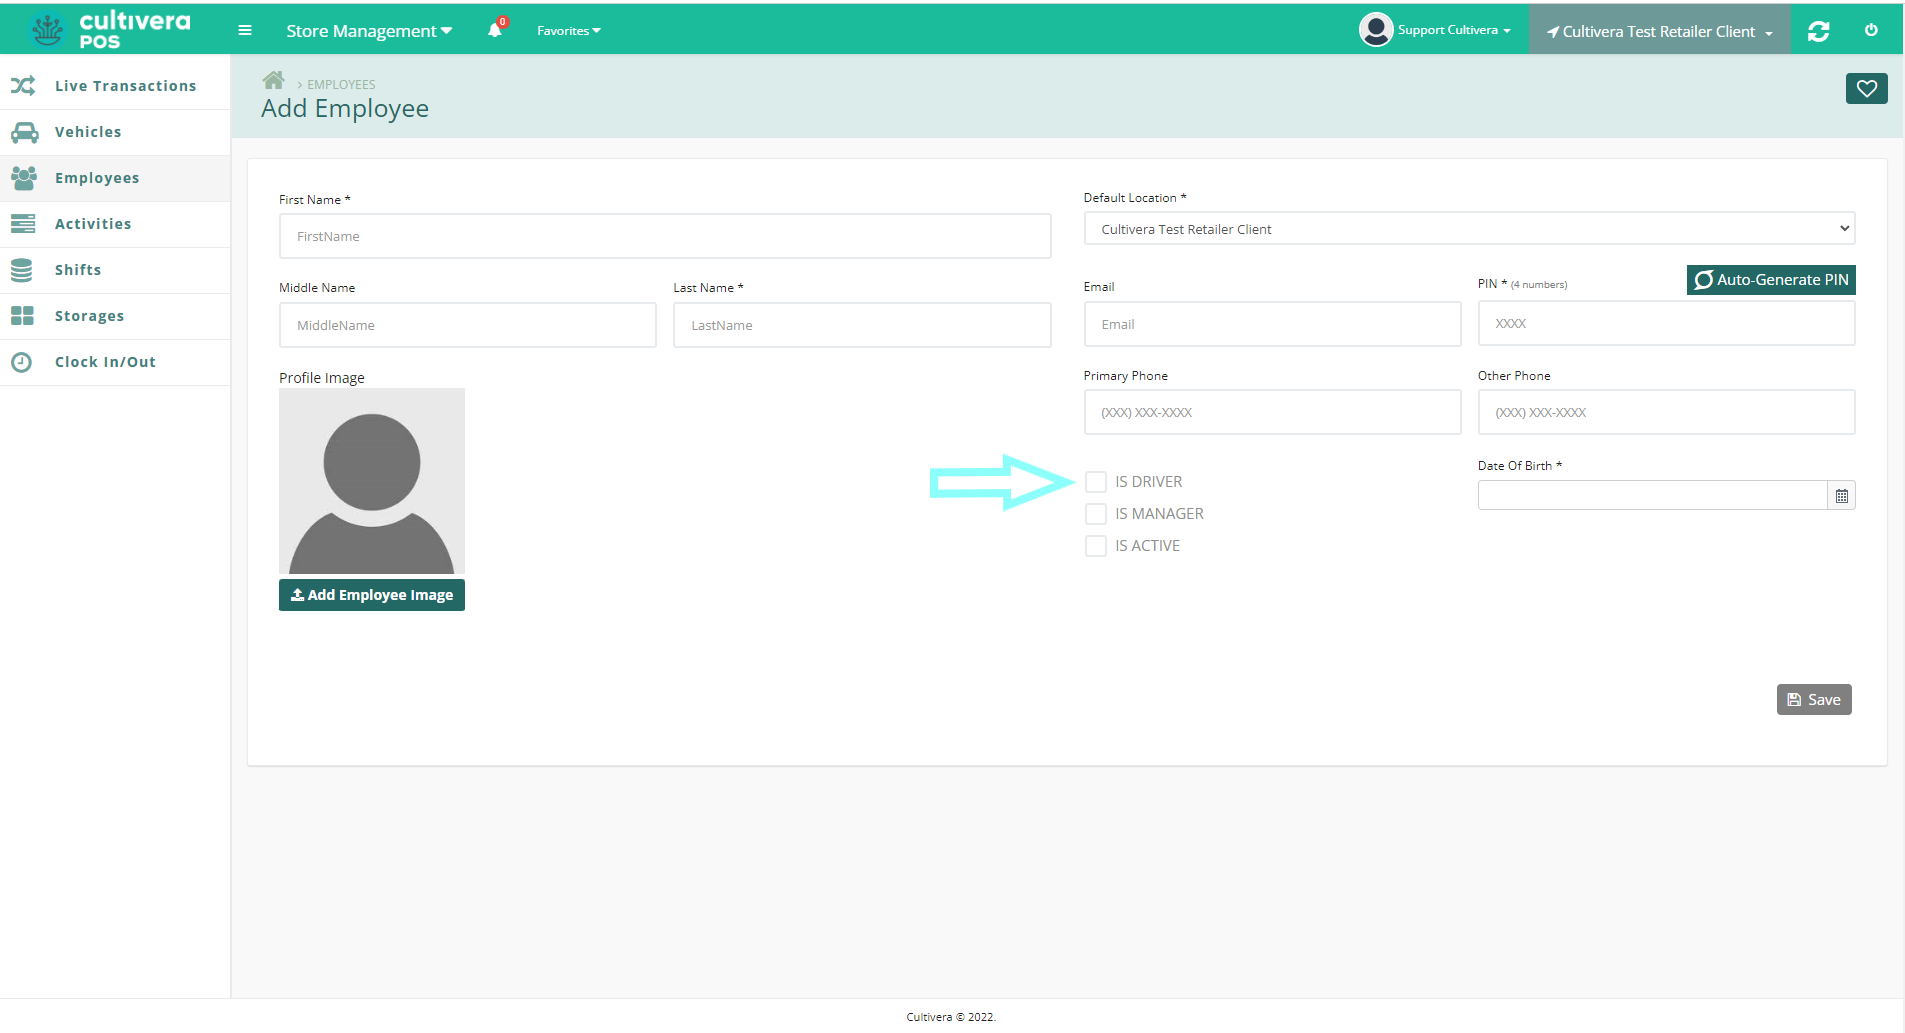
- If the Employee is a Manager, check the "Is Manager" box. This will allow the Employee to override using their Manager Pin for security features at the Terminal.
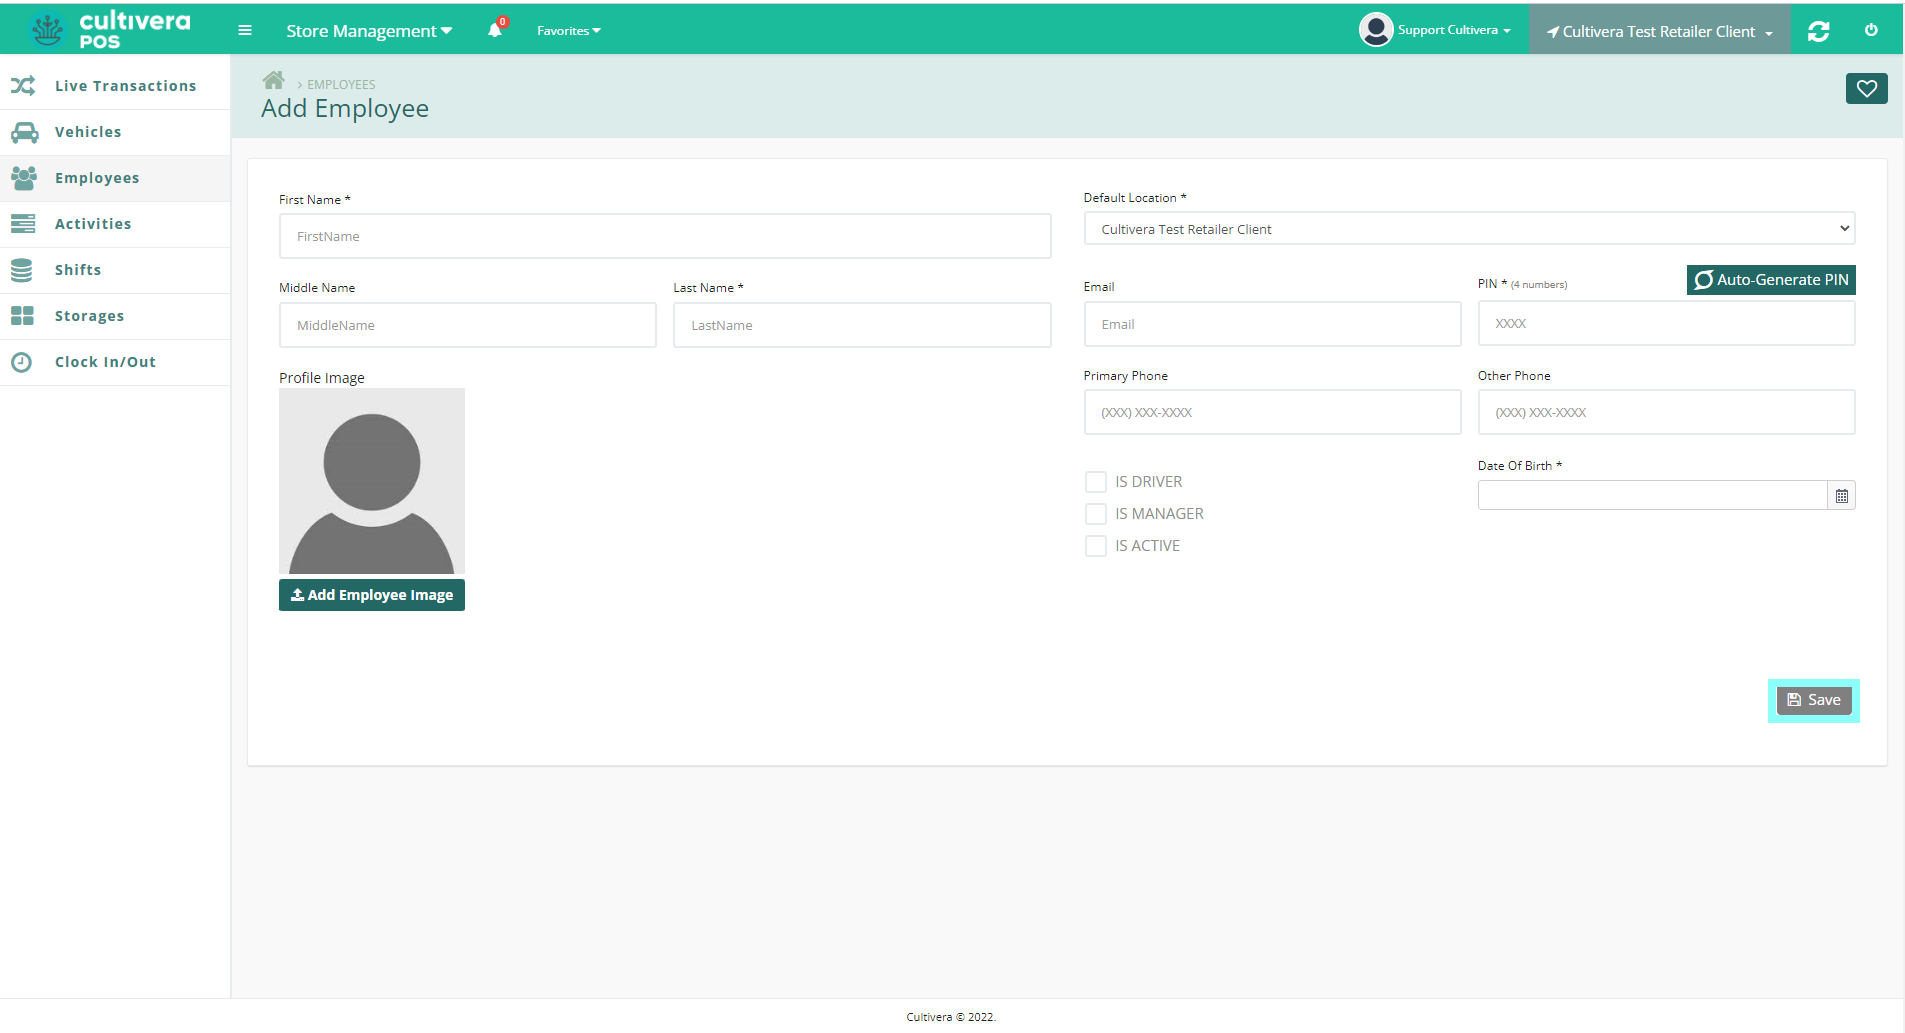
- Once all required fields are complete, the "Save" button will change to green. Click "Save".
To Edit an Employee
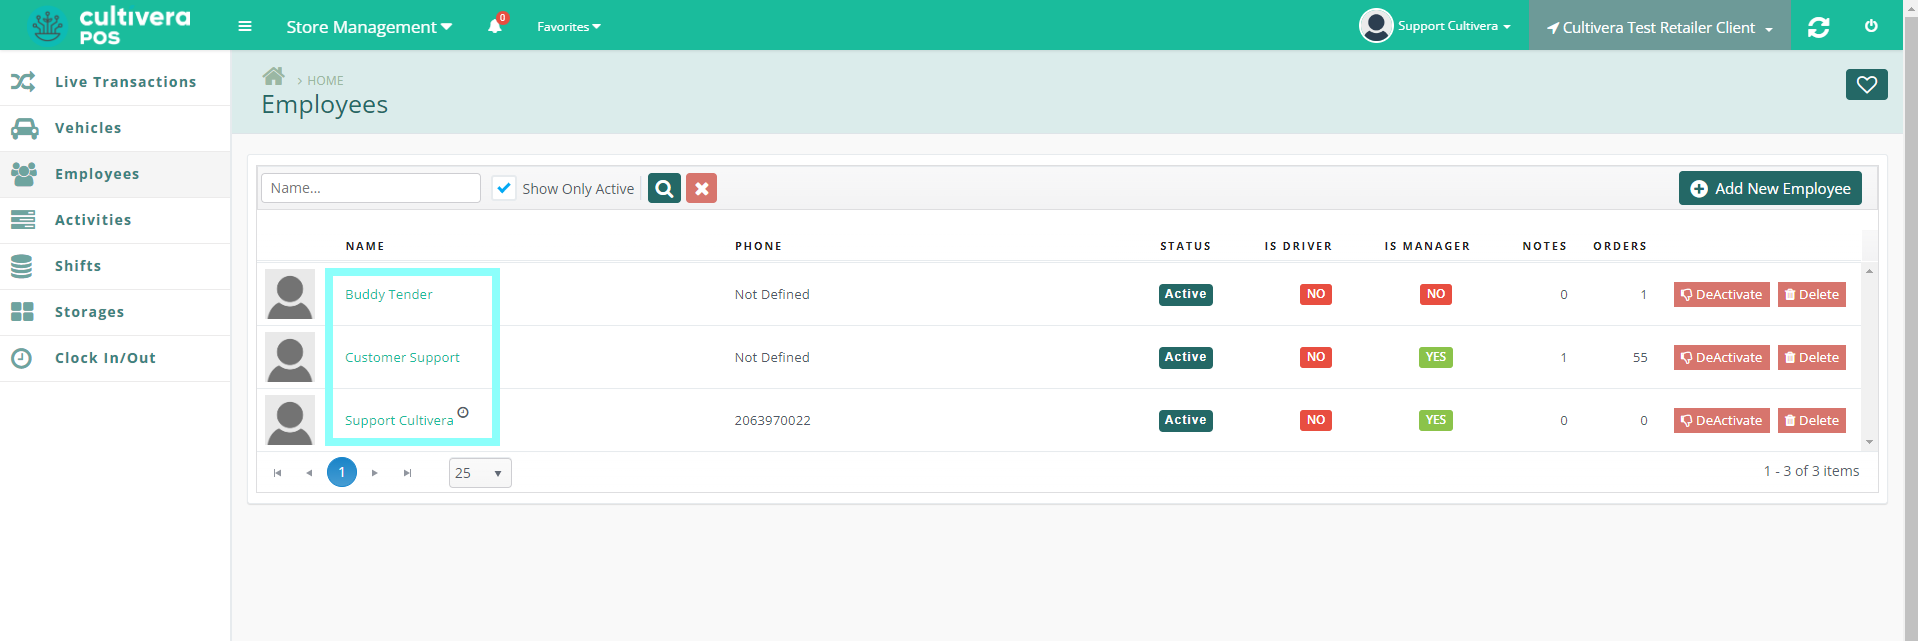
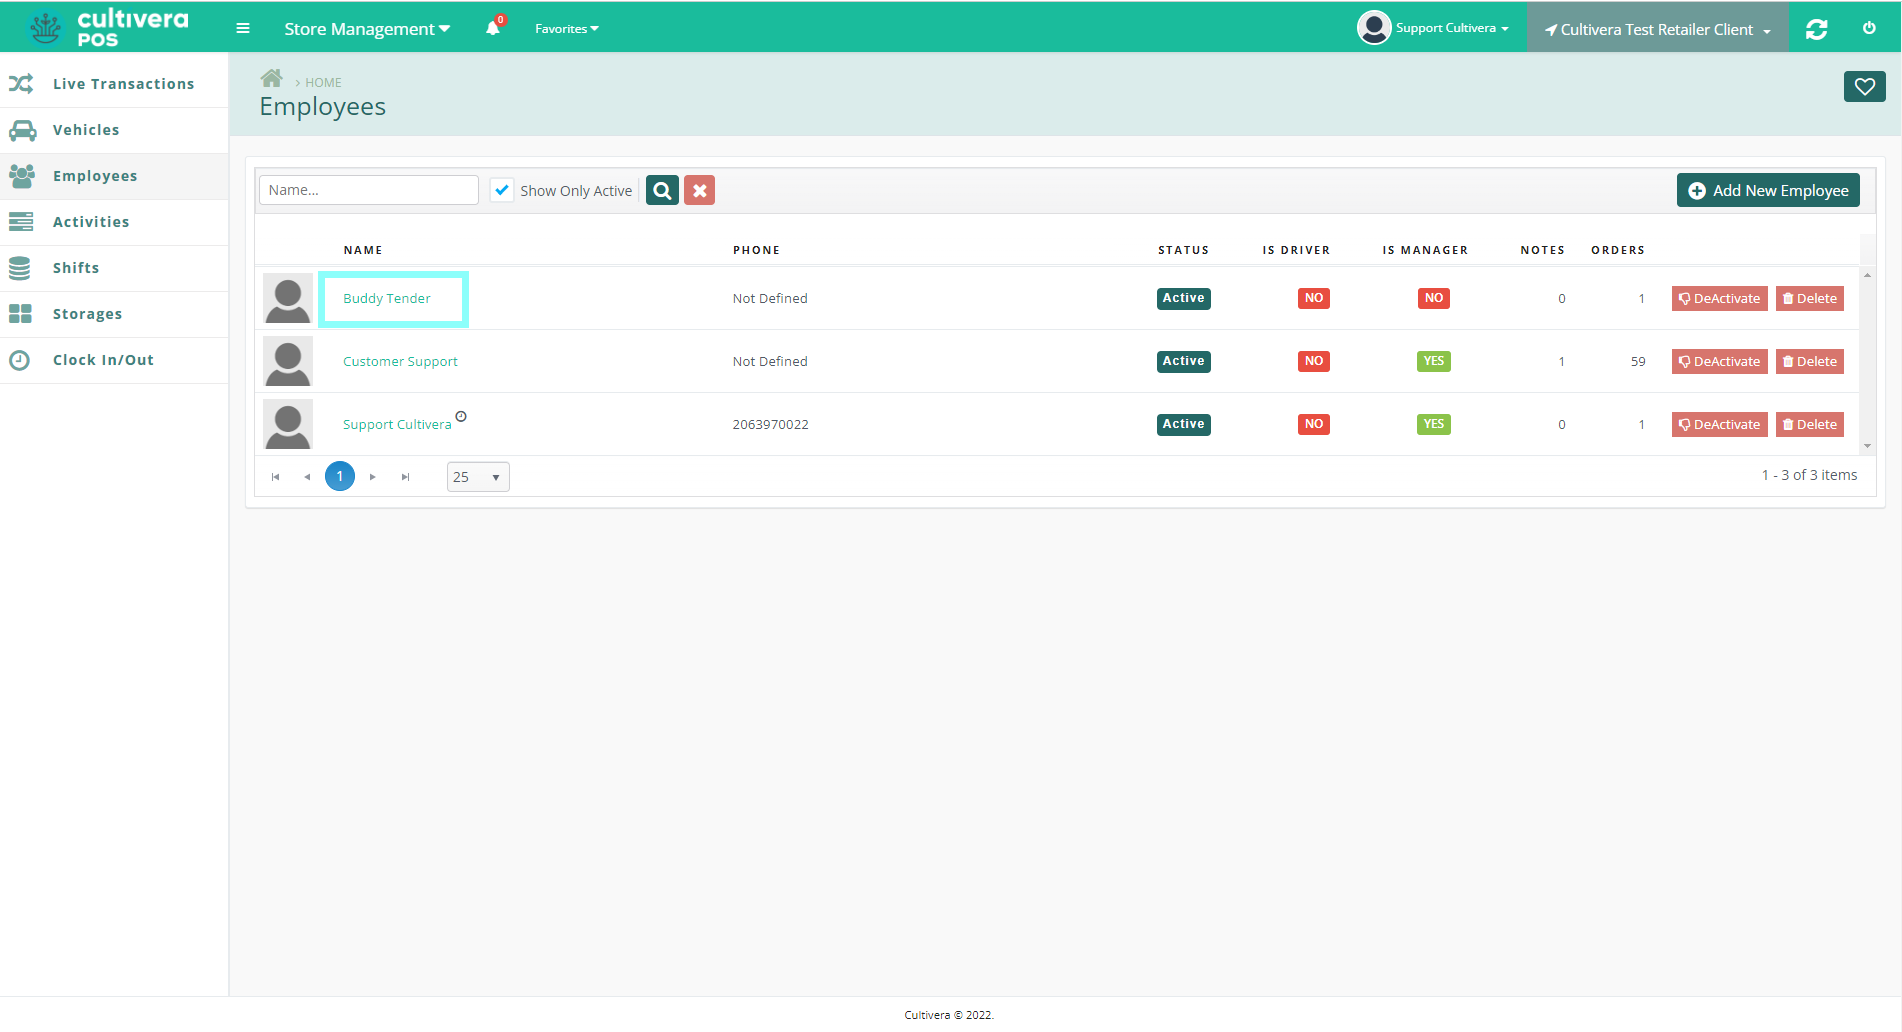
To edit an existing Employee, Navigate to the Employees home screen.
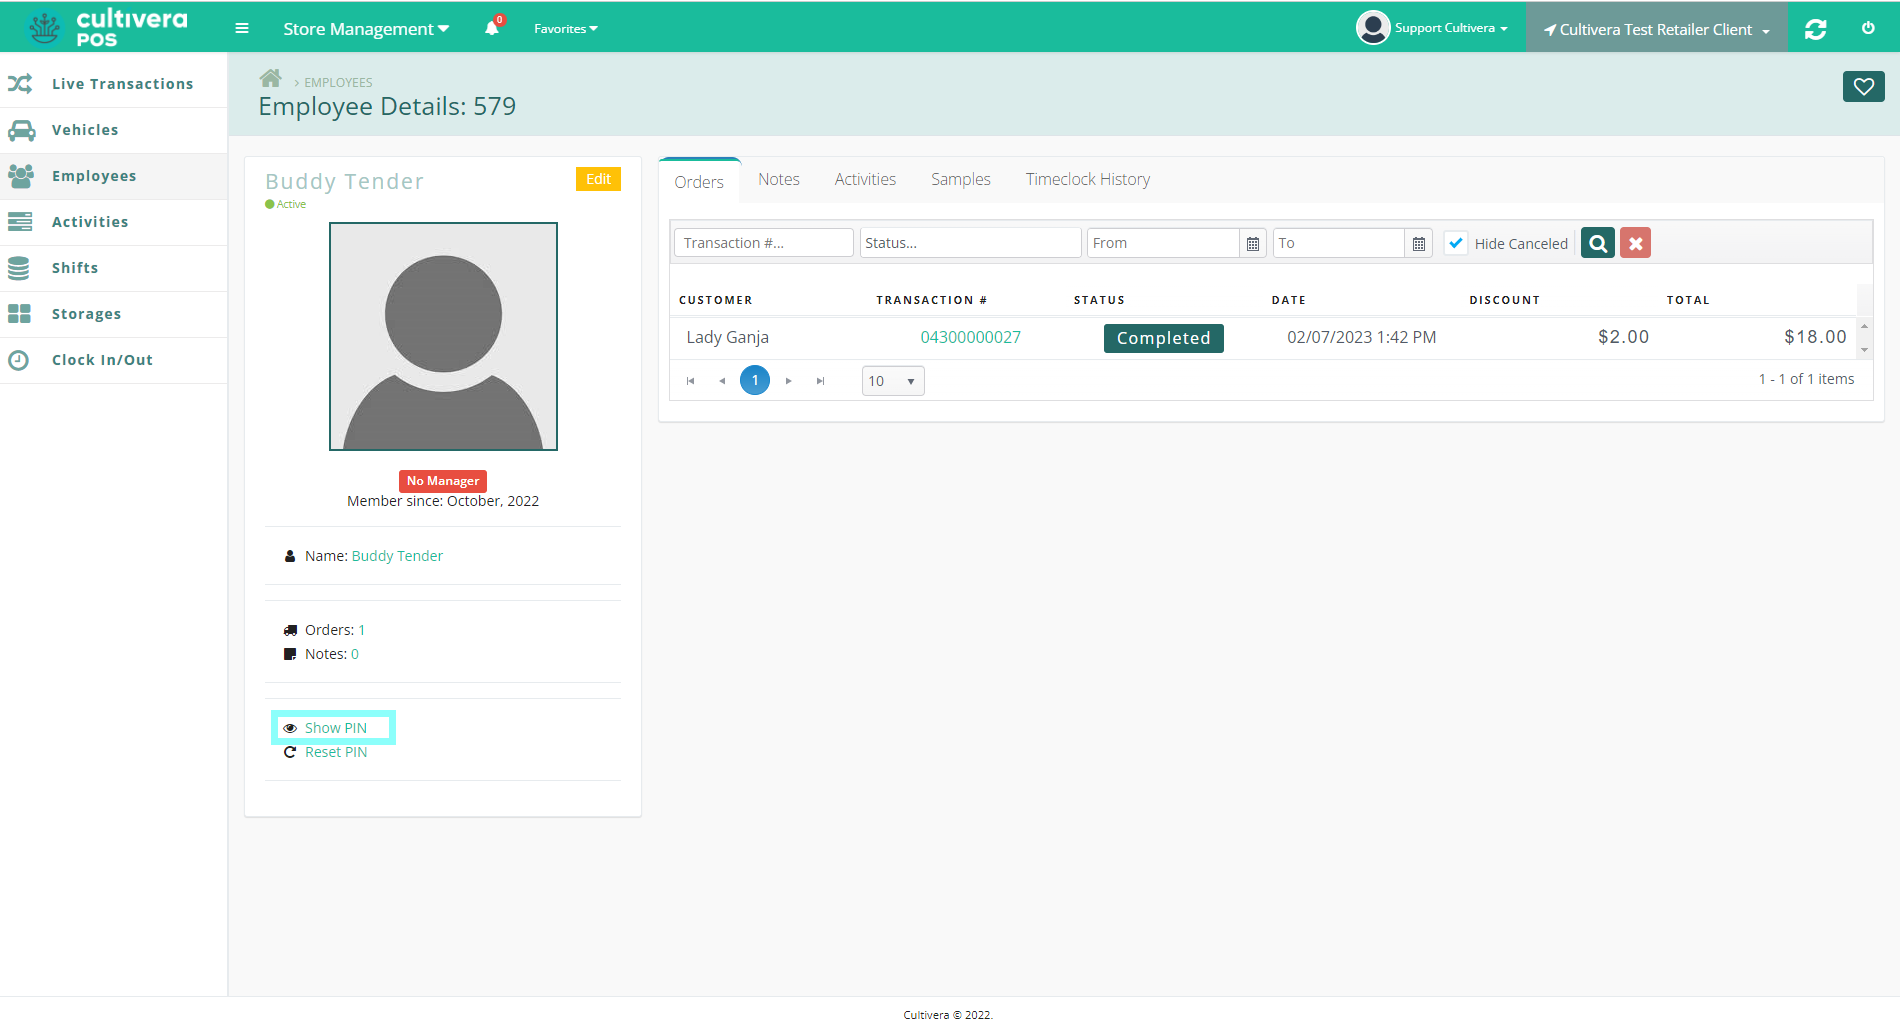
- Select the blue employee name from the list.
- Select the yellow "Edit" button to edit the employee’s information.
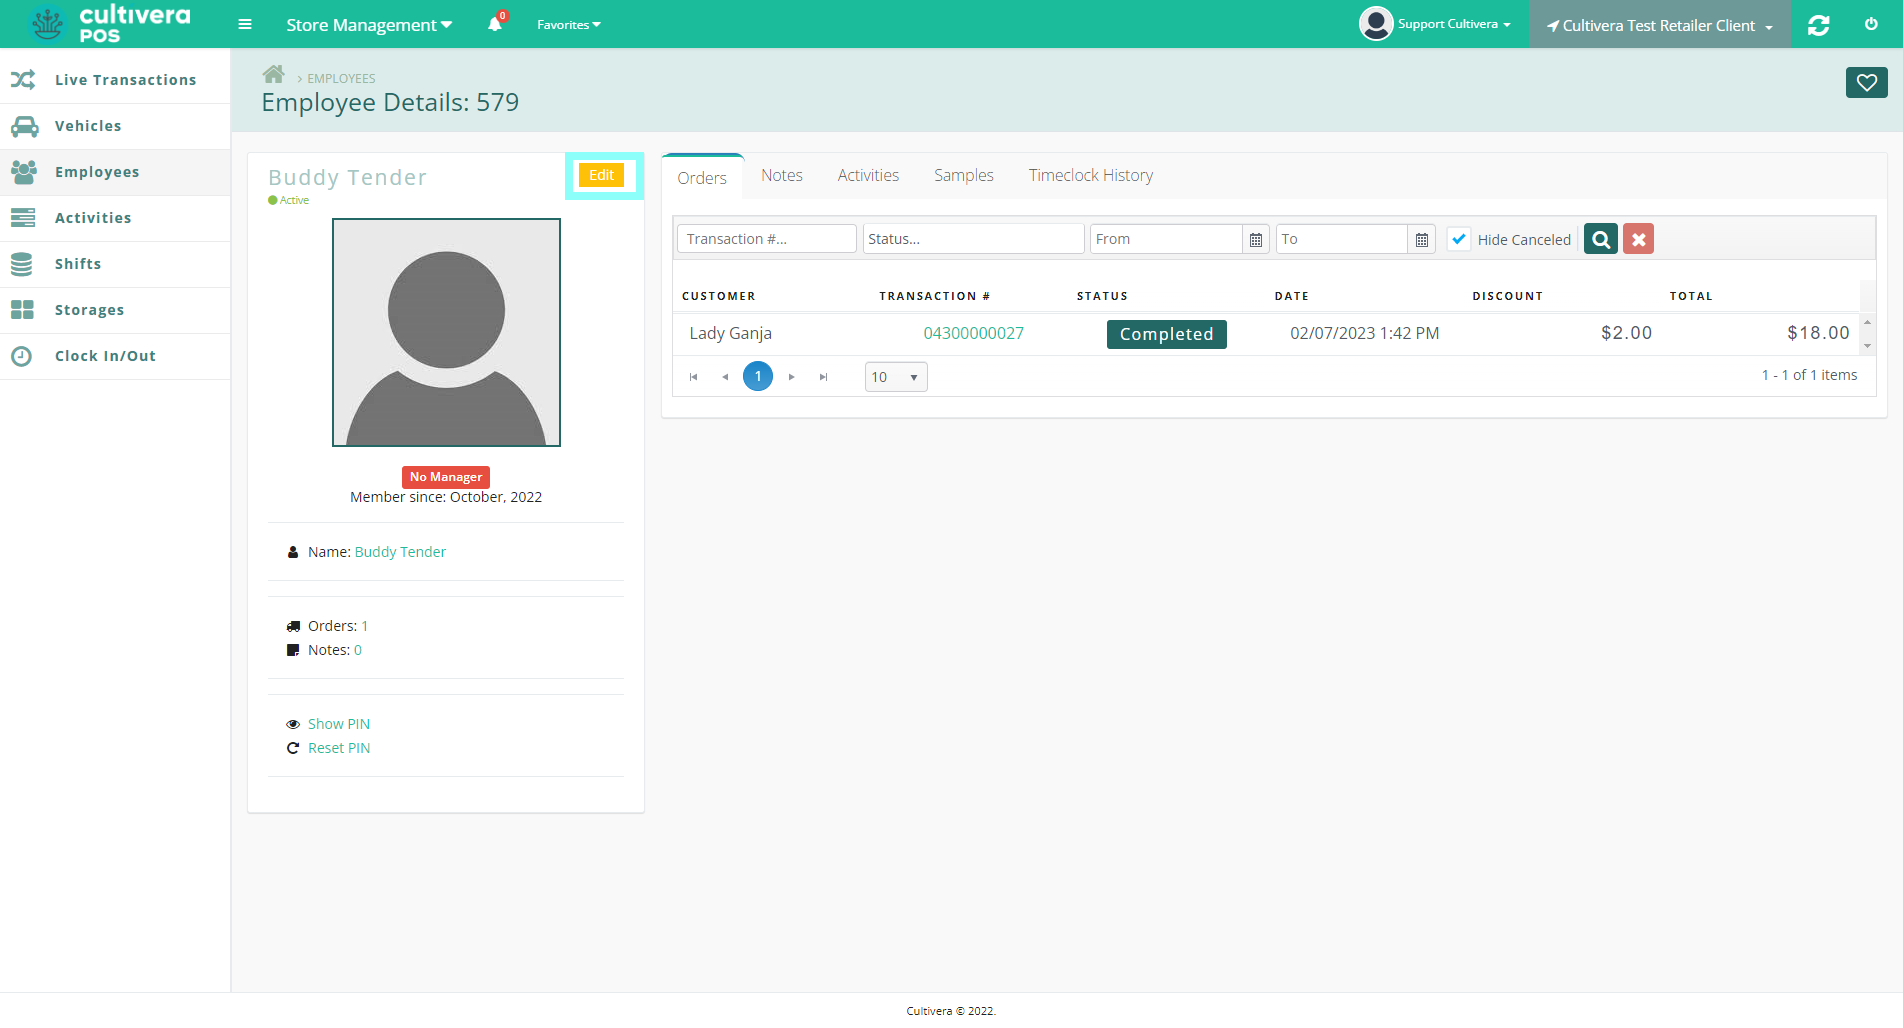 On the left side of the employee detail screen, you'll have the ability to show the employee’s pin and reset pin. (This will require a manager’s pin to complete.)
 - Enter desired edits, then Select "Update".
To Retrieve or Edit an Employee PIN Number
- Navigate to "Store Management", then Select "Employees".
- Choose the Employee in which you wish to retrieve or edit their PIN.
- To Retrieve their PIN, Select "Show PIN".
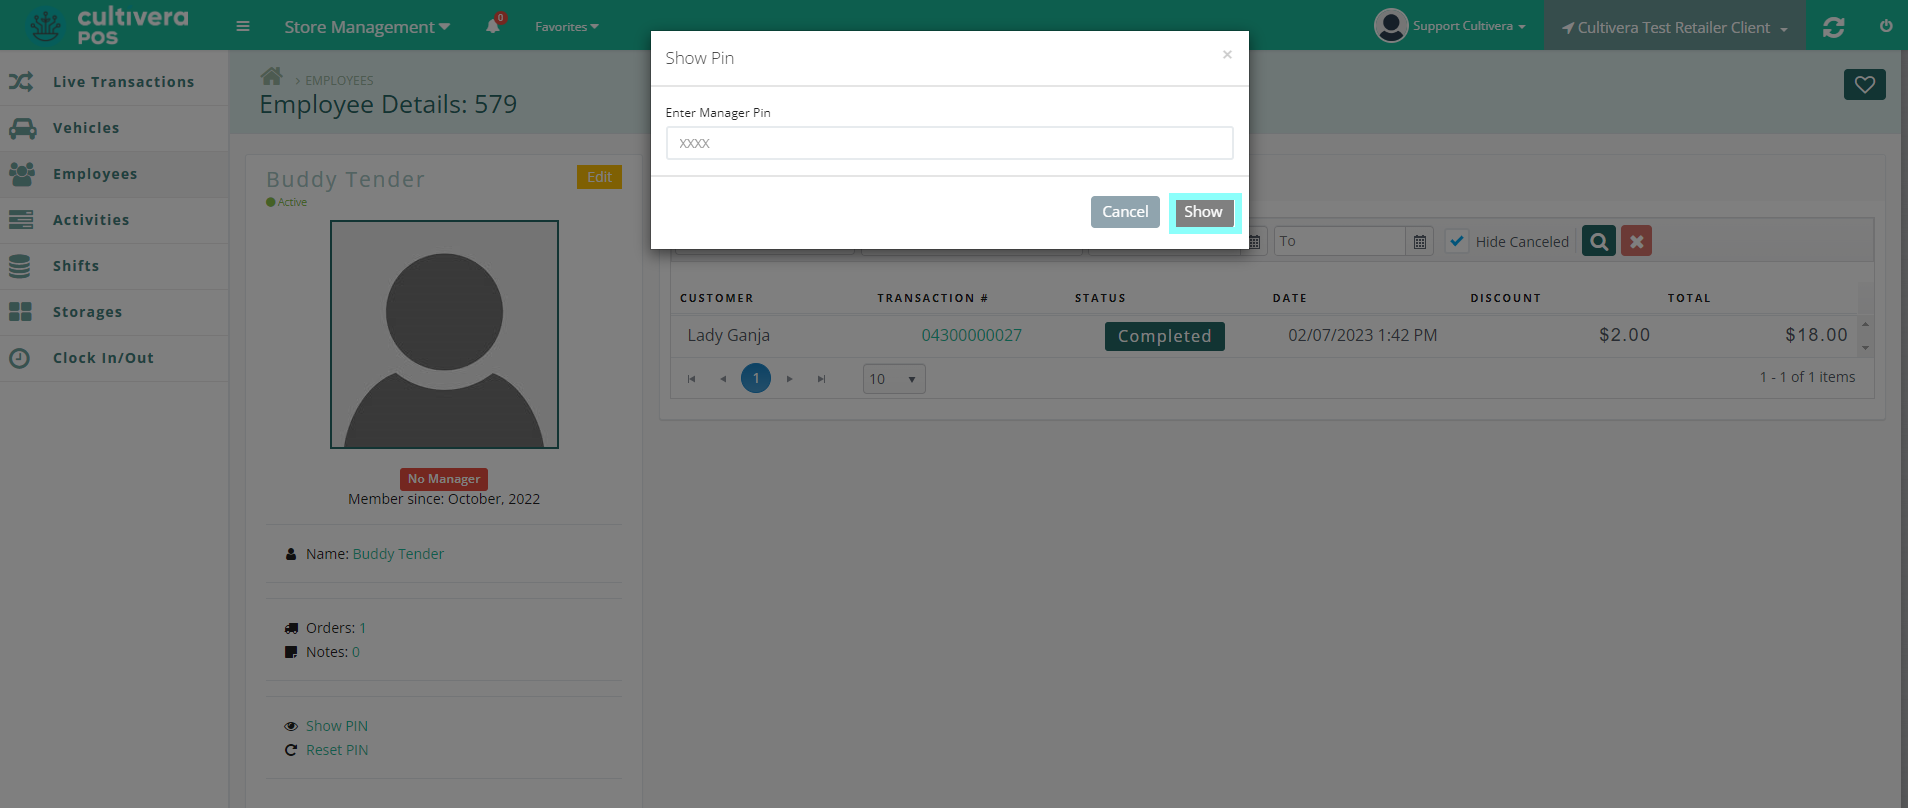
- Enter Manager's PIN to validate, then Select "Show".
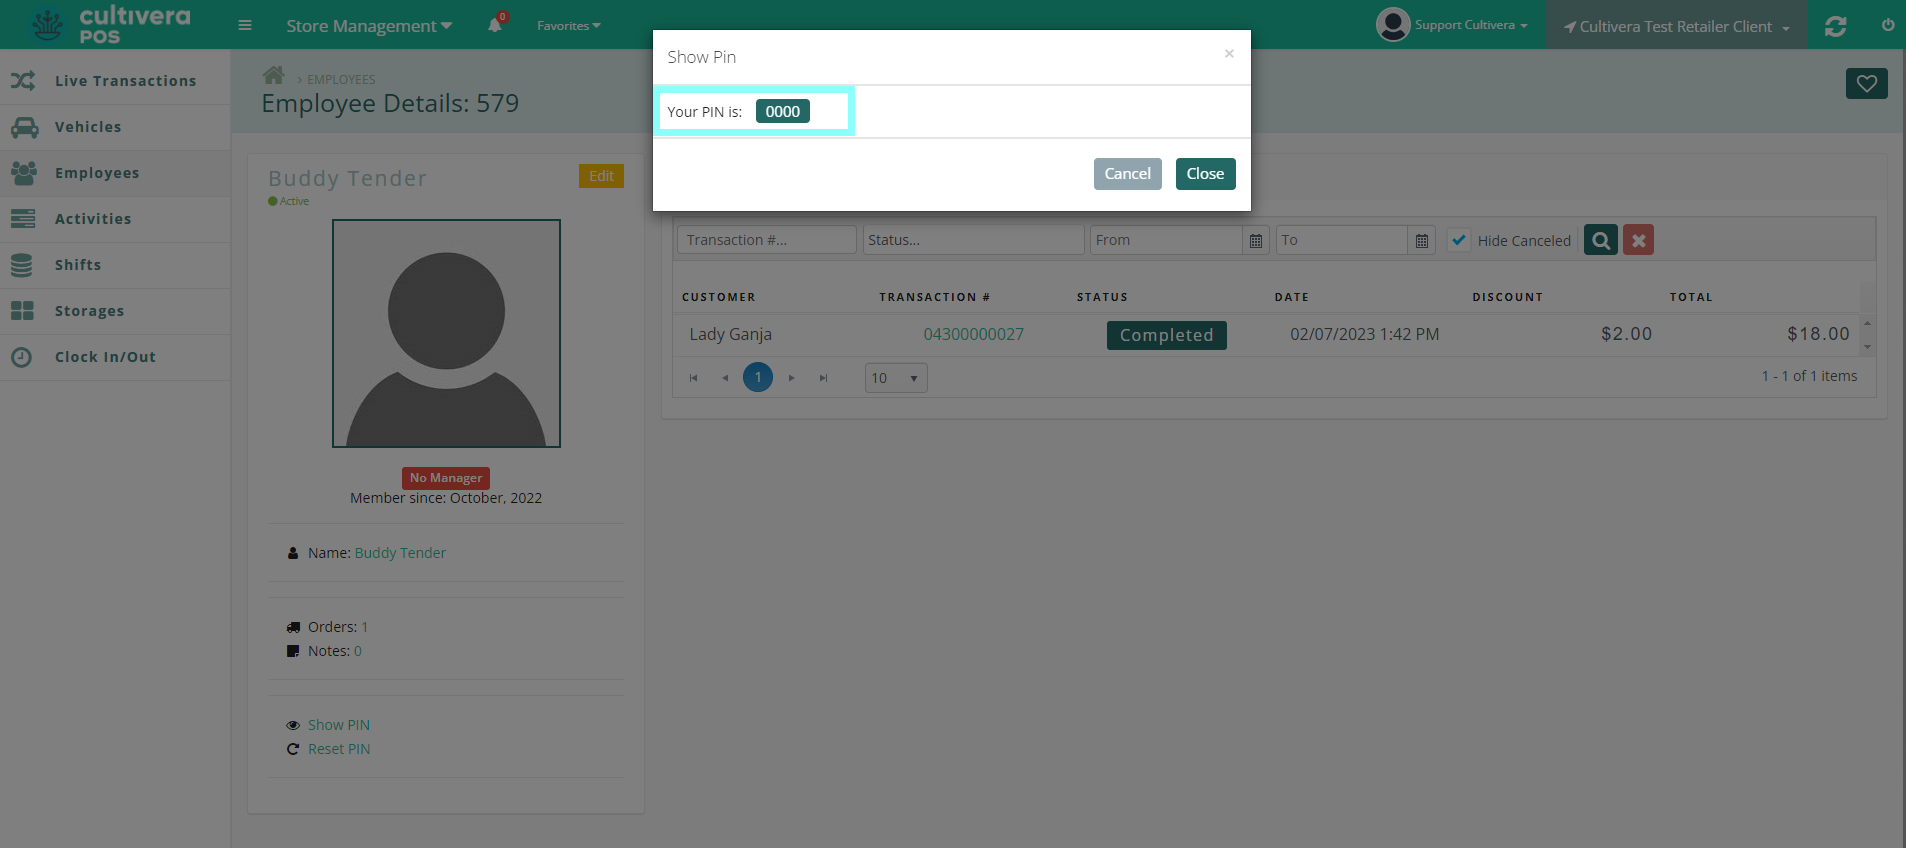
- The Employee PIN will now be displayed.
- Enter Manager's PIN to validate, then Select "Show".
- To Edit an Employee PIN, Select "Reset PIN".

- Enter the new PIN, or Auto-Generate a new PIN by Selecting the green box. Enter the Manager's PIN to validate, then Select "Reset".
The new PIN must not have been used previously by the employee.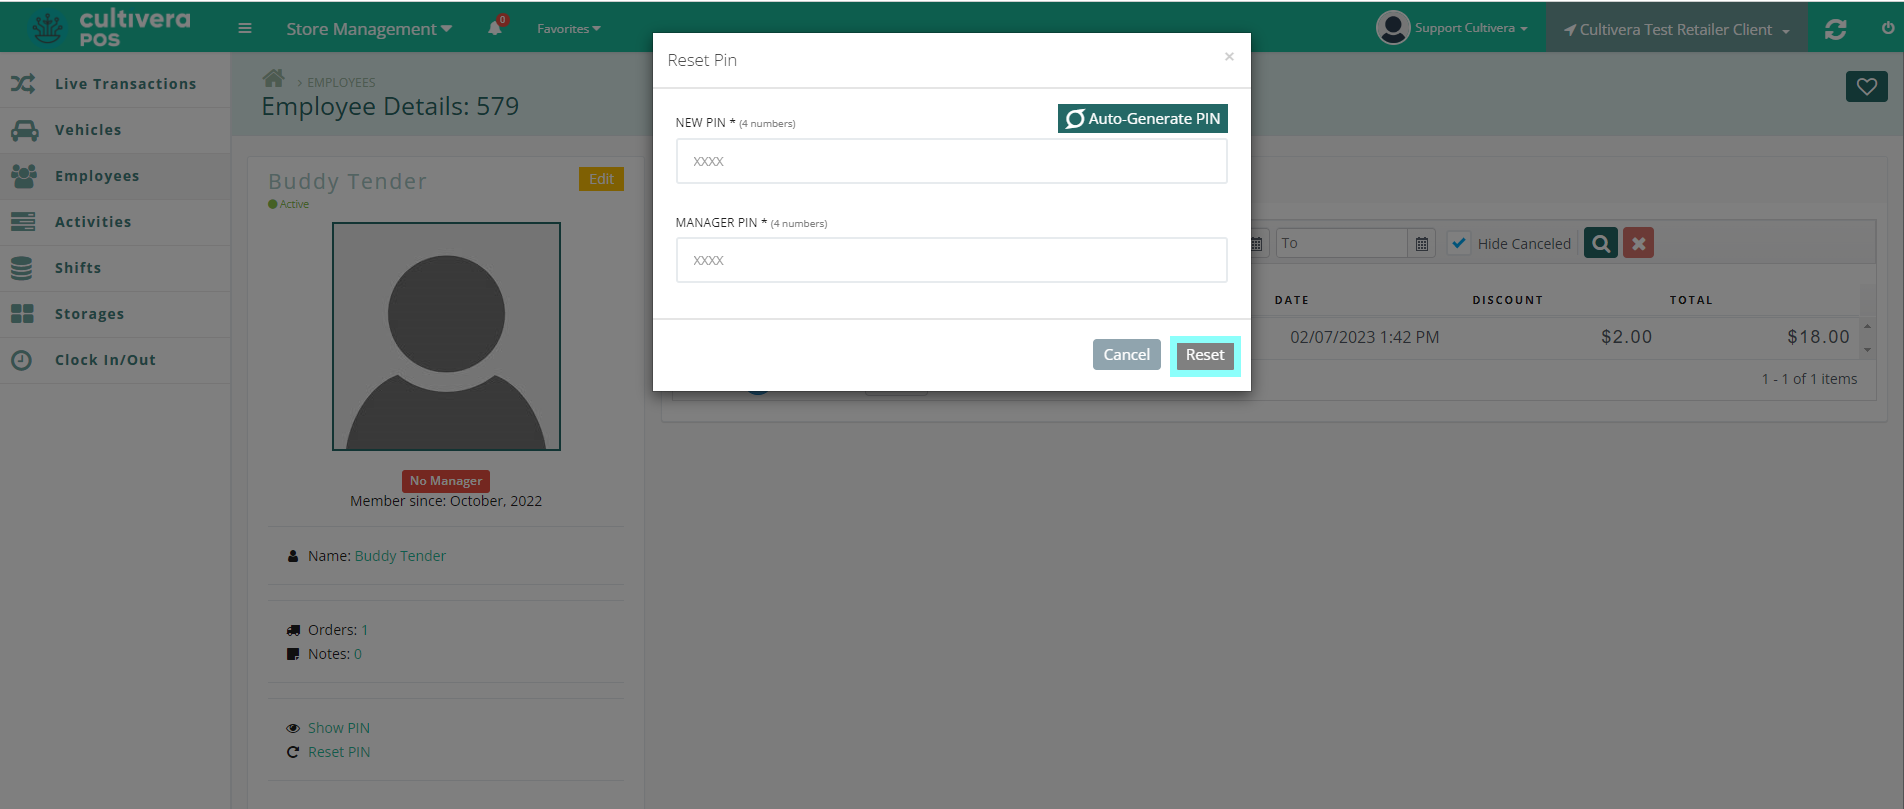
- The new PIN will now be associated with that employee.
- To Retrieve their PIN, Select "Show PIN".