Connecting Your Wireless Bluetooth Zebra Barcode Scanner
![]() Updated
Updated
Connecting Your Wireless Bluetooth Zebra Barcode Scanner
- Before you begin pairing the Zebra Wireless scanner, ensure the Device setting is enabled within the Administration module. Navigate to Administration > Devices > Select the Device link and expand the drop down menu for General Settings. From there, you'll need to turn the Bluetooth Zebra Barcode Scanner toggle to the on position.

- You may also reset the scanner to factory default settings with the barcode below. This may be necessary to discover and pair the device and is advised if pairing attempts are failing to connect. Scan the barcode below to Restore Factory Defaults to the Zebra Bluetooth Barcode Scanner.

- After enabling the Bluetooth Zebra Barcode Scanner device setting, sync your terminal. You will then see a red square scanner icon at the top of the Terminal app. Pressing it will bring up a pairing barcode to scan.
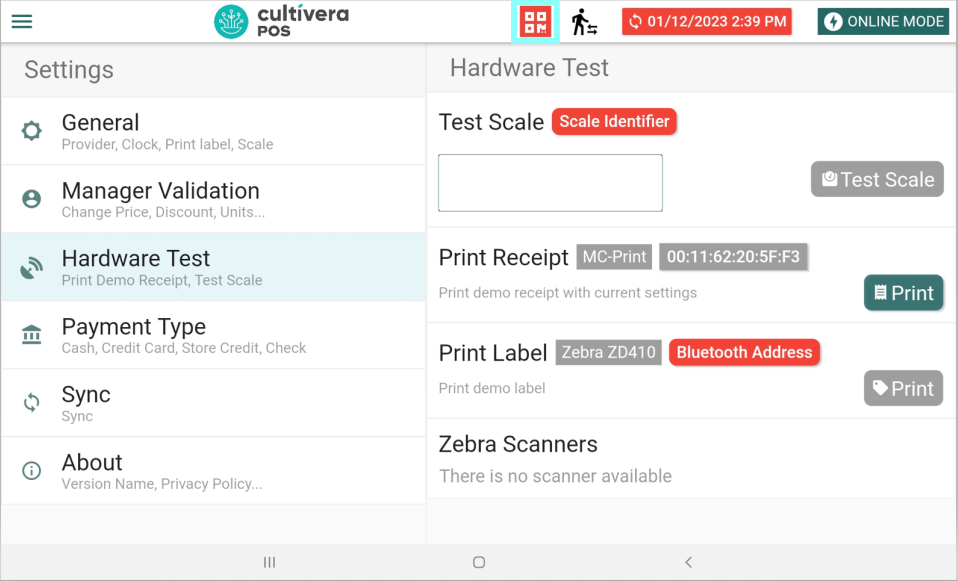
- Scan the pairing barcode with the Wireless Zebra Barcode Scanner.
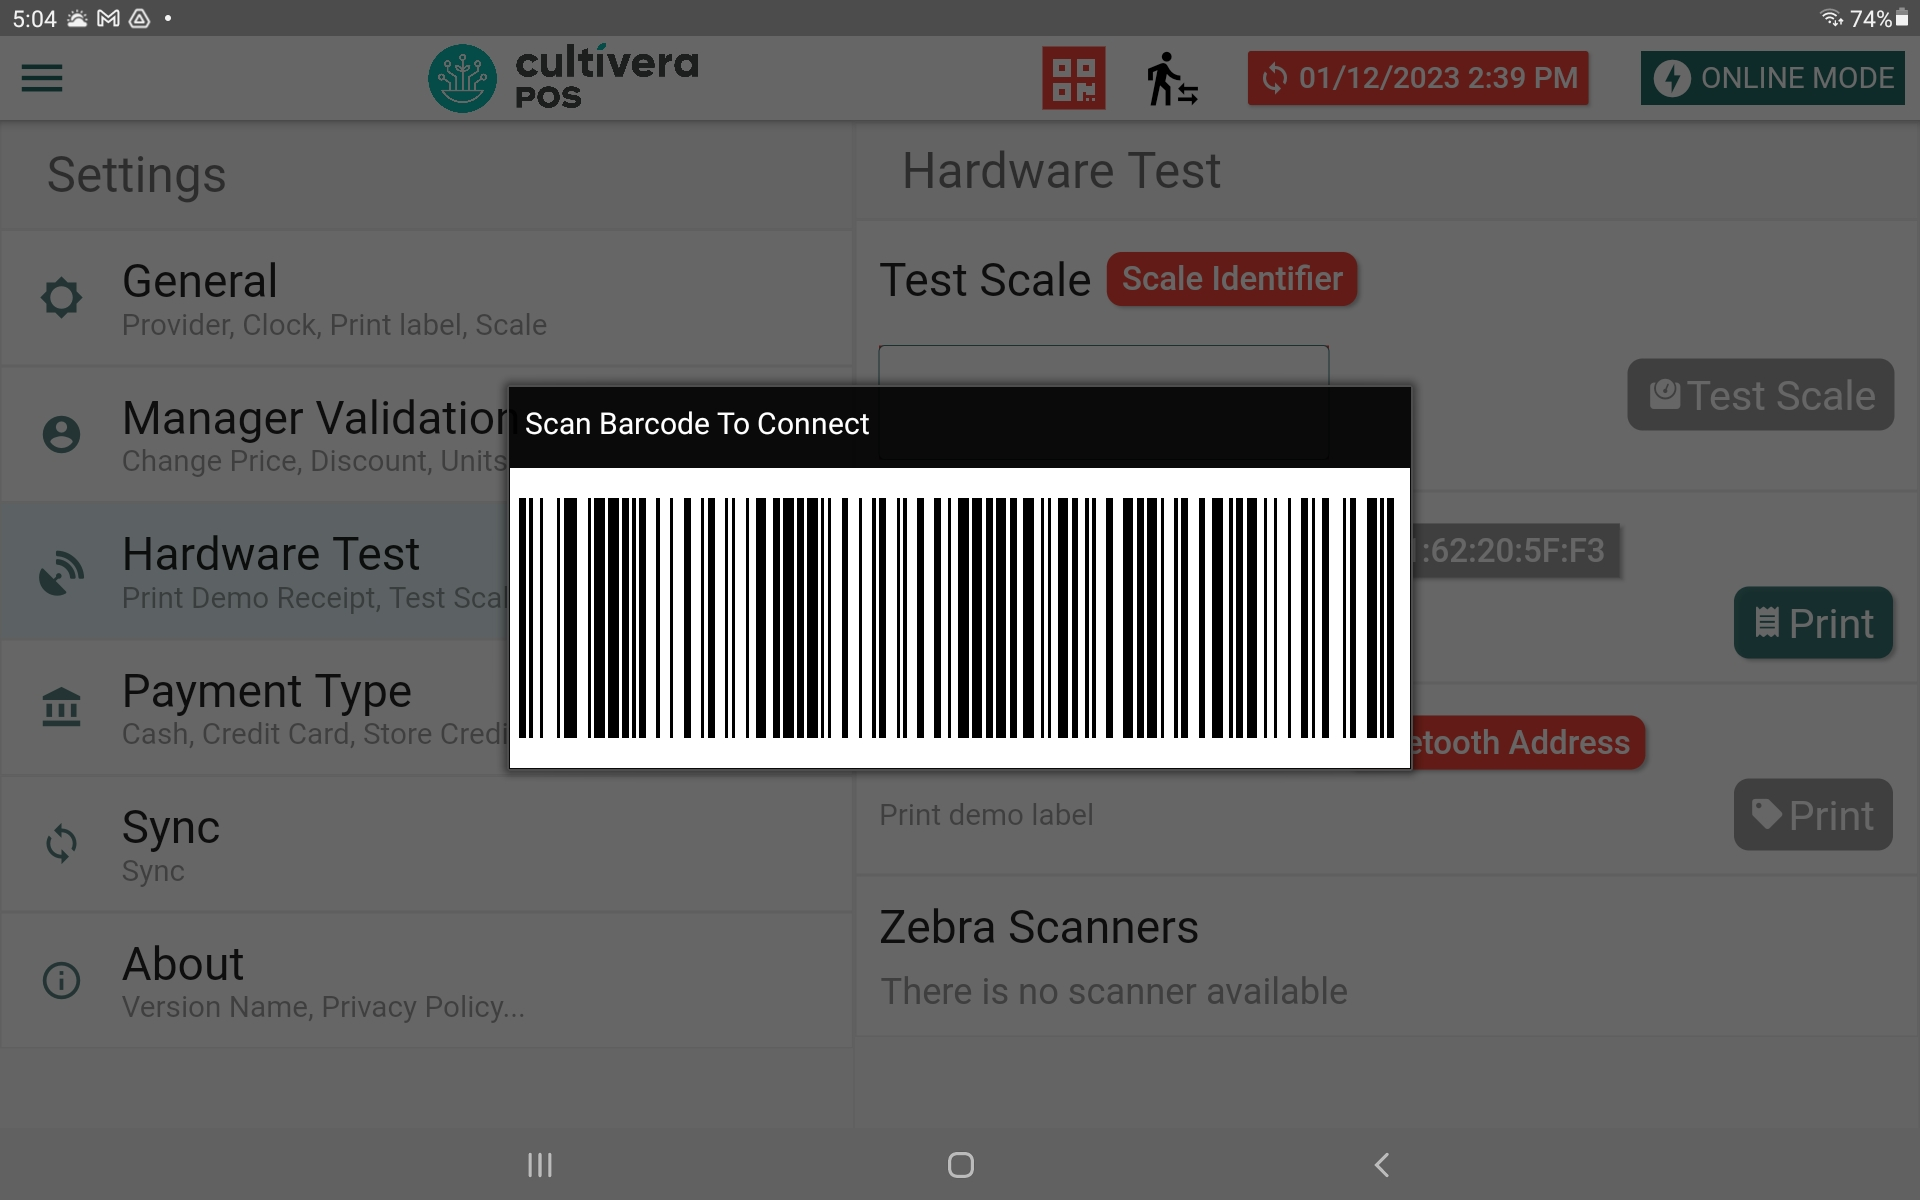
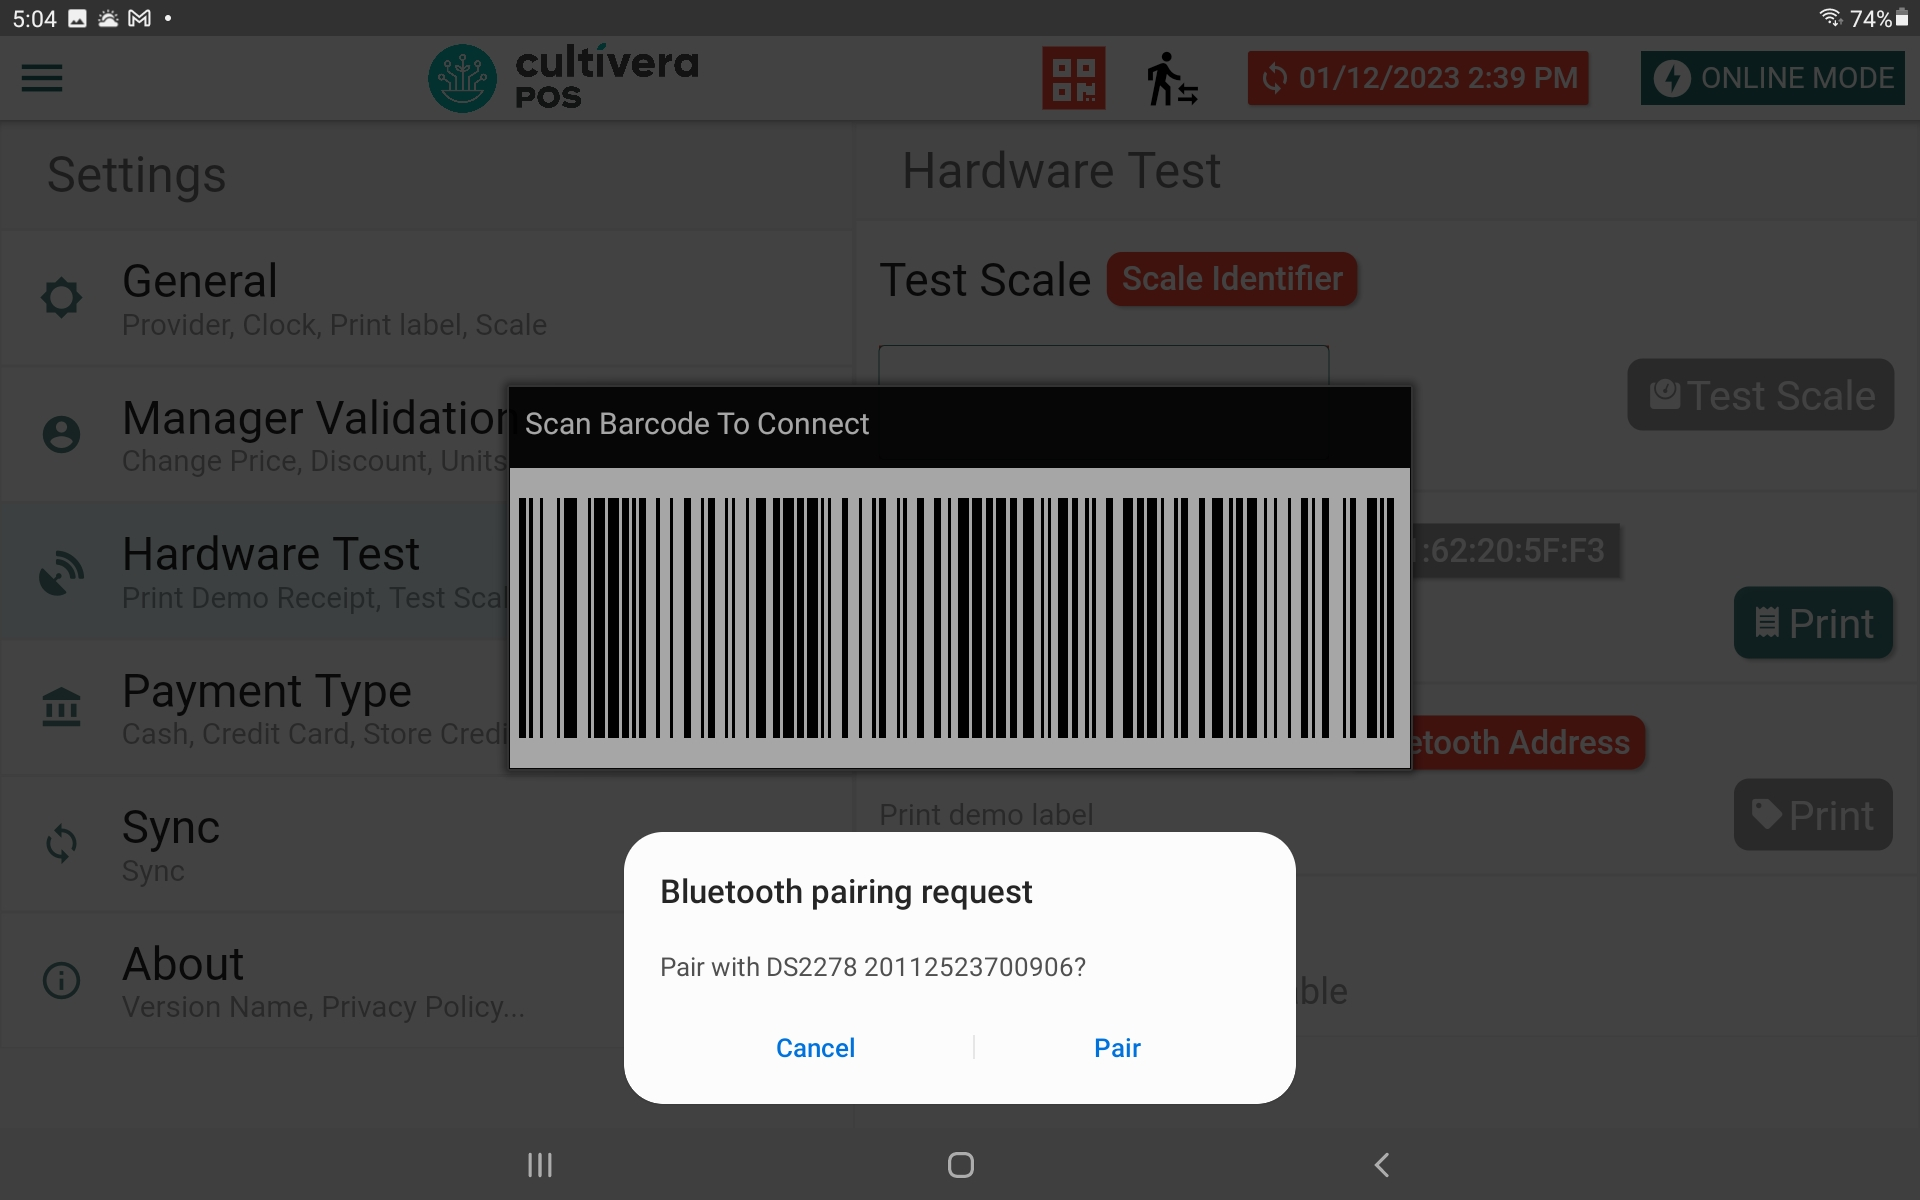
- A Bluetooth pairing request should appear next, press pair to connect the barcode scanner to your tablet device.
- After completing the pair request, you will now see the Zebra scanner connected within the Hardware test page of the terminal.
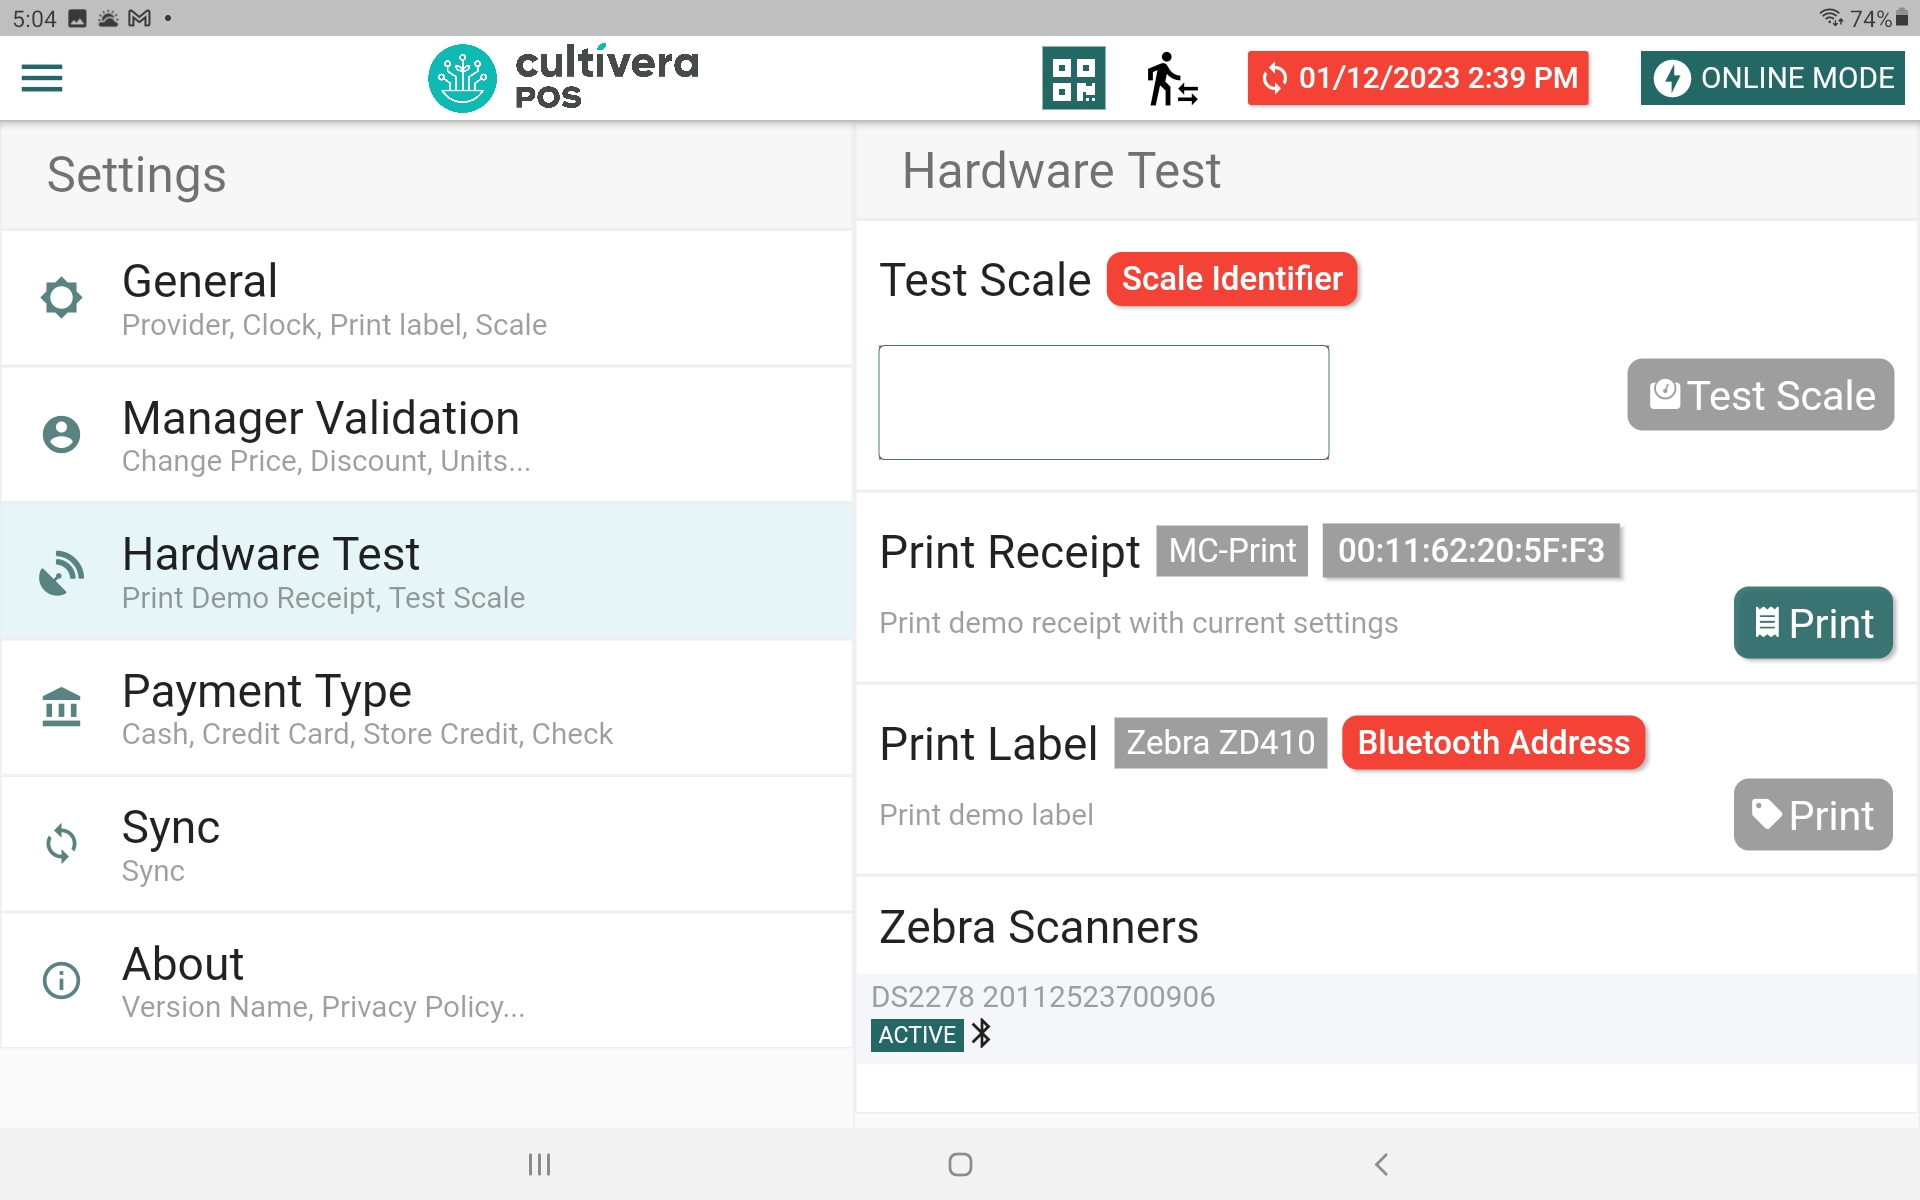
- Scan a product barcode at the terminal home page to test the scanner connection.
If you encounter any issues or if the scanner still doesn't work as expected after resetting the device, it's advisable to contact Zebra's customer support (https://www.zebra.com/us/en/about-zebra/contact-zebra/contact-tech-support.html) or refer to the official documentation for troubleshooting guidance (https://www.zebra.com/content/dam/zebra_new_ia/en-us/manuals/barcode-scanners/general/ds2278/ds2278-prg-en.pdf). They can provide specific assistance based on your scanner's model and any unique issues you may be experiencing.