Manually Adjusting Print Width on the Zebra ZD410 / ZD420
![]() Updated
Updated
Manually Adjusting Print Width on the Zebra ZD410 / ZD420
If you're experiencing any problems related to barcode format from the terminal or Back Office, it is suggested to manually adjust the media print width on the Zebra label printer. This is needed when the label printers SmartCal function does not correctly format the media output when simply loading the labels and setting the alignment sensor. Barcodes and labels will appear as if they're cut off or will partially print the desired media. These instructions will help you manually adjust the printing width and ensure the barcodes and labels print appropriately.
First, confirm the device is plugged in and powered on.
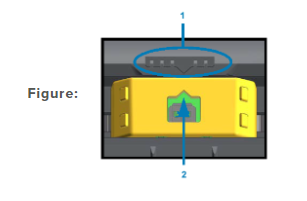
Next, load the labels into the label printer and center the media censor with the alignment arrow on the device.
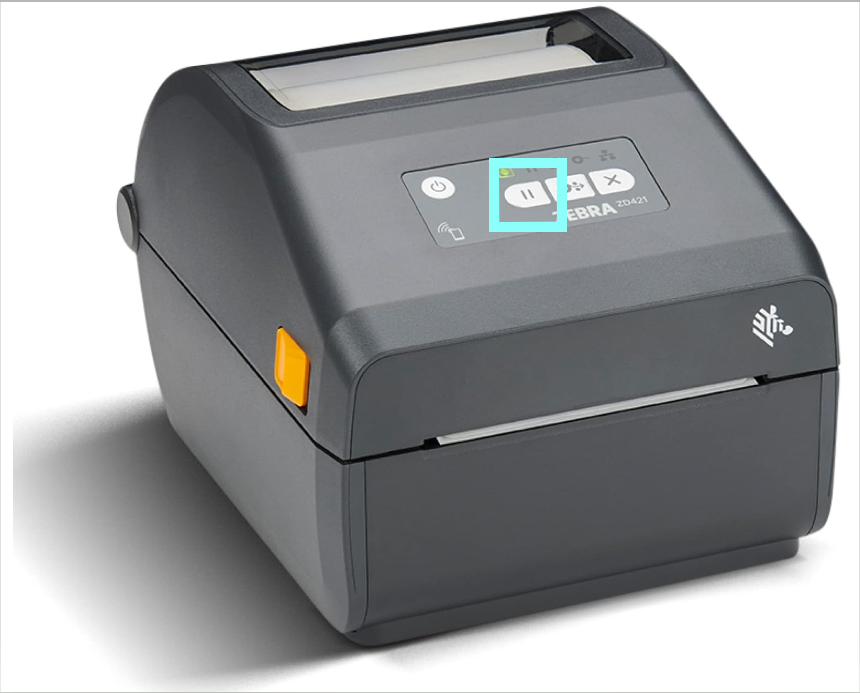
Once the labels are loaded successfully, hold down the pause (left) button on the label printer for 2 seconds. All the signal lights on the device flash yellow and the status icon on the far left of the device appears as solid yellow. This indicates the label printer is now in Advanced mode.
Below is a link to the manufacturer's website for a detailed walkthrough on how to enter advanced mode.
Press the feed (center) button until the Pause icon appears yellow which will indicate manual print width adjustment mode.
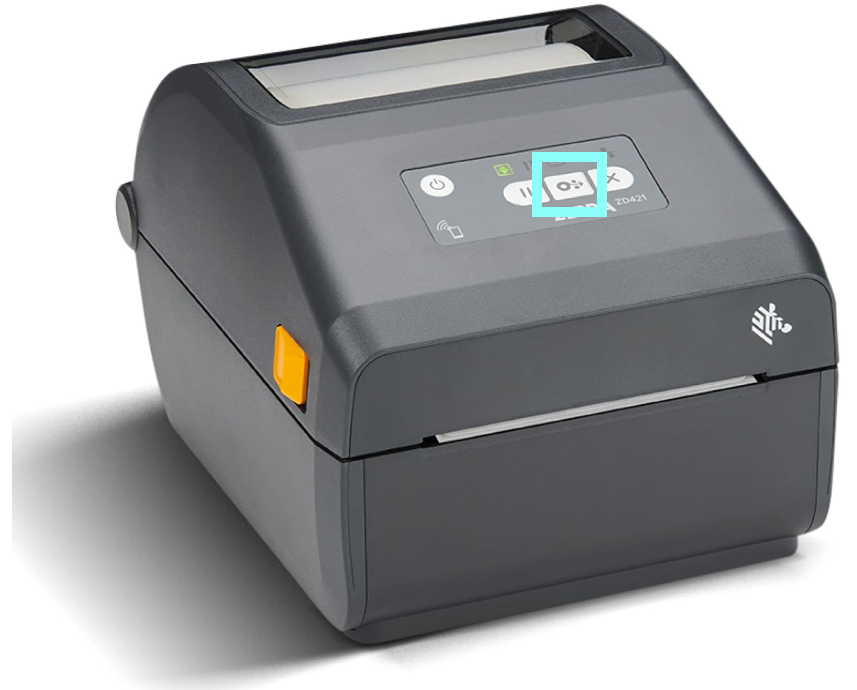
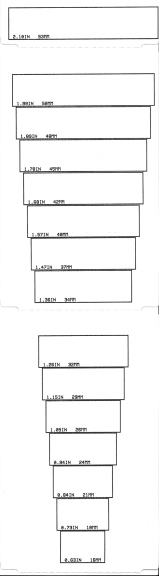
Once the pause icon is selected, press the pause (left) button to begin the manual print width adjustments. The label printer will begin printing a 16mm box, pauses, then prints a slightly larger box size. This process will repeat until the feed button is pressed to select the proper width. If you do not select a width, the maximum width will be selected by default once the it completes.
Instructions for manually setting the print width can be found at the manufacturer's website by following the link below:
After the print width has been selected, reprint the desired label from the terminal or back office to ensure the label appears as expected.
If you encounter any issues or if the label printer still doesn't work as expected, it's advisable to contact Zebra's customer support (https://www.zebra.com/us/en/about-zebra/contact-zebra/contact-tech-support.html) or refer to the official documentation for troubleshooting guidance. They can provide specific assistance based on your scanner's model and any unique issues you may be experiencing.