POS - Administration: Categories
![]() Updated
Updated
POS Administration: Product Categories
The Categories page will allow you to create a more user friendly way to organize and define your products.
For example, you can create categories for all the different kinds of products your dispensary carries to help define search filters or analyze sales. They can also be used in programming discounts within the discount details.
The following walkthrough will show you how to create and define categories for your products.
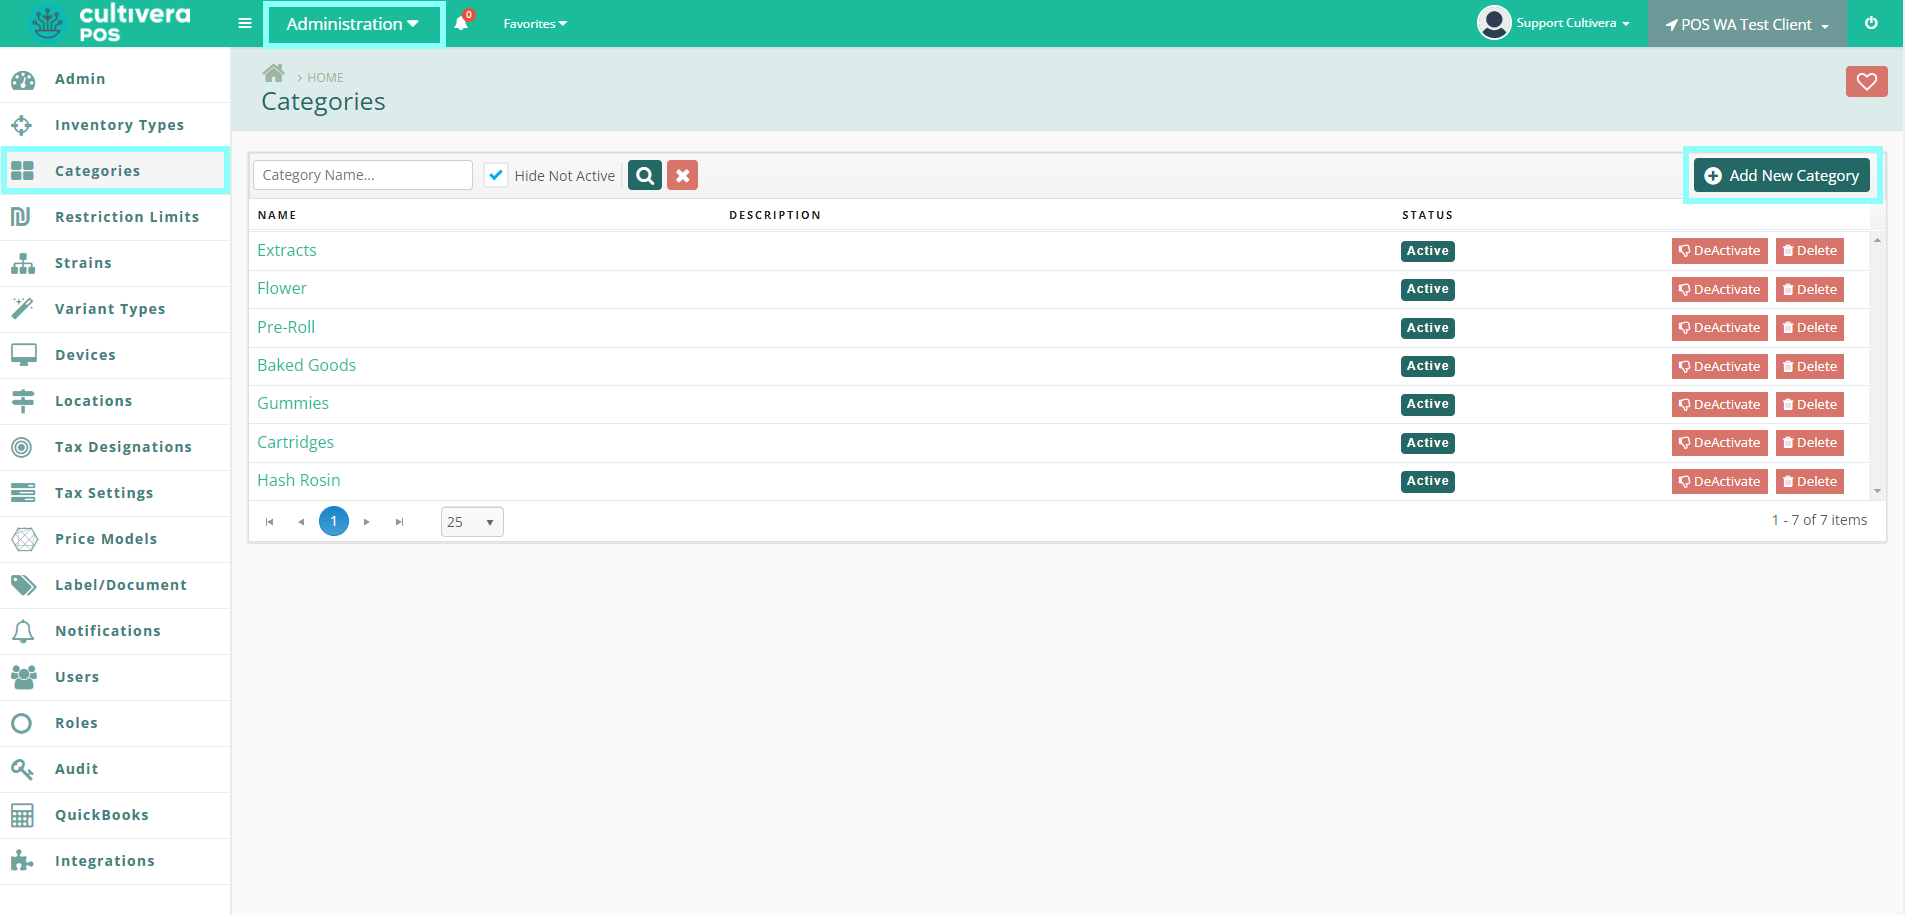
- To create product categories, navigate to the Administration module and select the Categories page. Then, click the "Add New Category" button.
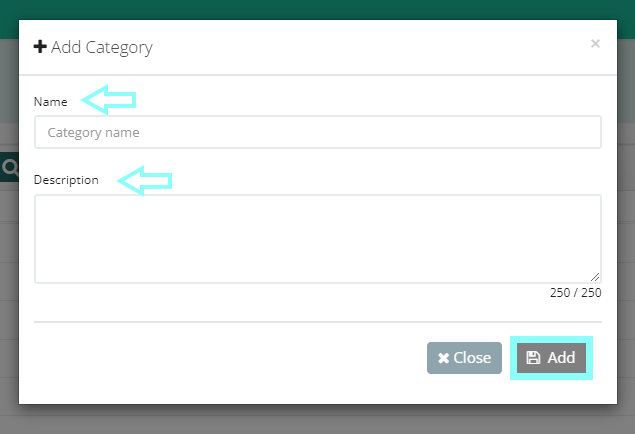
- From here, you can define the Category Name. You can also enter an optional Description. Once complete, click "Add".
- You should now see your newly created category in the list. You can Deactivate or Delete any categories created. You can also Edit any created category by clicking the teal name link and selecting the "Edit" button.

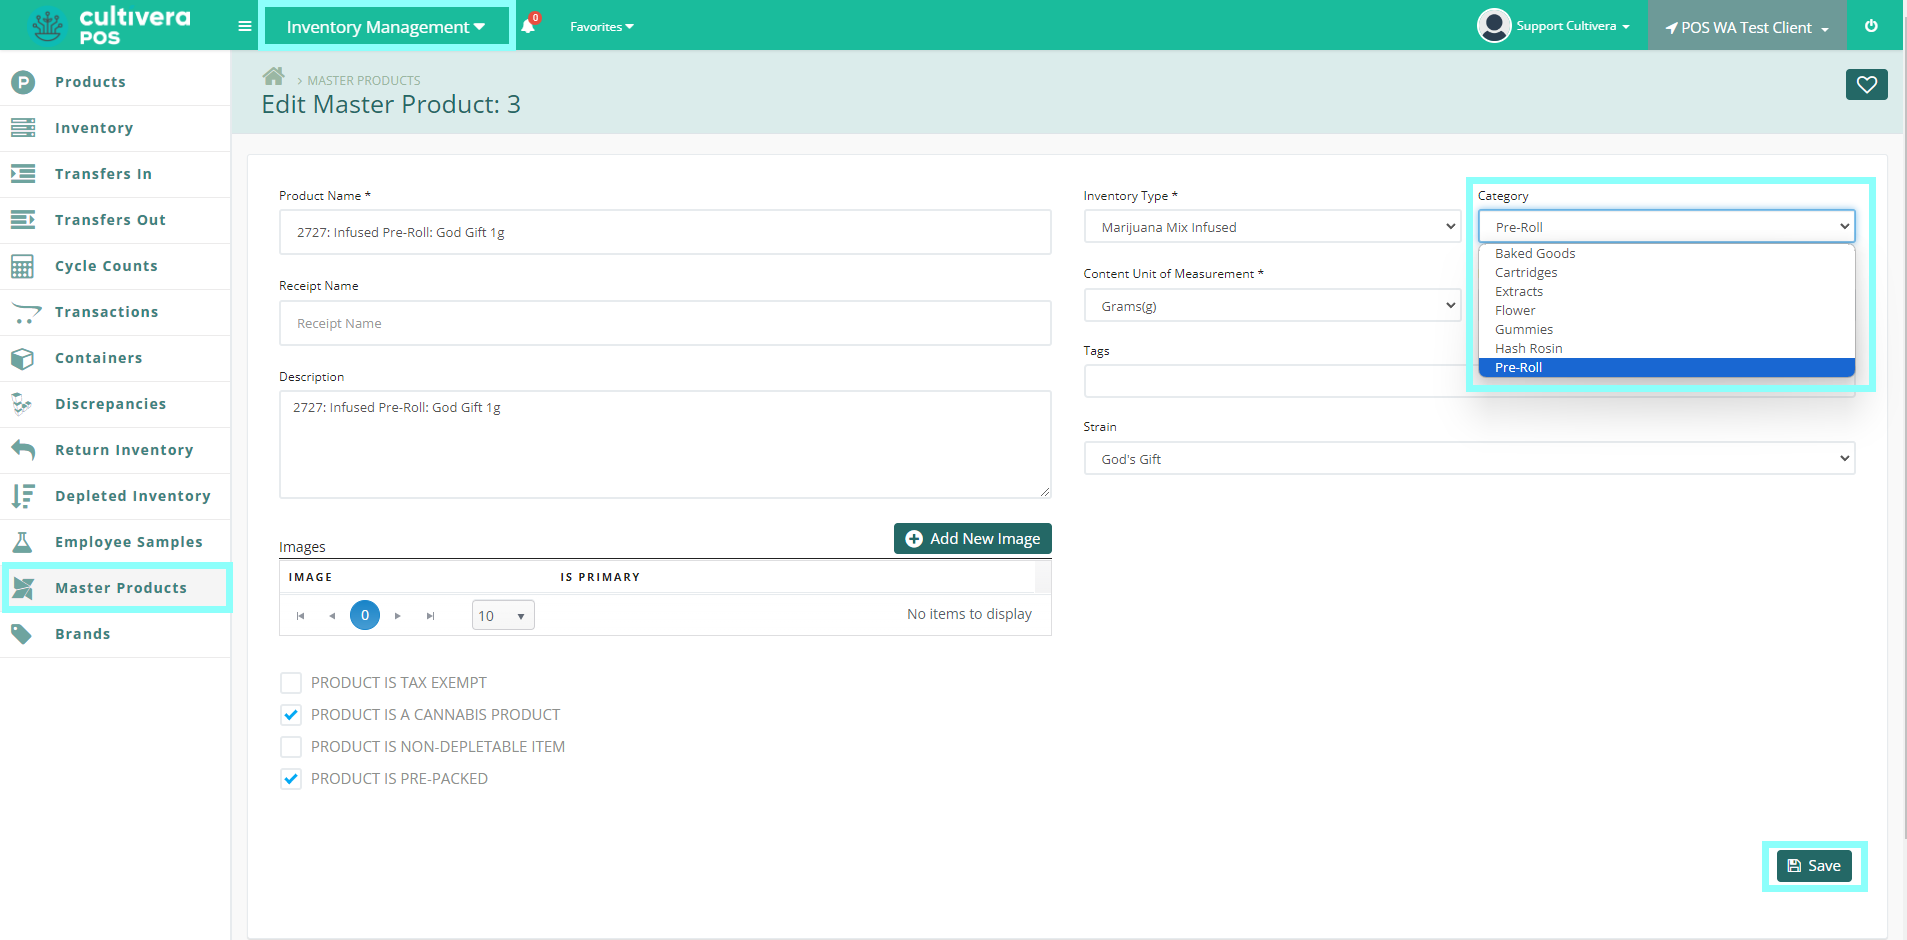
- You can assign categories from the Master Product Details within the Inventory Management module. Click the "Edit" button to edit "Category" details of the Master Product. Once complete, press "Save".
Once a product's category has been set, you will find a variety of search filters in the Inventory Management and Analytics modules. You may also use the categories created to further define discounts within the discount details.