POS - Inventory Management: Outbound Transfers for Stand Alone States
![]() Updated
Updated
POS Inventory Management: Outbound Transfers for Stand Alone States
All METRC users will handle product returns to vendors within METRC. The natural sync process will remove the items from inventory when the return transfer has been completed.
It is common to have problems with received products such as spoilage, or malfunctions. When encountering these issues, you will likely want to return those products to the Vendor. This walkthrough will show you how to designate specific inventory items for return and how to create documents for transfer.
- Log in to Cultivera Back Office:
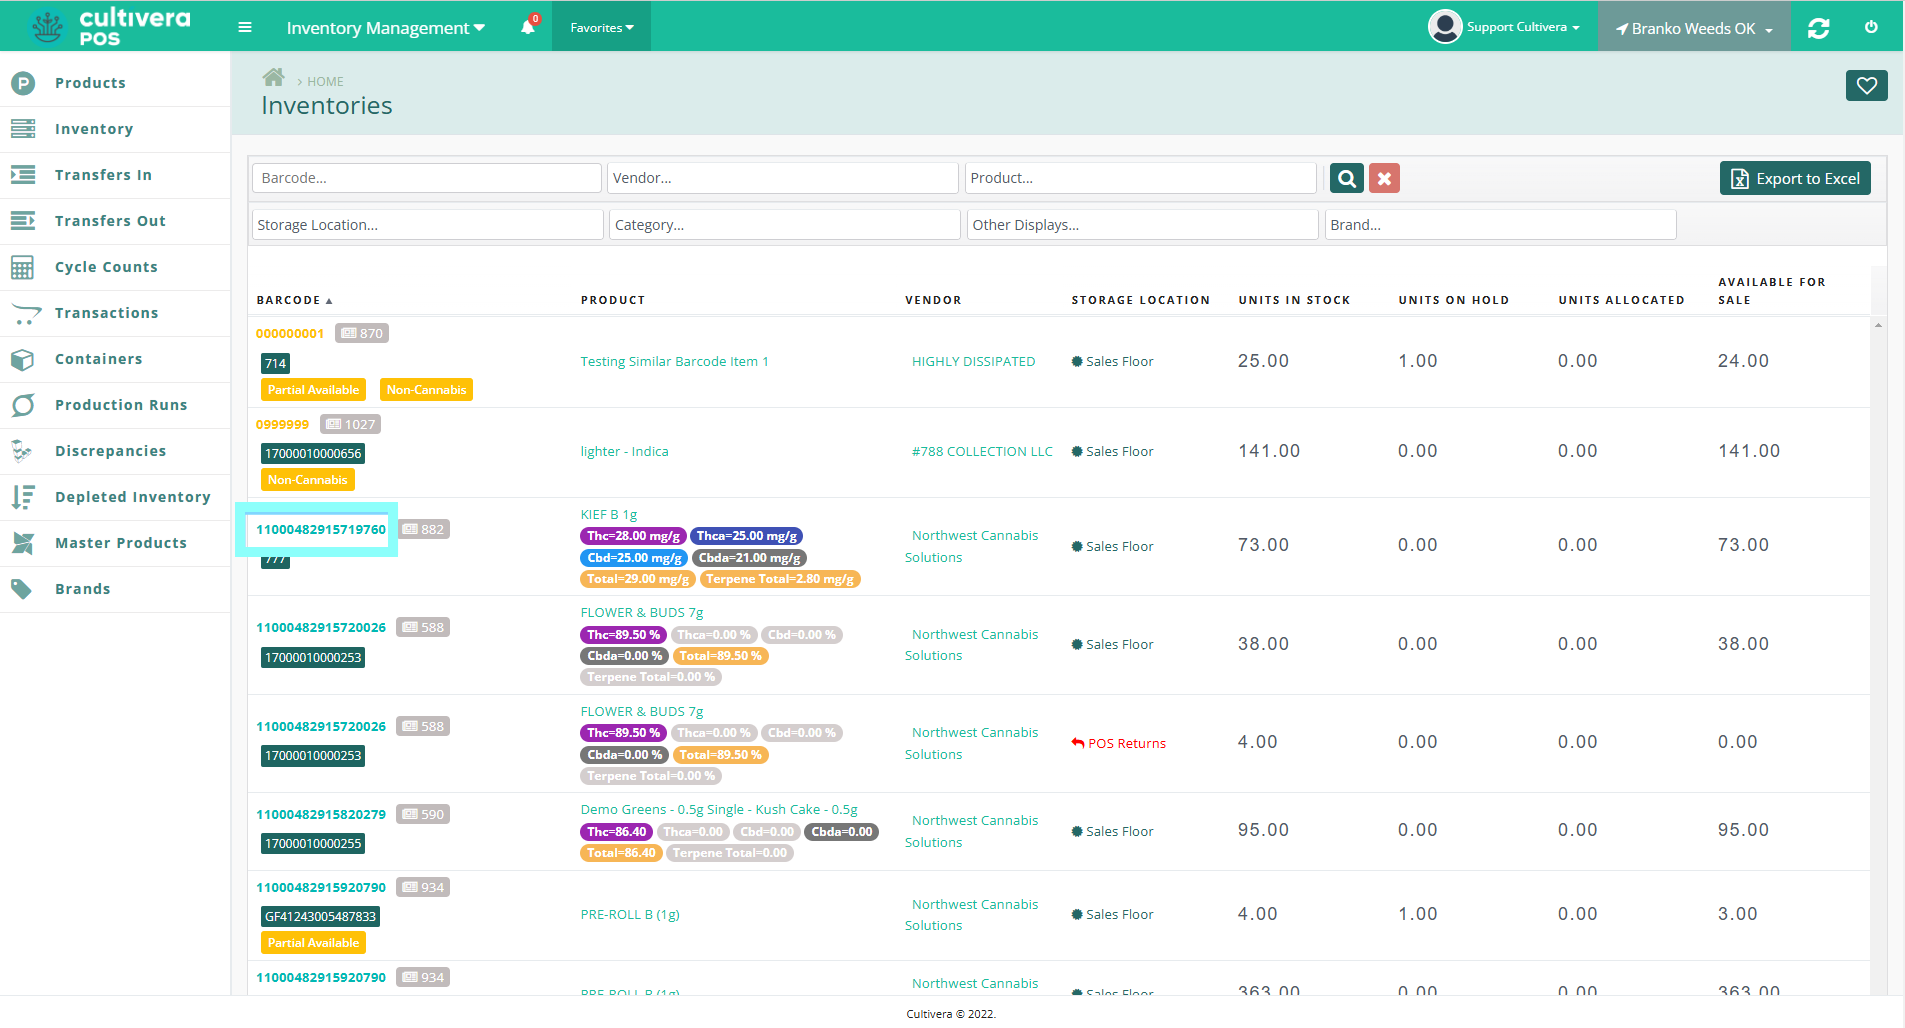
- Navigate to Inventory Management Module > Inventory page.
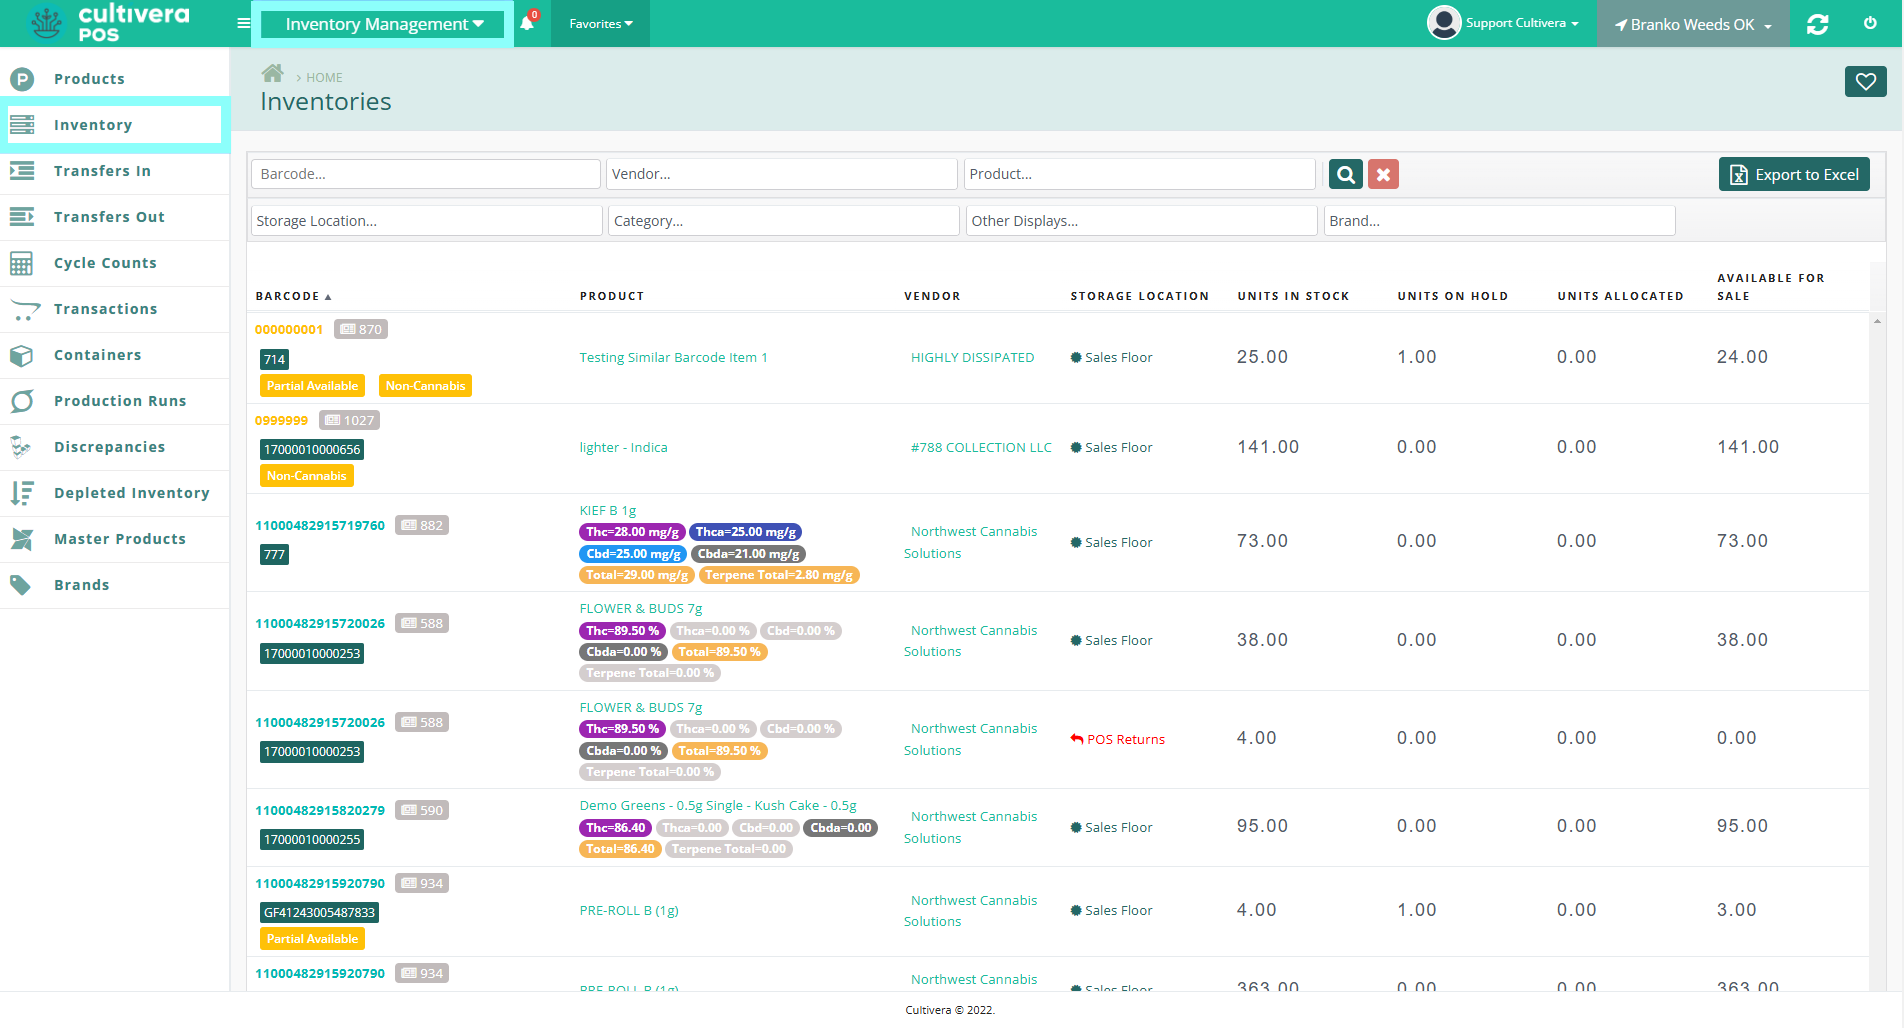
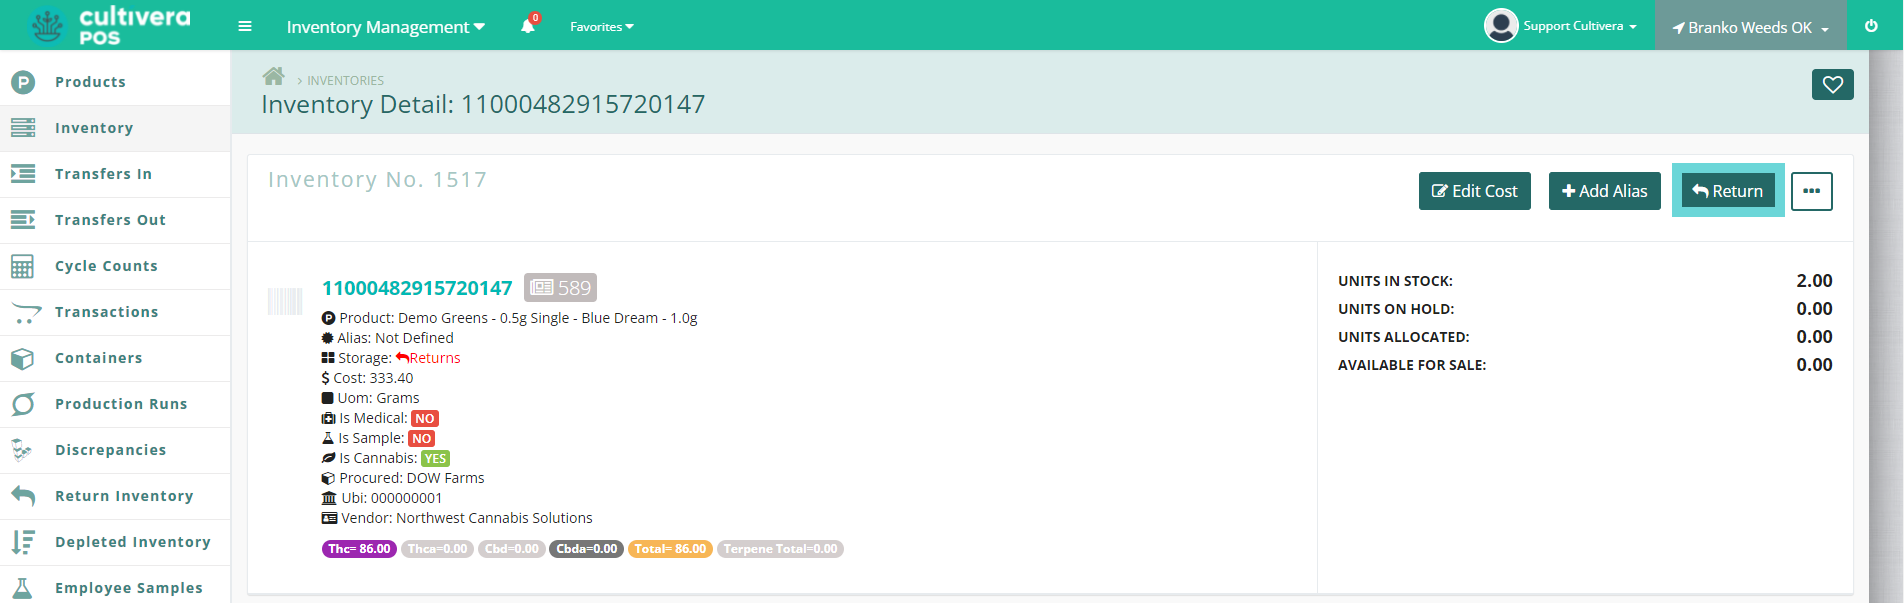
- Locate the inventory you wish to return and click the Barcode link to enter the Inventory Detail page.
You can create a return storage area in the Back Office to isolate return inventory.
- Click the "Return" button on the Inventory Detail page.
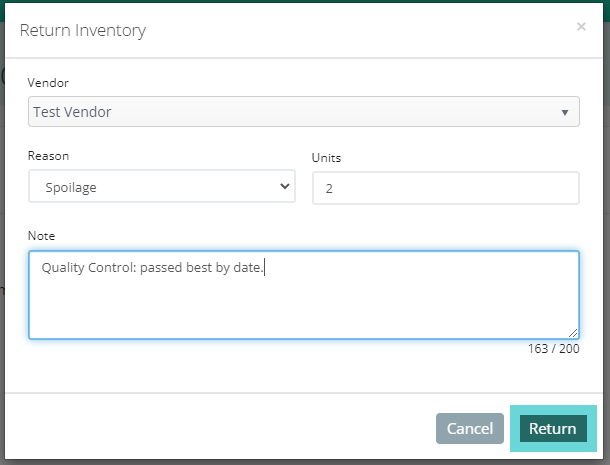
- Select the Vendor and Return Reason from the drop-down menu. Enter the quantity to return and a brief note, then click the "Return" button.
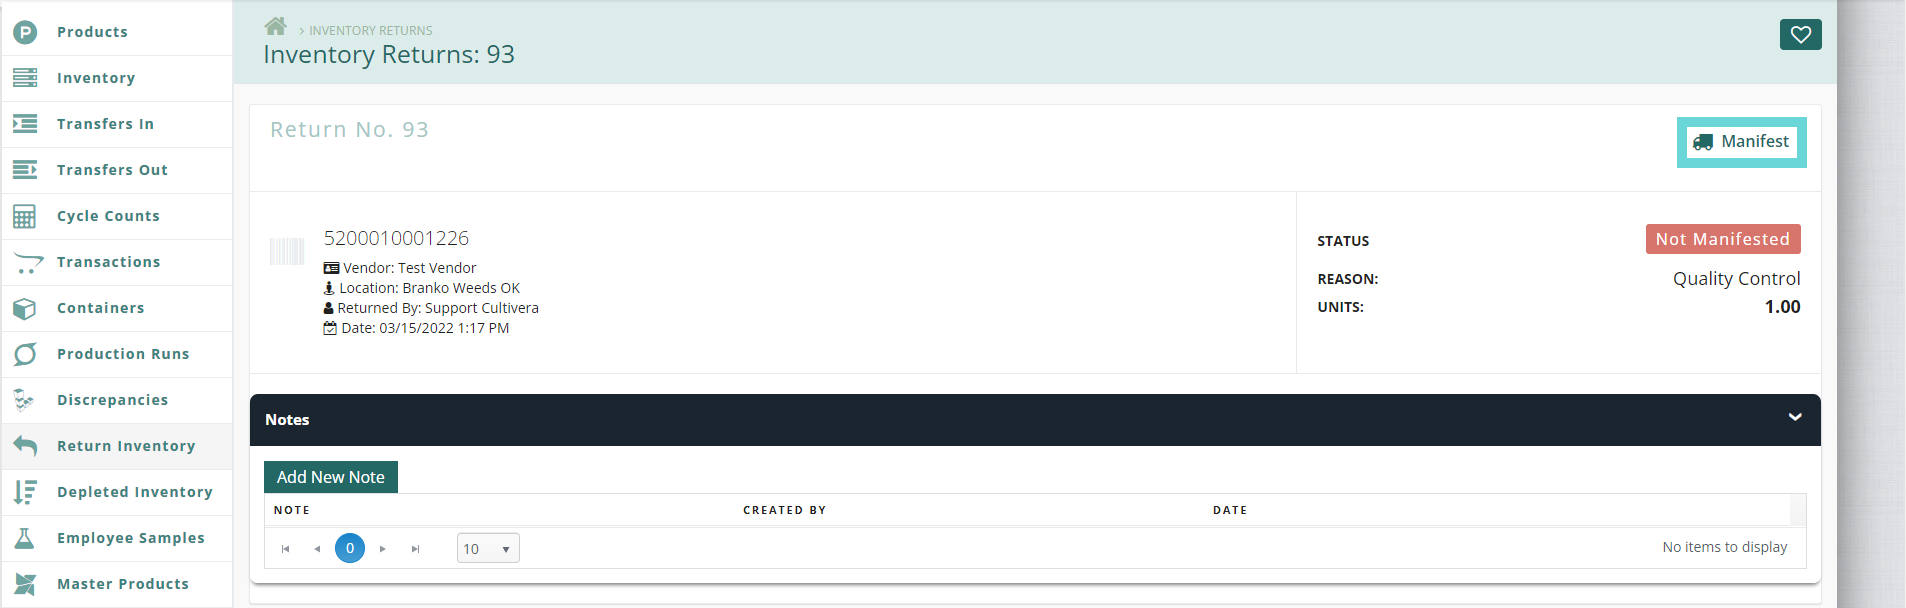
- After the items have been designated for return, navigate to the Return Inventory Page. To create a manifest for multiple items, select the check boxes next to each item, and click the "Manifest Selected" button.
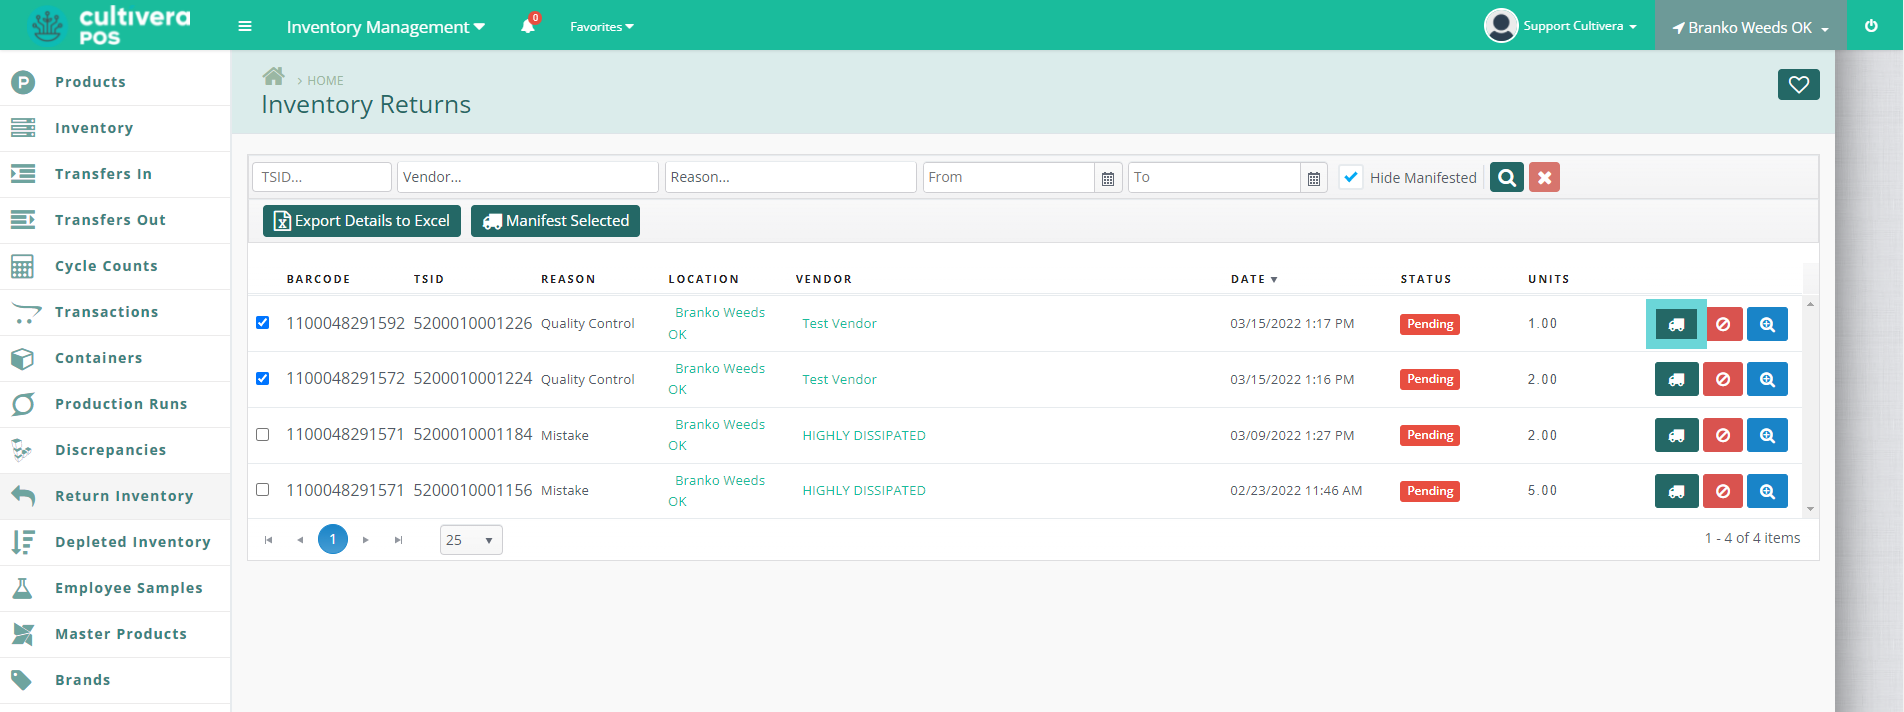
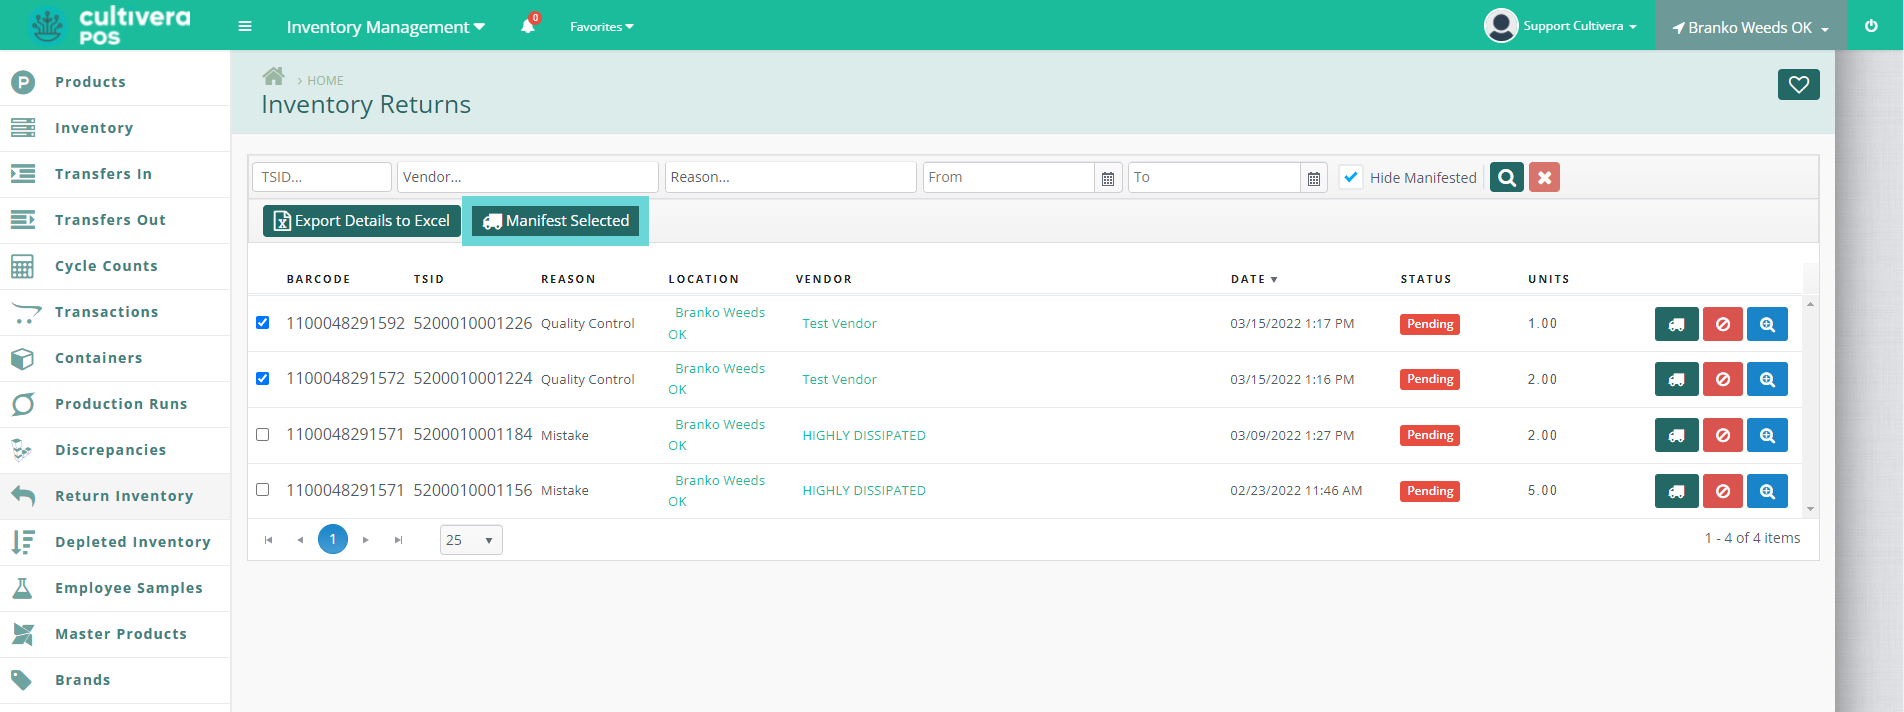 Manifesting a single item can be done by clicking the "Truck" Icon.
- To cancel a Pending return, click the "Circle-Slash" icon.

- To view the Return Details page, click the "Magnifier" icon.

Manifests can also be created from the Return Details page by clicking the "Manifest" button.
- Once you've selected to manifest the return inventory, you'll be directed to the Manifest Inventory Return page.
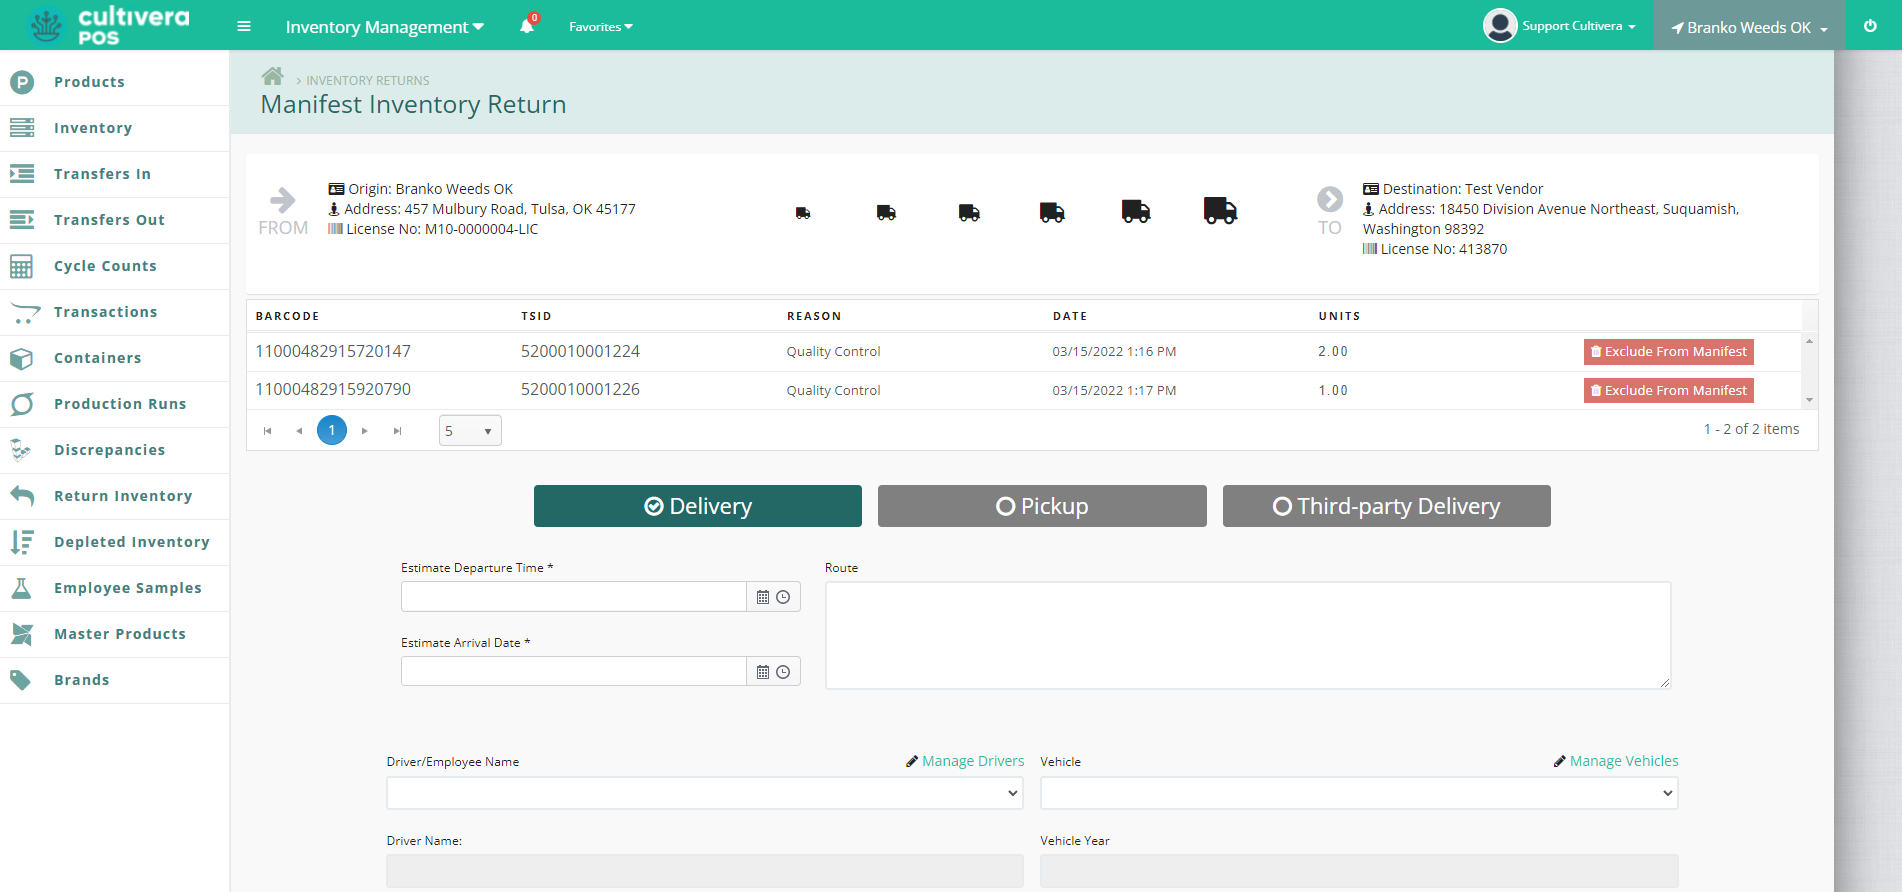
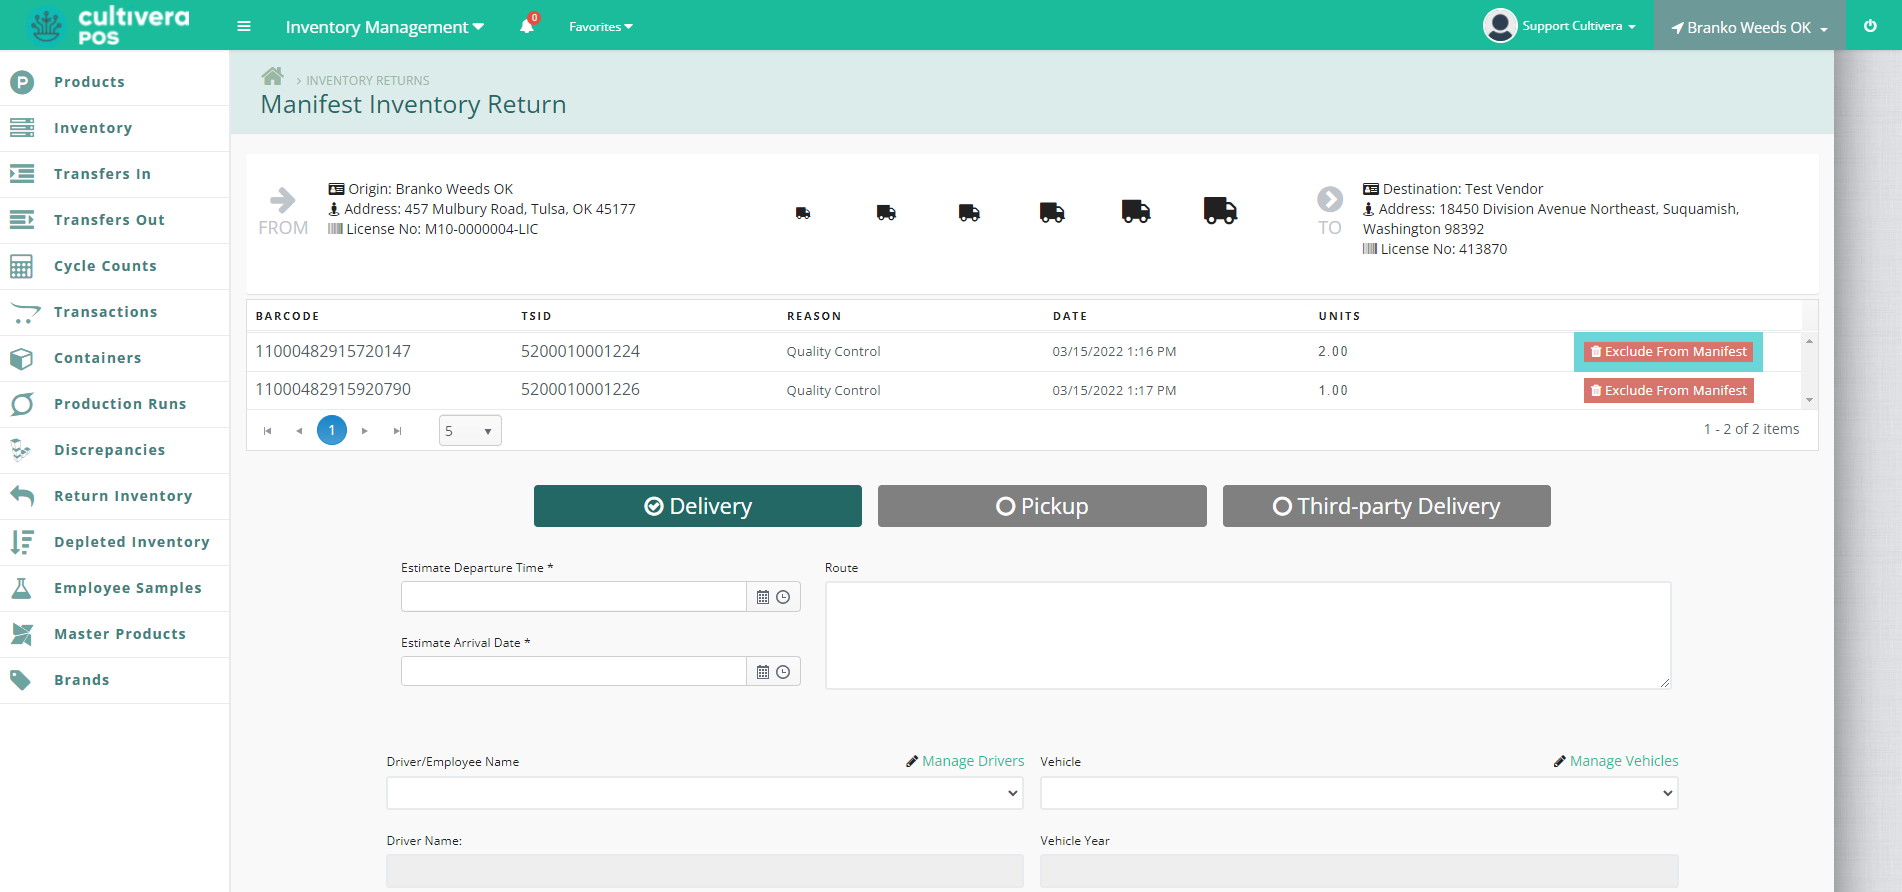
To remove an item from the manifest, click the "Exclude from Manifest" button.
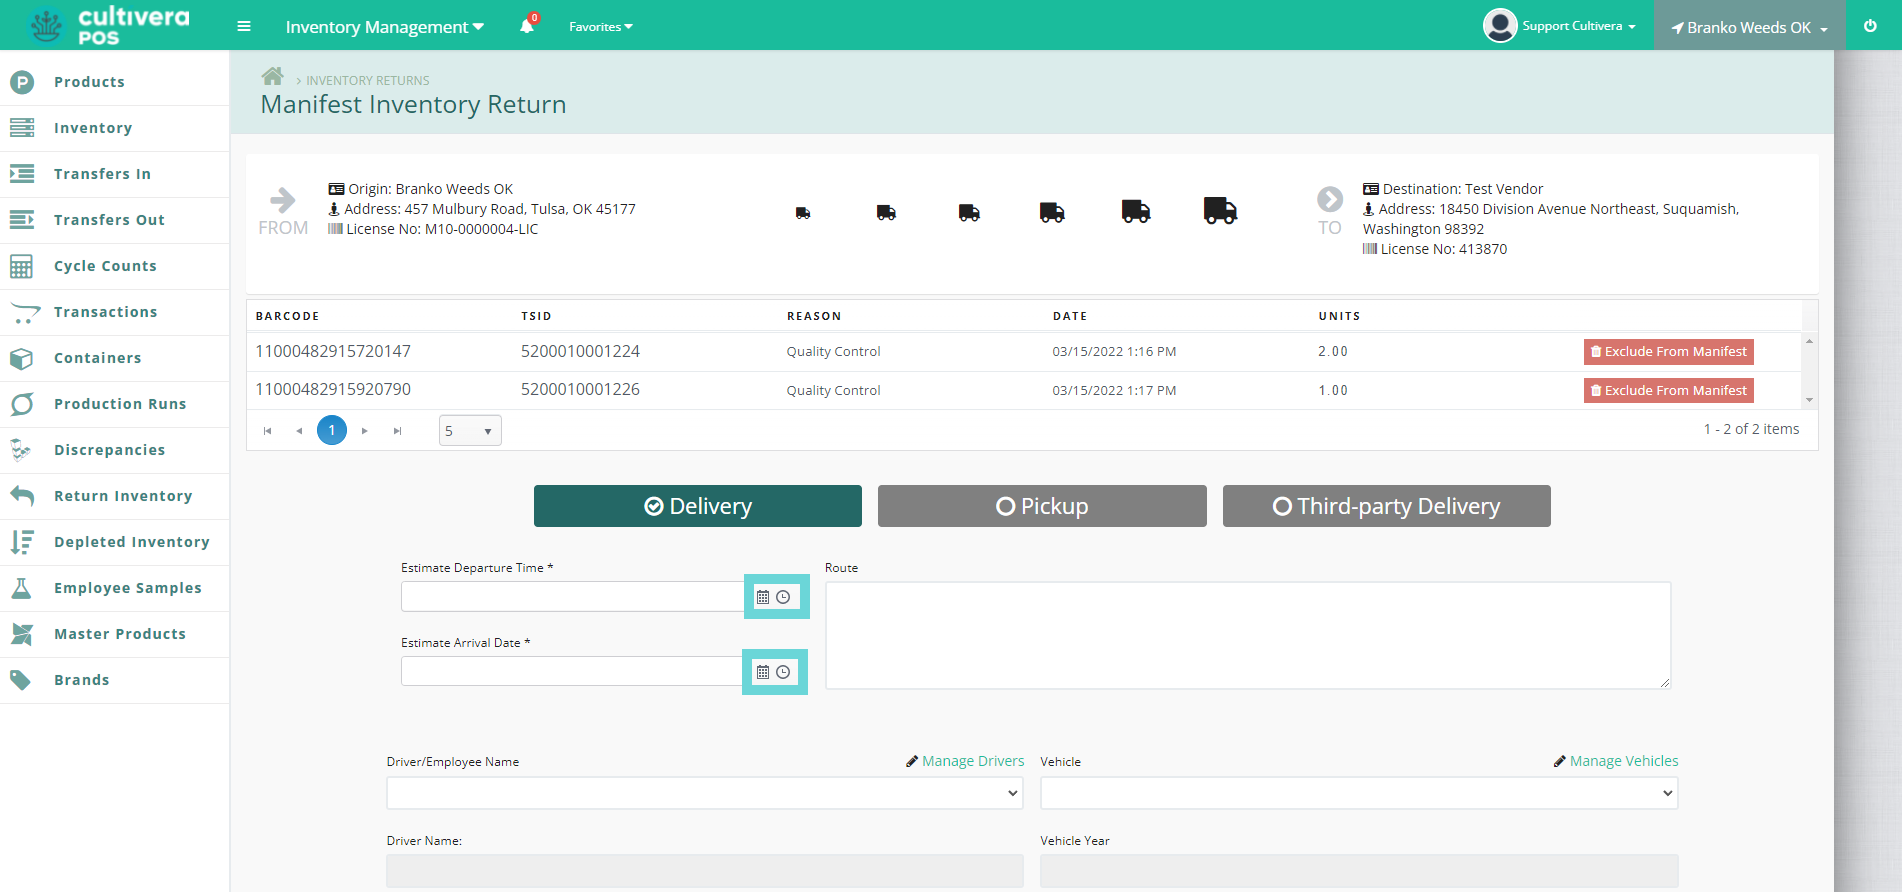
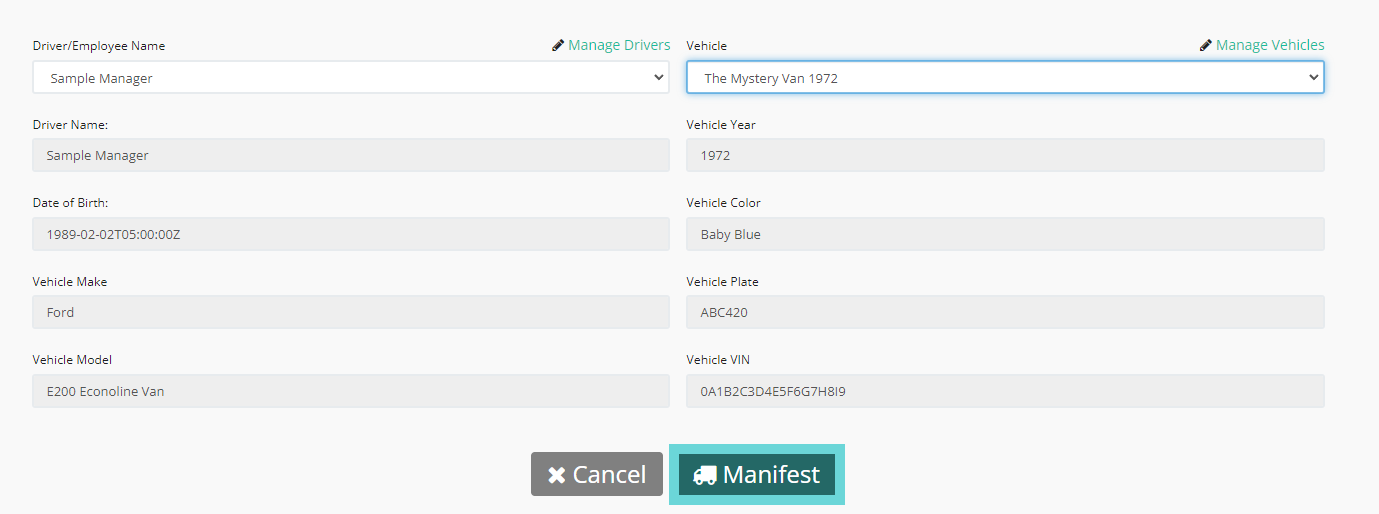
- Select the departure and arrival date/times by clicking the calendar and clock icons.
- Choose your driver and vehicle from the drop-down menu, then click the "Manifest" button to complete.
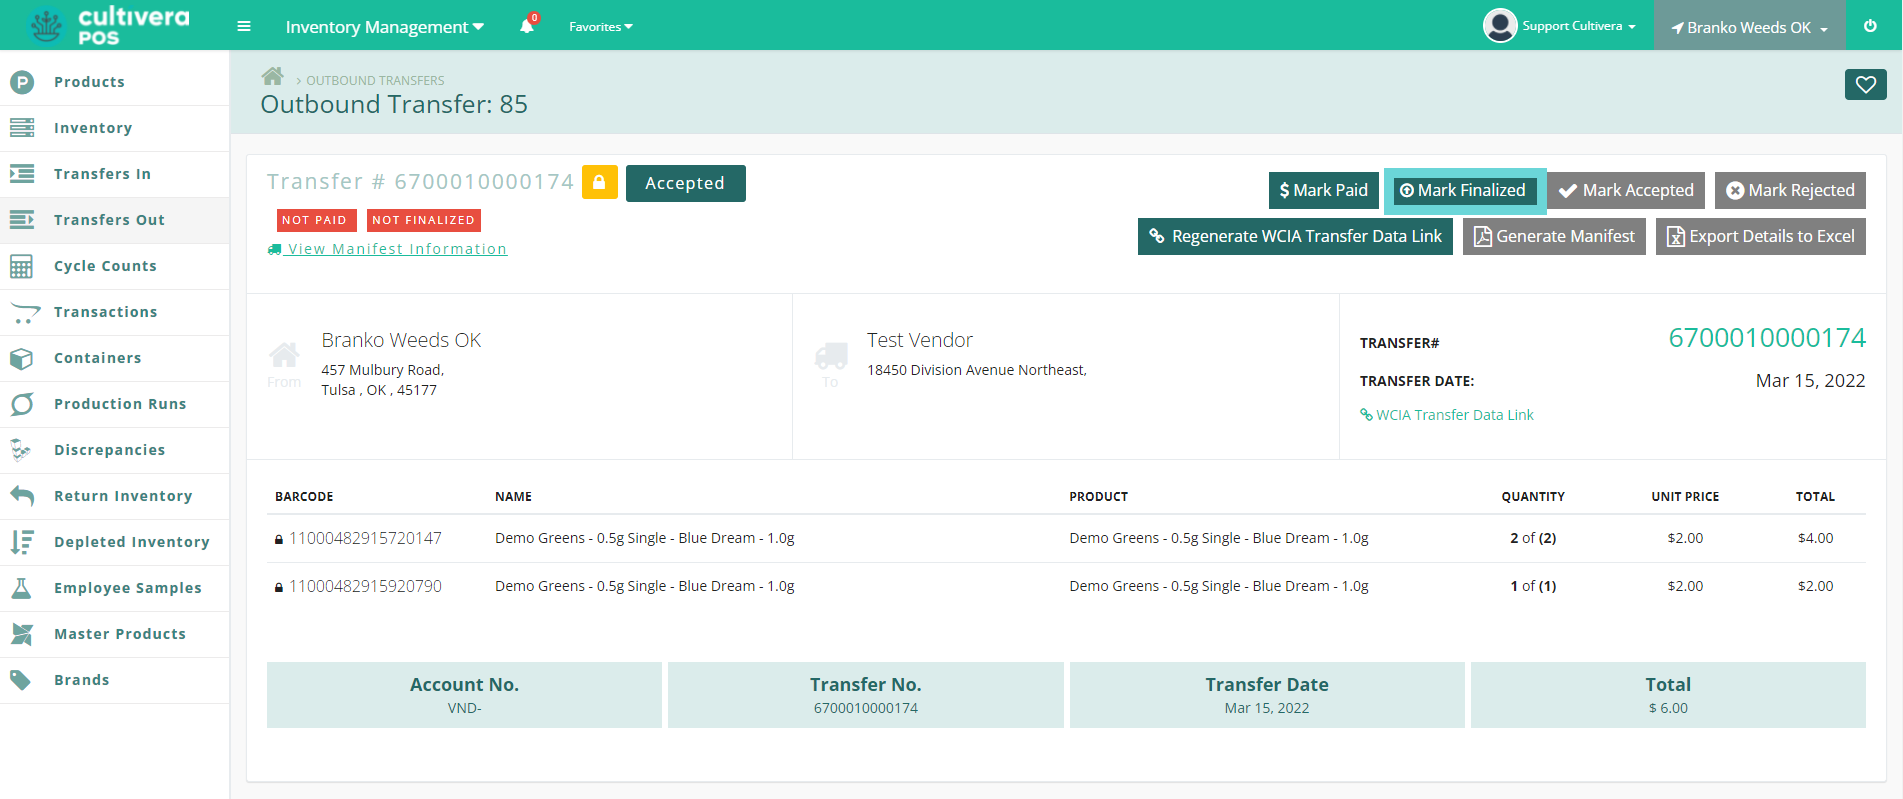
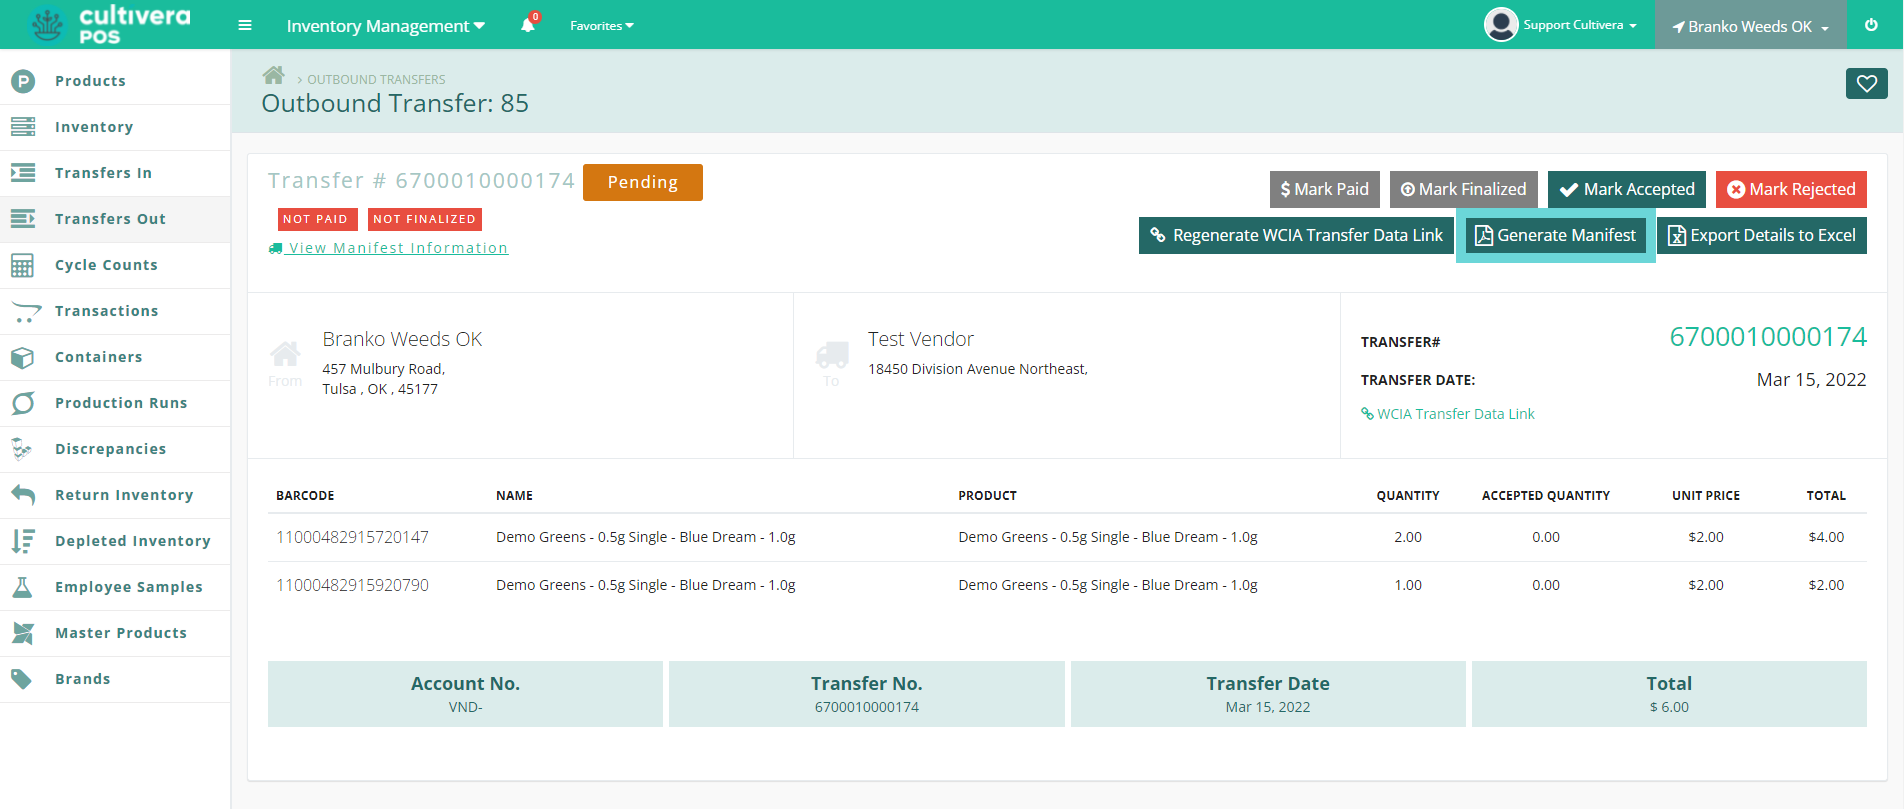
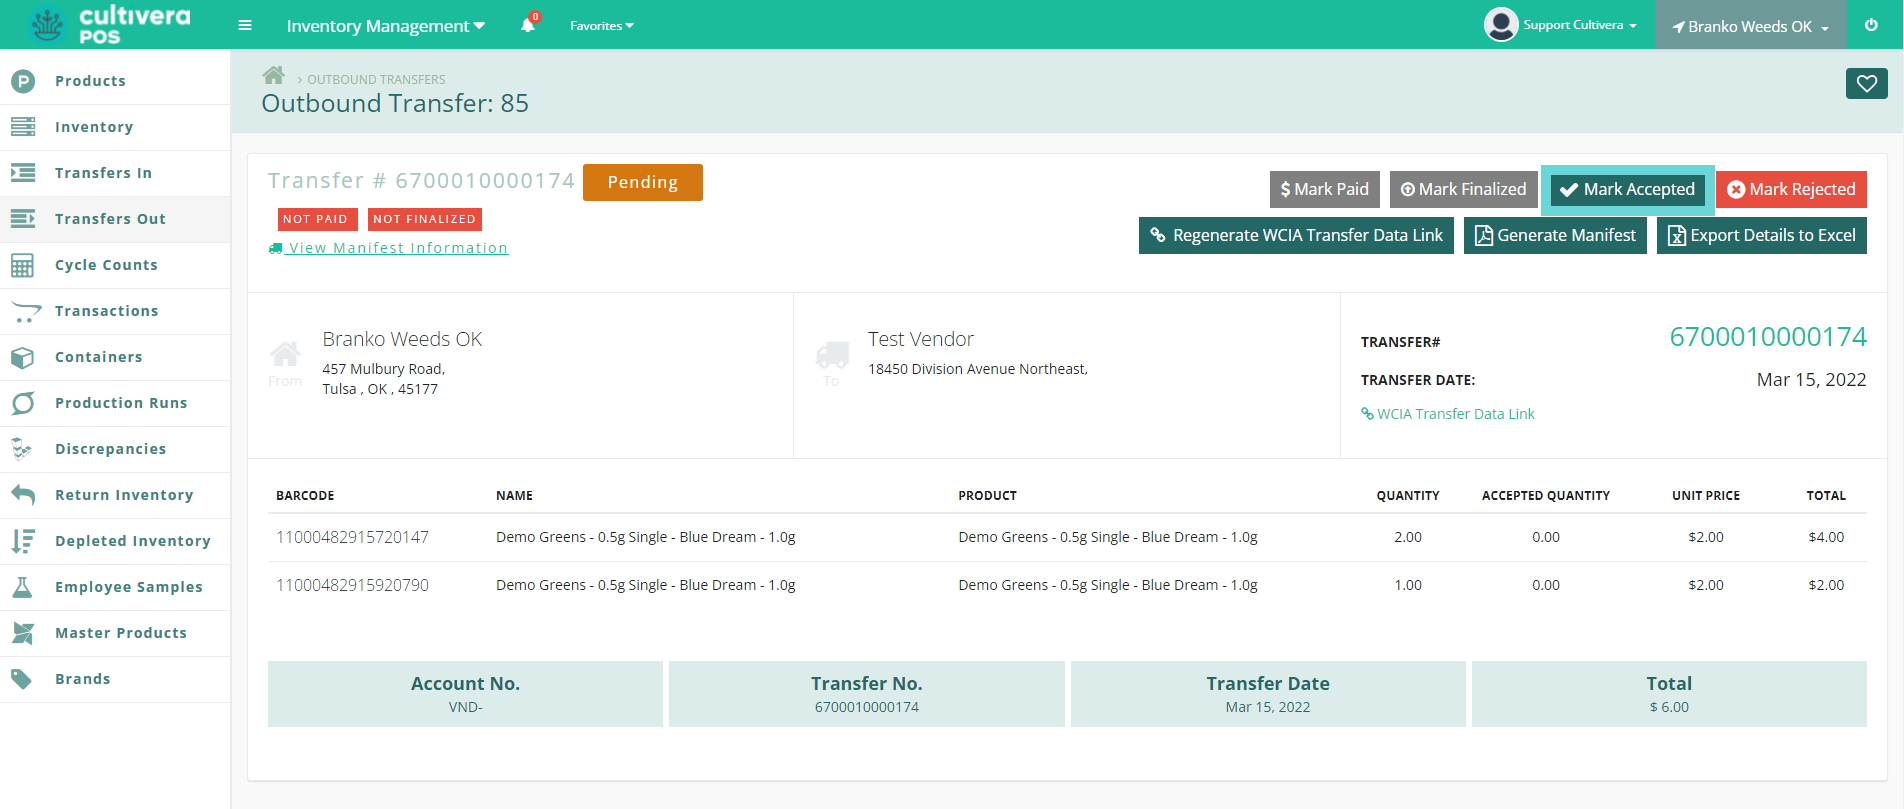
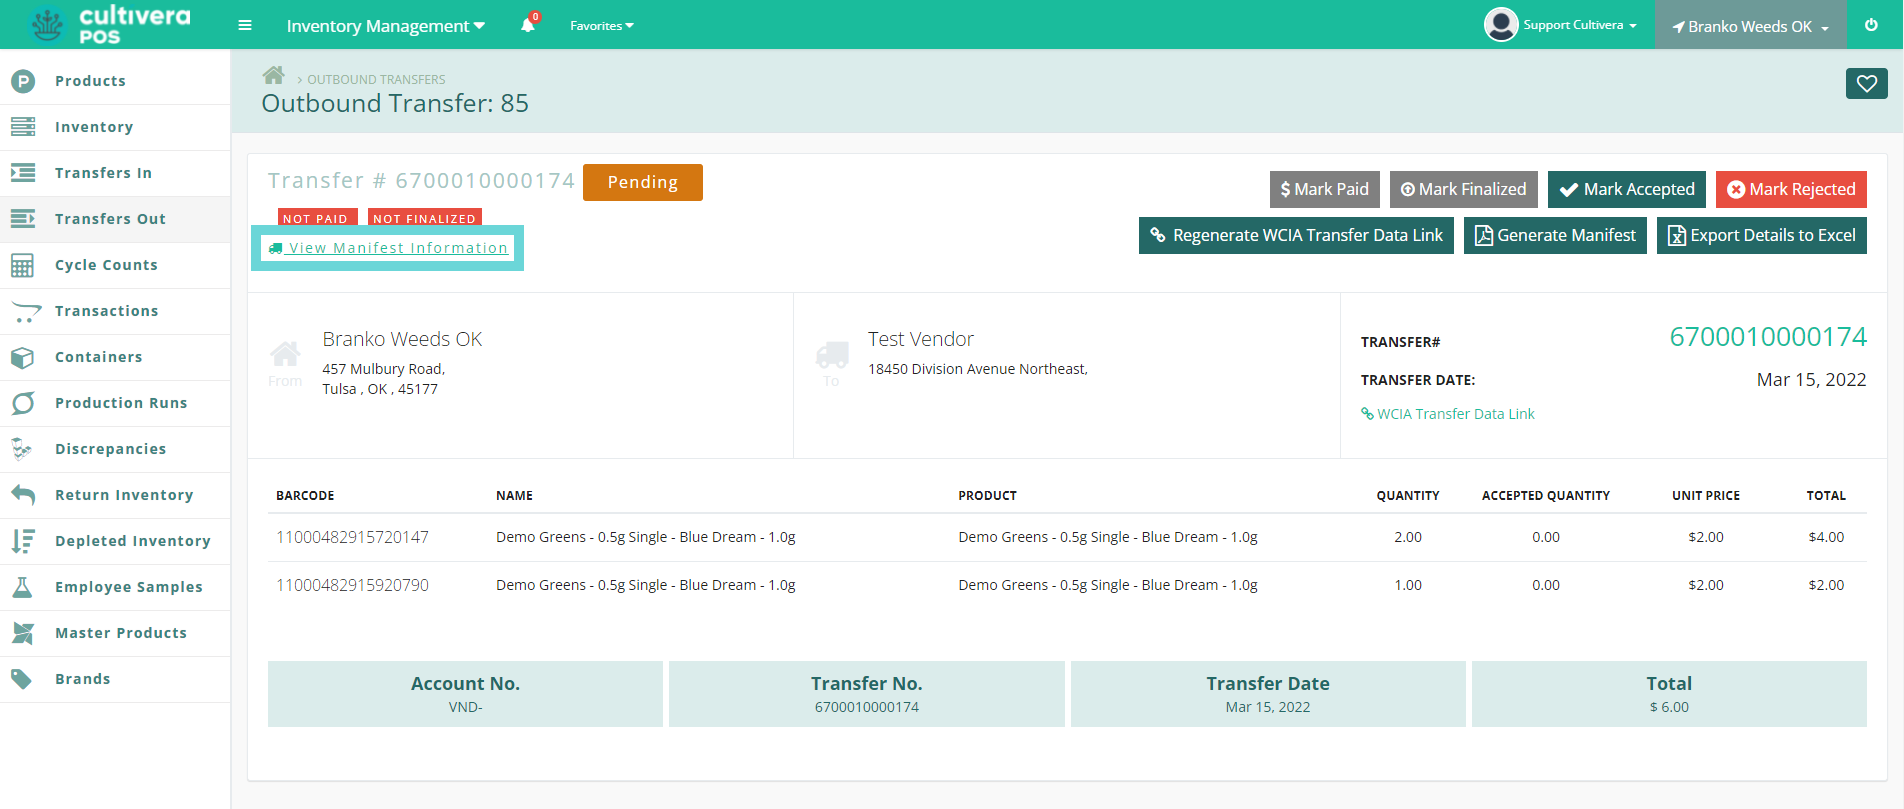
- After manifesting the return, navigate to the Transfers Out page. From here, you'll be able to generate necessary documents and files needed for drivers and vendors. To view the transfer details, click the "Details" button or the Transfer # link.
Details
The Outbound Transfer Details page will allow you to perform a variety of actions related to your scheduled return such as Generate a Printable Manifest Document, Export Details to Excel, Mark as Accepted, Rejected, Paid and Finalized.
- To generate a printable PDF of the created return, click the "Generate Manifest" button.
- A new tab within your web browser will open that allows you to print a copy of the transfer manifest.
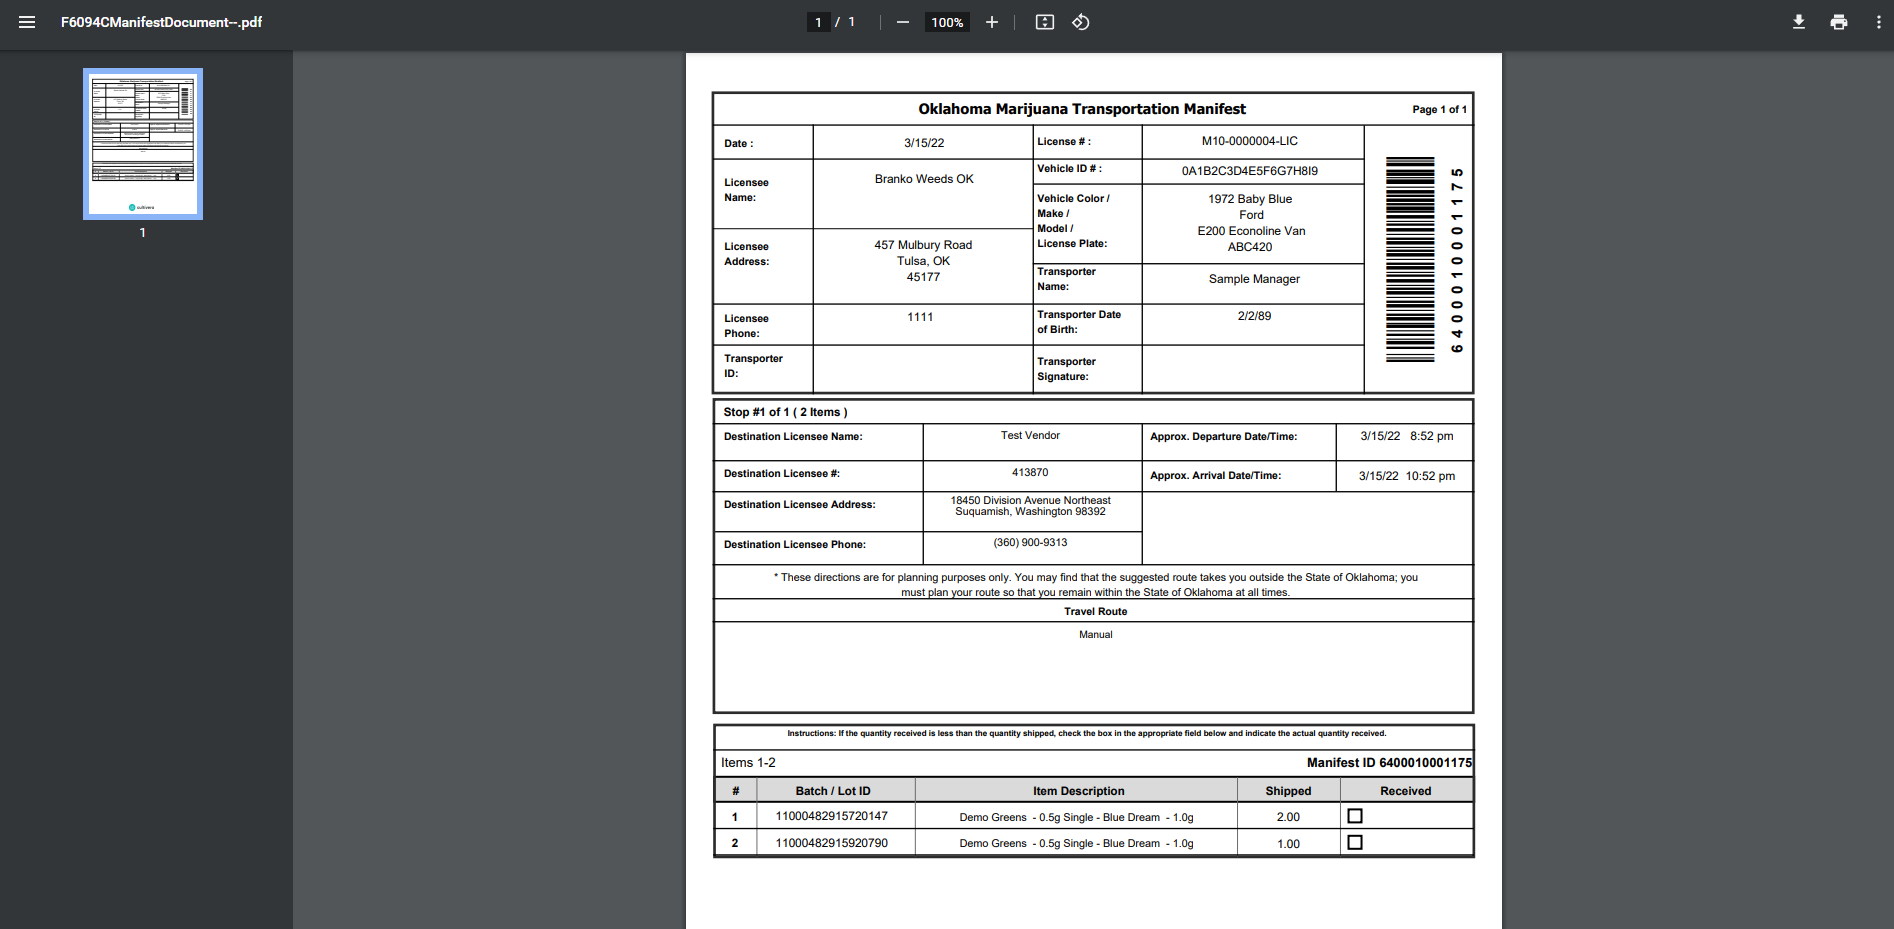
- A new tab within your web browser will open that allows you to print a copy of the transfer manifest.
Be sure to know your state's requirements for inventory returns, as this may not be the only document required for your outbound transfer.
To Generate a WSLCB Transfer Manifest
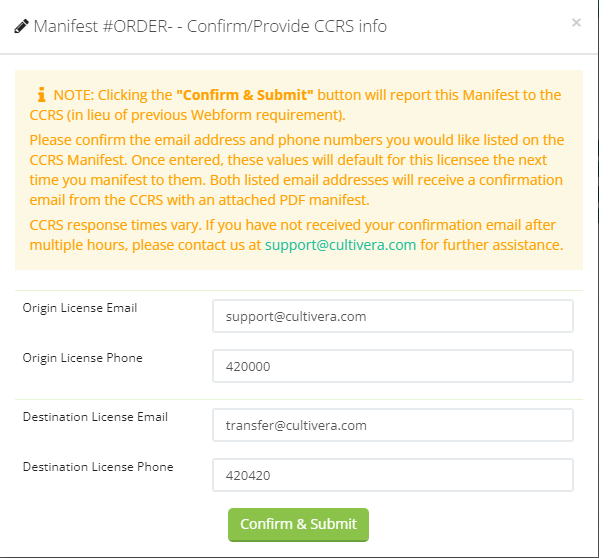
- Select the "Report to CCRS" button.

- Input the destination email and license number for the vendor receiving the transfer. Both emails provided will receive the WSLCB transfer manifest. Response times may vary, but if the manifest is not received within several hours after submission, please contact support@cultivera.com for assistance.
- Once the vendor has received your transfer and accepted it, press the "Mark Accepted" button.
- If the Vendor rejects the return, click the "Mark Rejected" button.
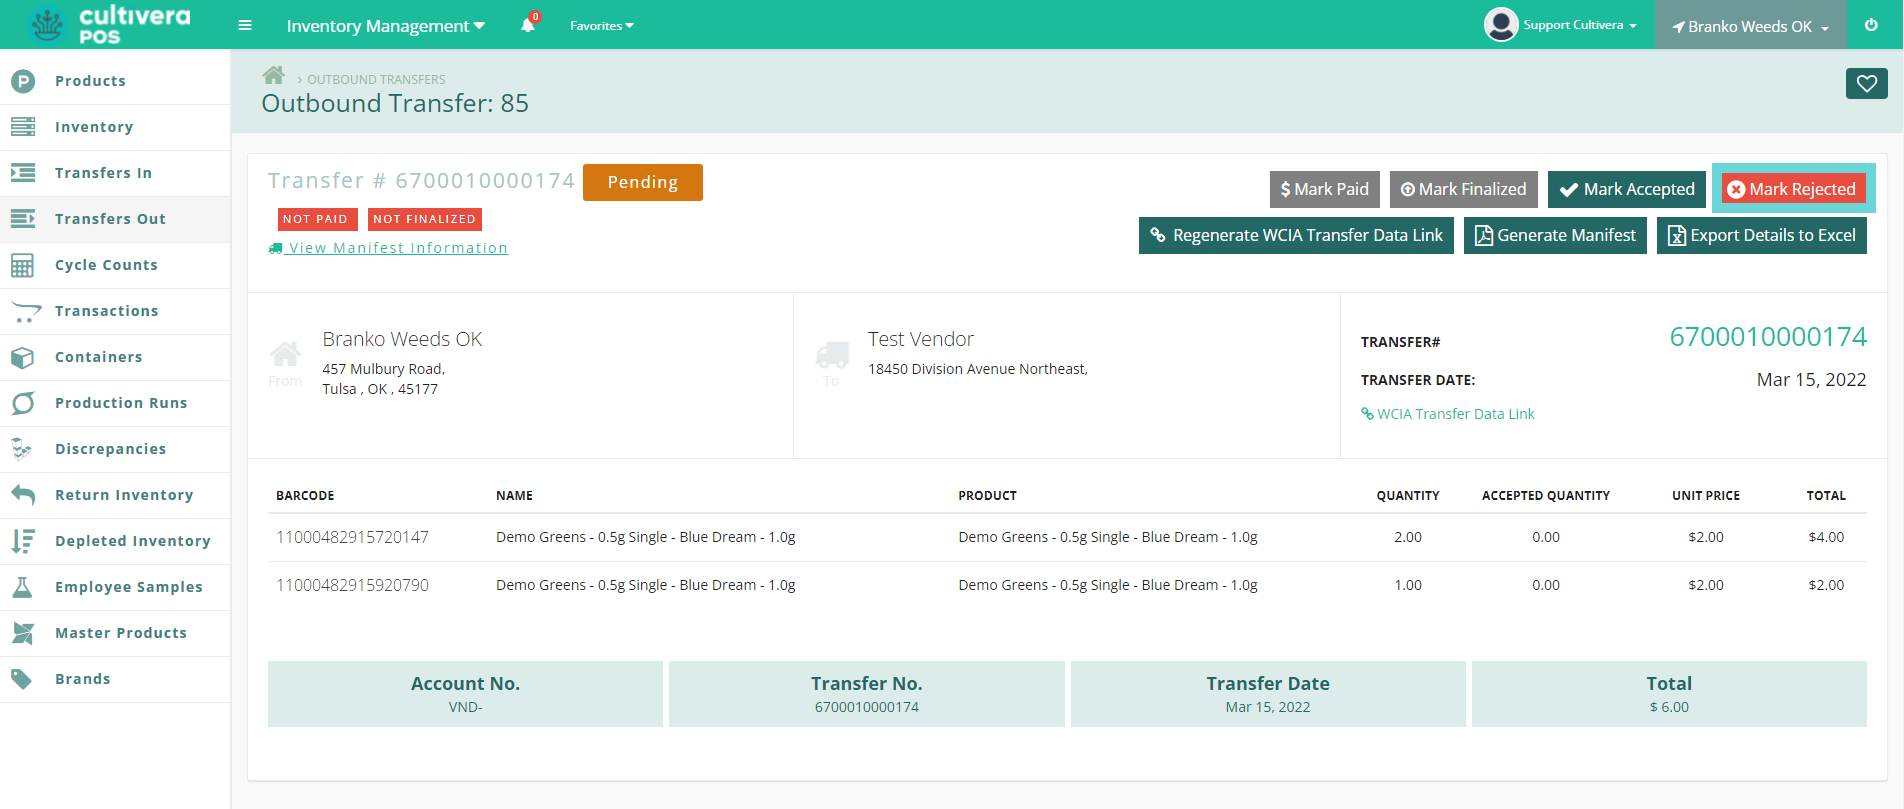
- If the Vendor rejects the return, click the "Mark Rejected" button.
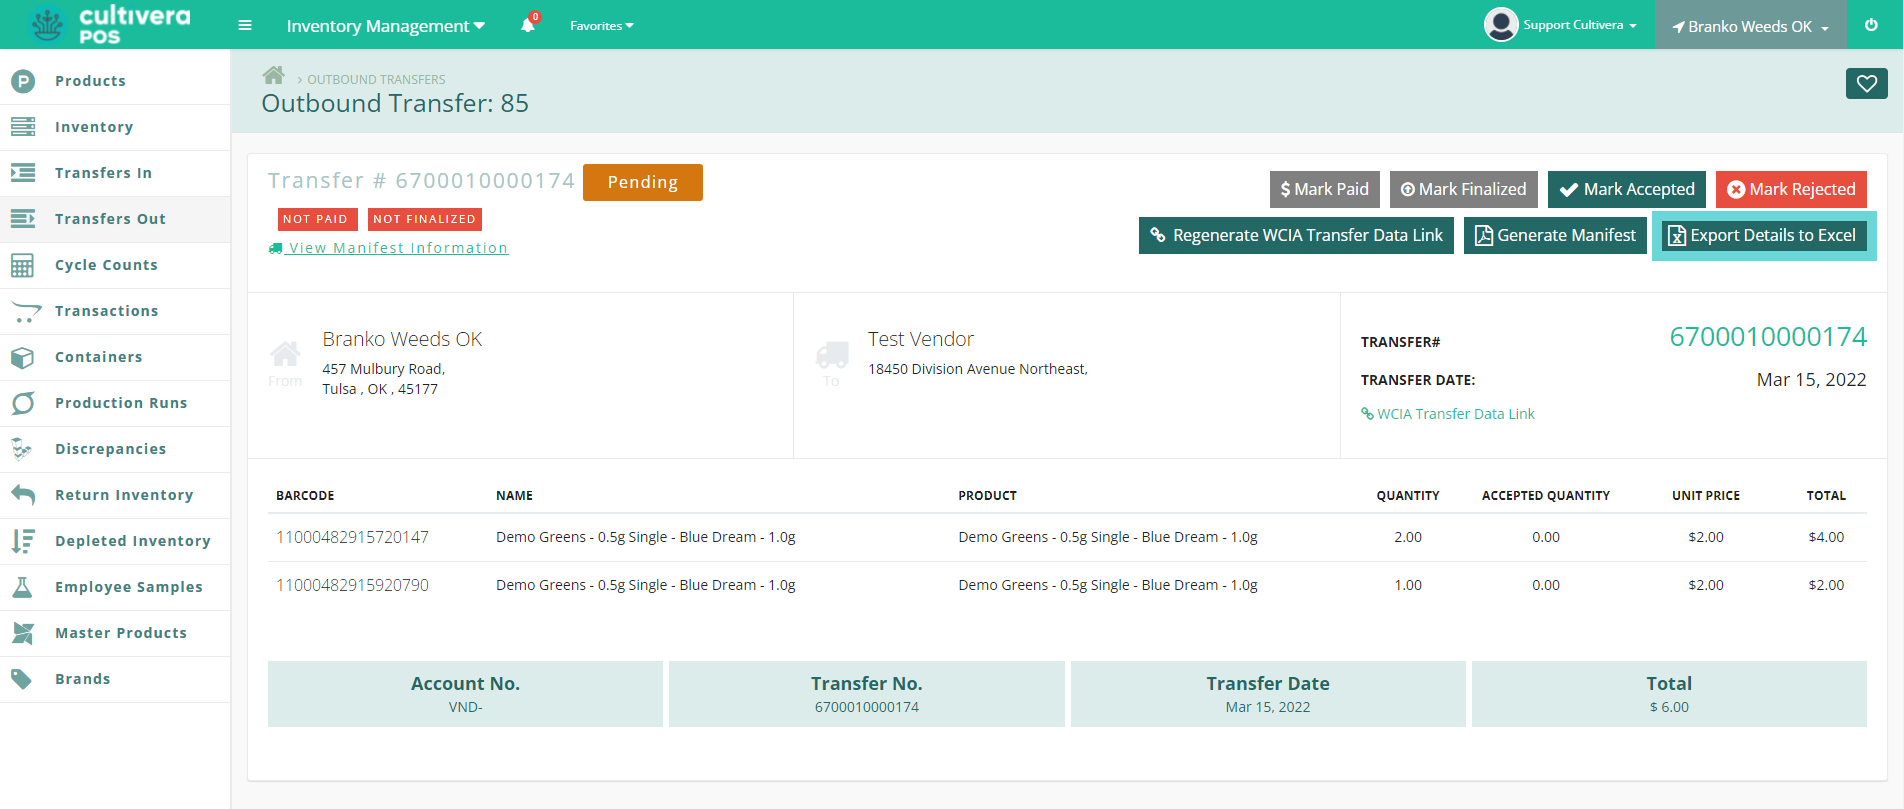
- To export the details of the transfer to an Excel document, click the "Export Details to Excel" button.
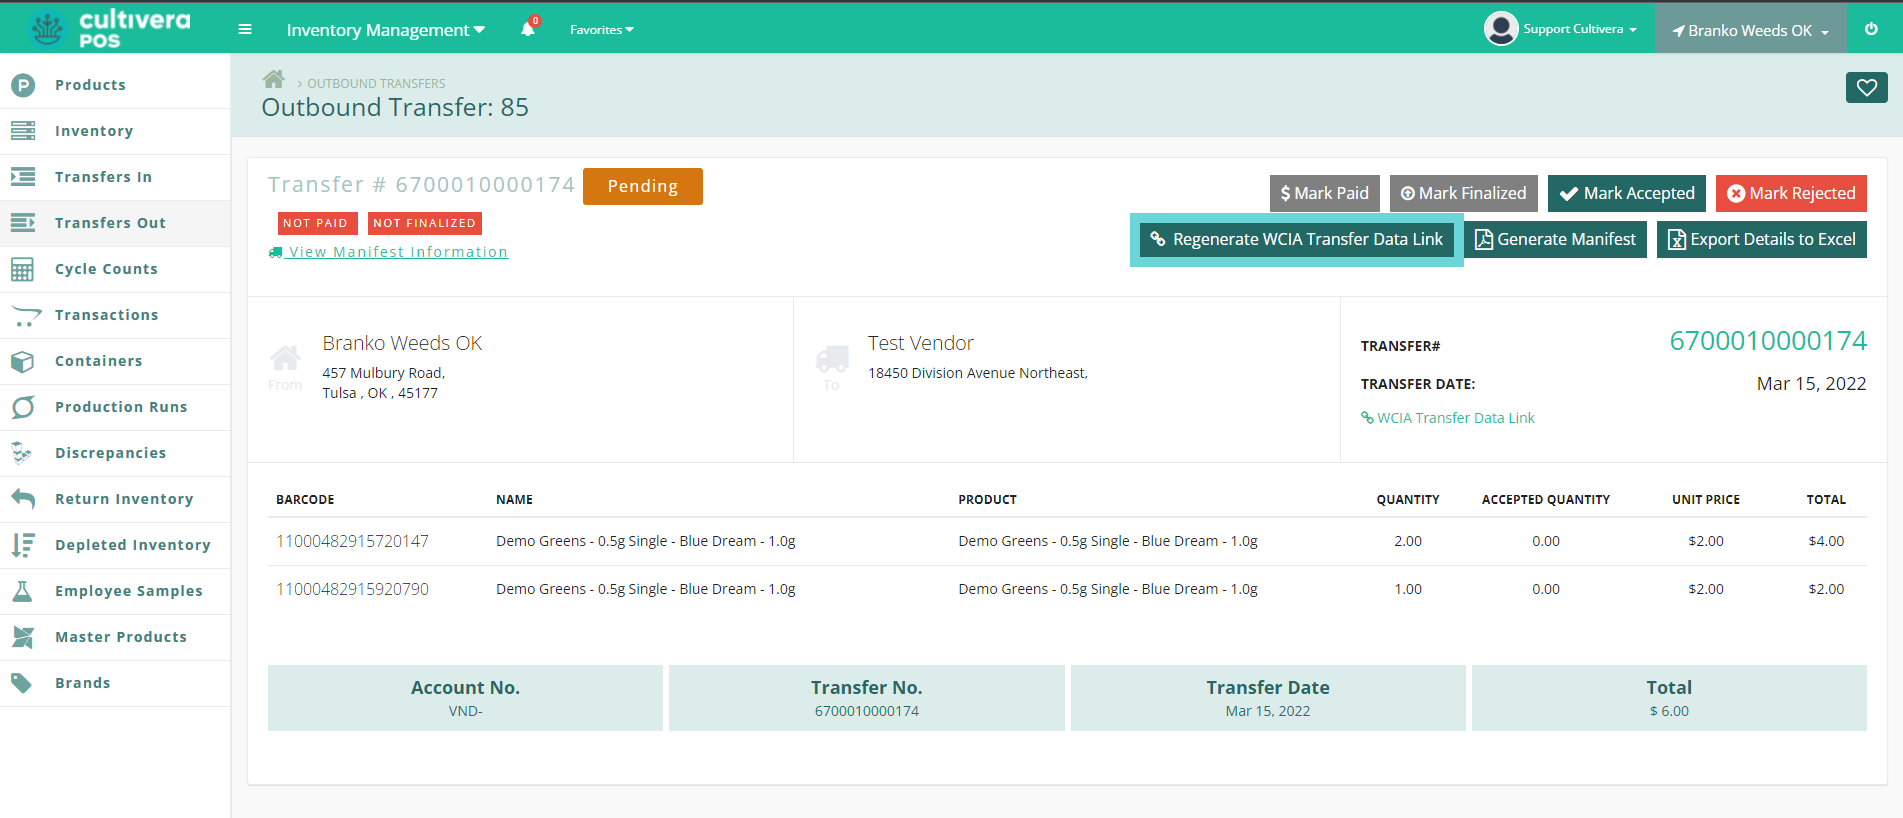
If your state uses a JSON link, this can also be generated in the Outbound Transfer Details page.
- To generate a JSON link for transfers, click the "Generate WCIA Transfer Data Link" button.
- To view the JSON Transfer link for your transfer, click on the teal View Manifest Information link.
Details
From here you can view detailed information about your transfer such as the origin and destination details, along with driver and vehicle information. This is also where you can copy or generate the JSON link. If you've already generated your WCIA Transfer State Link, click the "Copy to Clipboard" button, and paste in your correspondence with the vendor.
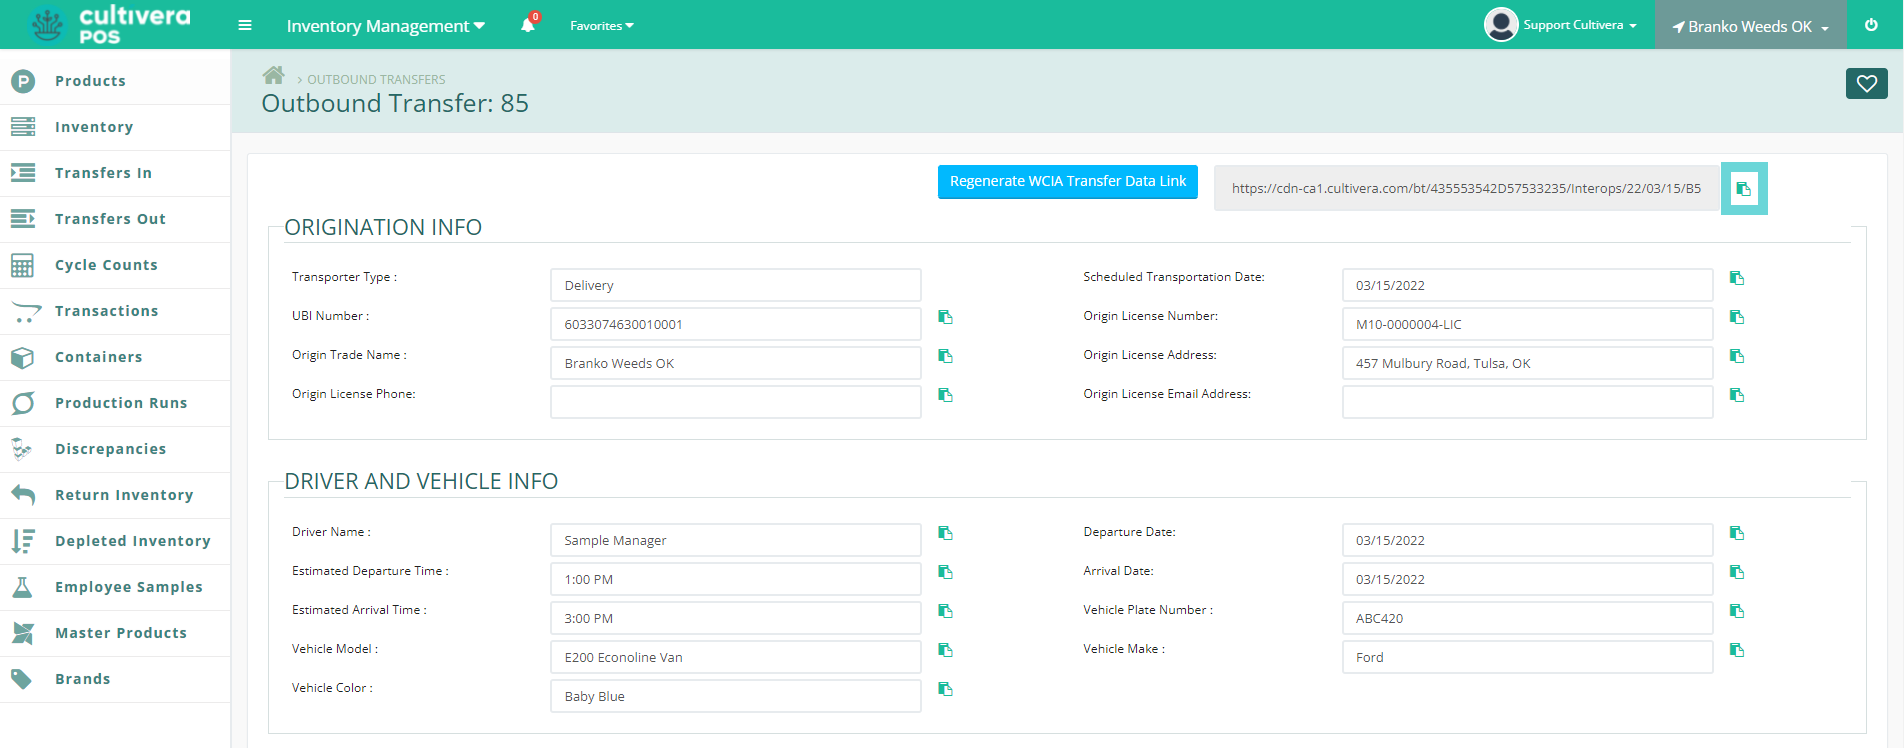
- If you need to generate the WCIA State Link, click the "Generate WCIA State Link" button here.
- If a credit for your return is received, you can now mark it paid by clicking the "Mark Paid" button.
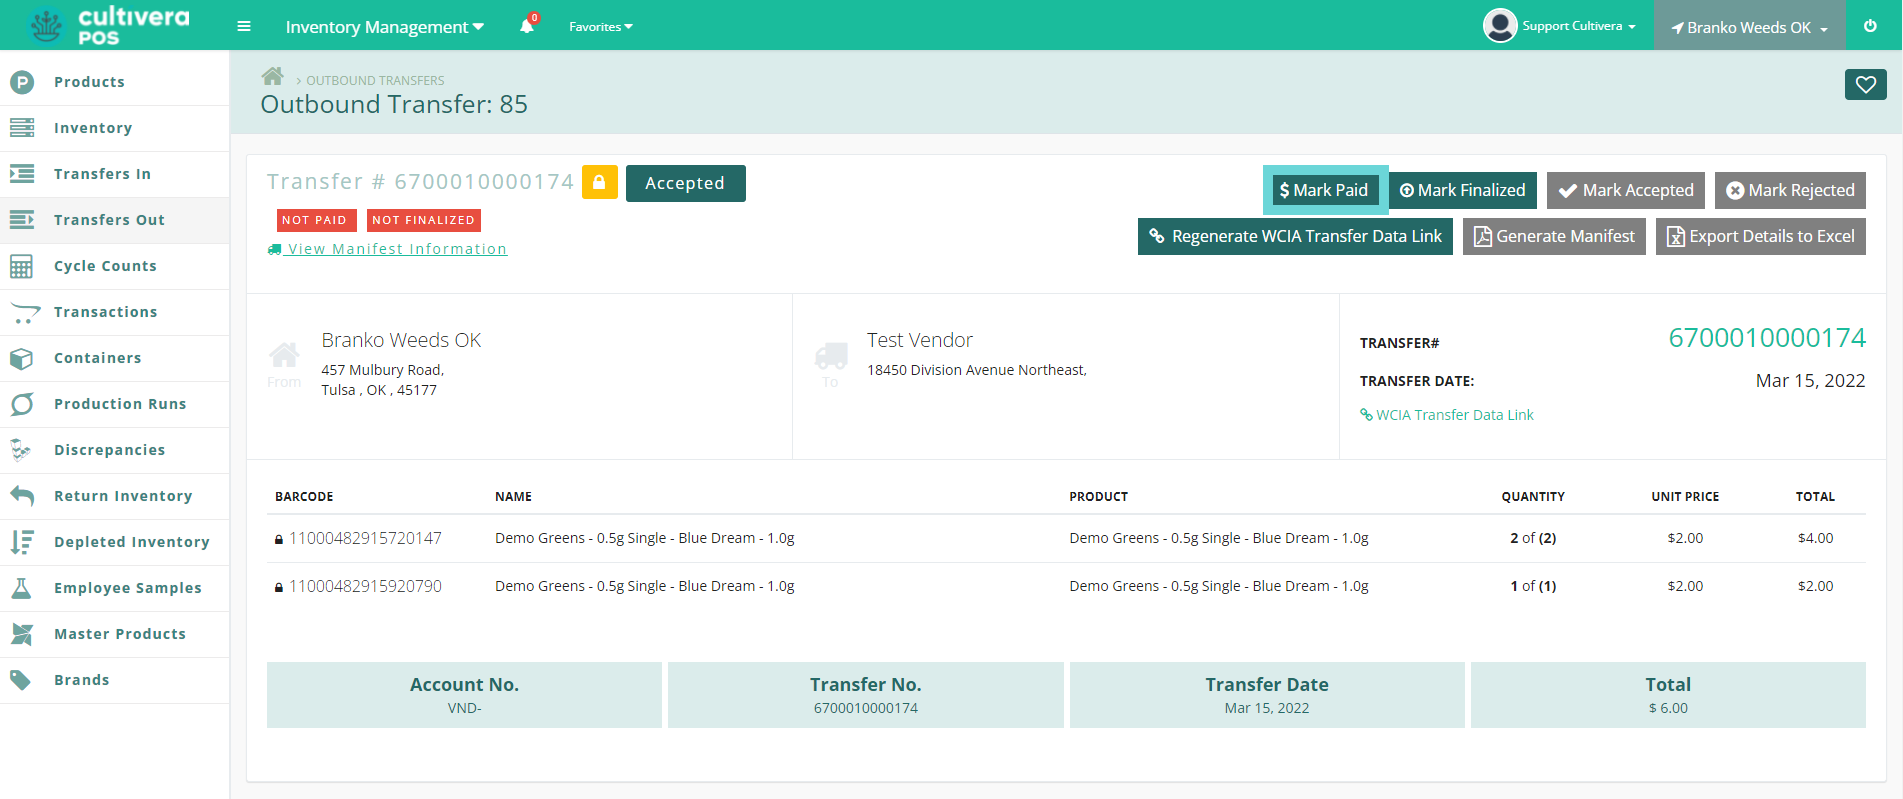
- After the Vendor has received the return and you've indicated that it's been accepted, you can finalize the transfer by clicking the "Mark Finalized" button.