POS - Inventory Management: Transfers In for Stand Alone States and Non-Cannabis Items / Manual METRC Sync
![]() Updated
Updated
POS Inventory Management: Transfers In for Stand Alone States and Non-Cannabis Items / Manual METRC Sync
Stand Alone Inbound Transfers & Non-Cannabis Transfers:
The Transfer In page is where product inventory from a Vendor is created and accepted into the system. This process is used in Standalone states or to create non-cannabis inventory when available.
Follow these steps to create a new Inbound Transfer.
- Login to Cultivera POS Backoffice.
- Select the license accepting the inventory from the drop down menu in the top right hand corner of the screen.

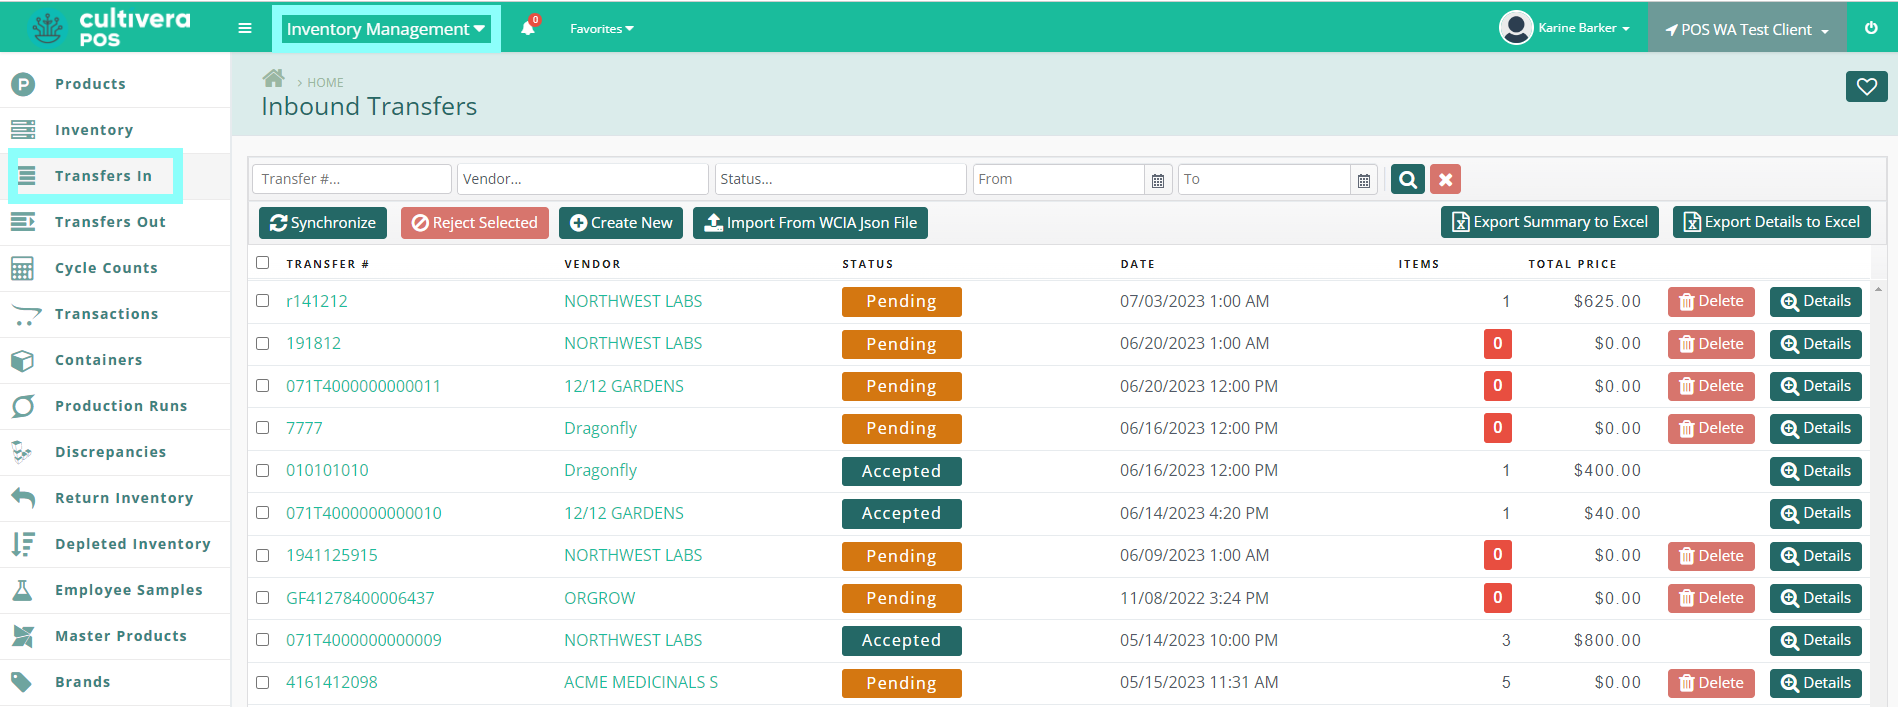
- Navigate to the Transfers In Page from the Inventory Management Module.
- To Create a New Transfer, select the green "Create New" button.
- To add products to, or edit an existing transfer, select the teal Transfer Number on the Inbound Transfer home page (example below), to open the Transfer Detail page.
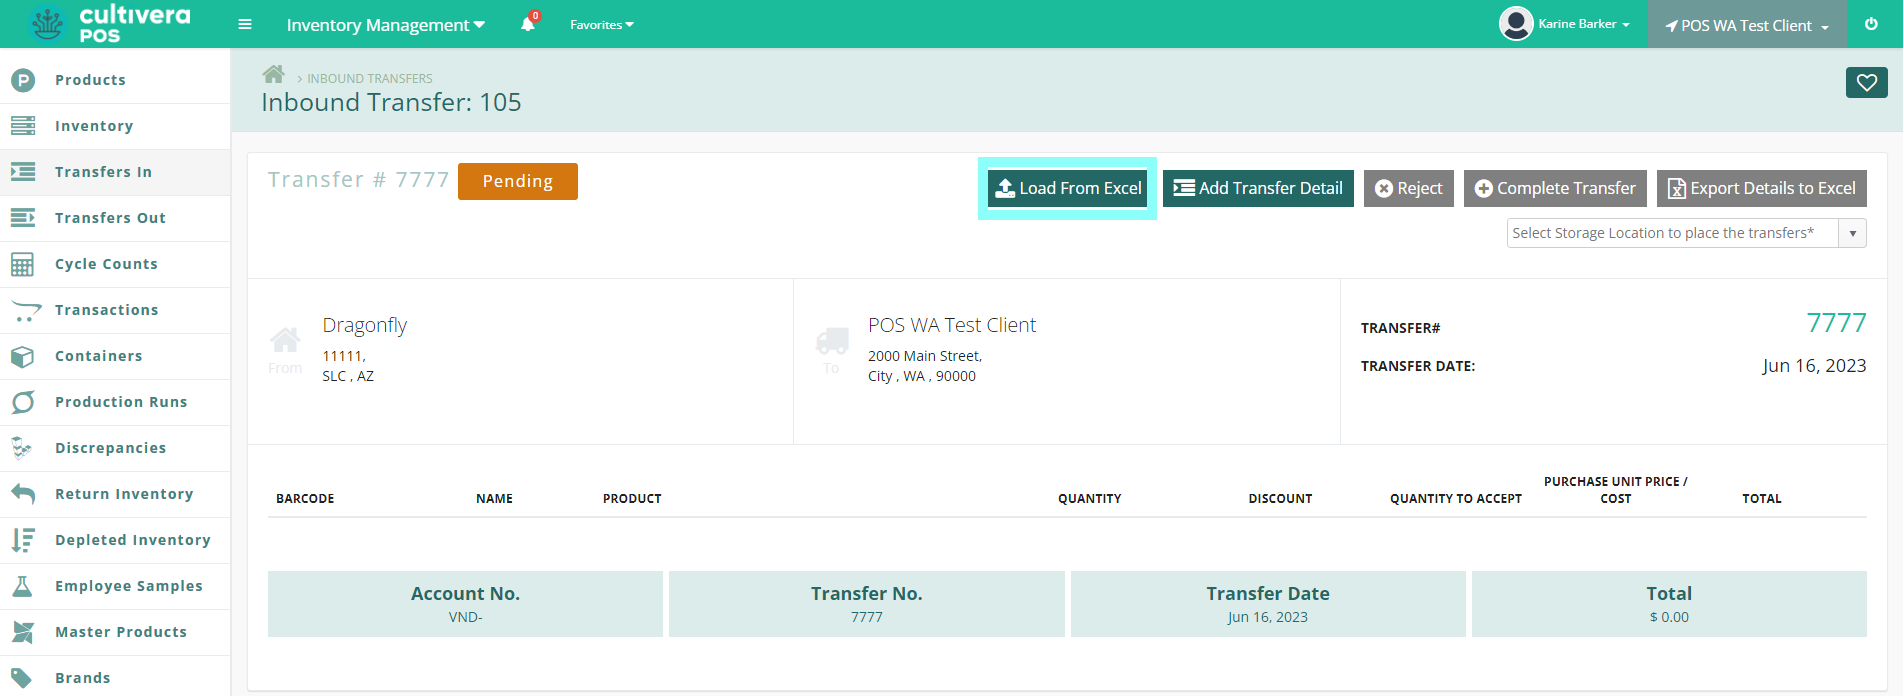
- The Transfer Detail page offers two ways to add products to a transfer: Load From Excel or manually Add Transfer Detail.
- Load From Excel if the order information is in an Excel file. When clicking "Load From Excel", the template for the required format appears for download.
- Select the file that is saved and formatted correctly to upload.
- Example of formatting can be downloaded from the teal “here” link.
- To add products individually, select the green button, "Add Transfer Detail".
- Enter Barcode on the physical product, or generate a new barcode and print it in house.
- Select product in the drop down menu, only if it is a product the shop has carried before.
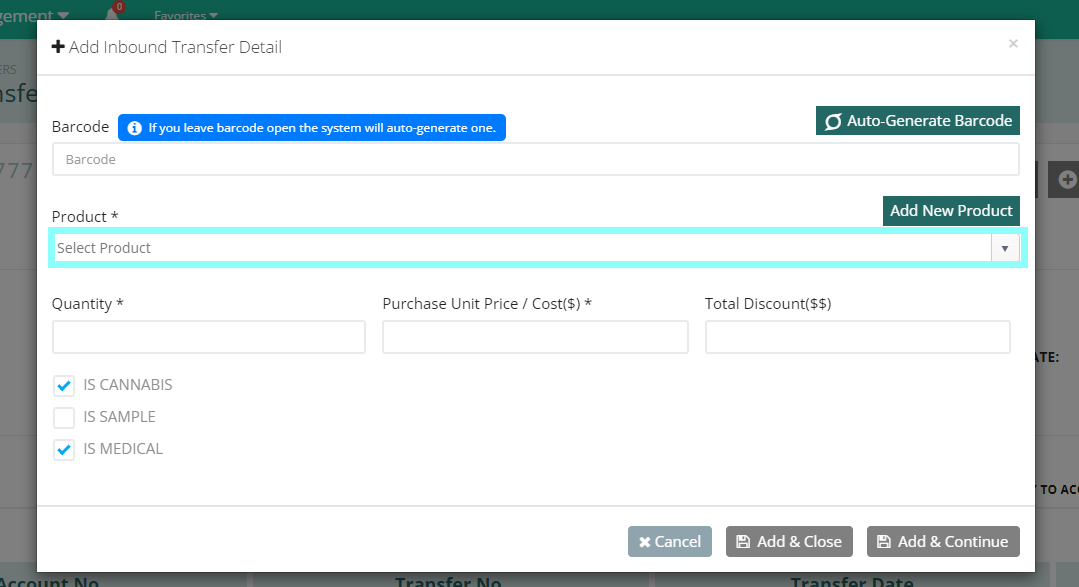
- If the product is new to the facility and has not been entered in the system before, Select the green "Add New Product" button.
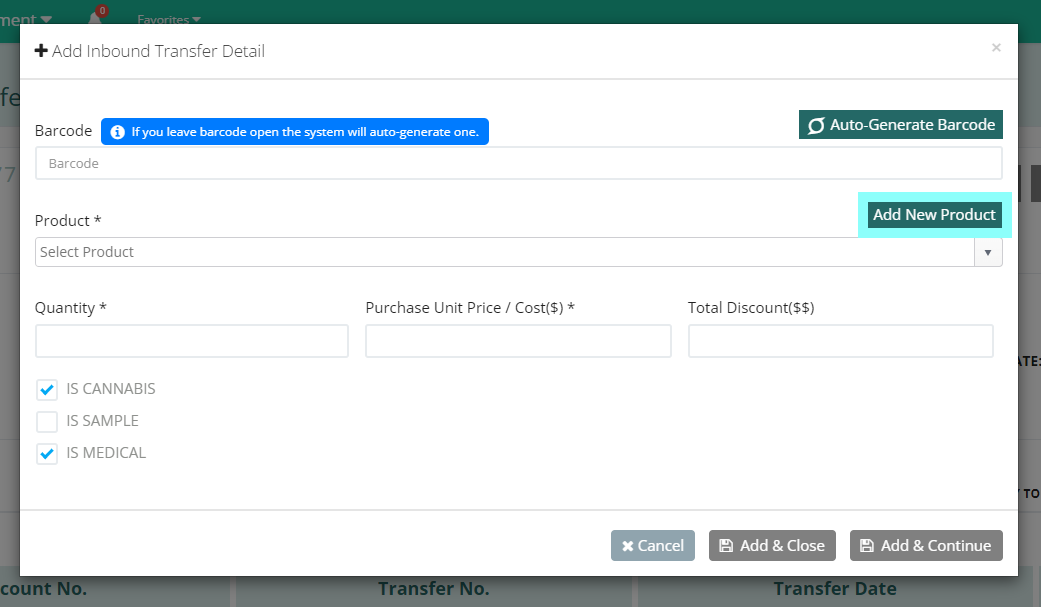
- Complete as much information as possible. *Required Product information will have asterisks.
 If bringing in Non-Cannabis inventory, uncheck "IS CANNABIS" and "IS MEDICAL" boxes.Sales Price is price to the customer, Unit Price/Cost is what the shop paid per unit.Inventory Type and Package Size/Content Unit of Measurement are imported to match the State’s rules of accepted inventory types for reporting and transactional limits at the counter.
 - Once complete, the green buttons at the bottom will appear:
- Select "Add & Close" if finished.
- To add another product, Select "Add & Continue".
- Complete as much information as possible. *Required Product information will have asterisks.
- When ready to Complete Transfer, Select the storage room the product will be transferred to.
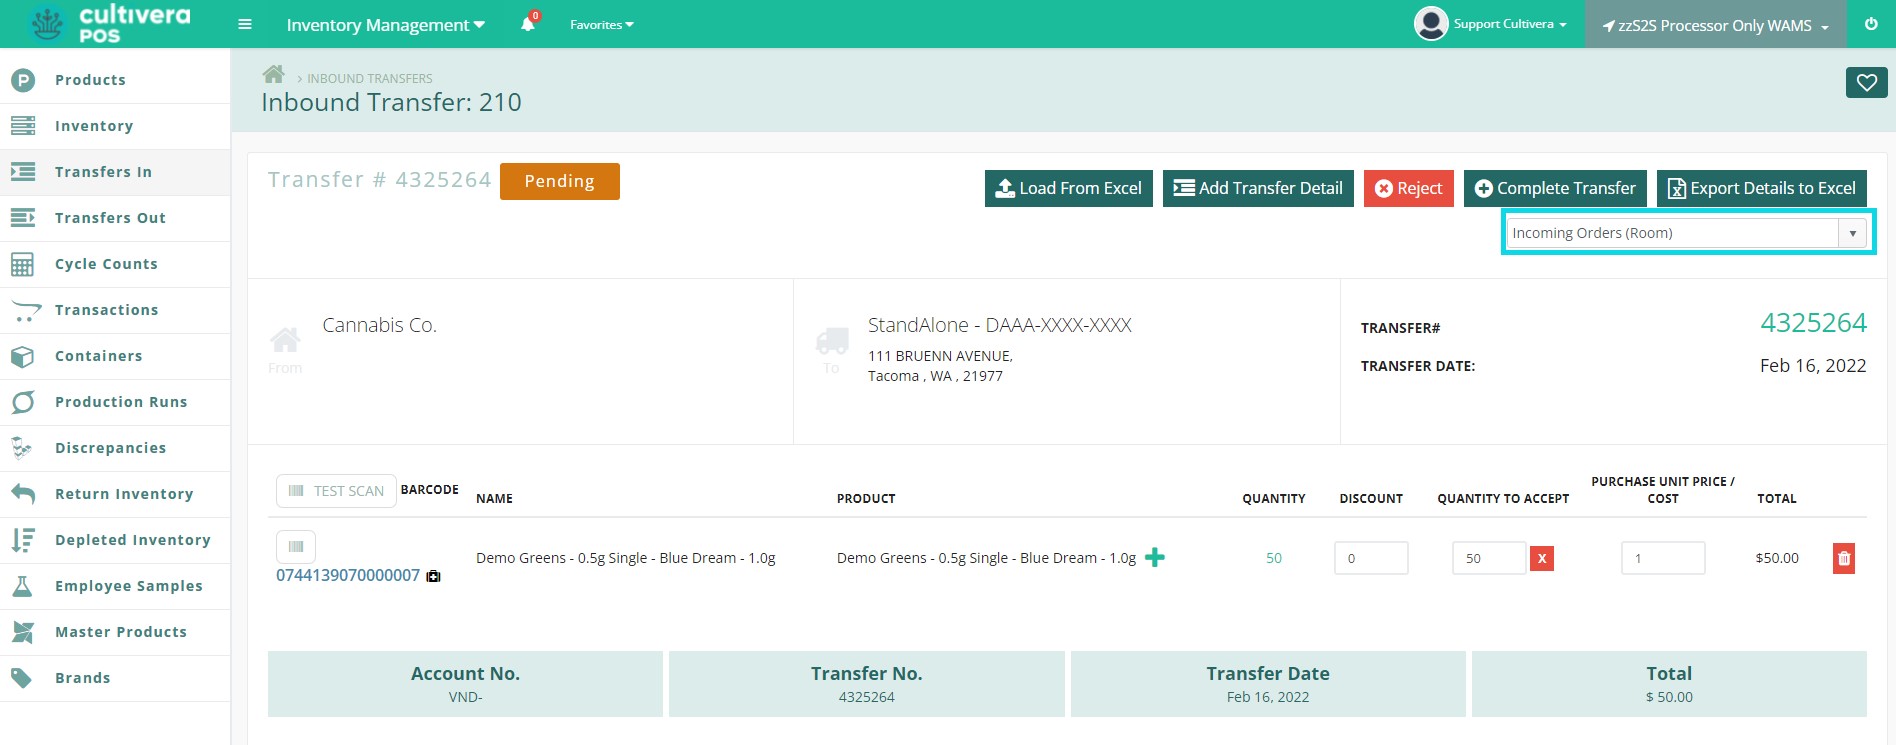
- Select the green "Complete Transfer" Button.
- The transfer will display one more time for review. If no editing is required Select "Complete" to finish the transfer.
Product accepted in the transfer will display in Inventory for editing.
To Edit any Inventory:
- Right click any product that you would like to make for sale at the terminal.
To select multiple entries, click and highlight all desired, then right click, or hold the CTRL button and click.
- Select amount of inventory you want to move to the Sales floor.
METRC Manual Sync for newly received inbound transfers:
If you have accepted a transfer within the METRC traceability system and do not see the order status as Accepted in Cultivera POS, follow the steps below to manually sync METRC transfers and inventory.
Navigate to the Sync Page by clicking the "Refresh" icon next to the logout button in the Back Office.

From the Sync Page, select the "Sync All" button.
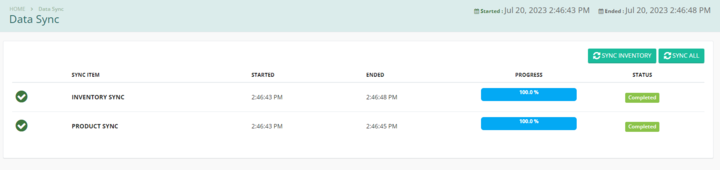
Once selected, choose the date before the transfer was accepted and press "Submit".

After a manual sync is performed, navigate back to the Transfers In page in the Inventory Management module to verify the pending transfer is now accepted.