Connecting the Star Micronics MC Print 3 via Bluetooth
![]() Updated
Updated
Connecting the Star Micronics MC Print 3 via Bluetooth to Your Tablet Device
This step by step guide will help assist in connecting your Star Micronics MC Print 3 via Bluetooth to your tablet device. Hardware support is available from the manufacturer and the Setup Manual can be found at the Star Micronics website.
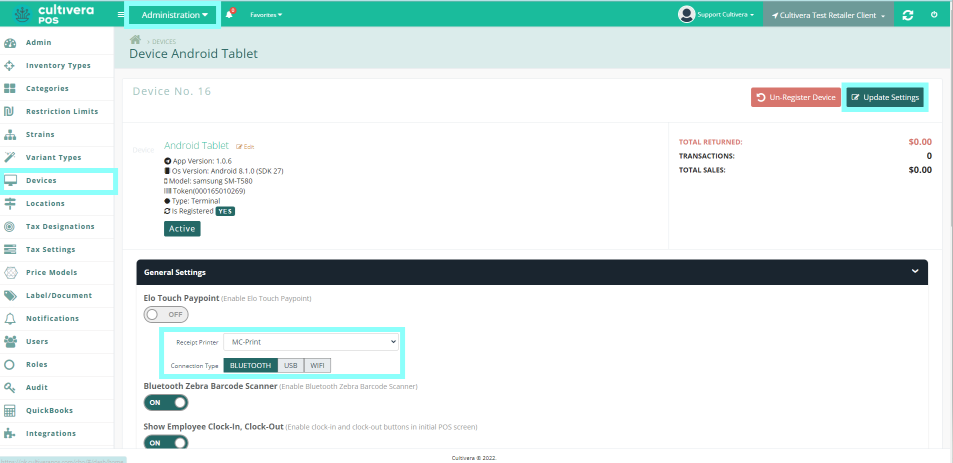
- First, you must configure your receipt printer device settings in the Cultivera POS Back Office. Log in and navigate to the Administration Module > Devices Page > Device Settings.
- From there, expand the General Settings by clicking the drop down menu and revealing the Receipt Printer configurations.
- Select the MC Print receipt printer and the Bluetooth Connection Type
- Press the Update Settings button to save your changes.
Bluetooth Connection for Tablet Devices:
Begin by setting up your Start Micronics MC Print 3 and ensuring the power cable is plugged in and the device powers on. After confirming the printer has power, you'll need to obtain the Bluetooth MAC address for the device. To do so, you can print a Self Test page or utilize the Star Micronics Set Up Utility App which can be found on the Apple App Store or the Android Google Play Store. To print a Self Test Page, follow the steps below:
- Turn the printer power OFF by holding the power button.
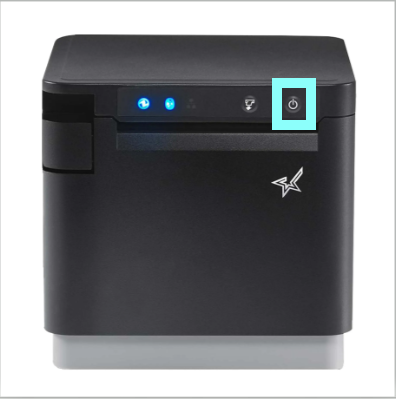
- Hold the feed button while powering ON the printer to produce a self test page. This may take several seconds, but once it begins printing, you may release the feed button.
- Once you've finished the Test Print, remove the sheet that was printed. For the MCP31LB, MCP31LBNH, and MCP31CB model, Bluetooth information and network information are printed following printer information.
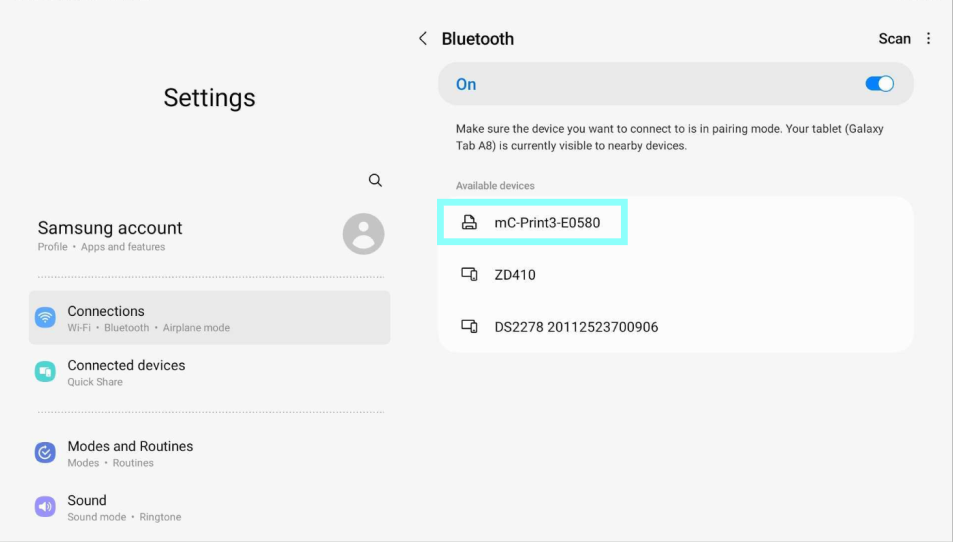
- Next, you will need to connect the printer in the Bluetooth Settings of your tablet. For Android tablets, swipe down from the top of the screen, then press and hold the Bluetooth Icon to bring up your pairable devices. Select the MC Print 3 from the list to begin pairing.
- For Apple iPads, select Settings, then navigate to the Bluetooth page. A list of pairable devices will be displayed. Select the MC Print 3 from the list to pair the printer to the tablet.

Setting up the Star Micronics MC Print 3 for Bluetooth Pairing:
If you are having difficulty discovering the pairable device in your tablet's Bluetooth settings, follow the steps below to confirm Bluetooth Pairing Mode is enabled.
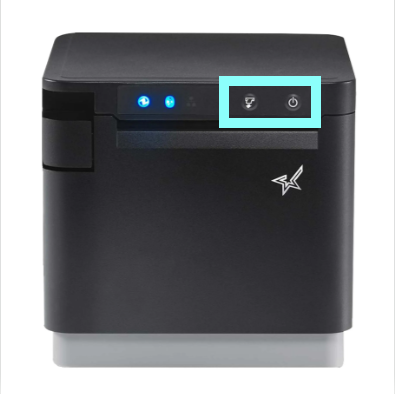
- Turn off the printer.
- Press and Hold the Reset button on the back of the device (you may need a paper clip or pen to do so) and the Power button at the same time. The network icon will flash green when powering on.
- Press the feed button to switch to the Bluetooth icon (it will be lit blue).
Utilizing the Star Micronics Set Up Utility App to Pair the MC Print 3:
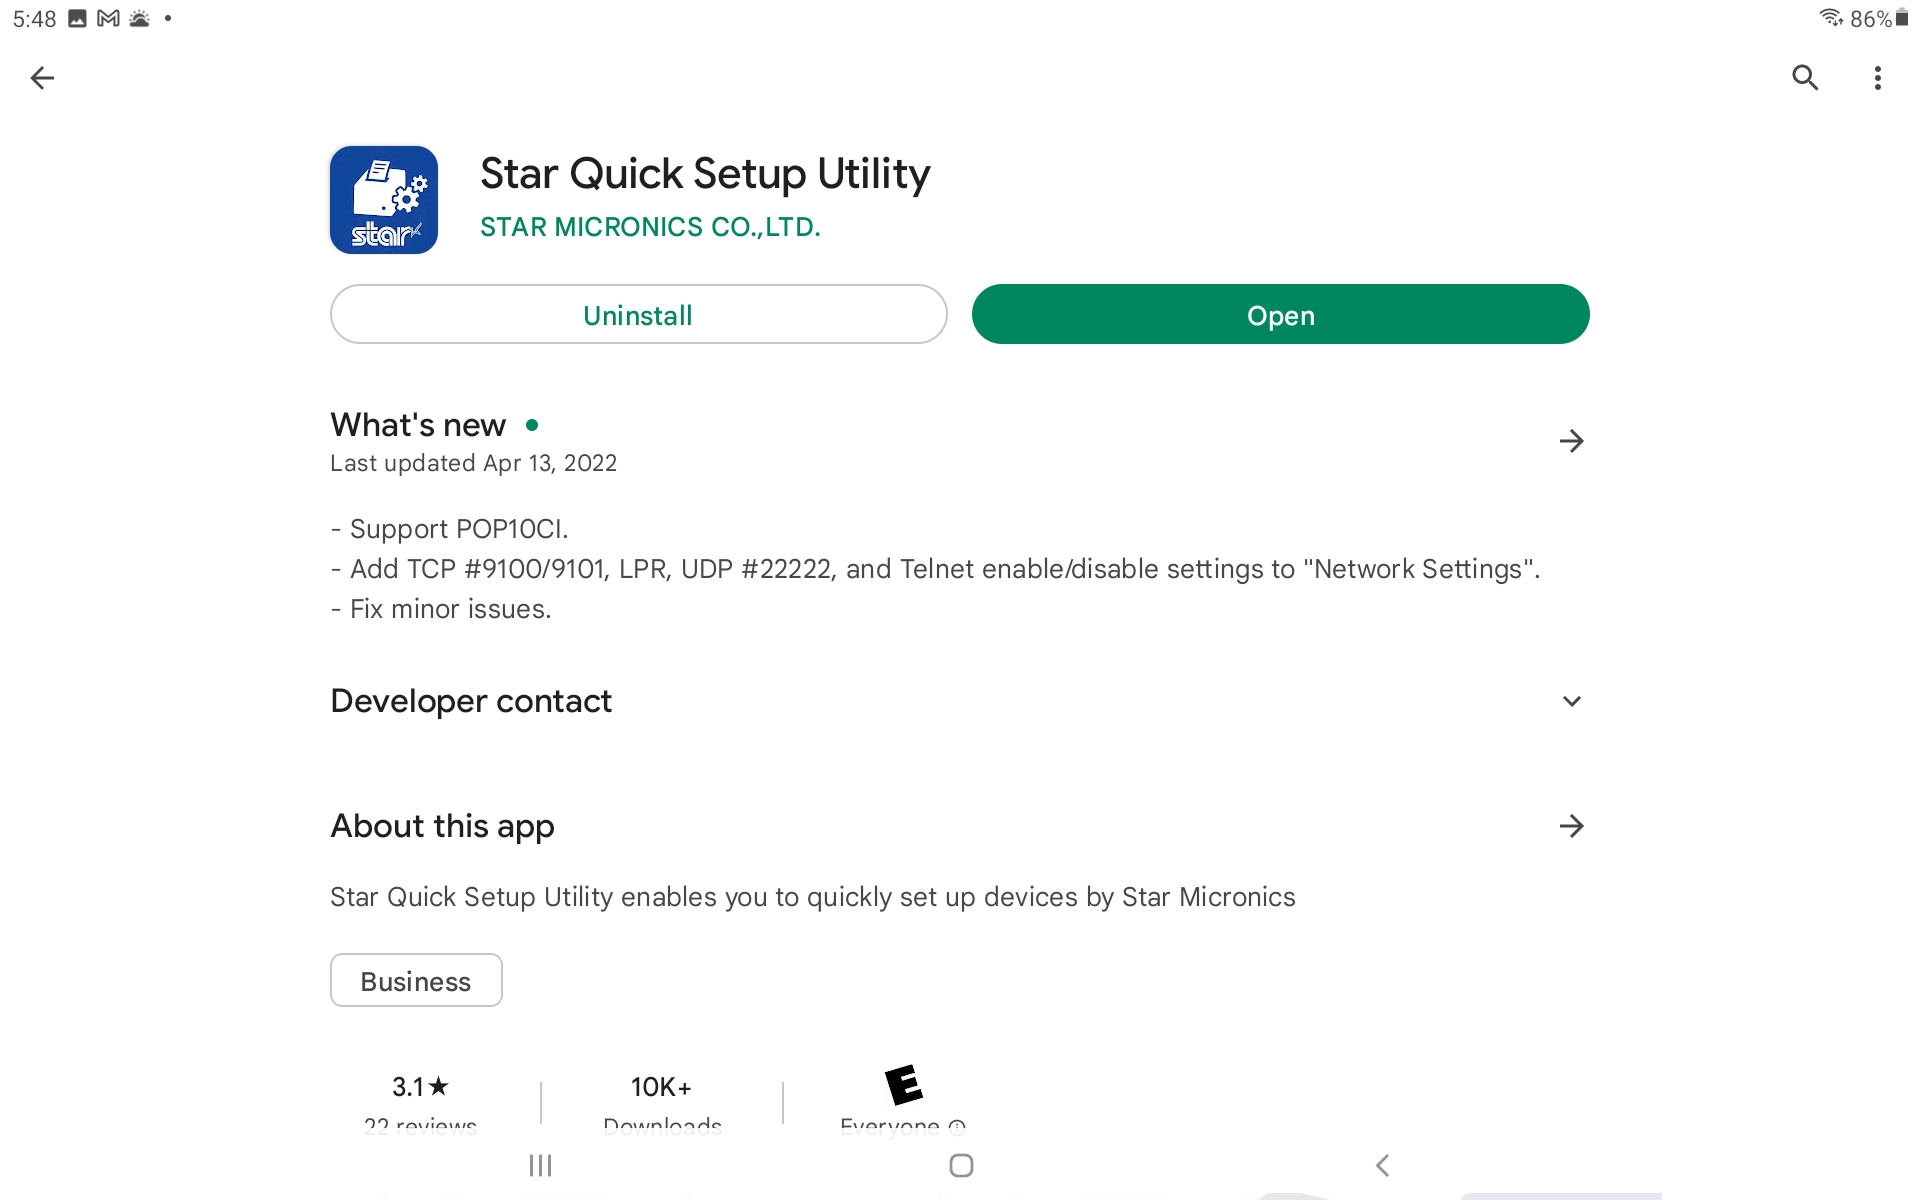
You can also use the Star Micronics Set Up Utility app to pair the MC Print 3 via Bluetooth. Follow the instructions below to download and use the Set Up app.
- Download the Star Micronics Setup Utility app from Google Play or the Apple App Store.
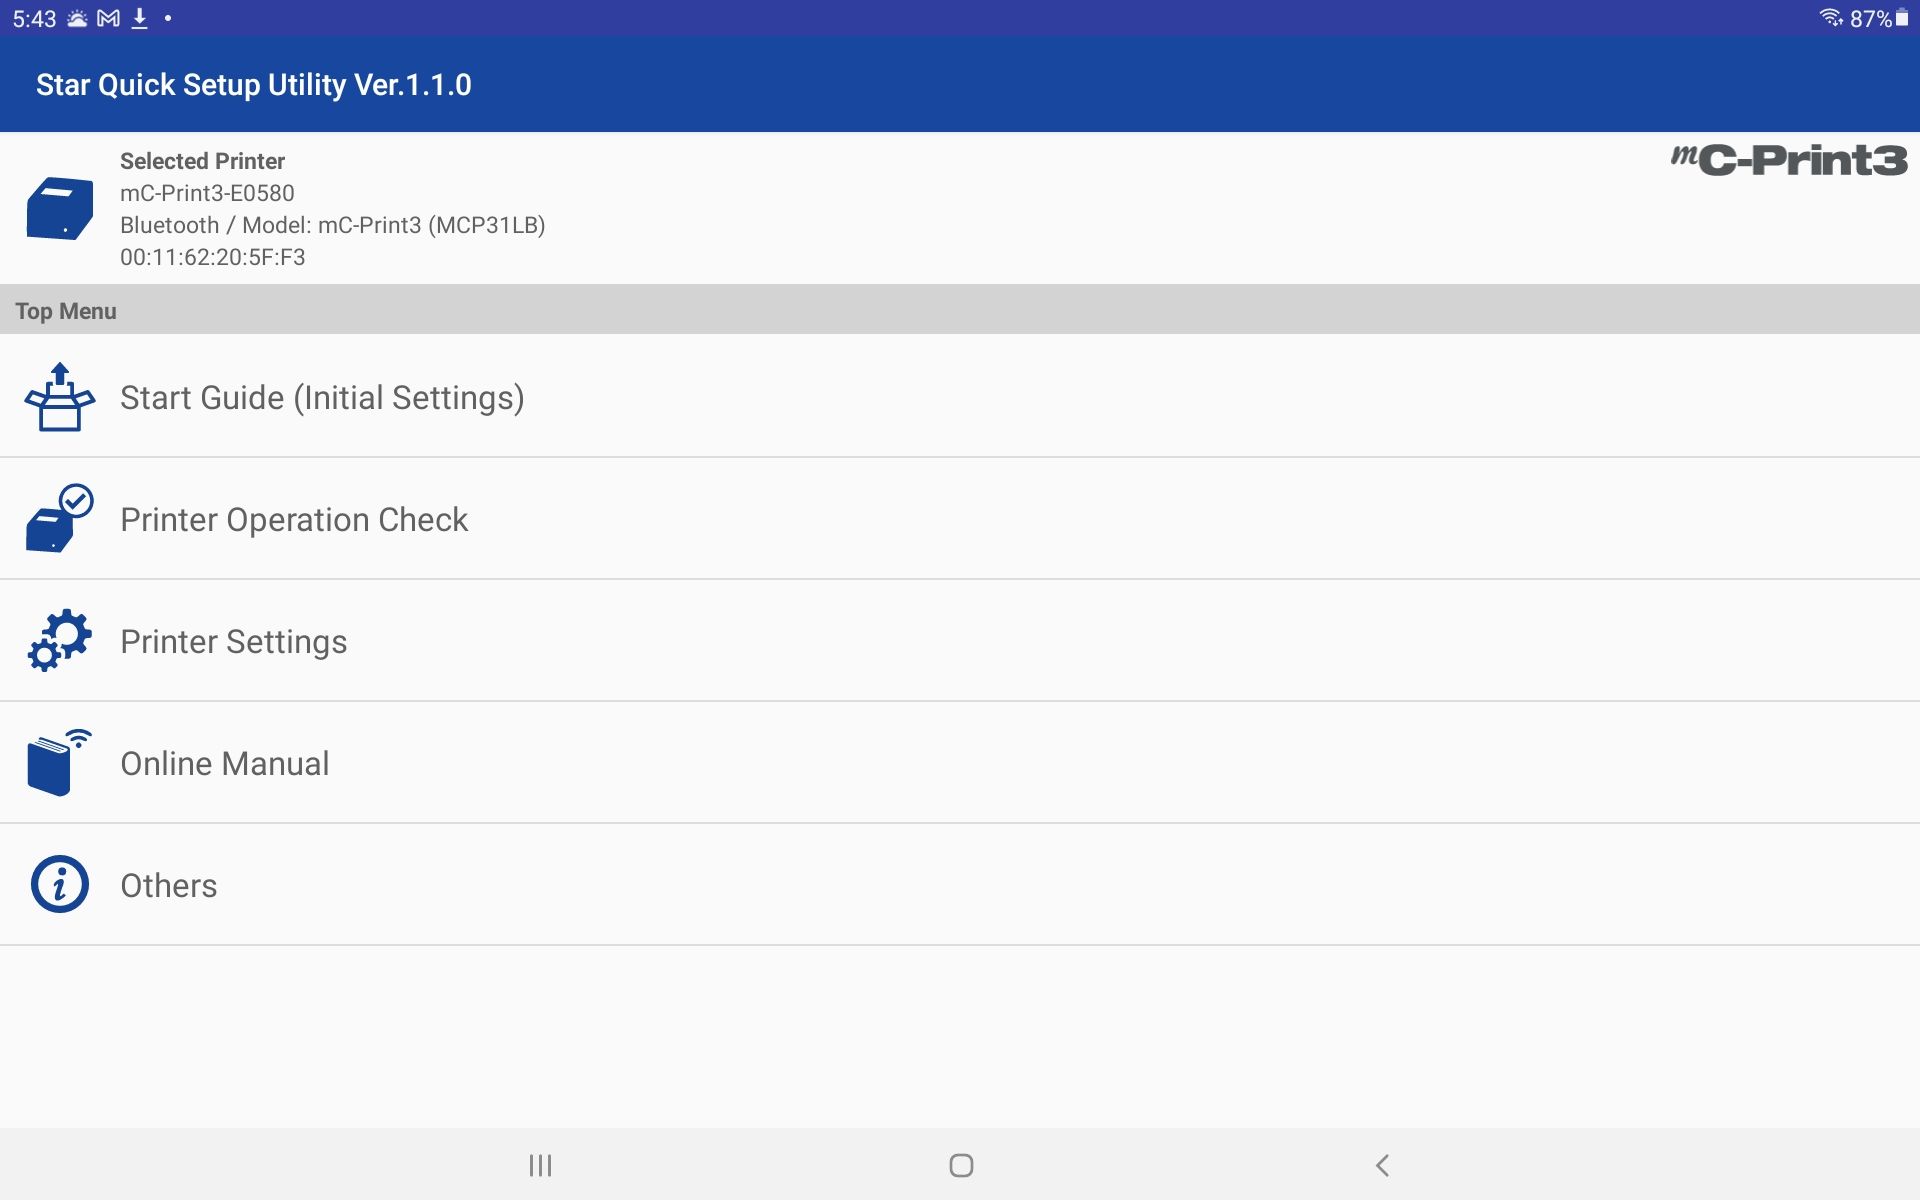
- You can open the Star Micronics Utility App and select your available printer device.
- After you select the device, you will be asked if you'd like to pair your printer. Select "Yes".
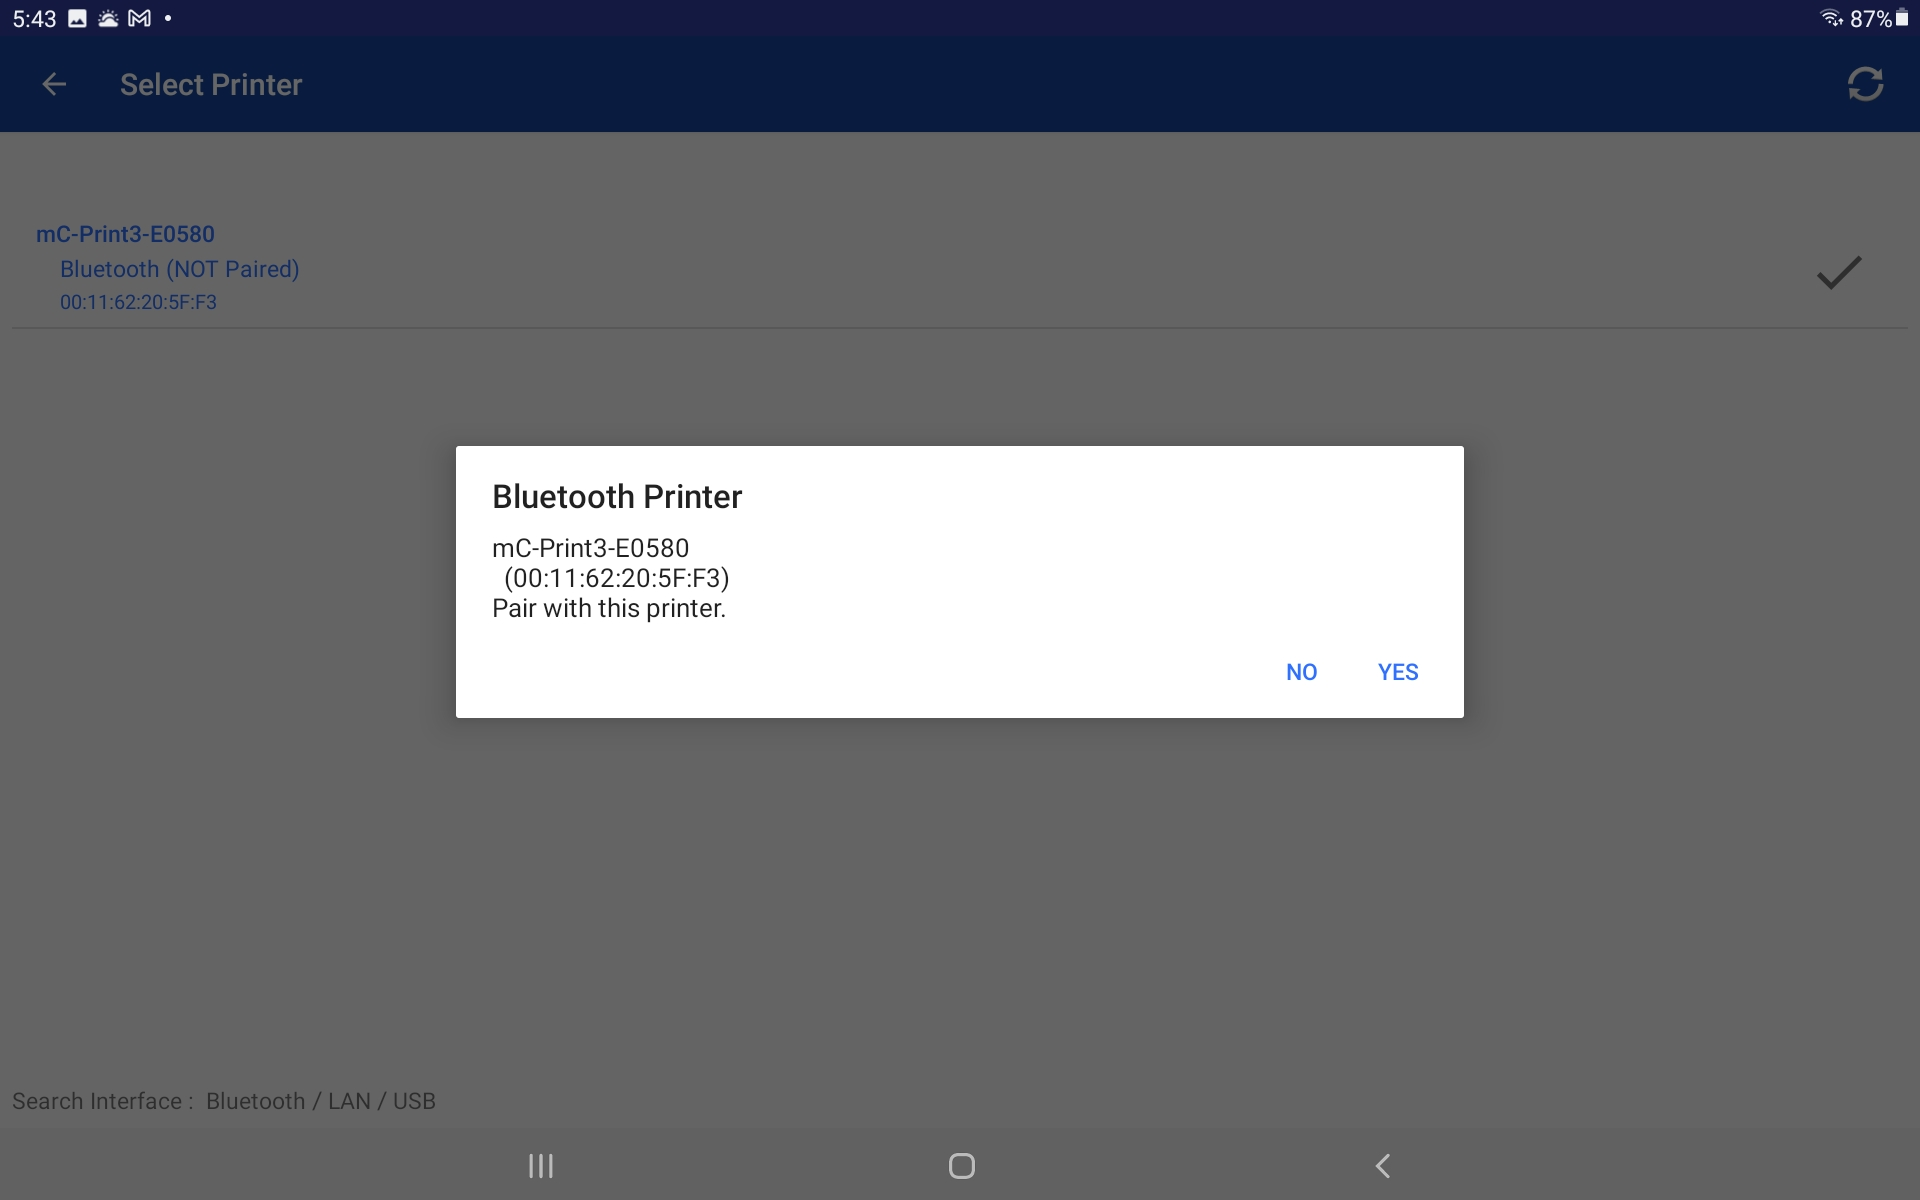
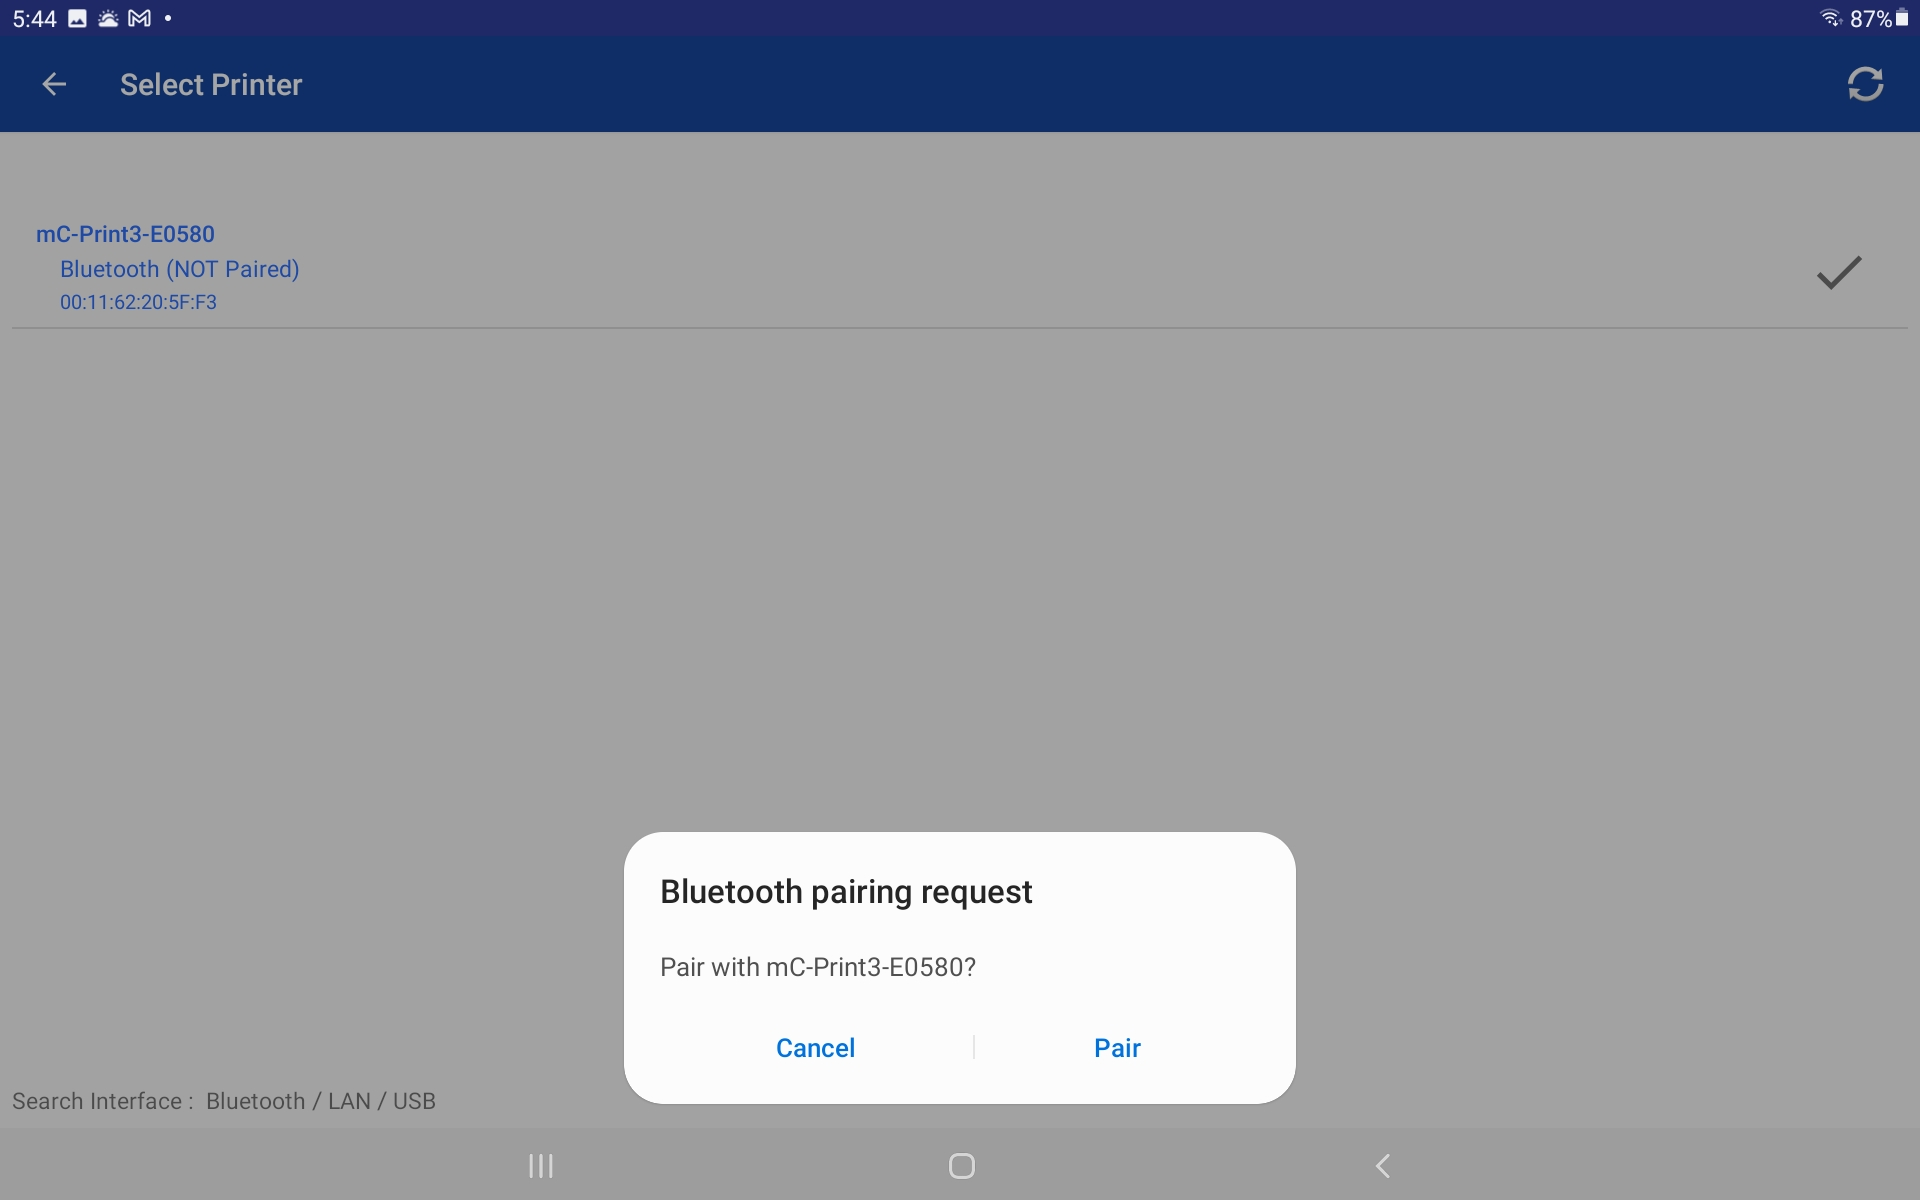
- Your tablet will then prompt you asking if you'd like to allow this device to pair. Select "Pair."
- After the receipt printer has been paired to the tablet, you'll now need to input the Bluetooth MAC Address from the Self Test page. The address can also be found in the Star Micronics Utility app on the home page. Follow the steps below to input the Bluetooth MAC Address in the Cultivera POS app.
Inputting the Bluetooth MAC Address in the Cultivera POS App Settings:
- Navigate back to the Cultivera POS app. Press the Menu button and select the Settings page.
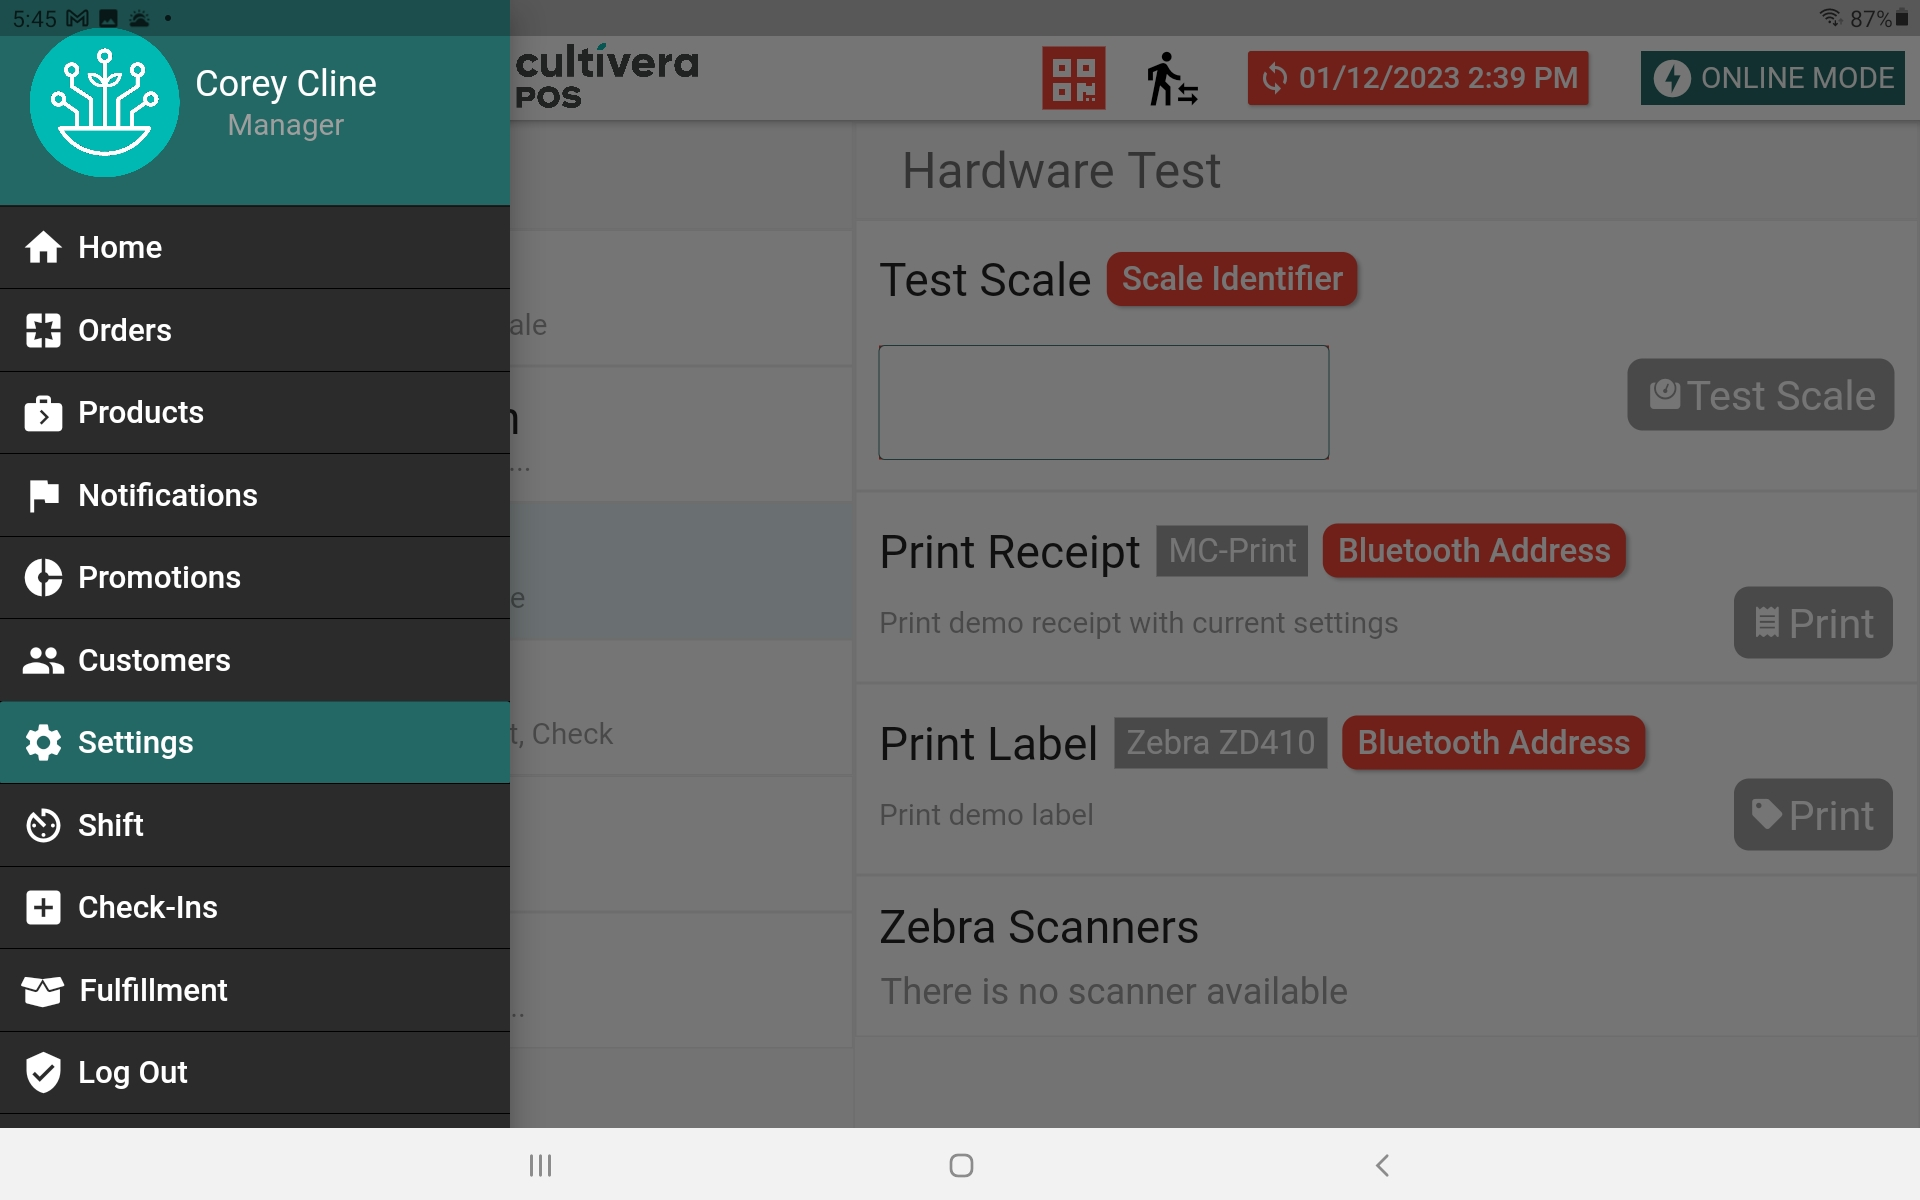
- Select the Hardware Test page and press the Bluetooth Address button next to the printer name. Enter the Bluetooth MAC Address from either the Star Micronics Setup Utility App or the Self Test Page.
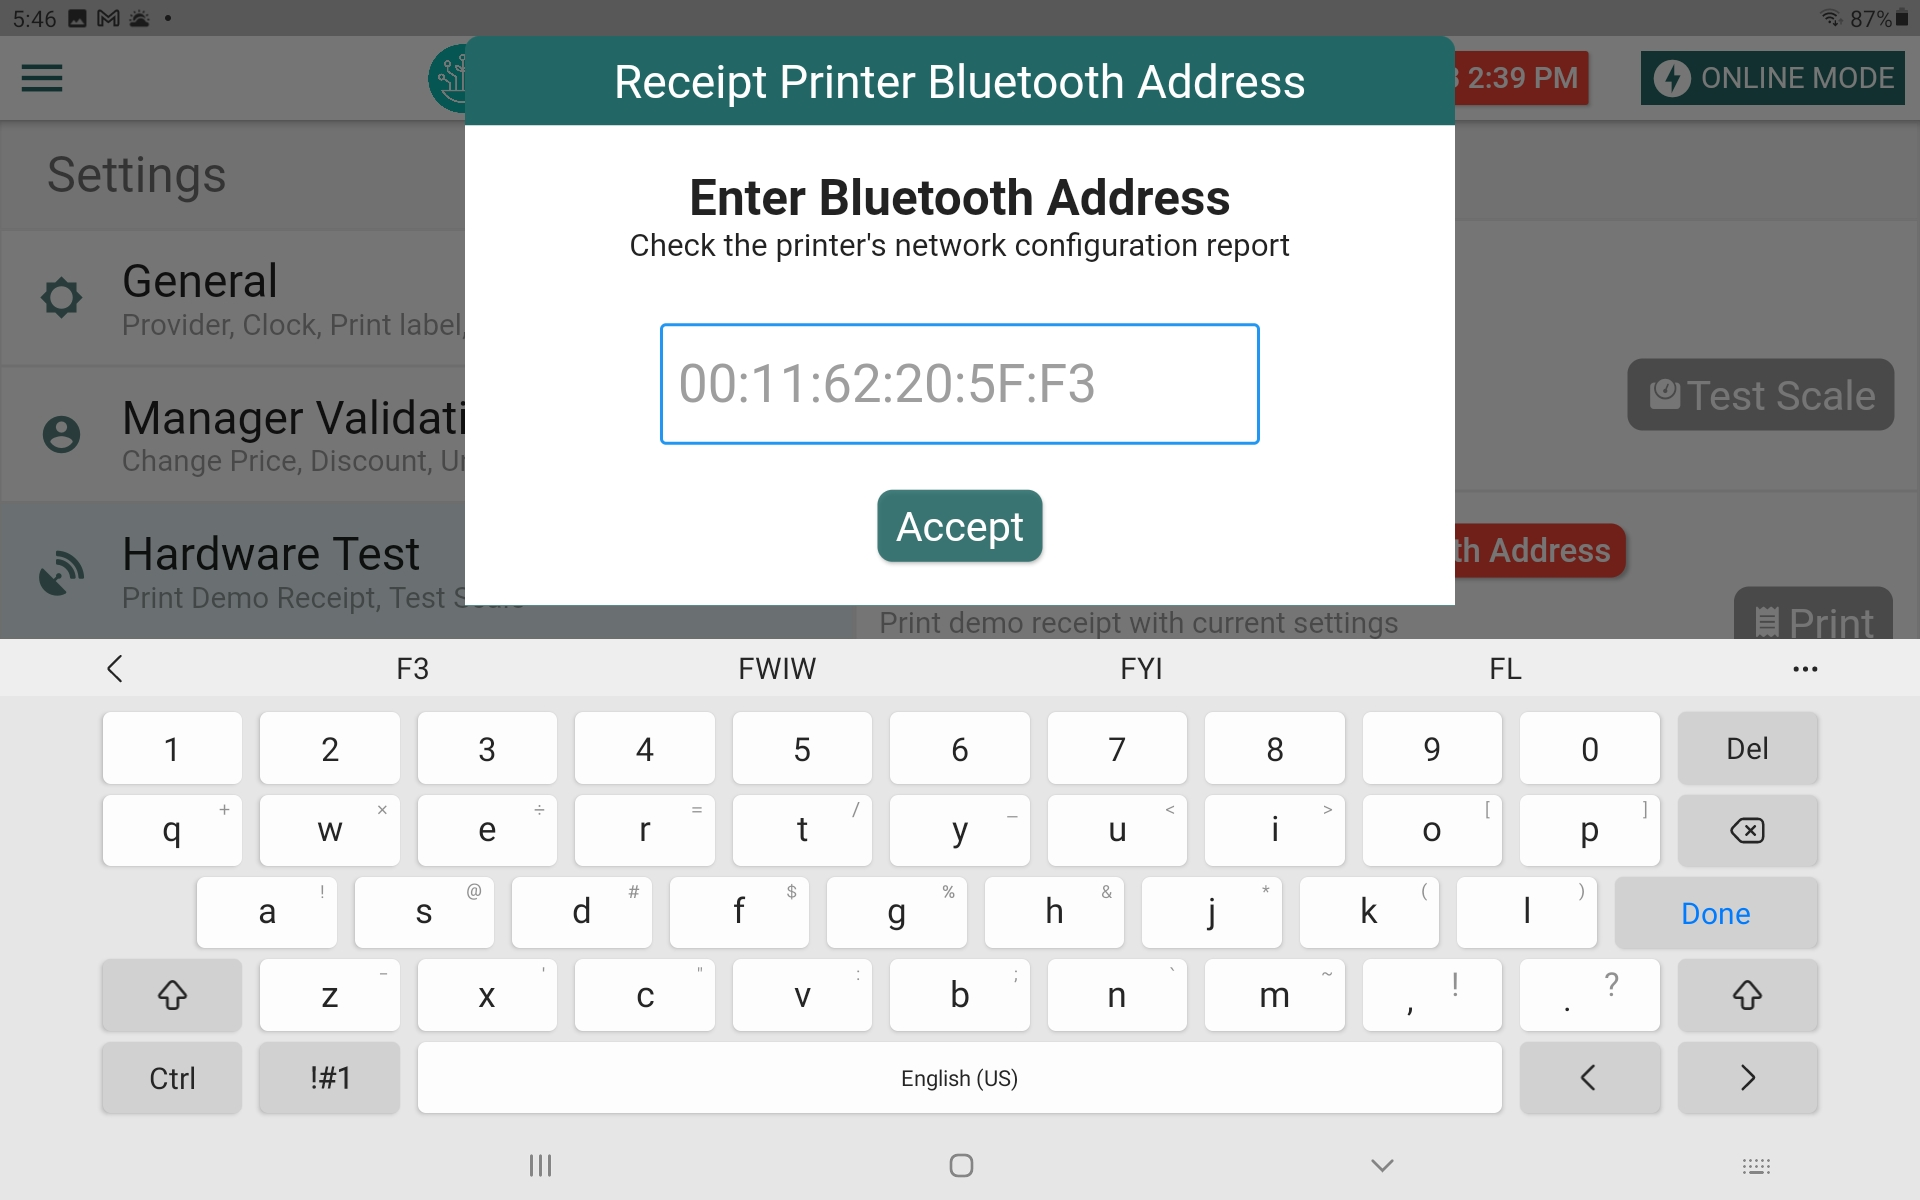
- Once the address is input, you can now test print from the Cultivera POS app. You may also navigate to the Shifts page and try printing a shift report to test the function. Rebooting the devices and closing / re-opening the Cultivera POS app may be necessary.
If you encounter any issues or if the printer still doesn't work as expected, it's advisable to contact Star Micronics customer support (https://starmicronics.com/star-micronics-technical-support/) or refer to the official documentation (https://starmicronics.com/support/products/mc-print3-support-page/)for troubleshooting guidance. They can provide specific assistance based on your printer's model and any unique issues you may be experiencing.