POS - Terminal Sales: Conducting Transactions
![]() Updated
Updated
Conducting Sales Transactions at the Cultivera POS Terminal
Conducting a Transaction is the process of making a sale at the POS Terminal. Here are the steps involved in making a sale at the Terminal within the Cultivera POS system.
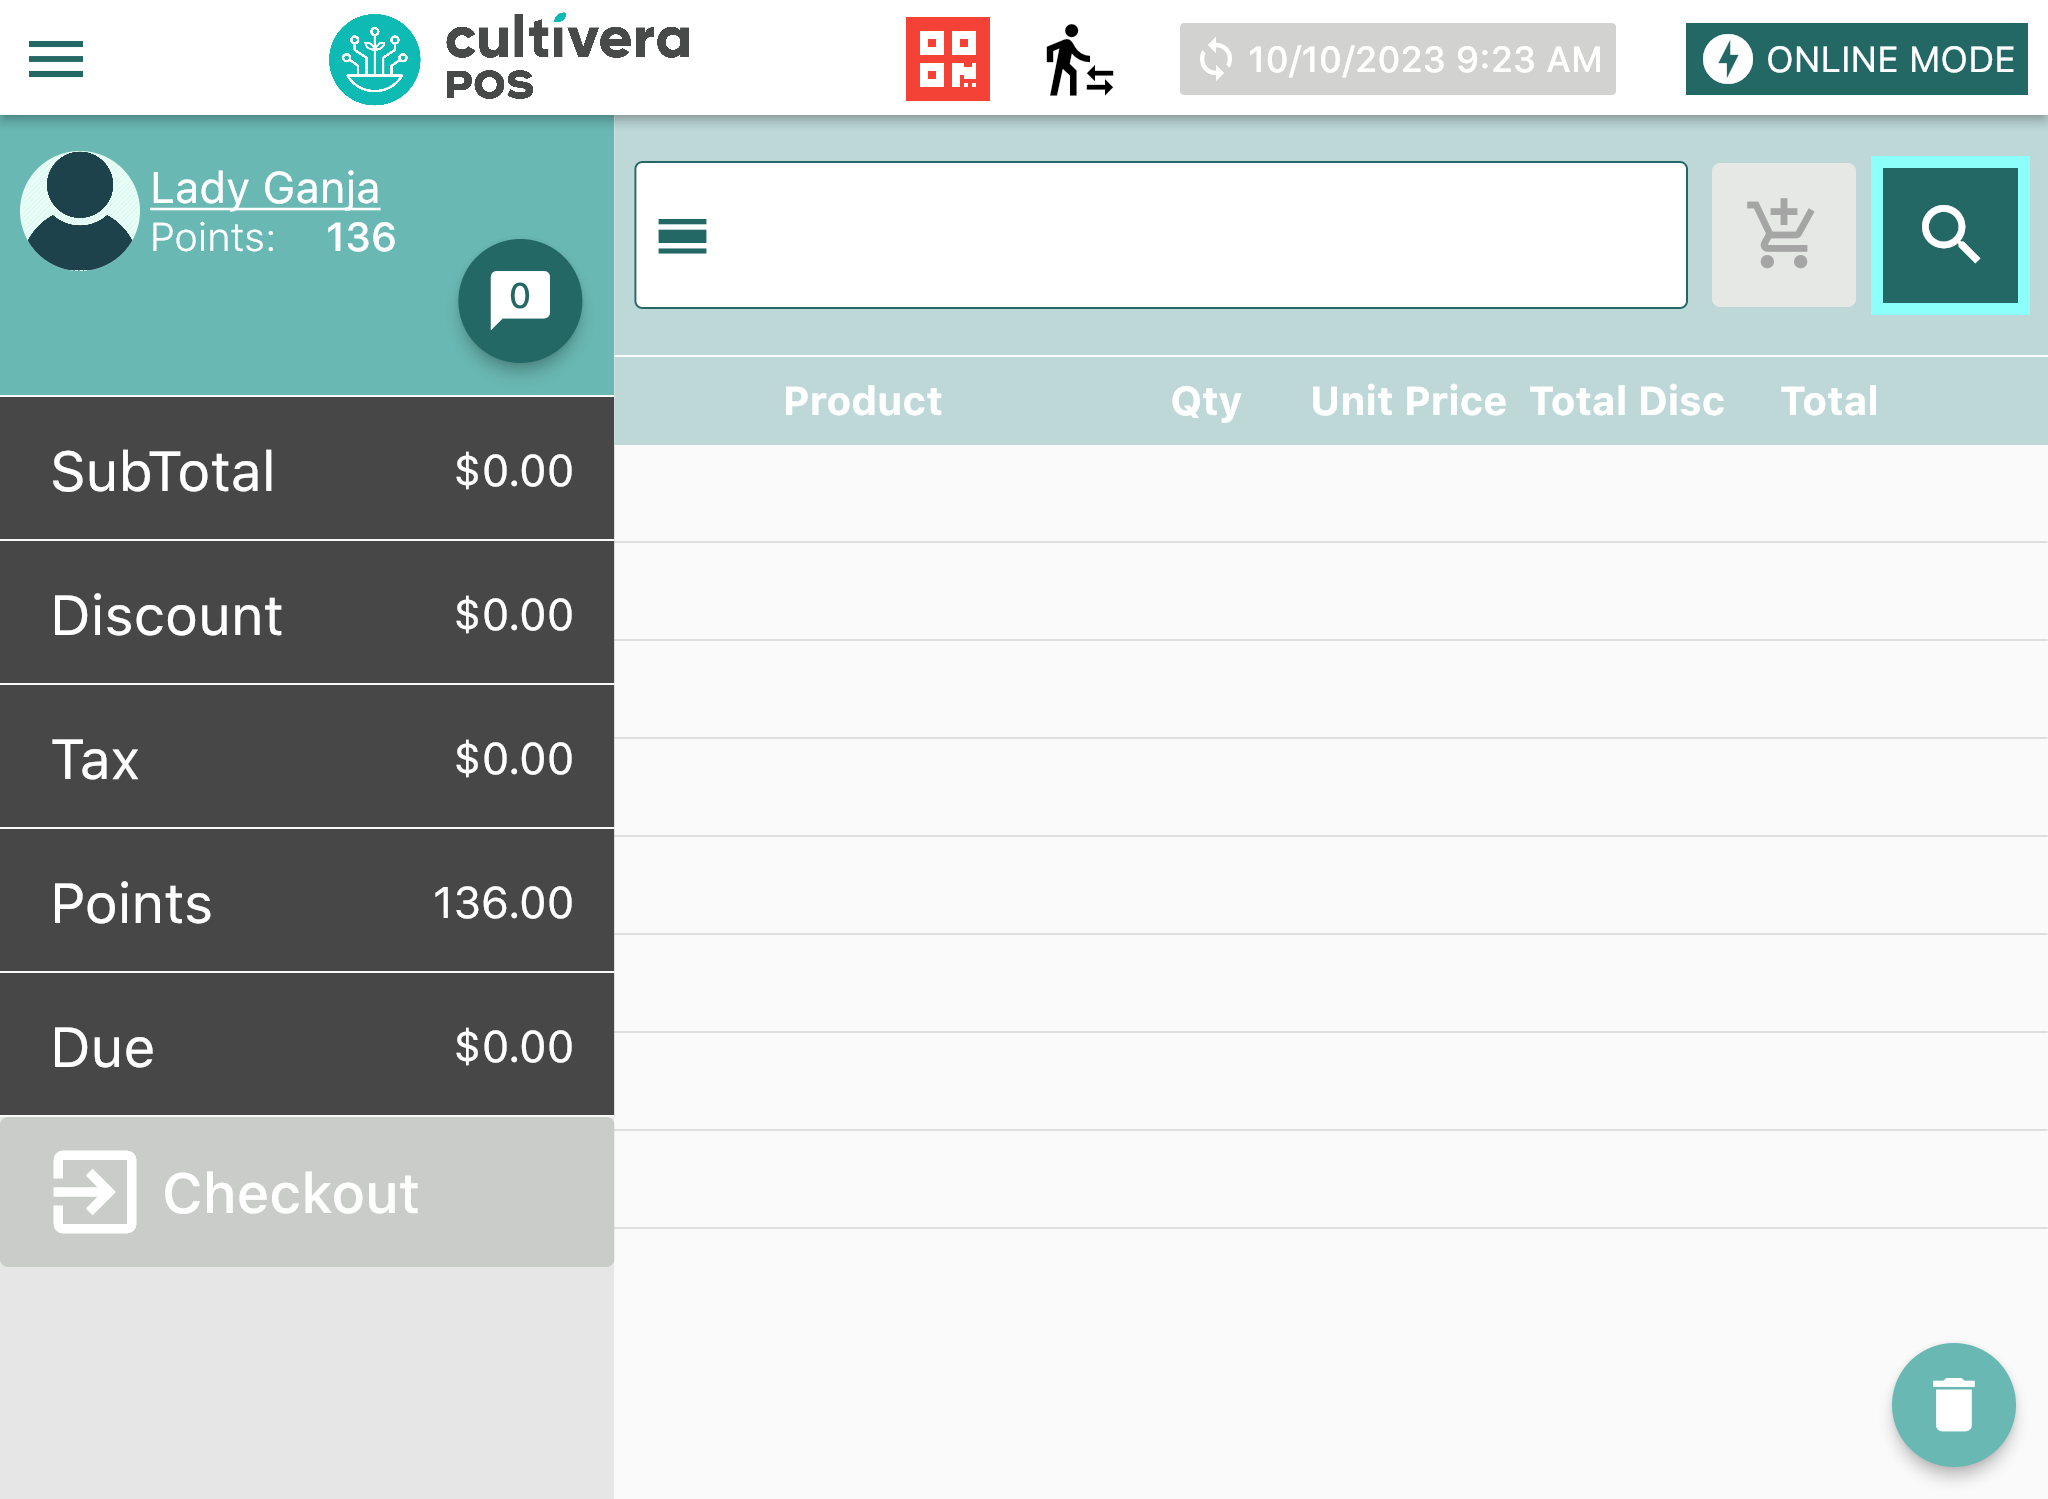
Assigning a Customer to the Cart
- Navigate to the Home screen by Selecting the Menu button (3 horizontal lines) in the upper left corner.
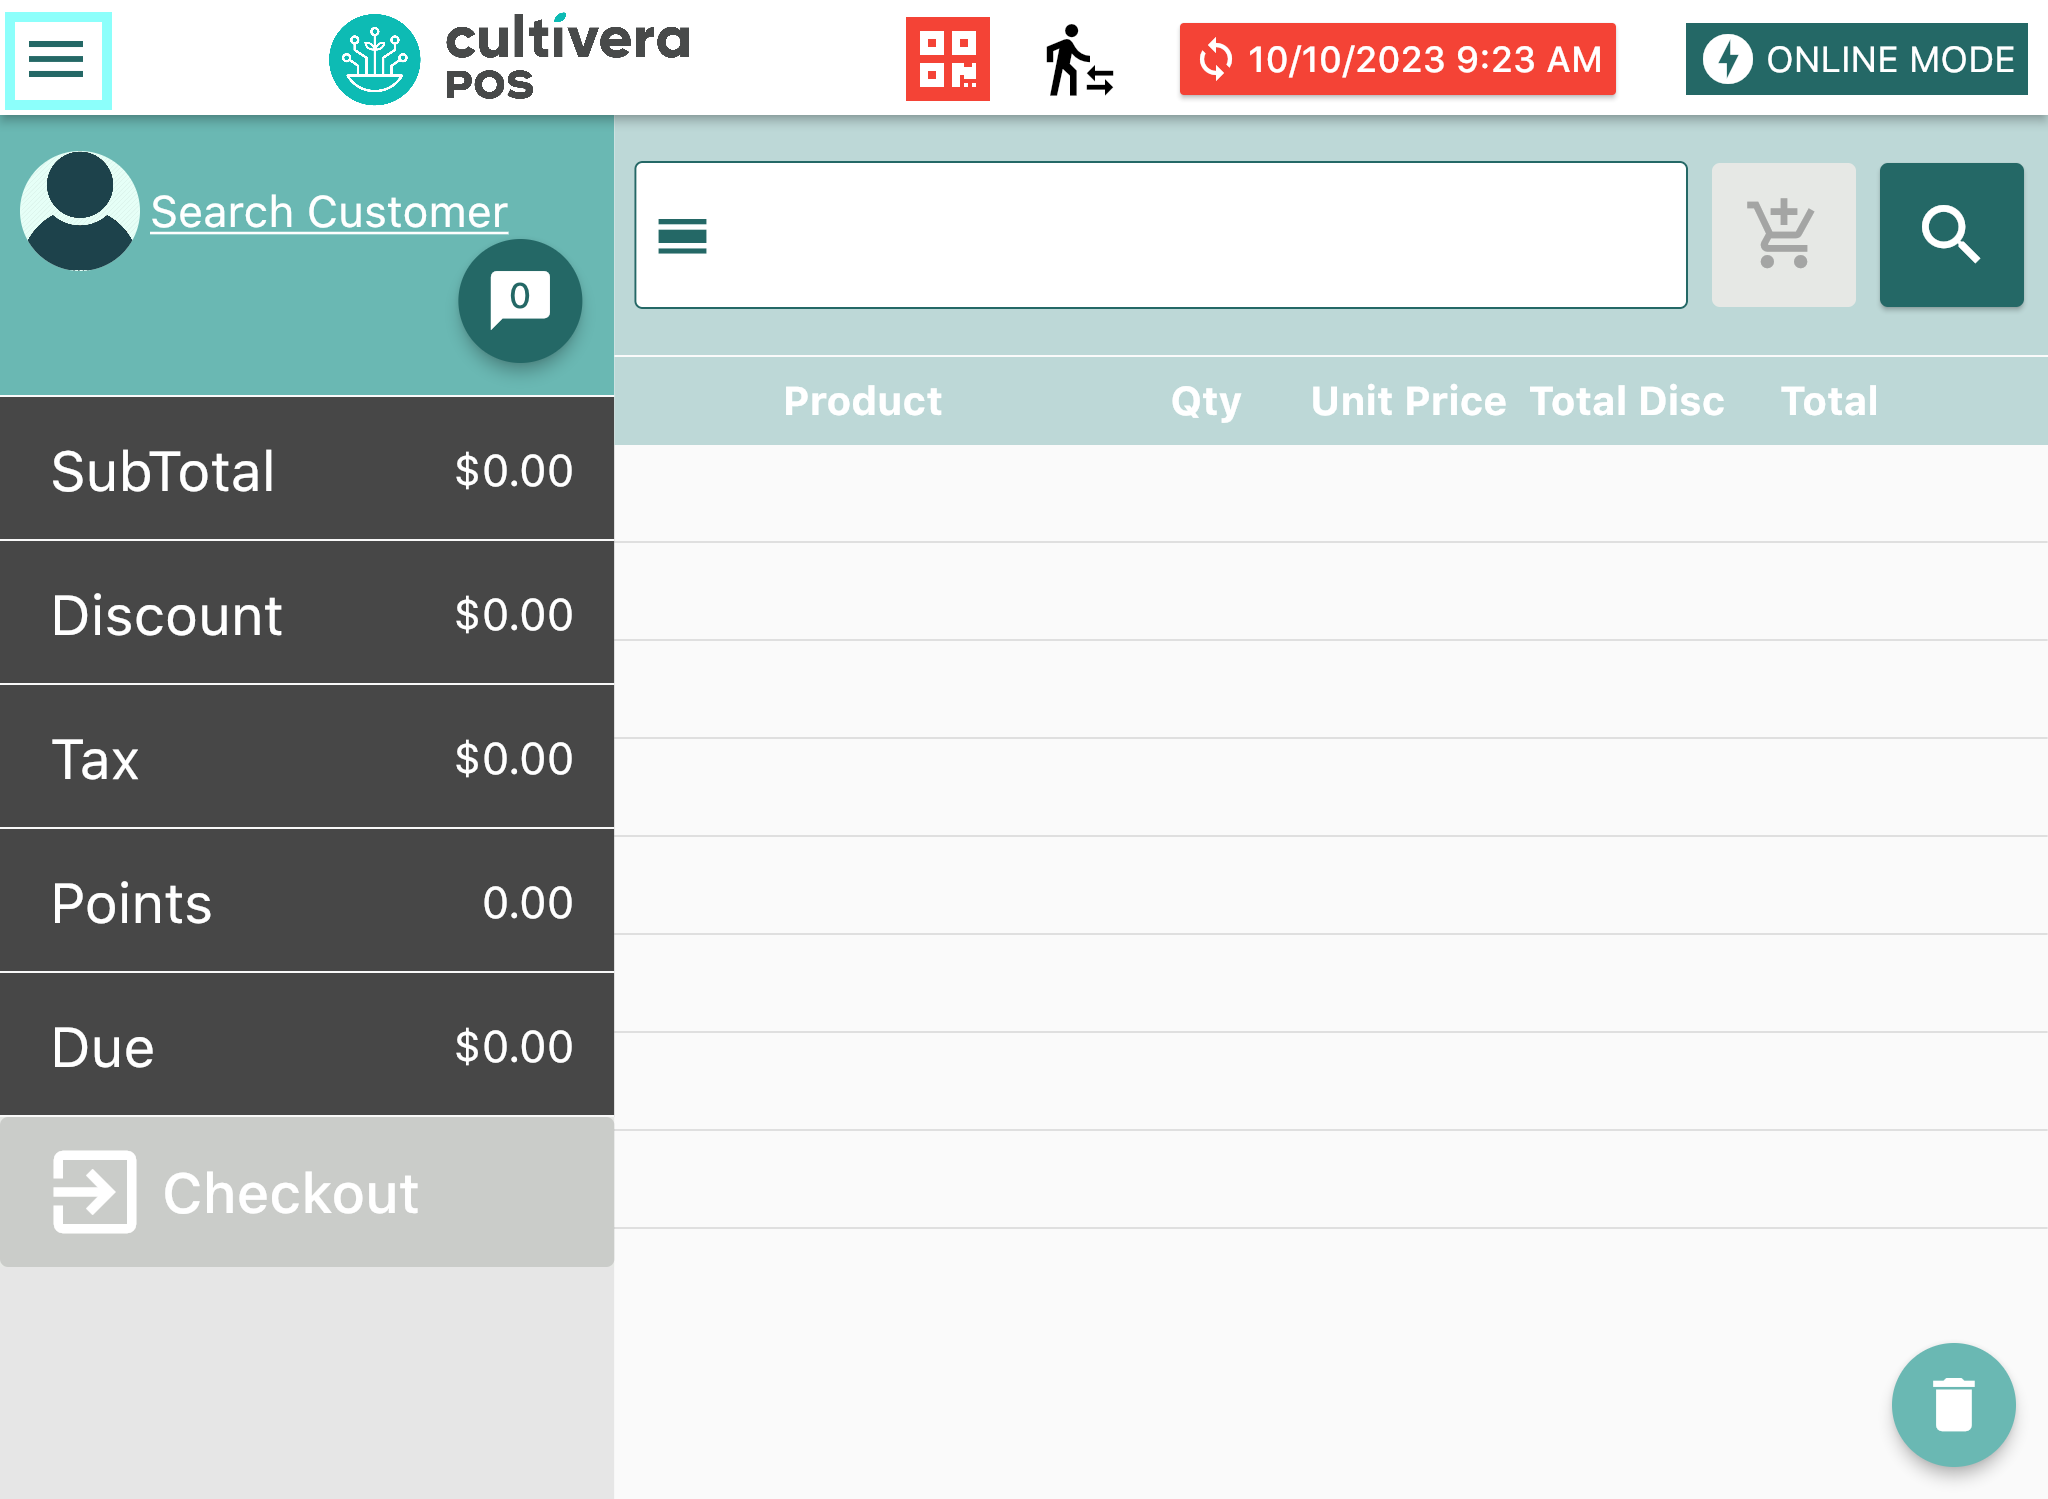
- Select "Home".

- Select "Home".
- Search for your desired customer by Selecting "Search Customer".

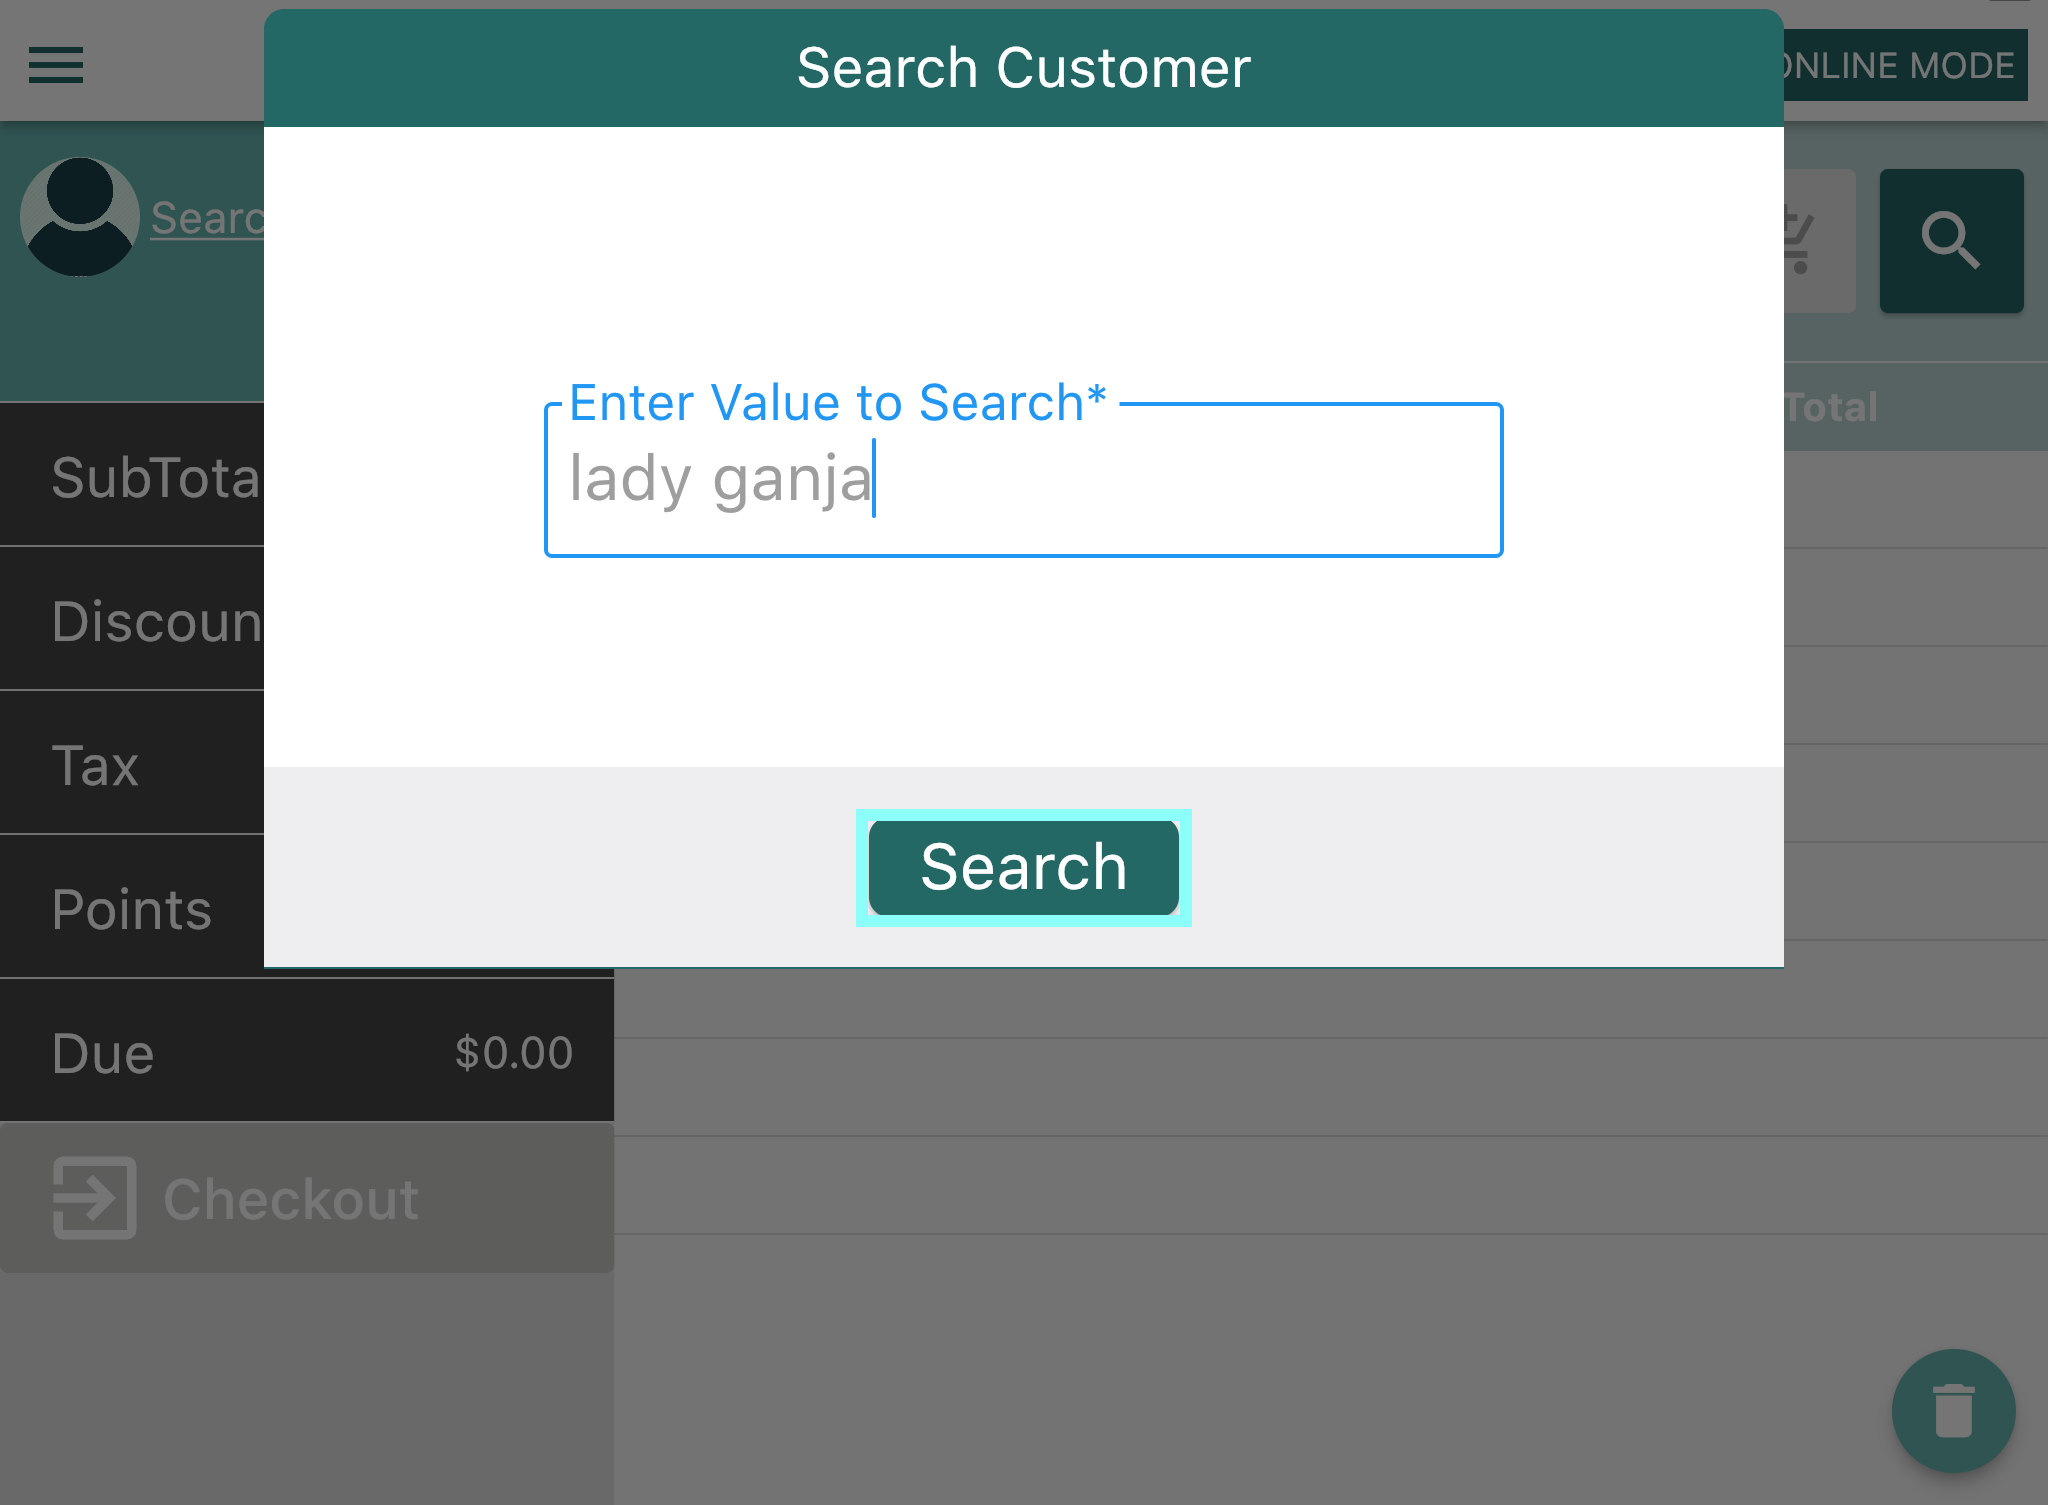
- You can begin a Search for the desired customer by inputting their Name, Phone Number, or Medical Card ID #, then Selecting "Search".
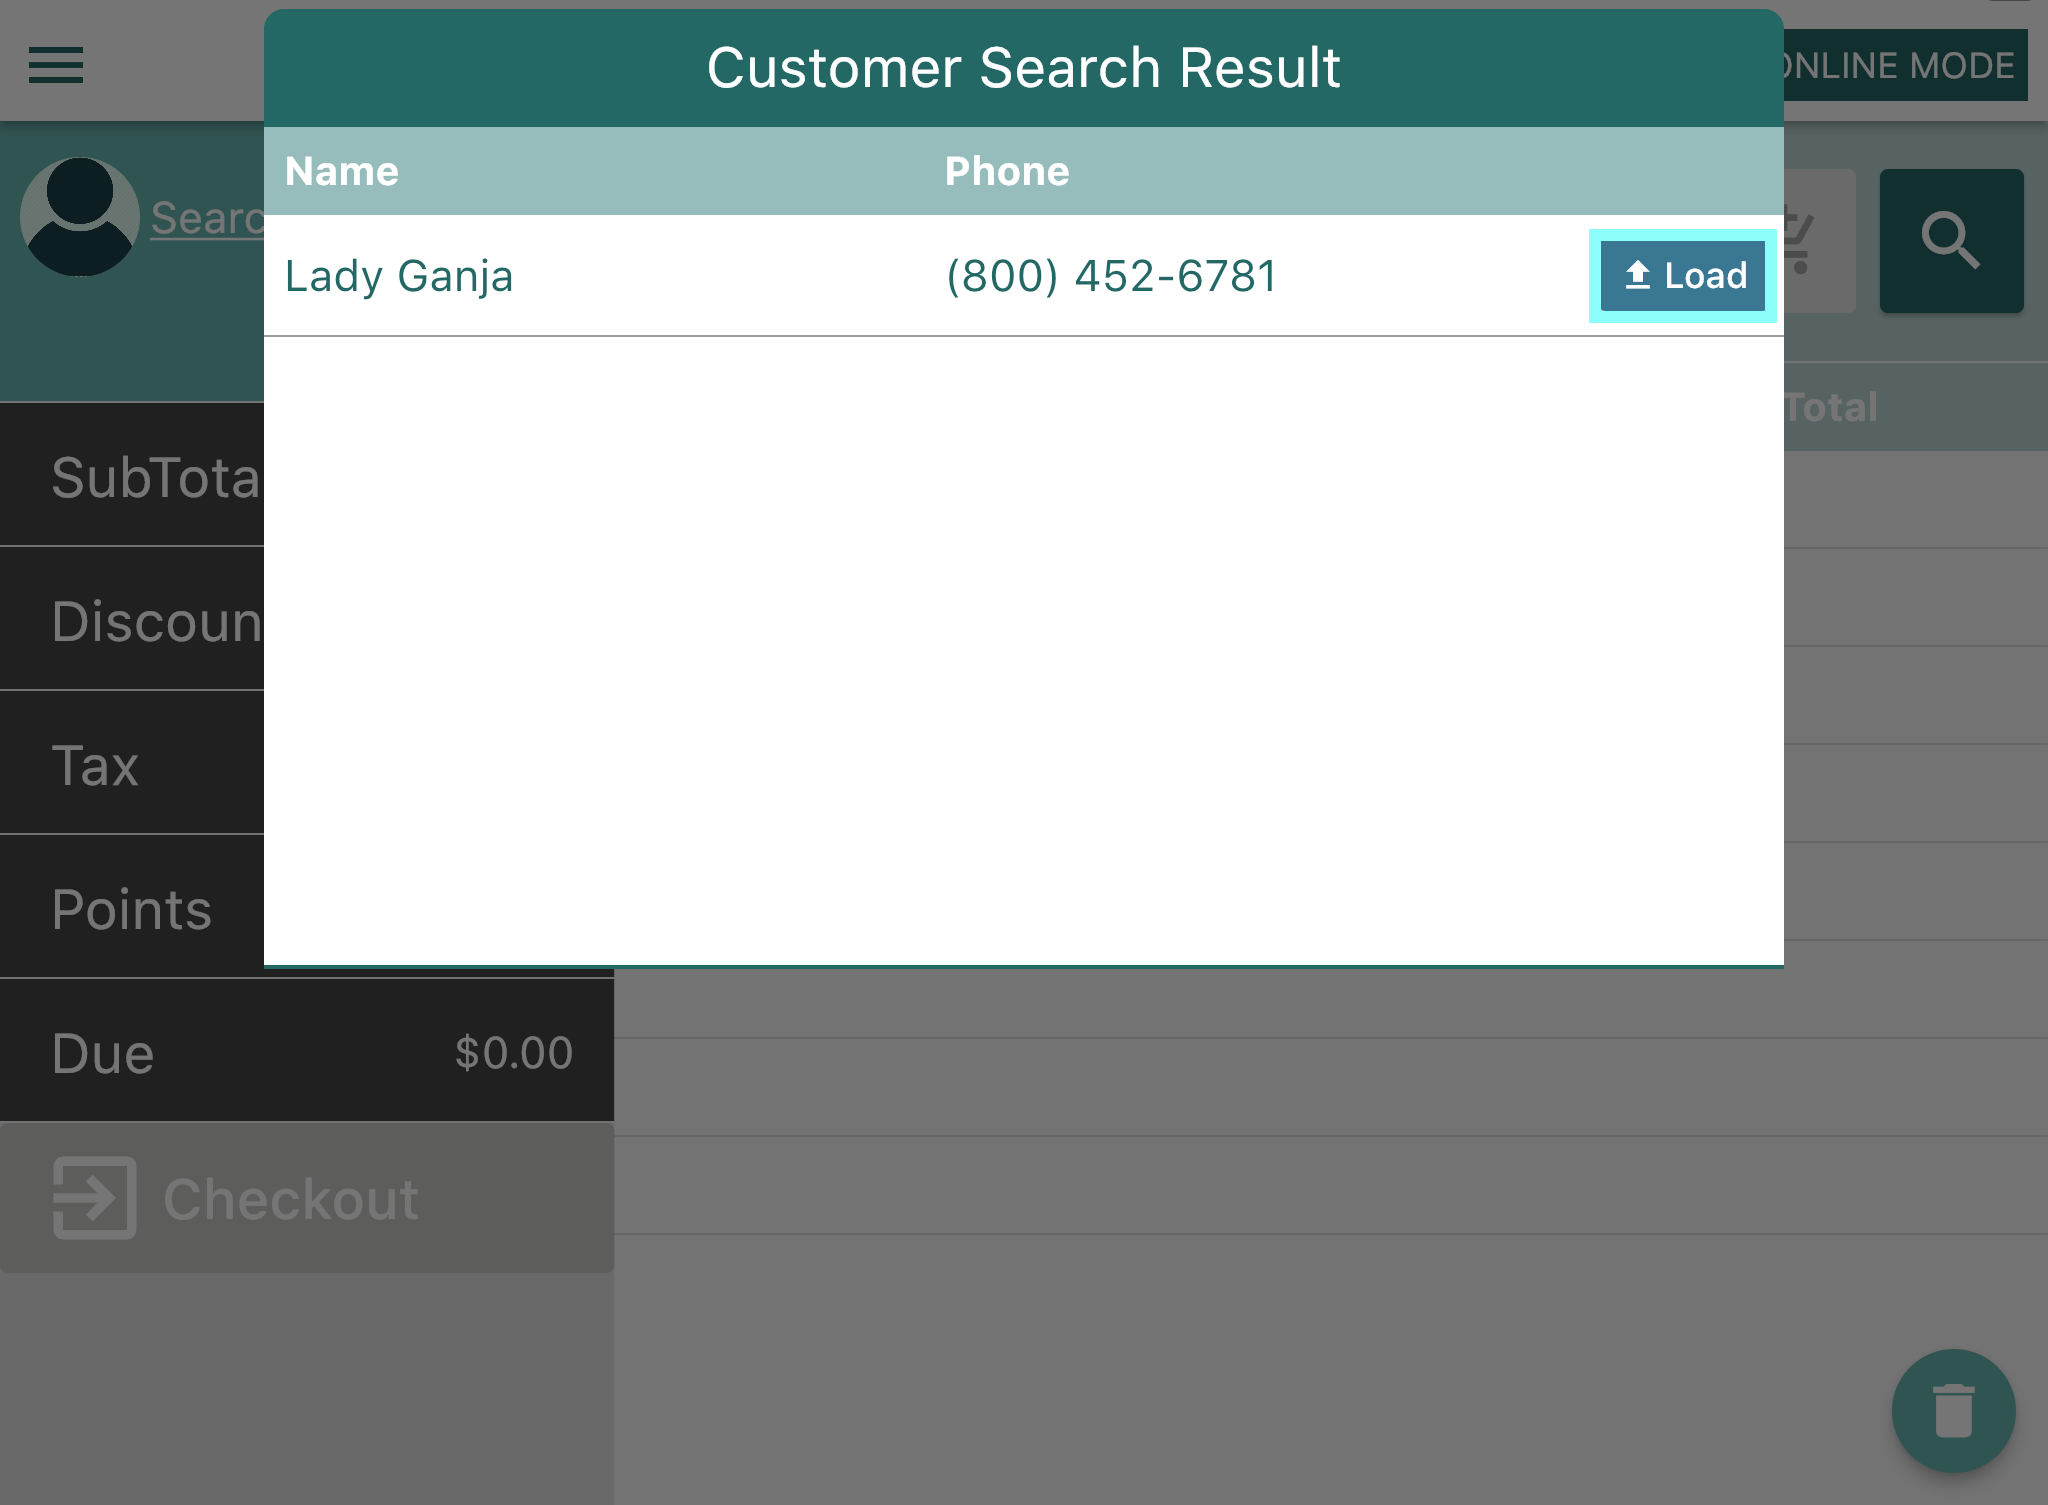
- Once the customer's information has populated, Select "Load" next to their Name and Phone Number.
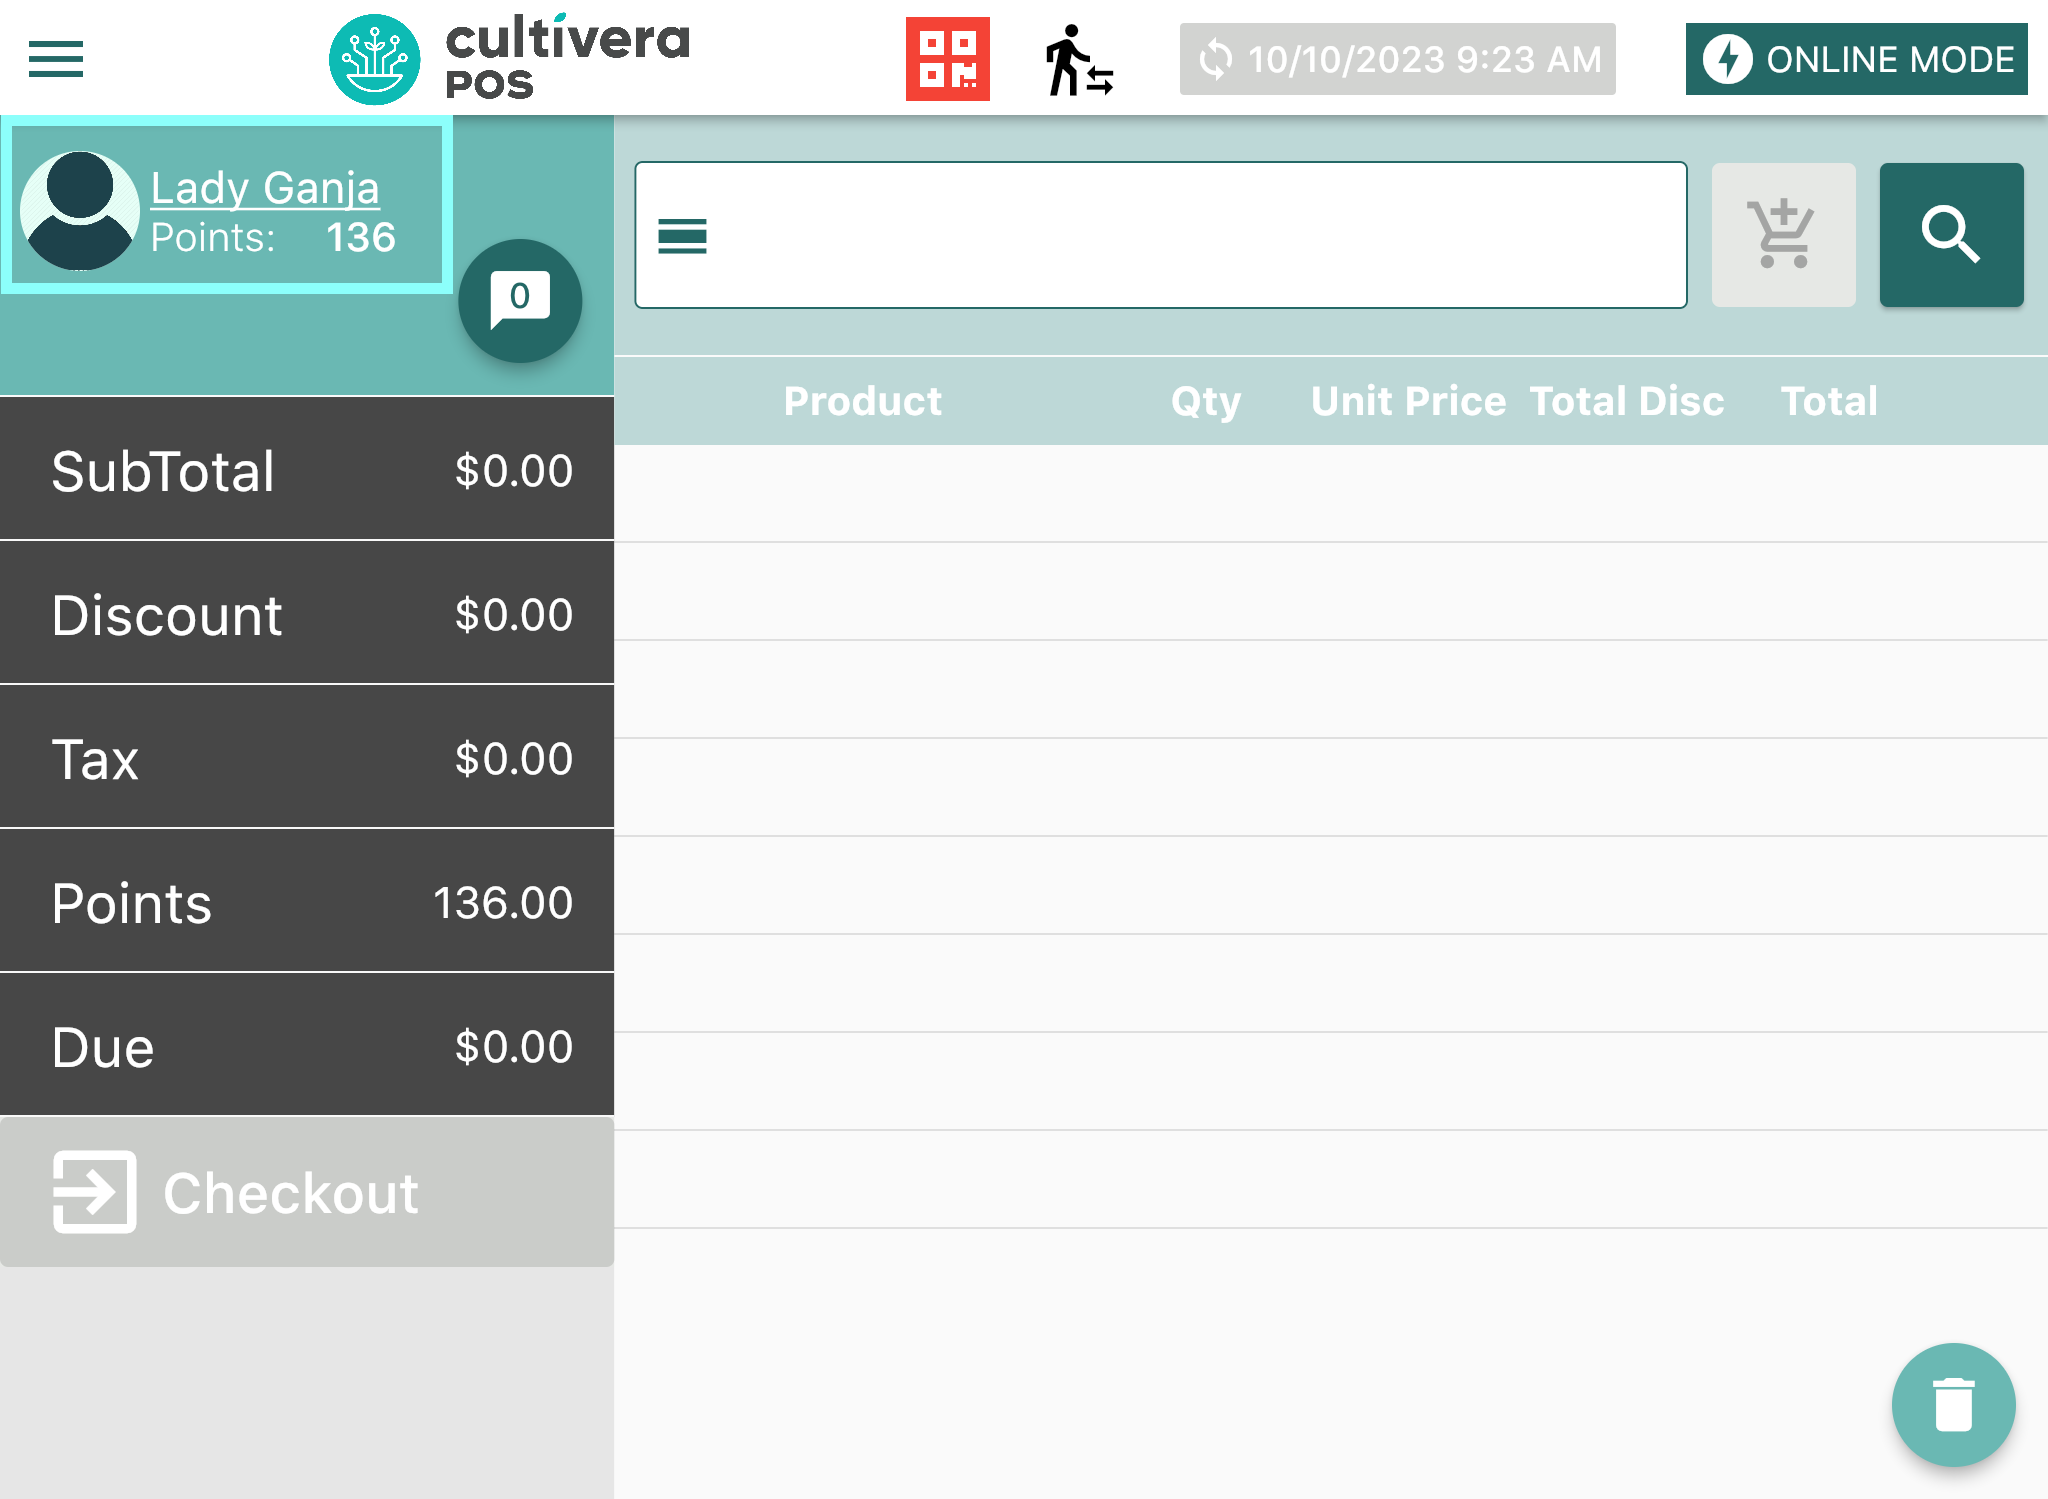
- You will now see the selected customer assigned to the cart.
Adding Products to the Cart
- You can begin a Search for the desired customer by inputting their Name, Phone Number, or Medical Card ID #, then Selecting "Search".
- Select the Magnifying Glass icon to search for a product to add to the cart.
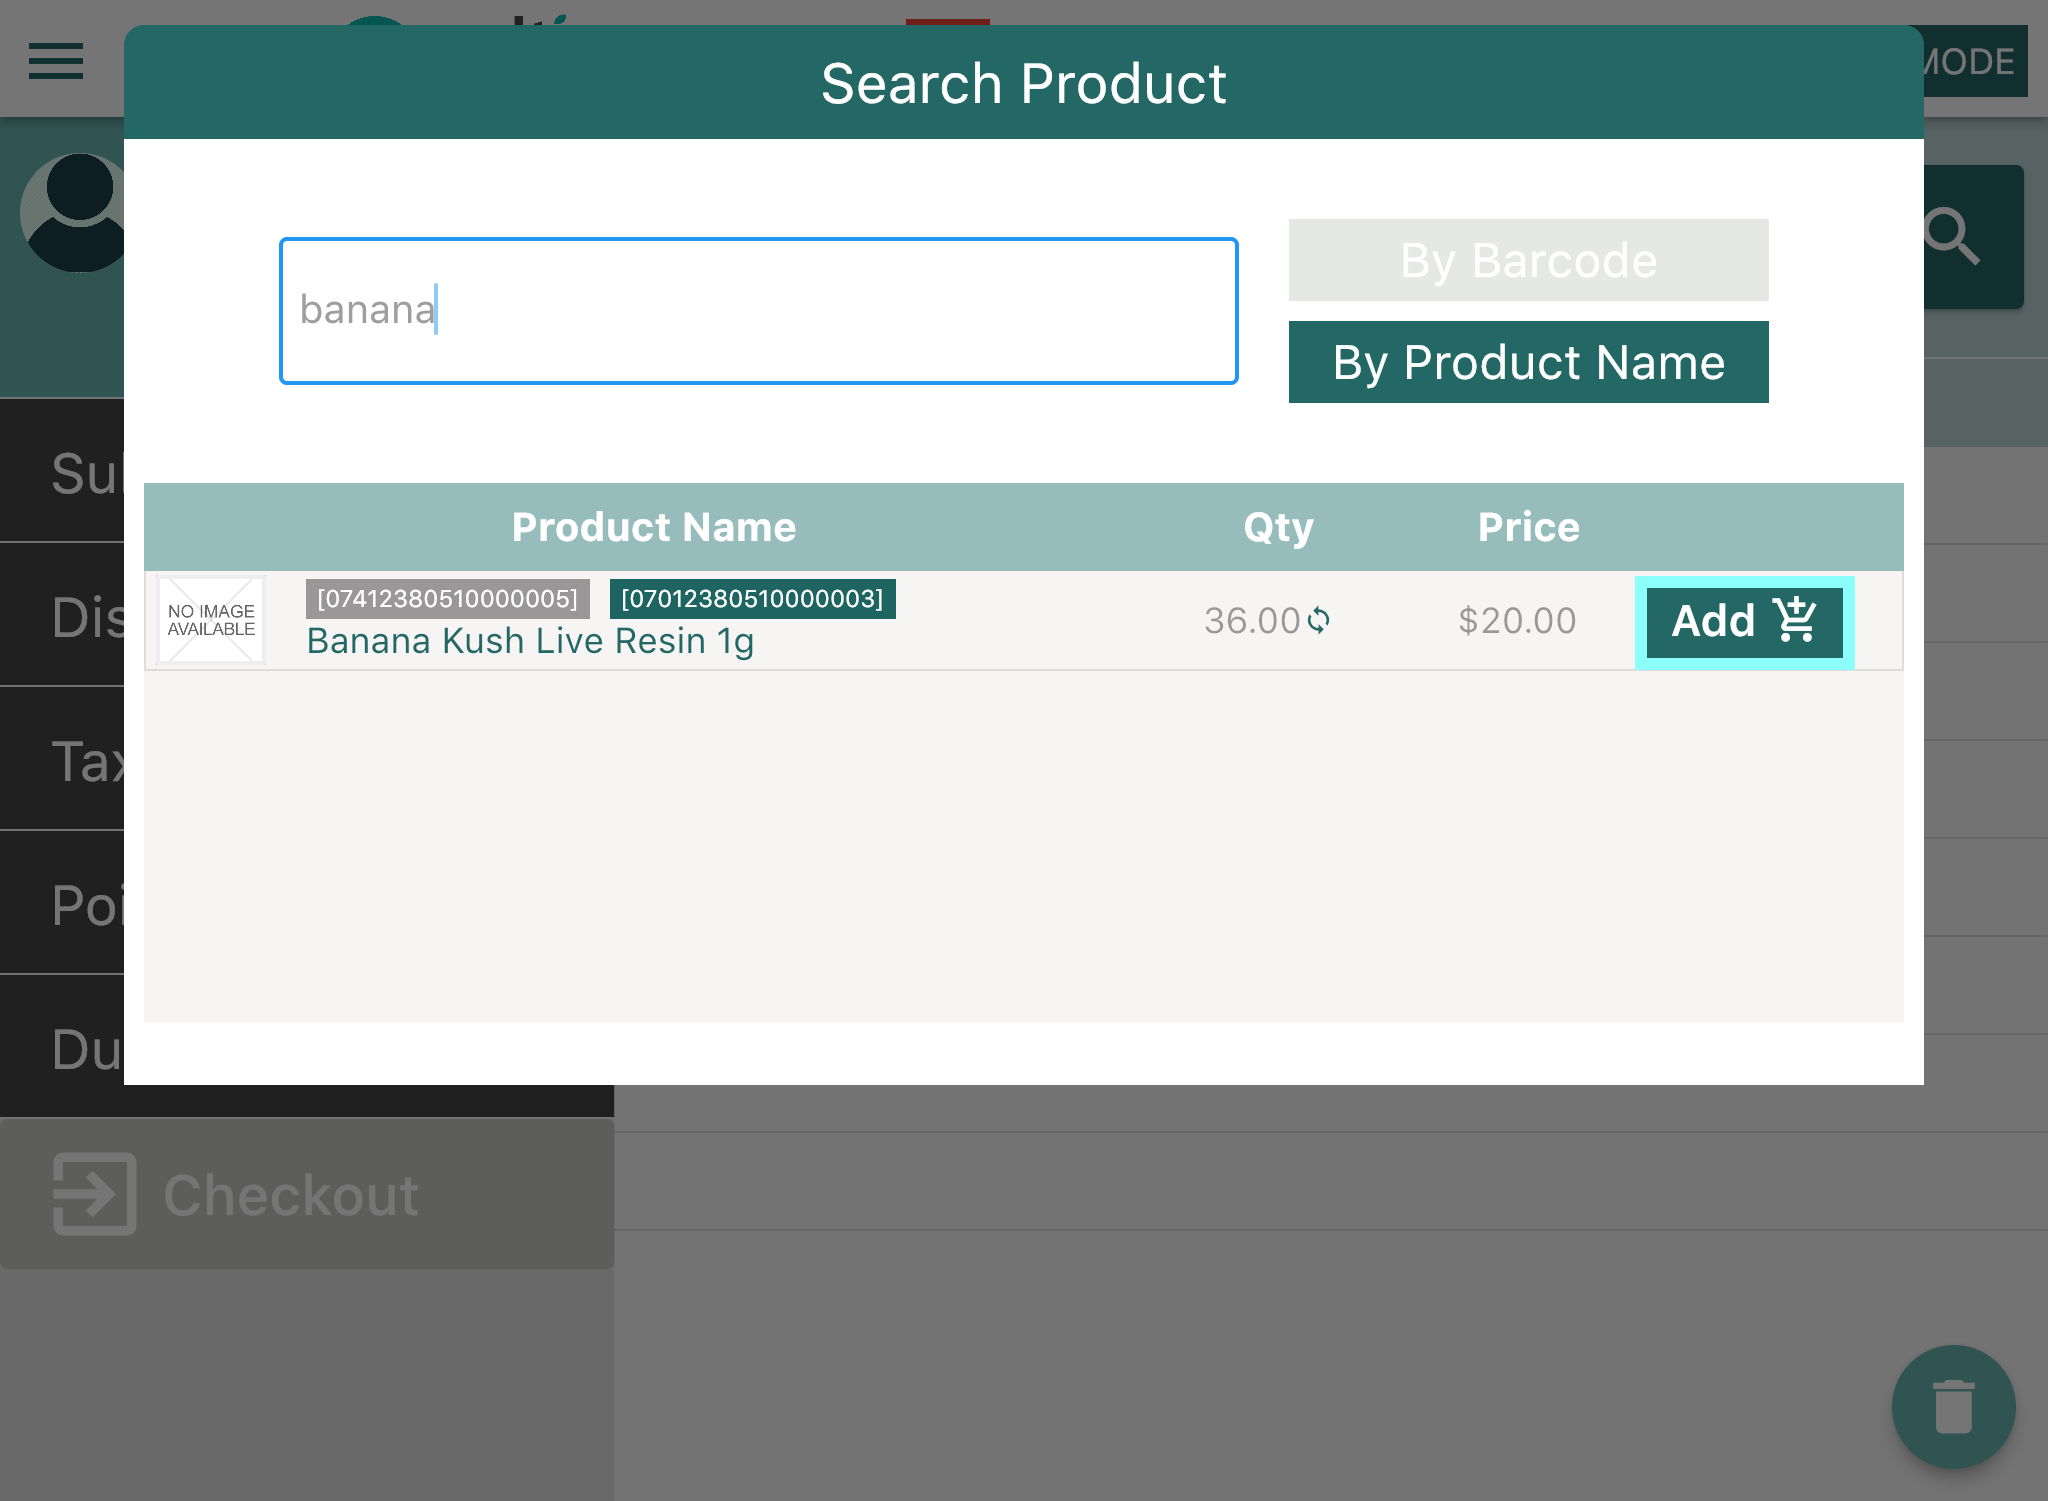
- You can select to search "By Barcode" or "By Product Name".
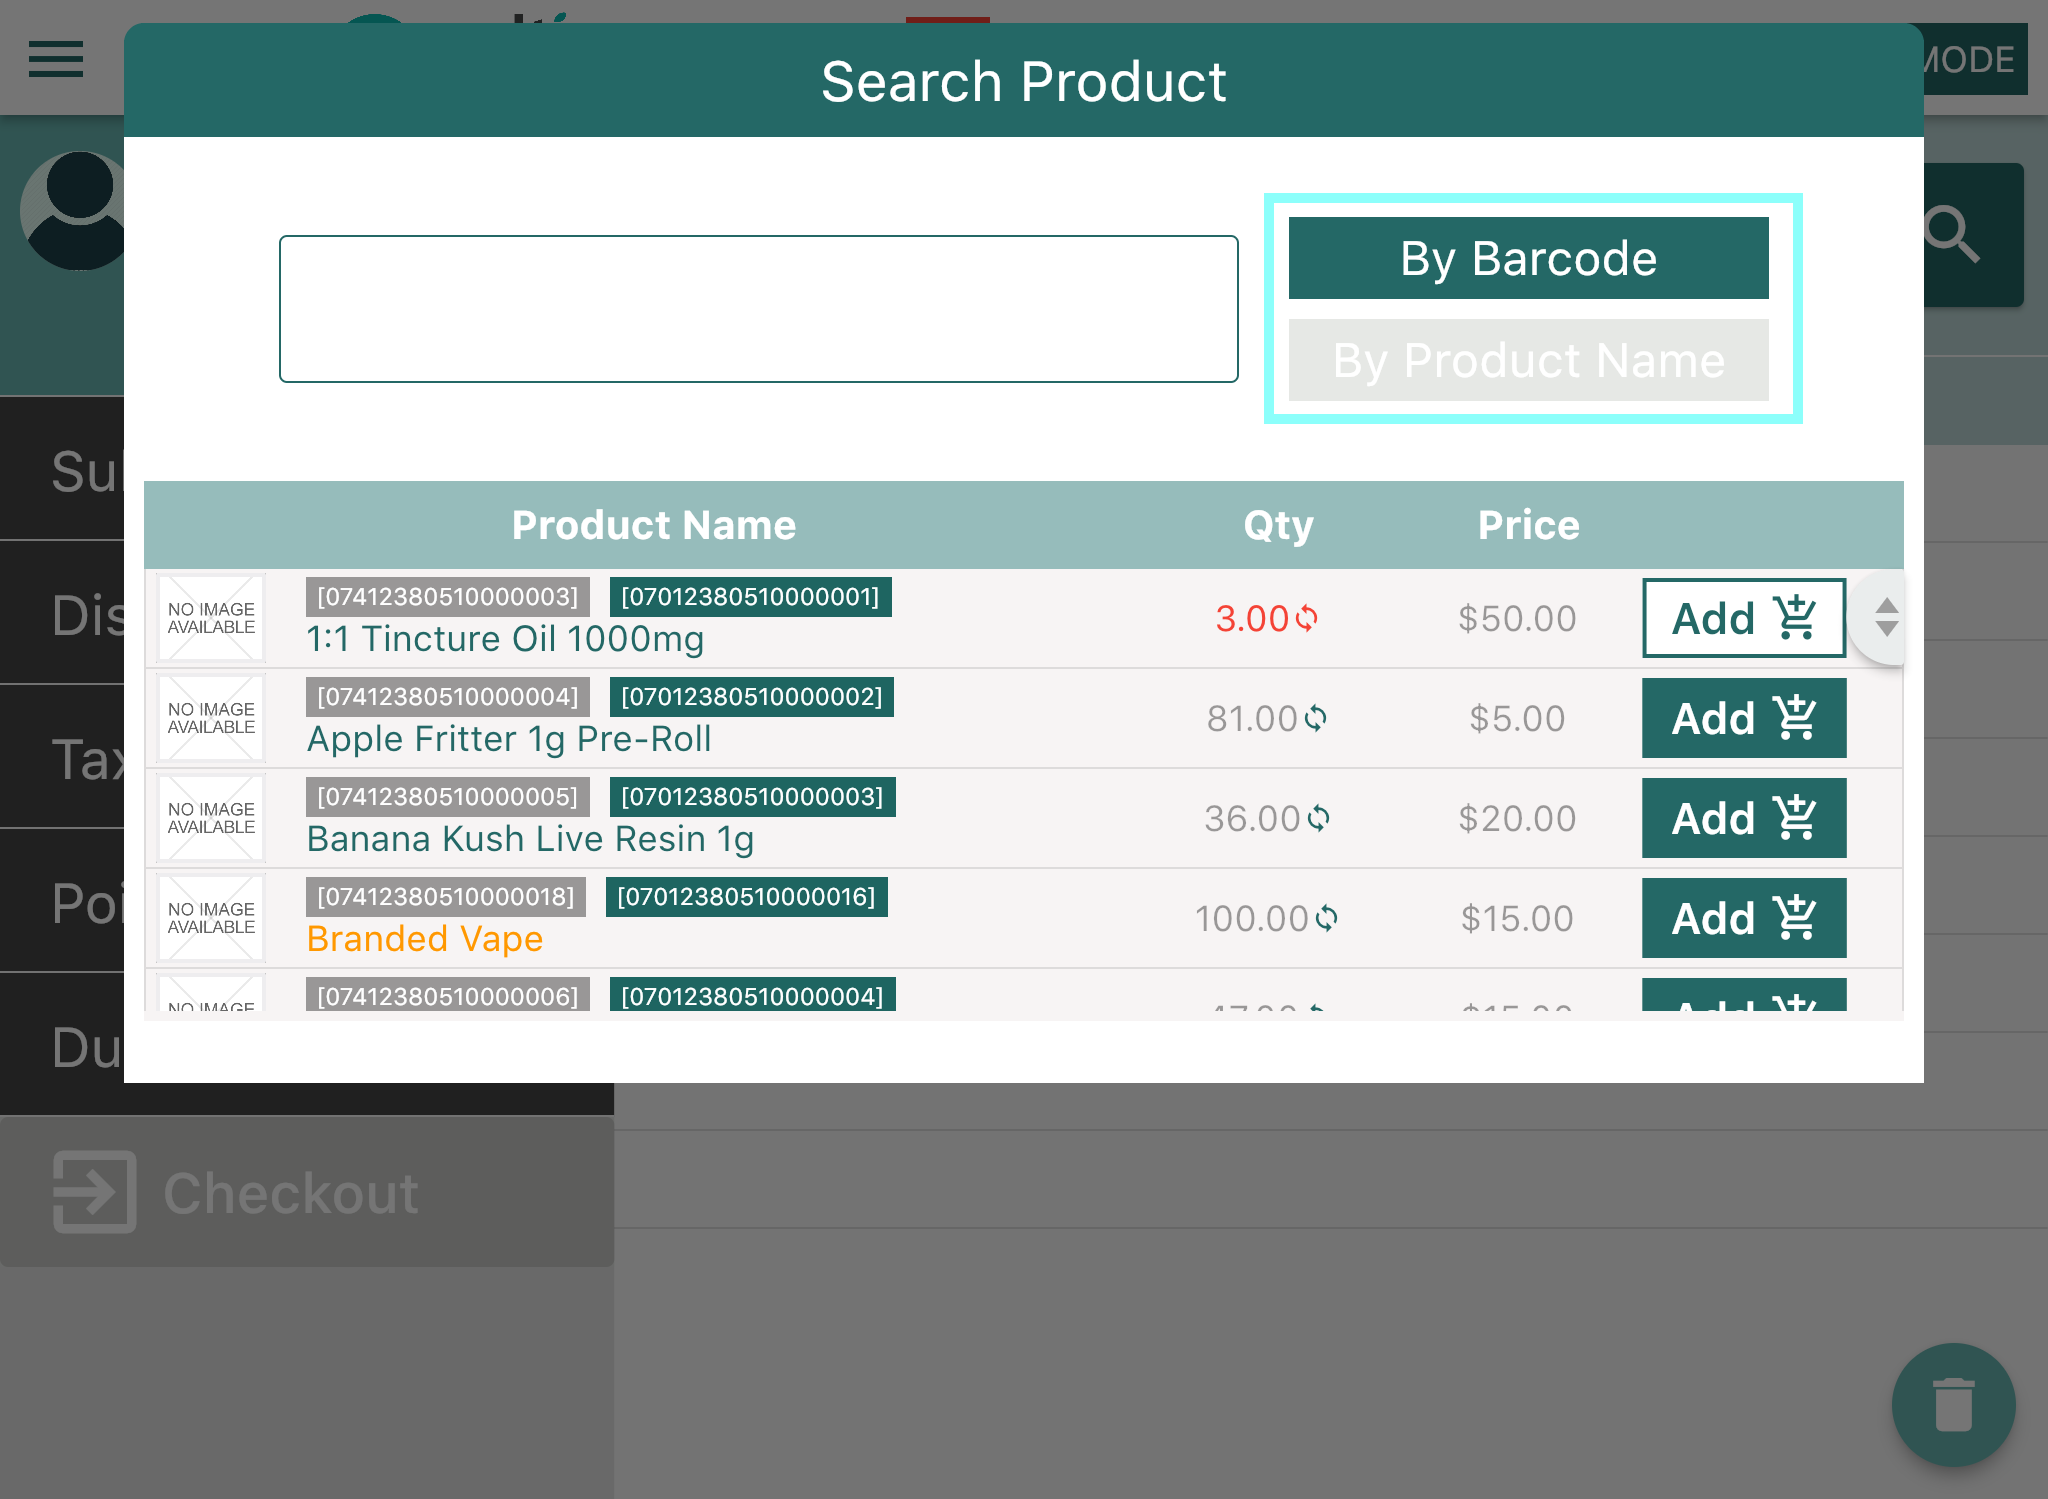
- Once you’ve found the desired product, Click the “Add” button next to that product.
 To get updated available product quantities at any time, Click the "Refresh" option next to an item’s quantity as shown below.
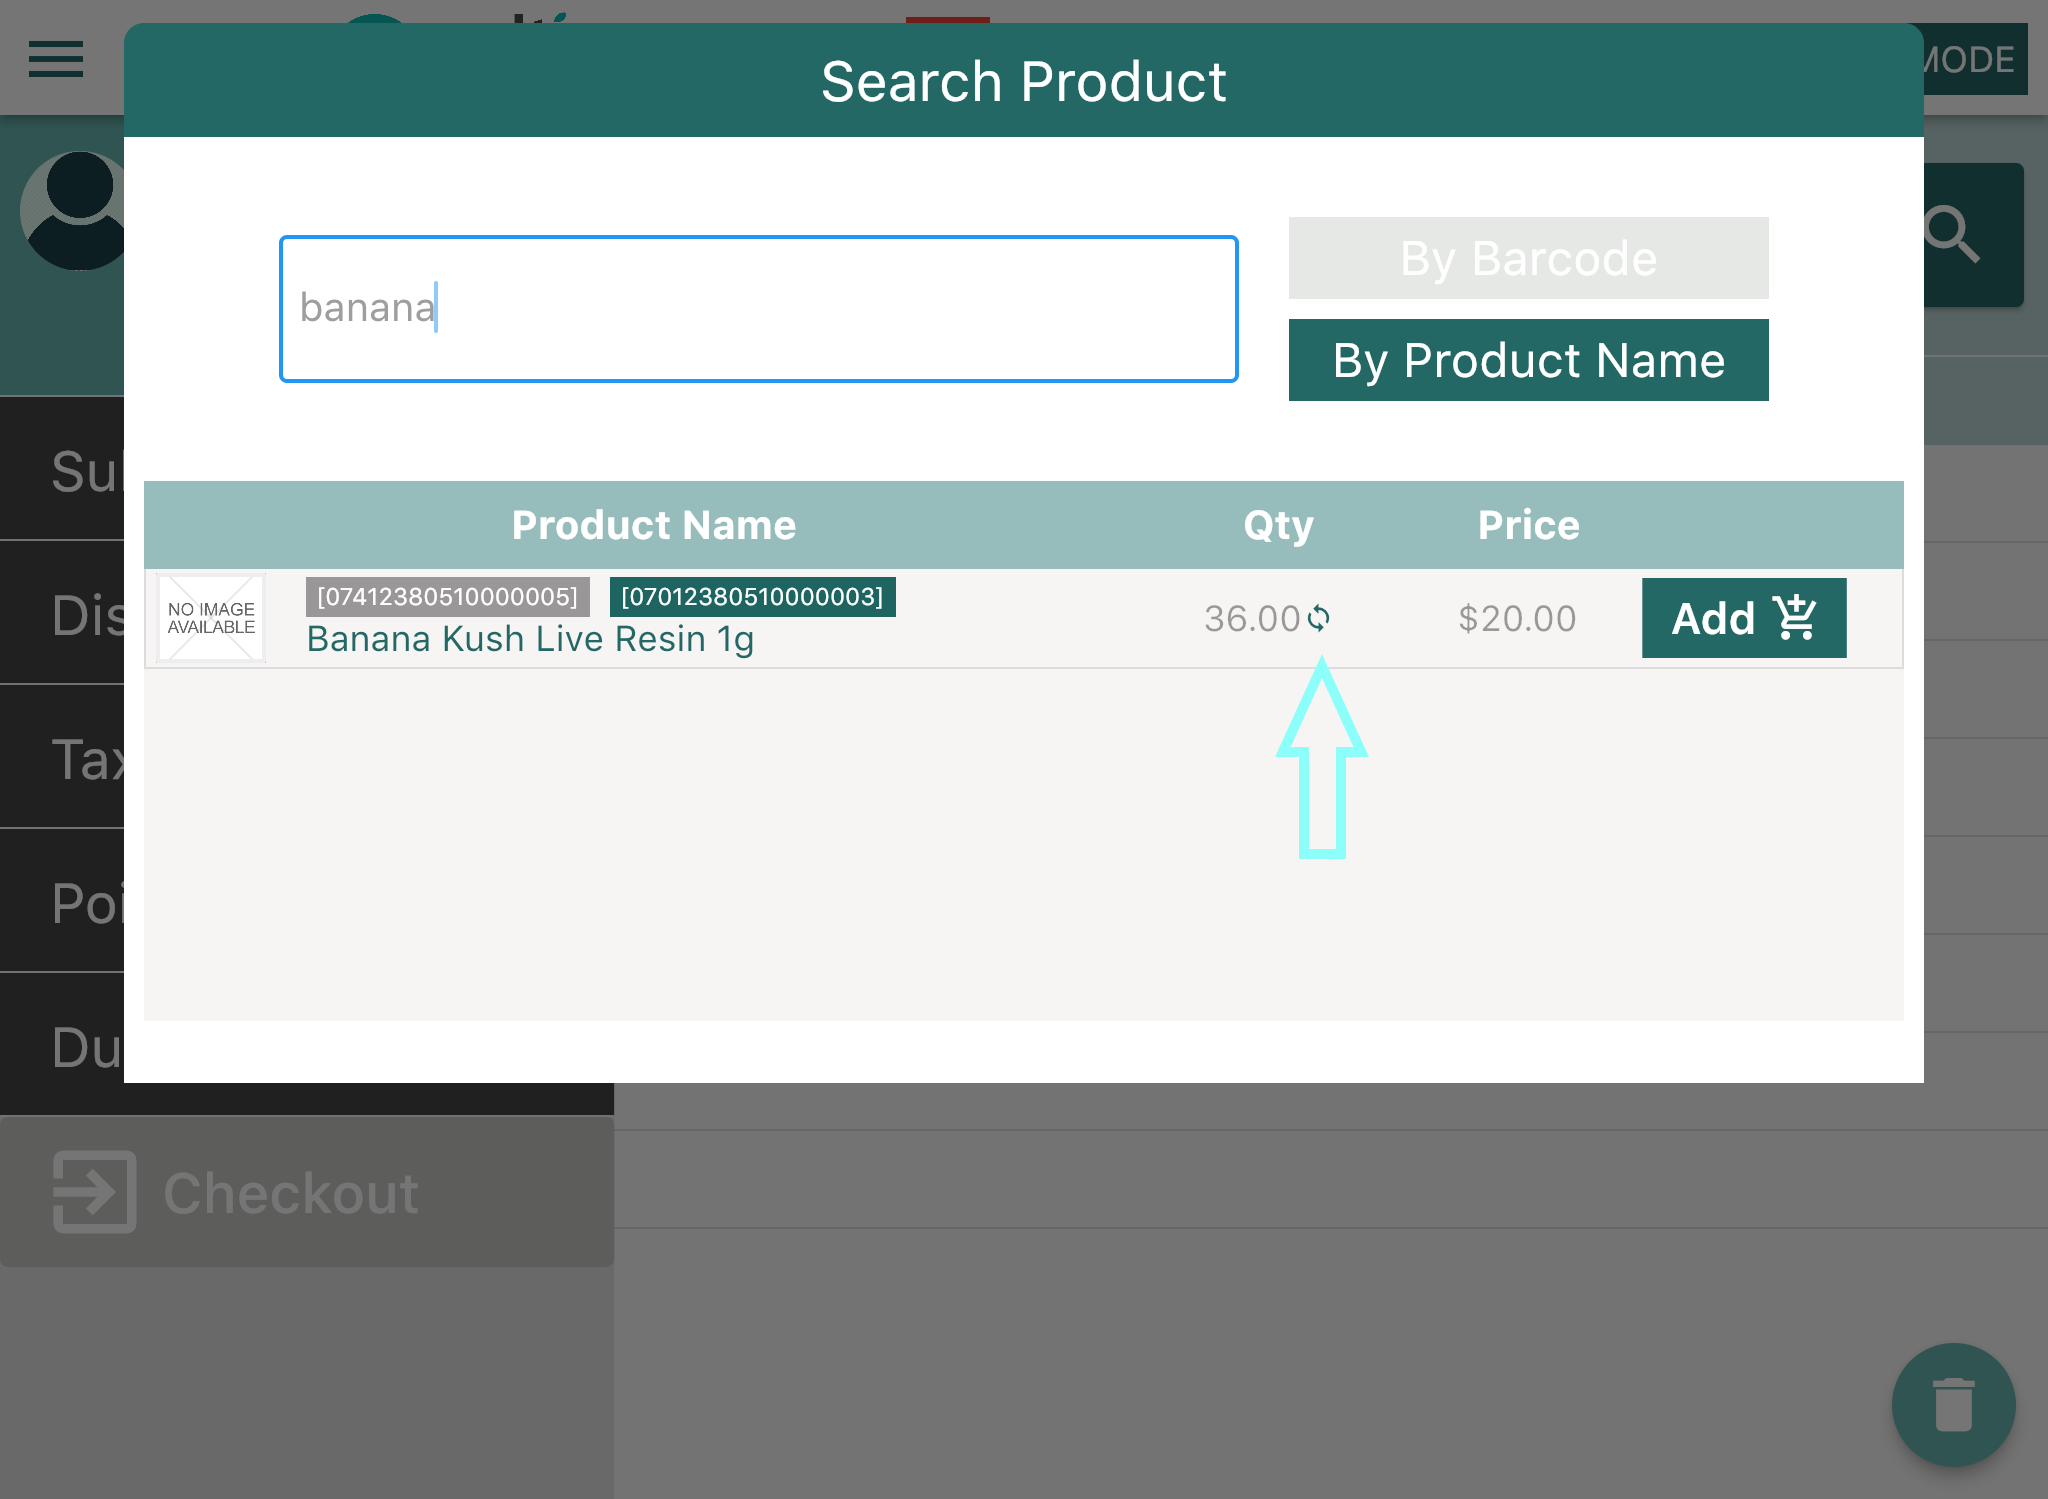
- Once you’ve found the desired product, Click the “Add” button next to that product.
- Once the product has been added, it will appear in the cart.
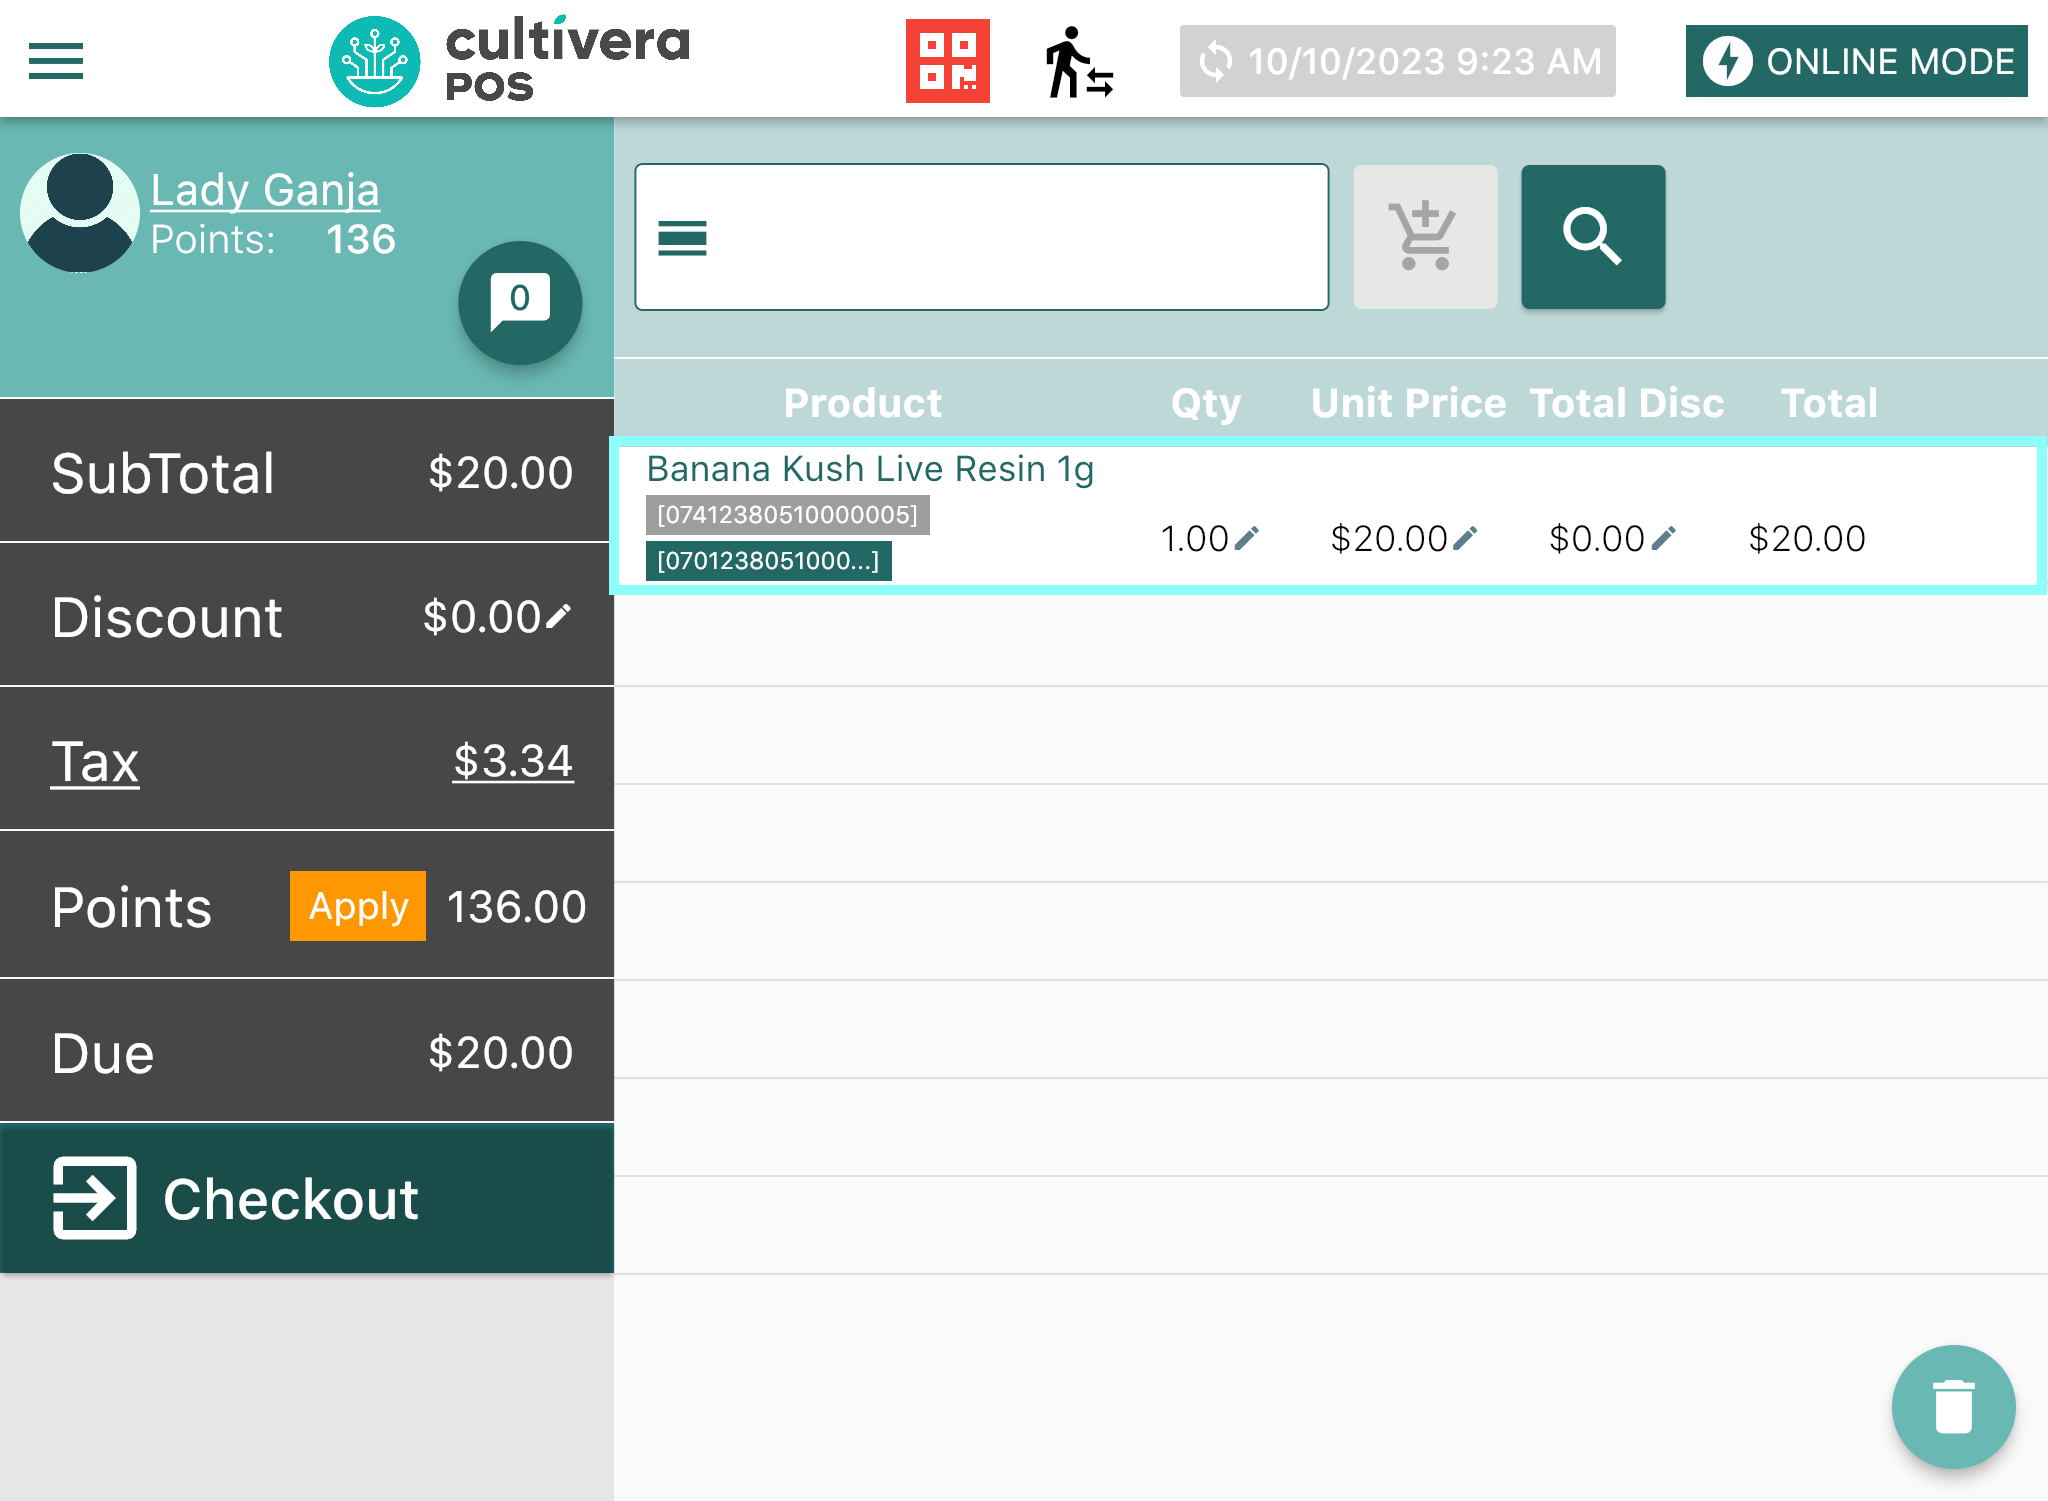
- Repeat this process for each product that your customer wishes to purchase.
- Select the "Pencil" icon beside any line item to make adjustments to Quantity, Unit price, or Total Discount if needed.
- You can select to search "By Barcode" or "By Product Name".

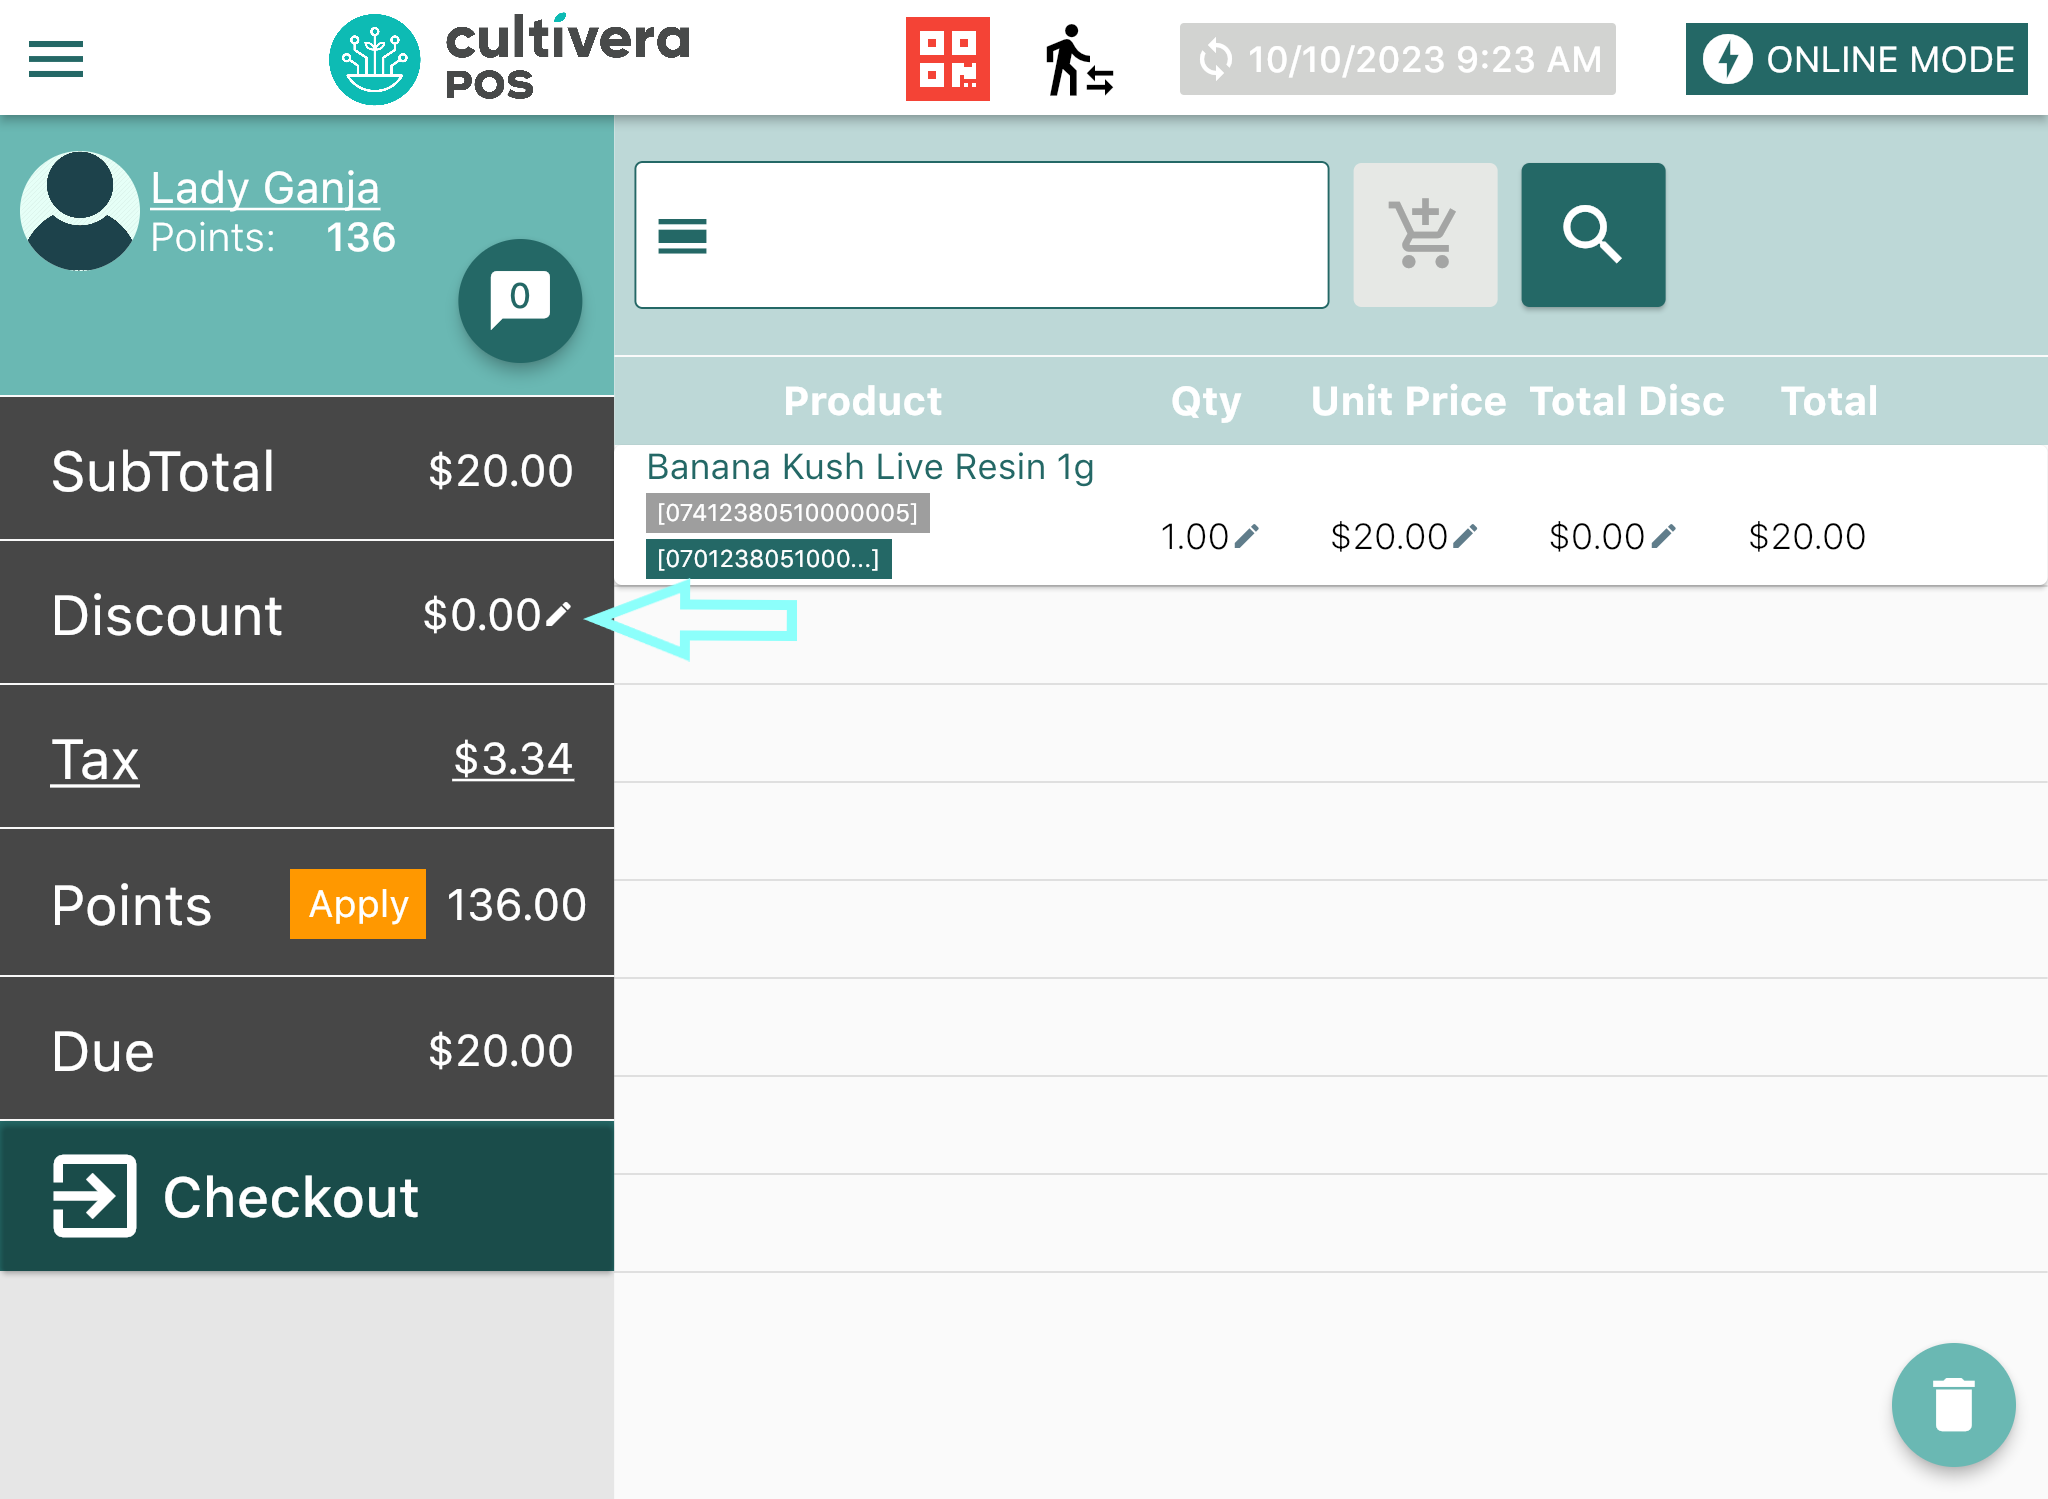
You can also apply a discount to all items in the cart by using the "Pencil" icon next to the “Discount” field under the cart Total.
Completing the Transaction
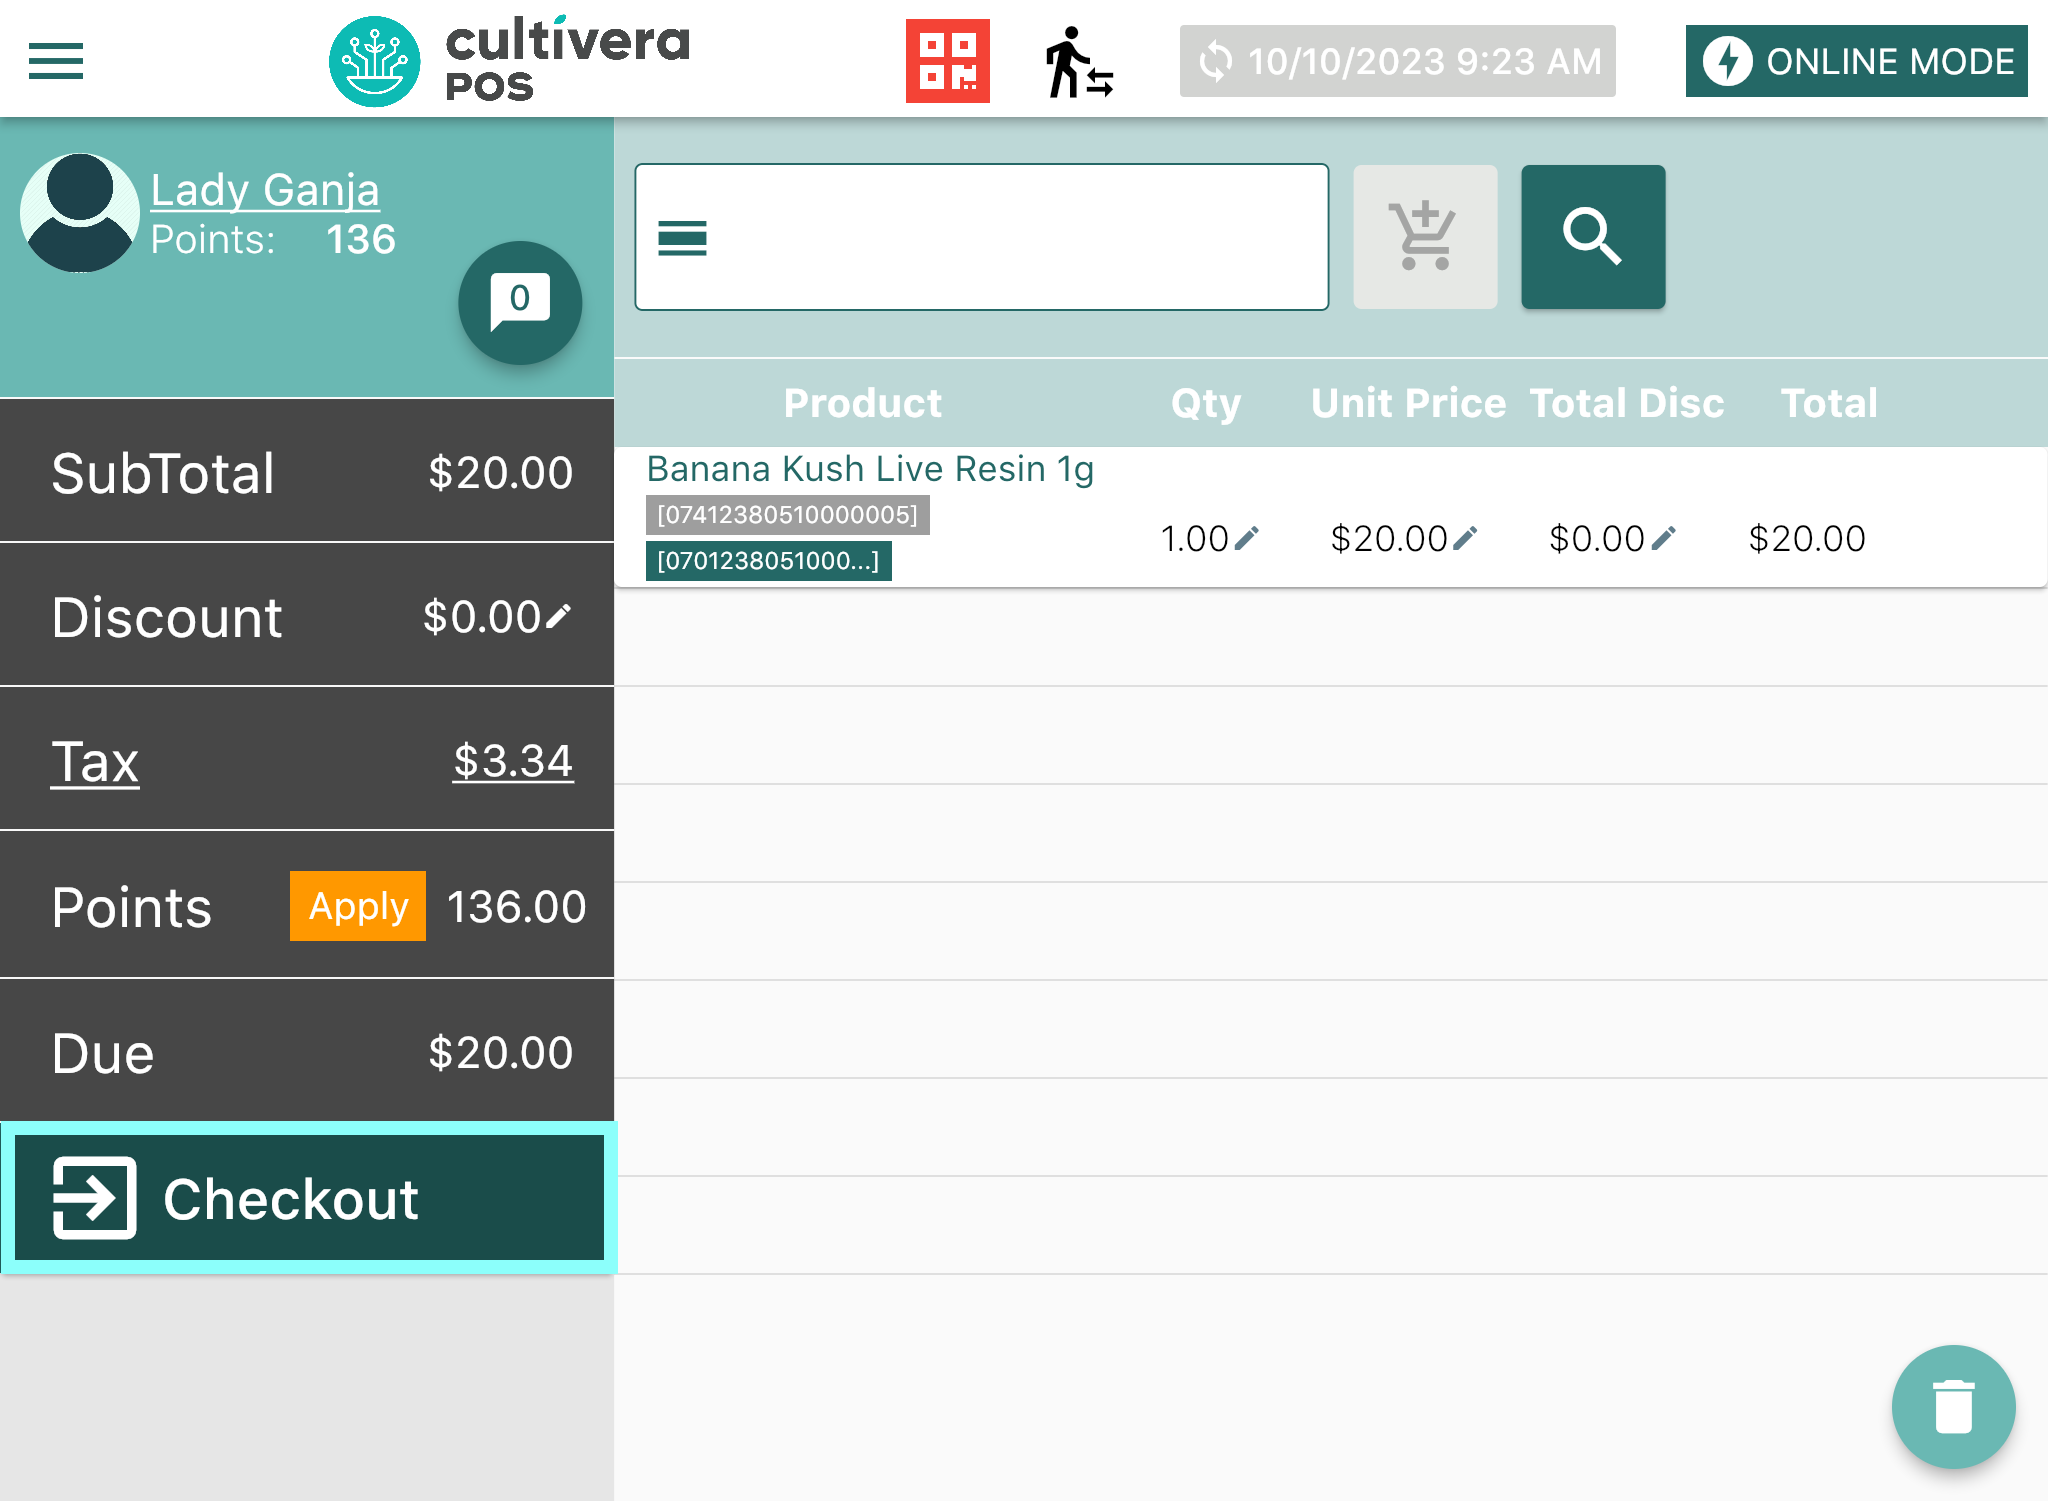
- Once you have all desired items added to the cart, Select “Checkout” to start the checkout process.
- Enter the amount paid by the customer either using the keypad or by selecting a dollar amount provided in the green boxes.
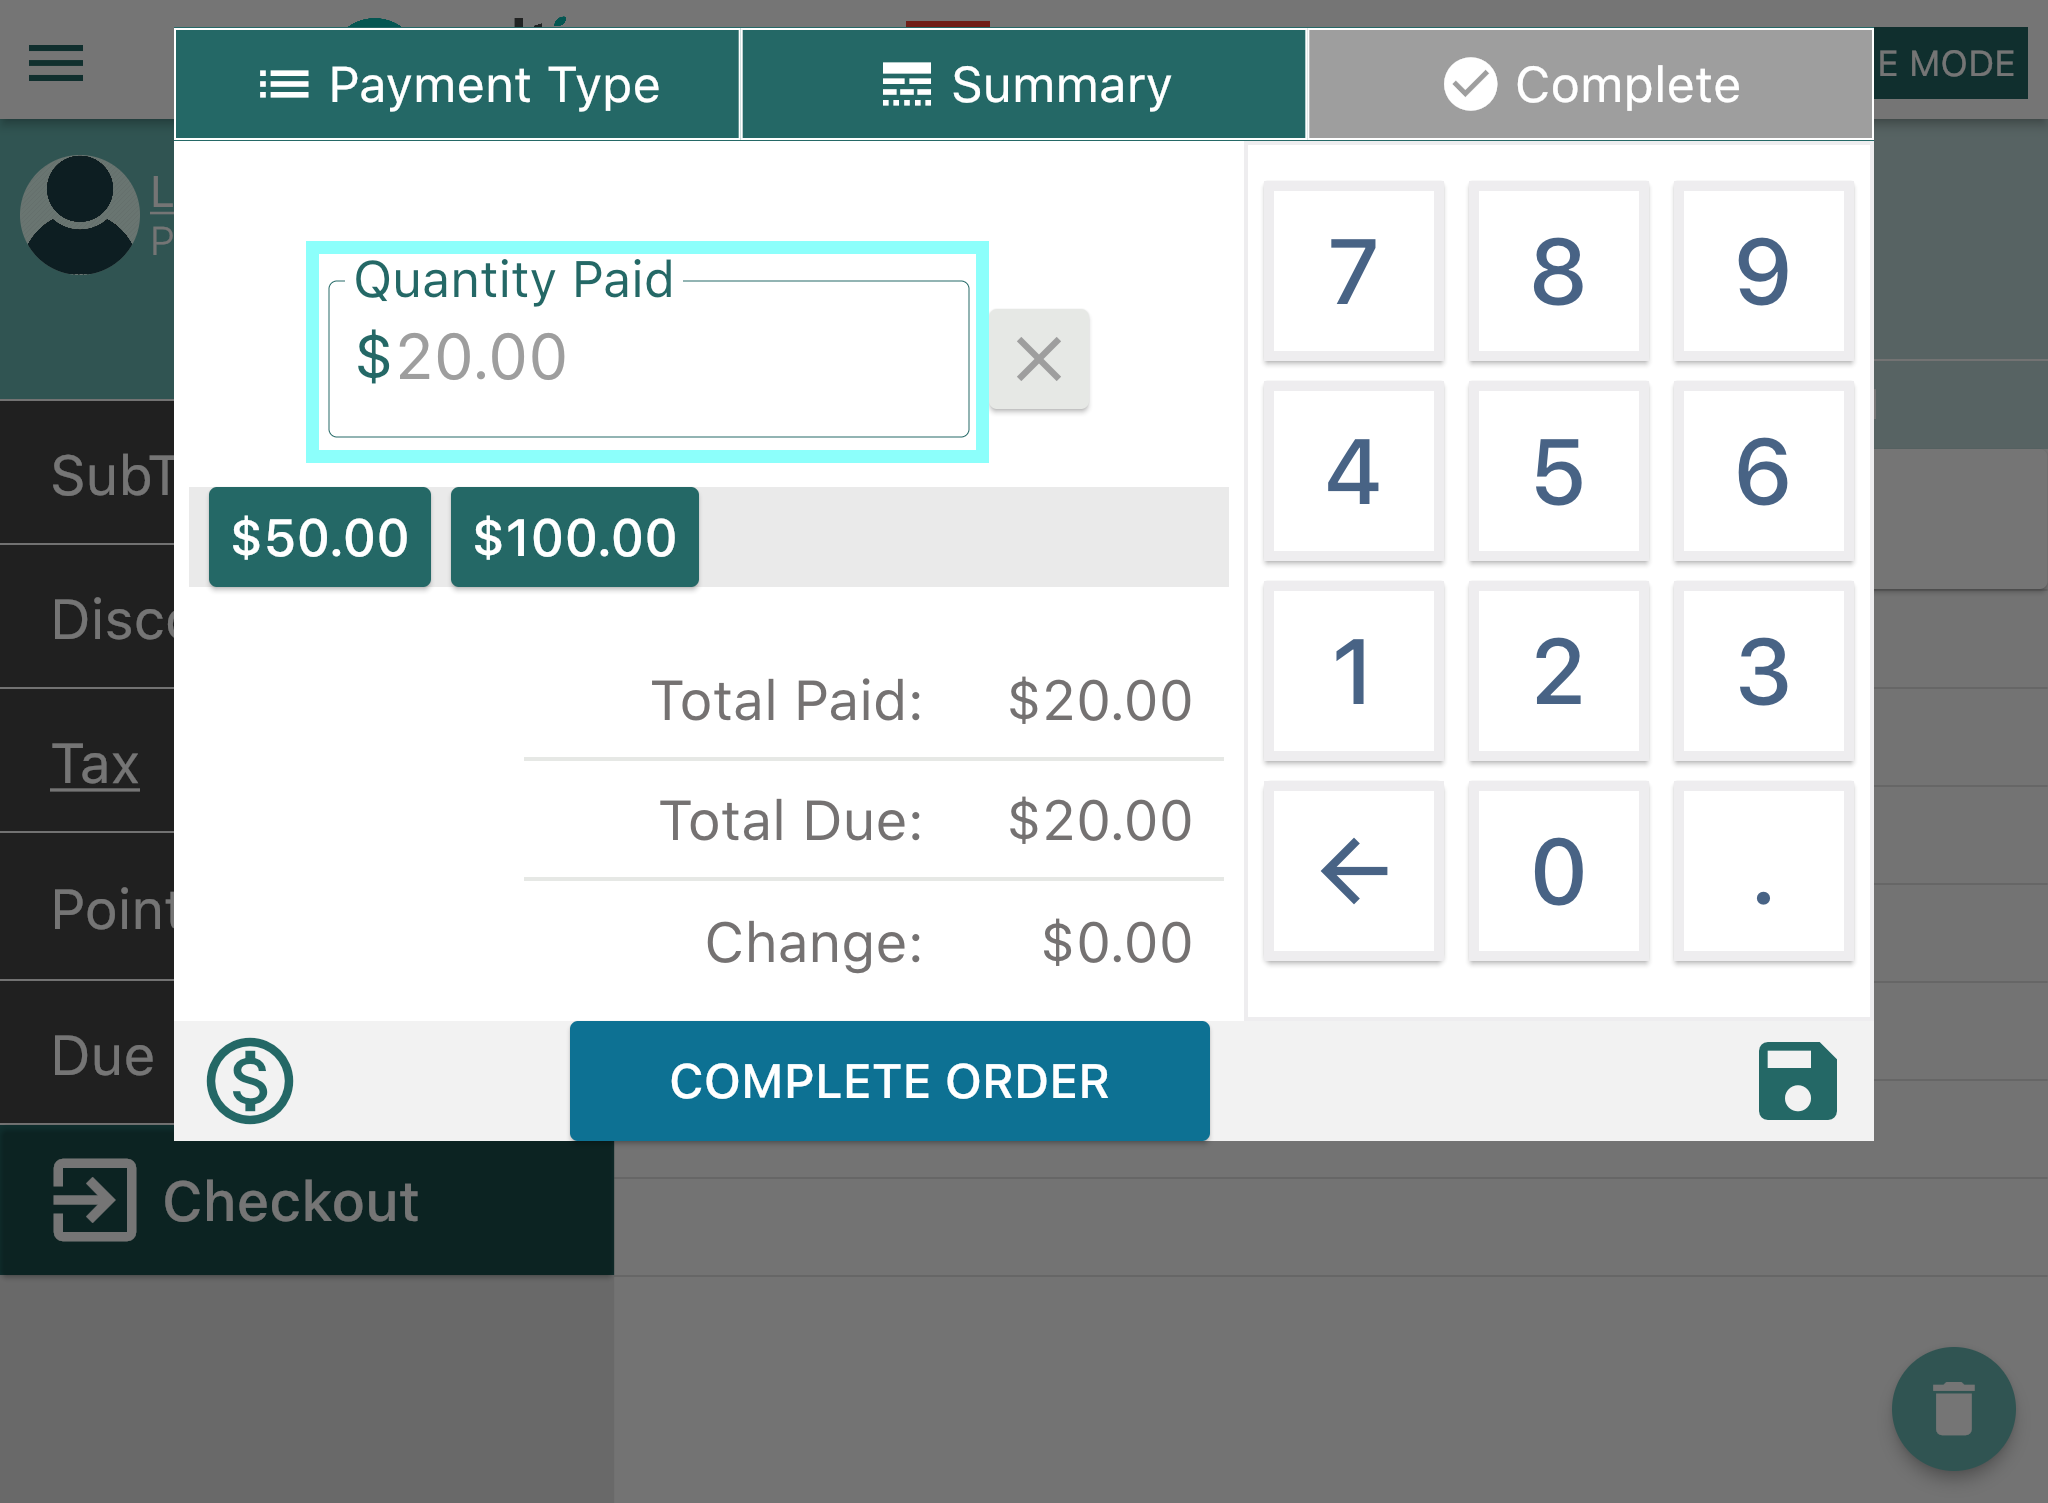
- Once the amount has been entered, Select “Complete Order”.

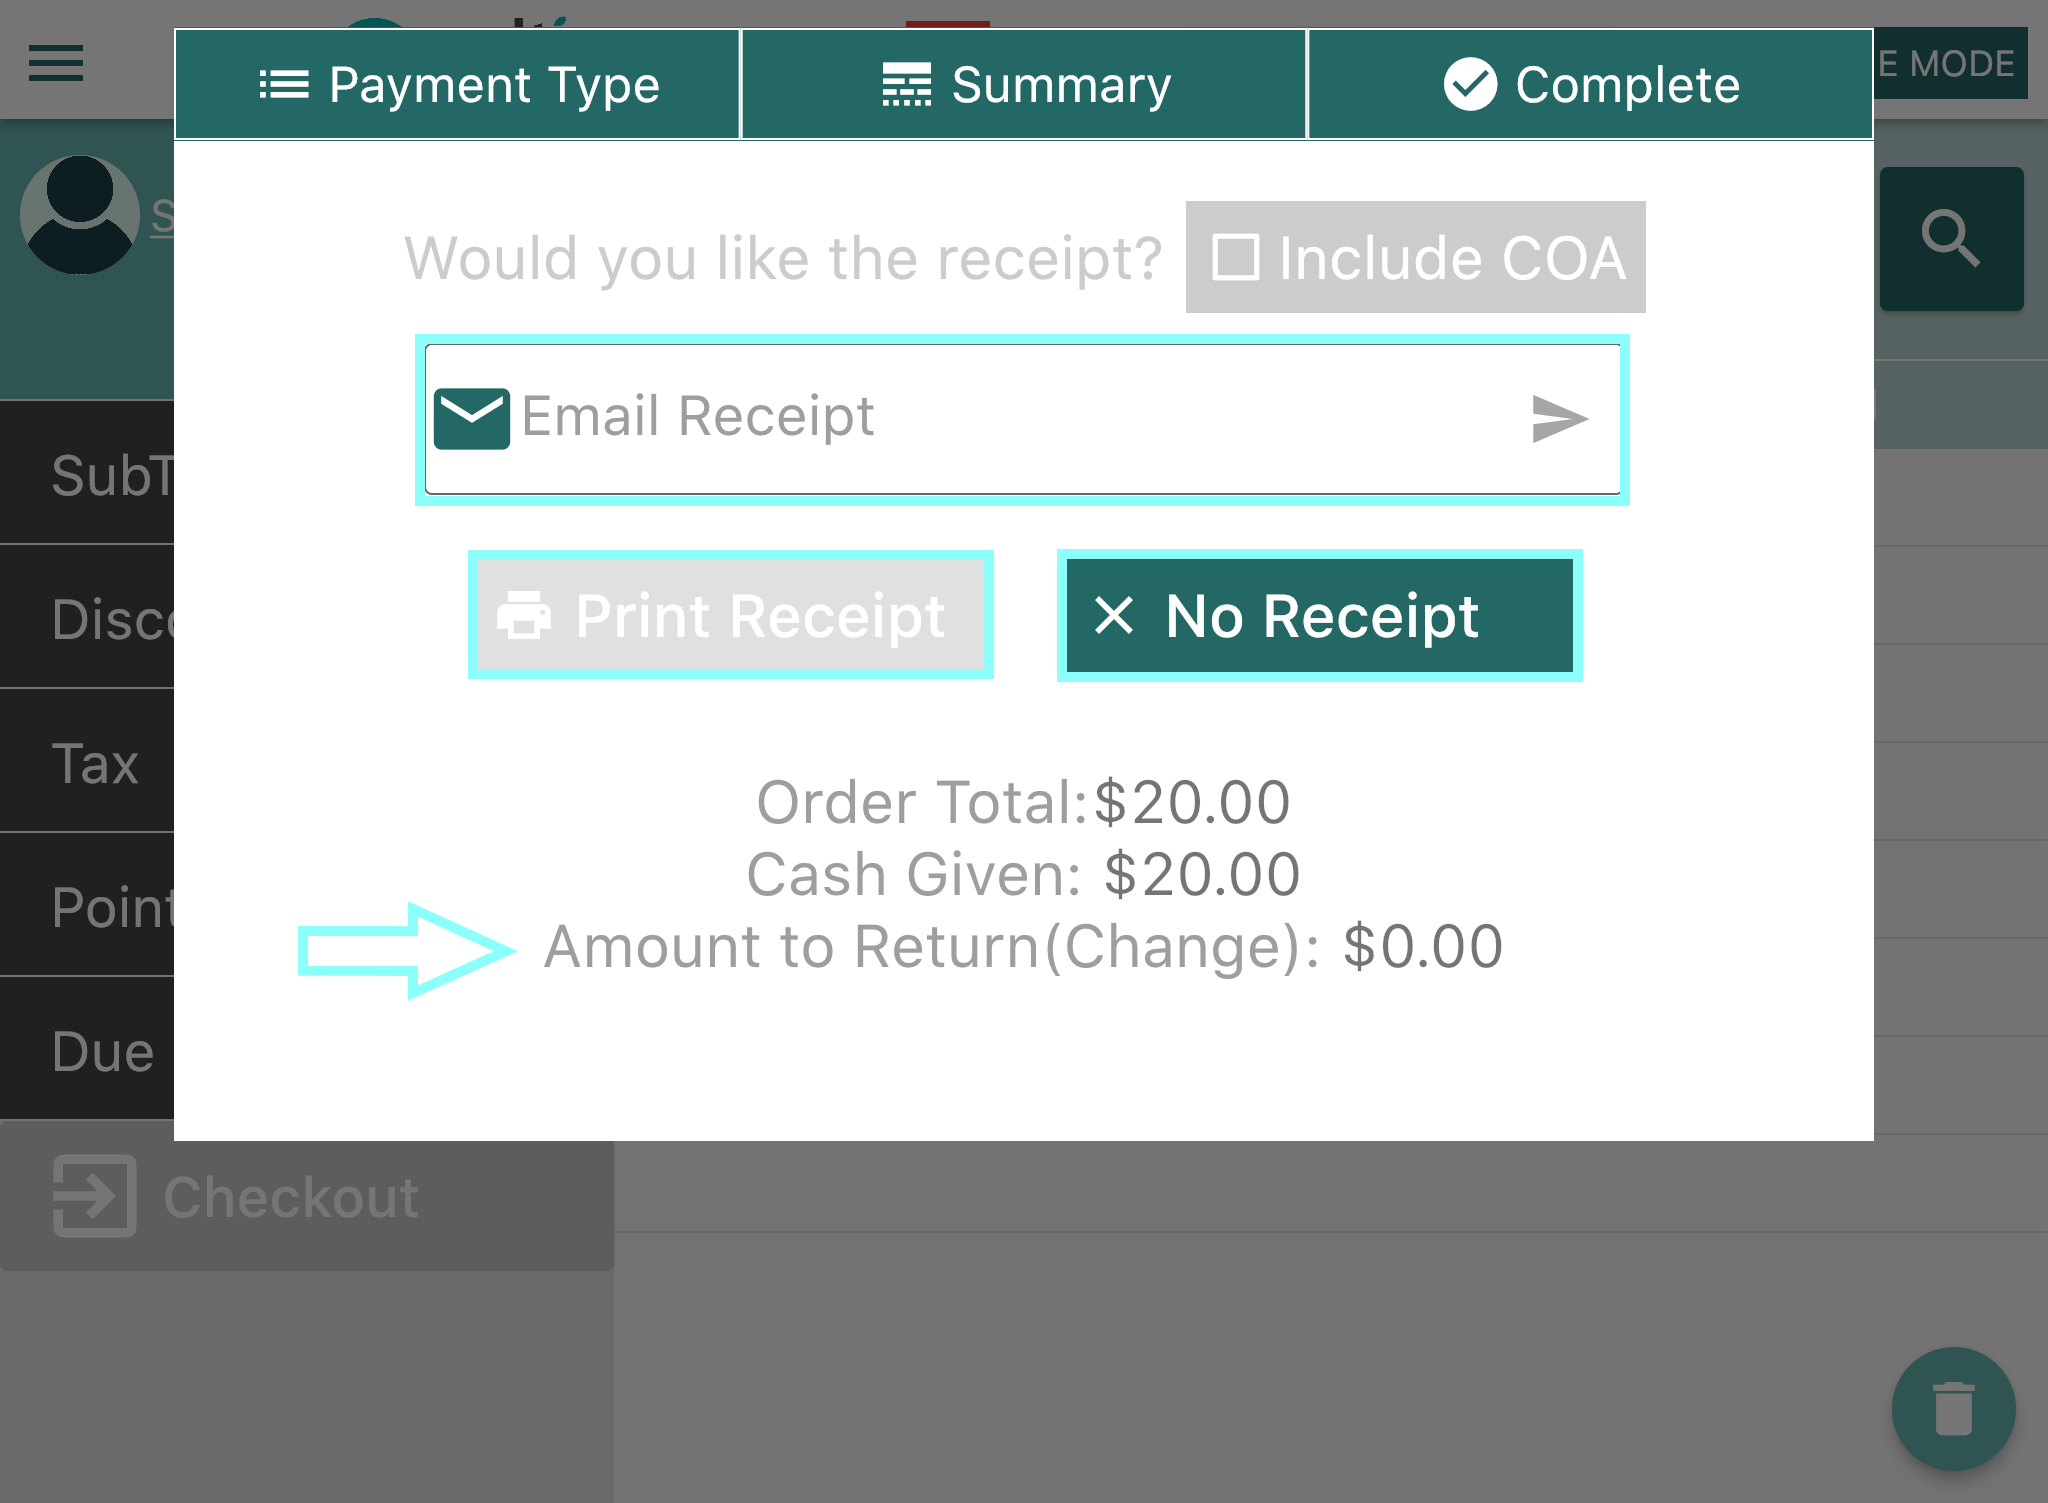
- Any change due back to the customer will show next to "Amount to Return(Change Given)". The customer will have the following options to receive their receipt: Email Receipt, Print Receipt, or No Receipt.If the customer has an email address already on file, it will automatically populate into the "Email Receipt" box.
- Enter the amount paid by the customer either using the keypad or by selecting a dollar amount provided in the green boxes.
- Once the preferred receipt delivery method has been selected, the transaction will be complete.