Connecting Your Zebra ZD411/421 Barcode Printer via Bluetooth
![]() Updated
Updated
Connecting Your Zebra ZD411/421 Barcode Printer via Bluetooth
The Zebra barcode printer can be connected via Bluetooth by following these instructions for Android and iPad. Androids and iPads have different connection steps to follow. A walkthrough is provided for each below.
Connecting your iPad to the Zebra Label Printer via Bluetooth:
- To begin, set up your Zebra label printer and navigate to the location settings within the Administration module.

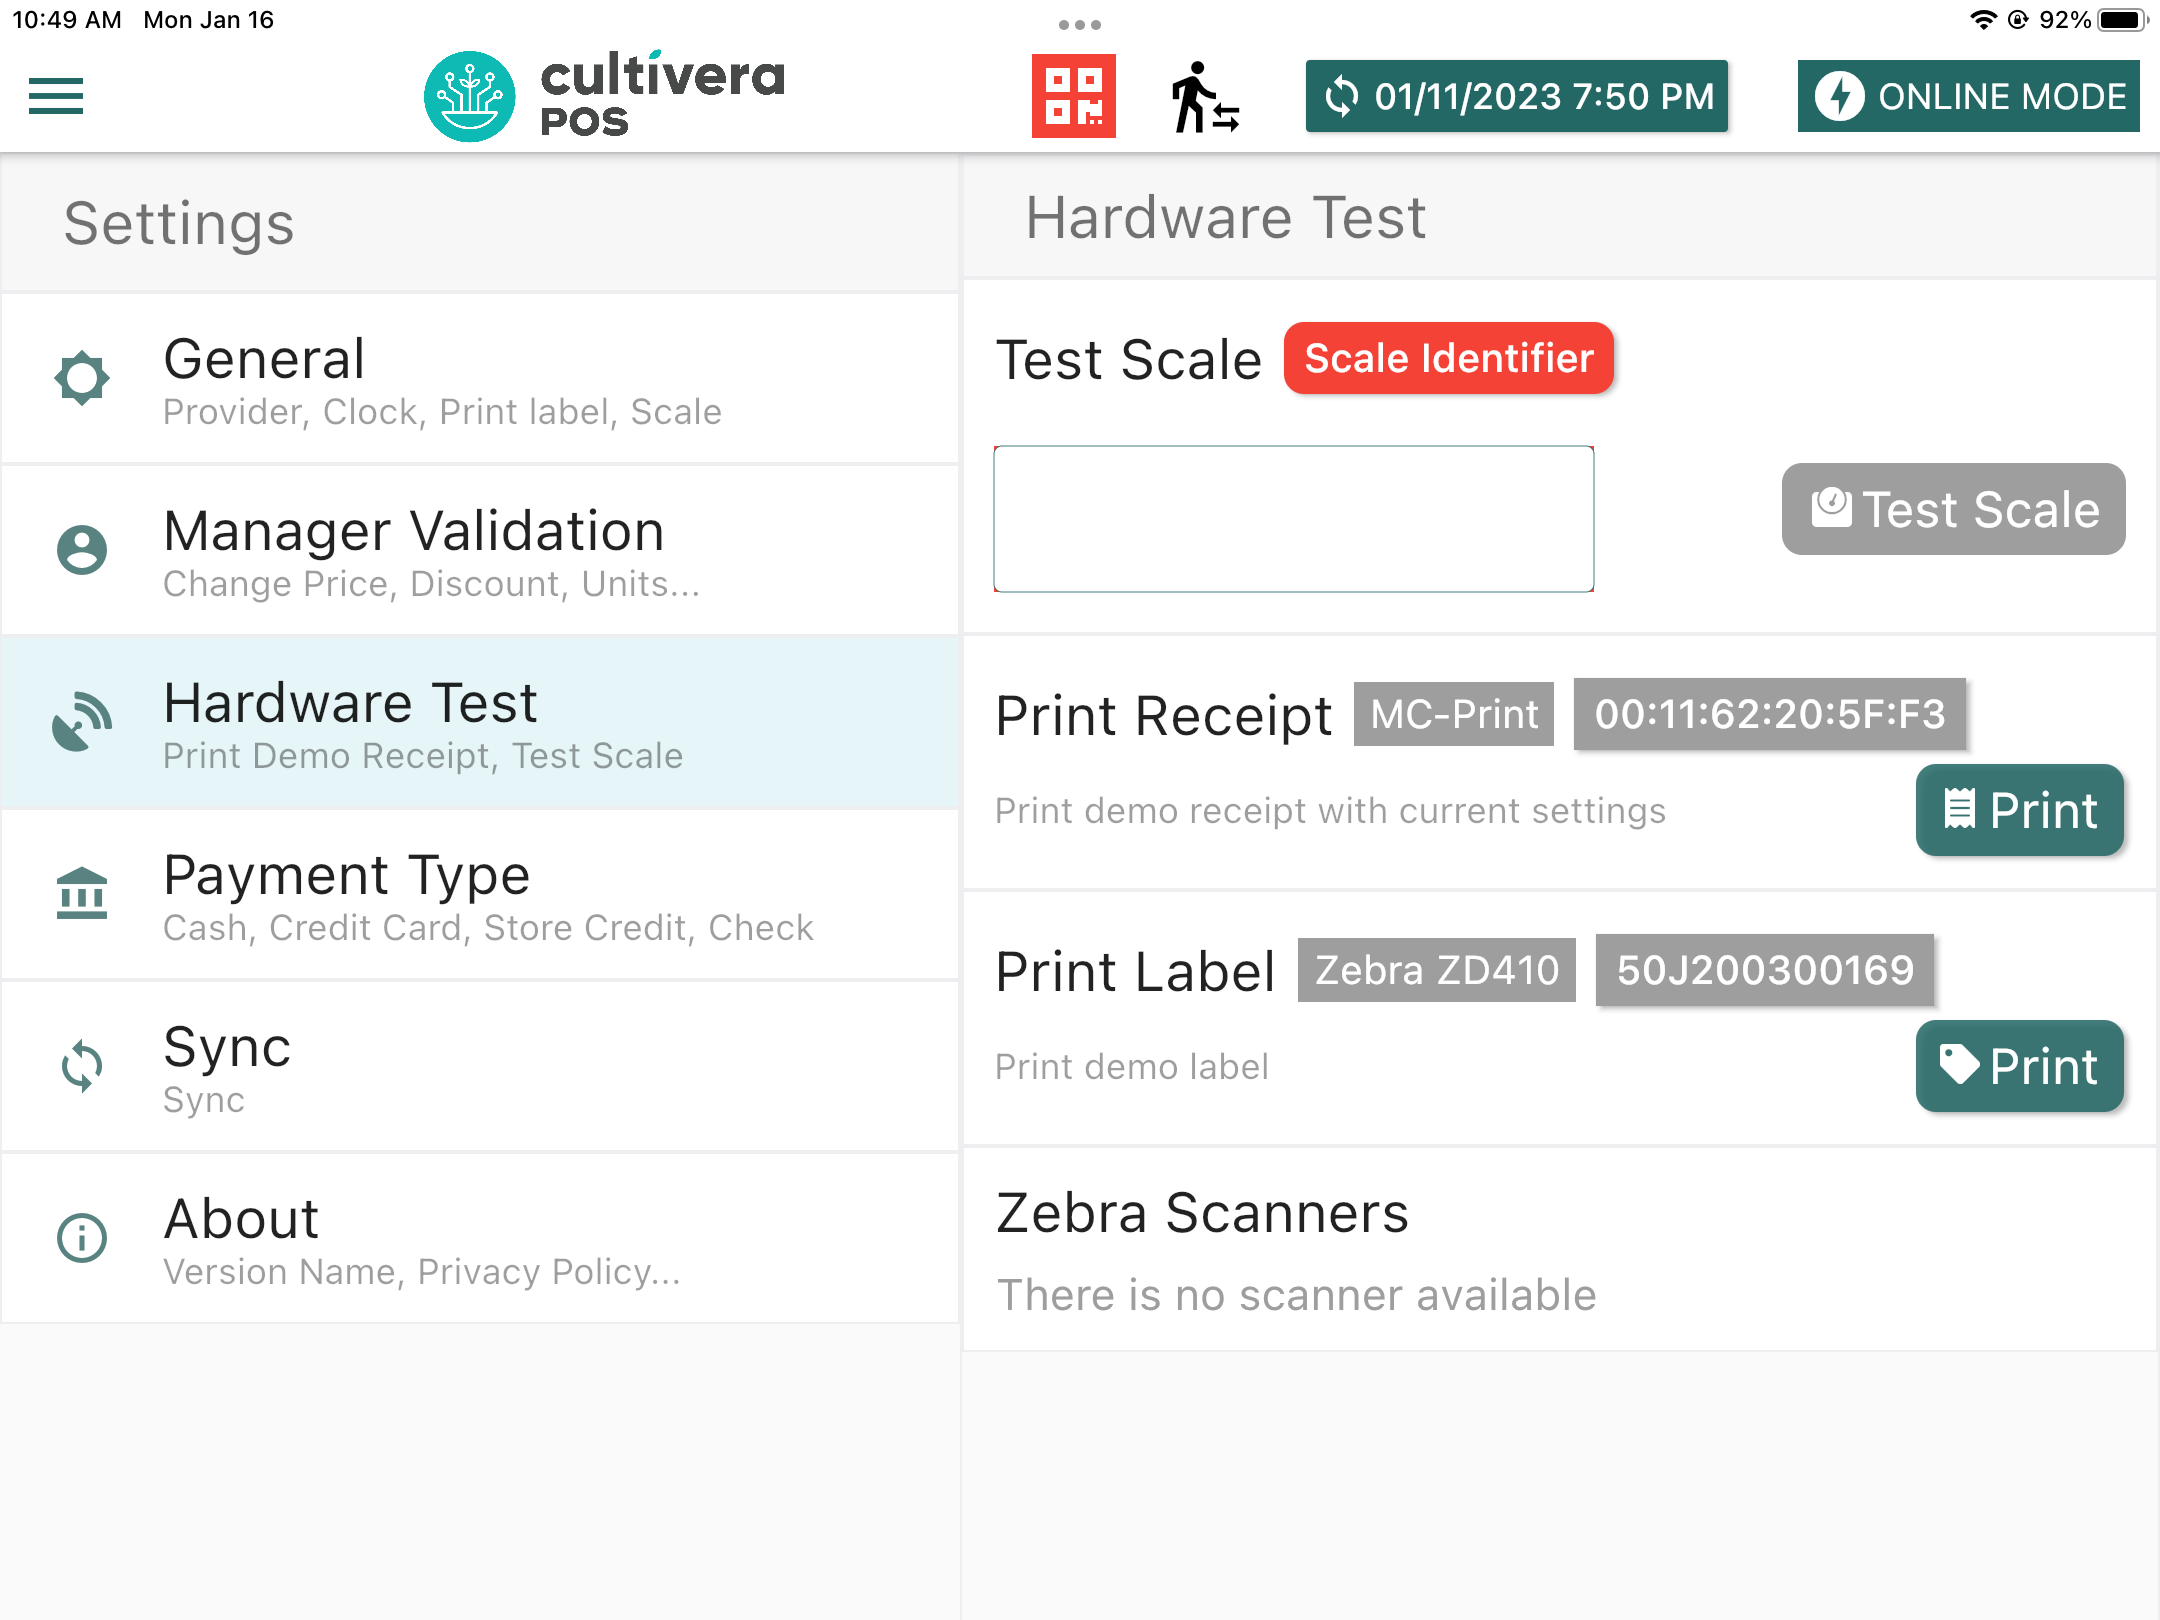
- Under the General Settings, you can select the printer and connection type.
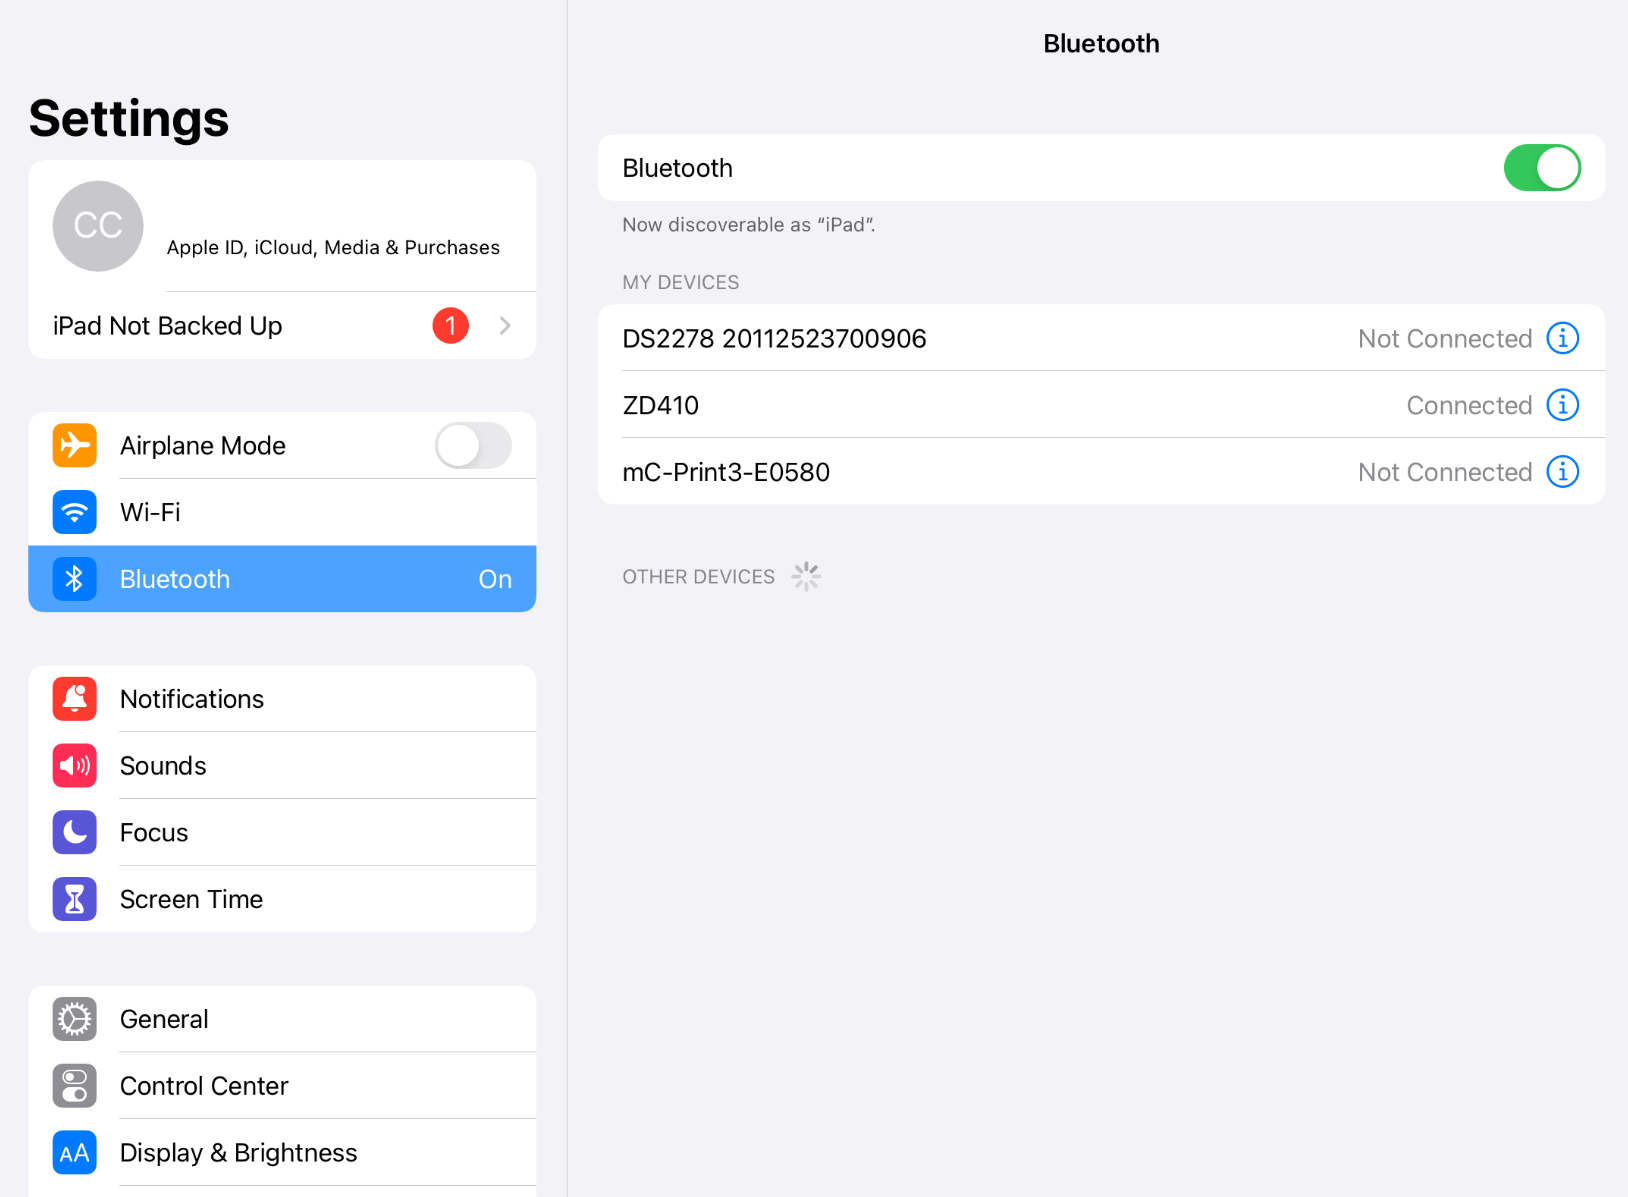
- Then navigate to your iPad settings and select the Bluetooth page. From here, you will see the Zebra label printer ready to pair.
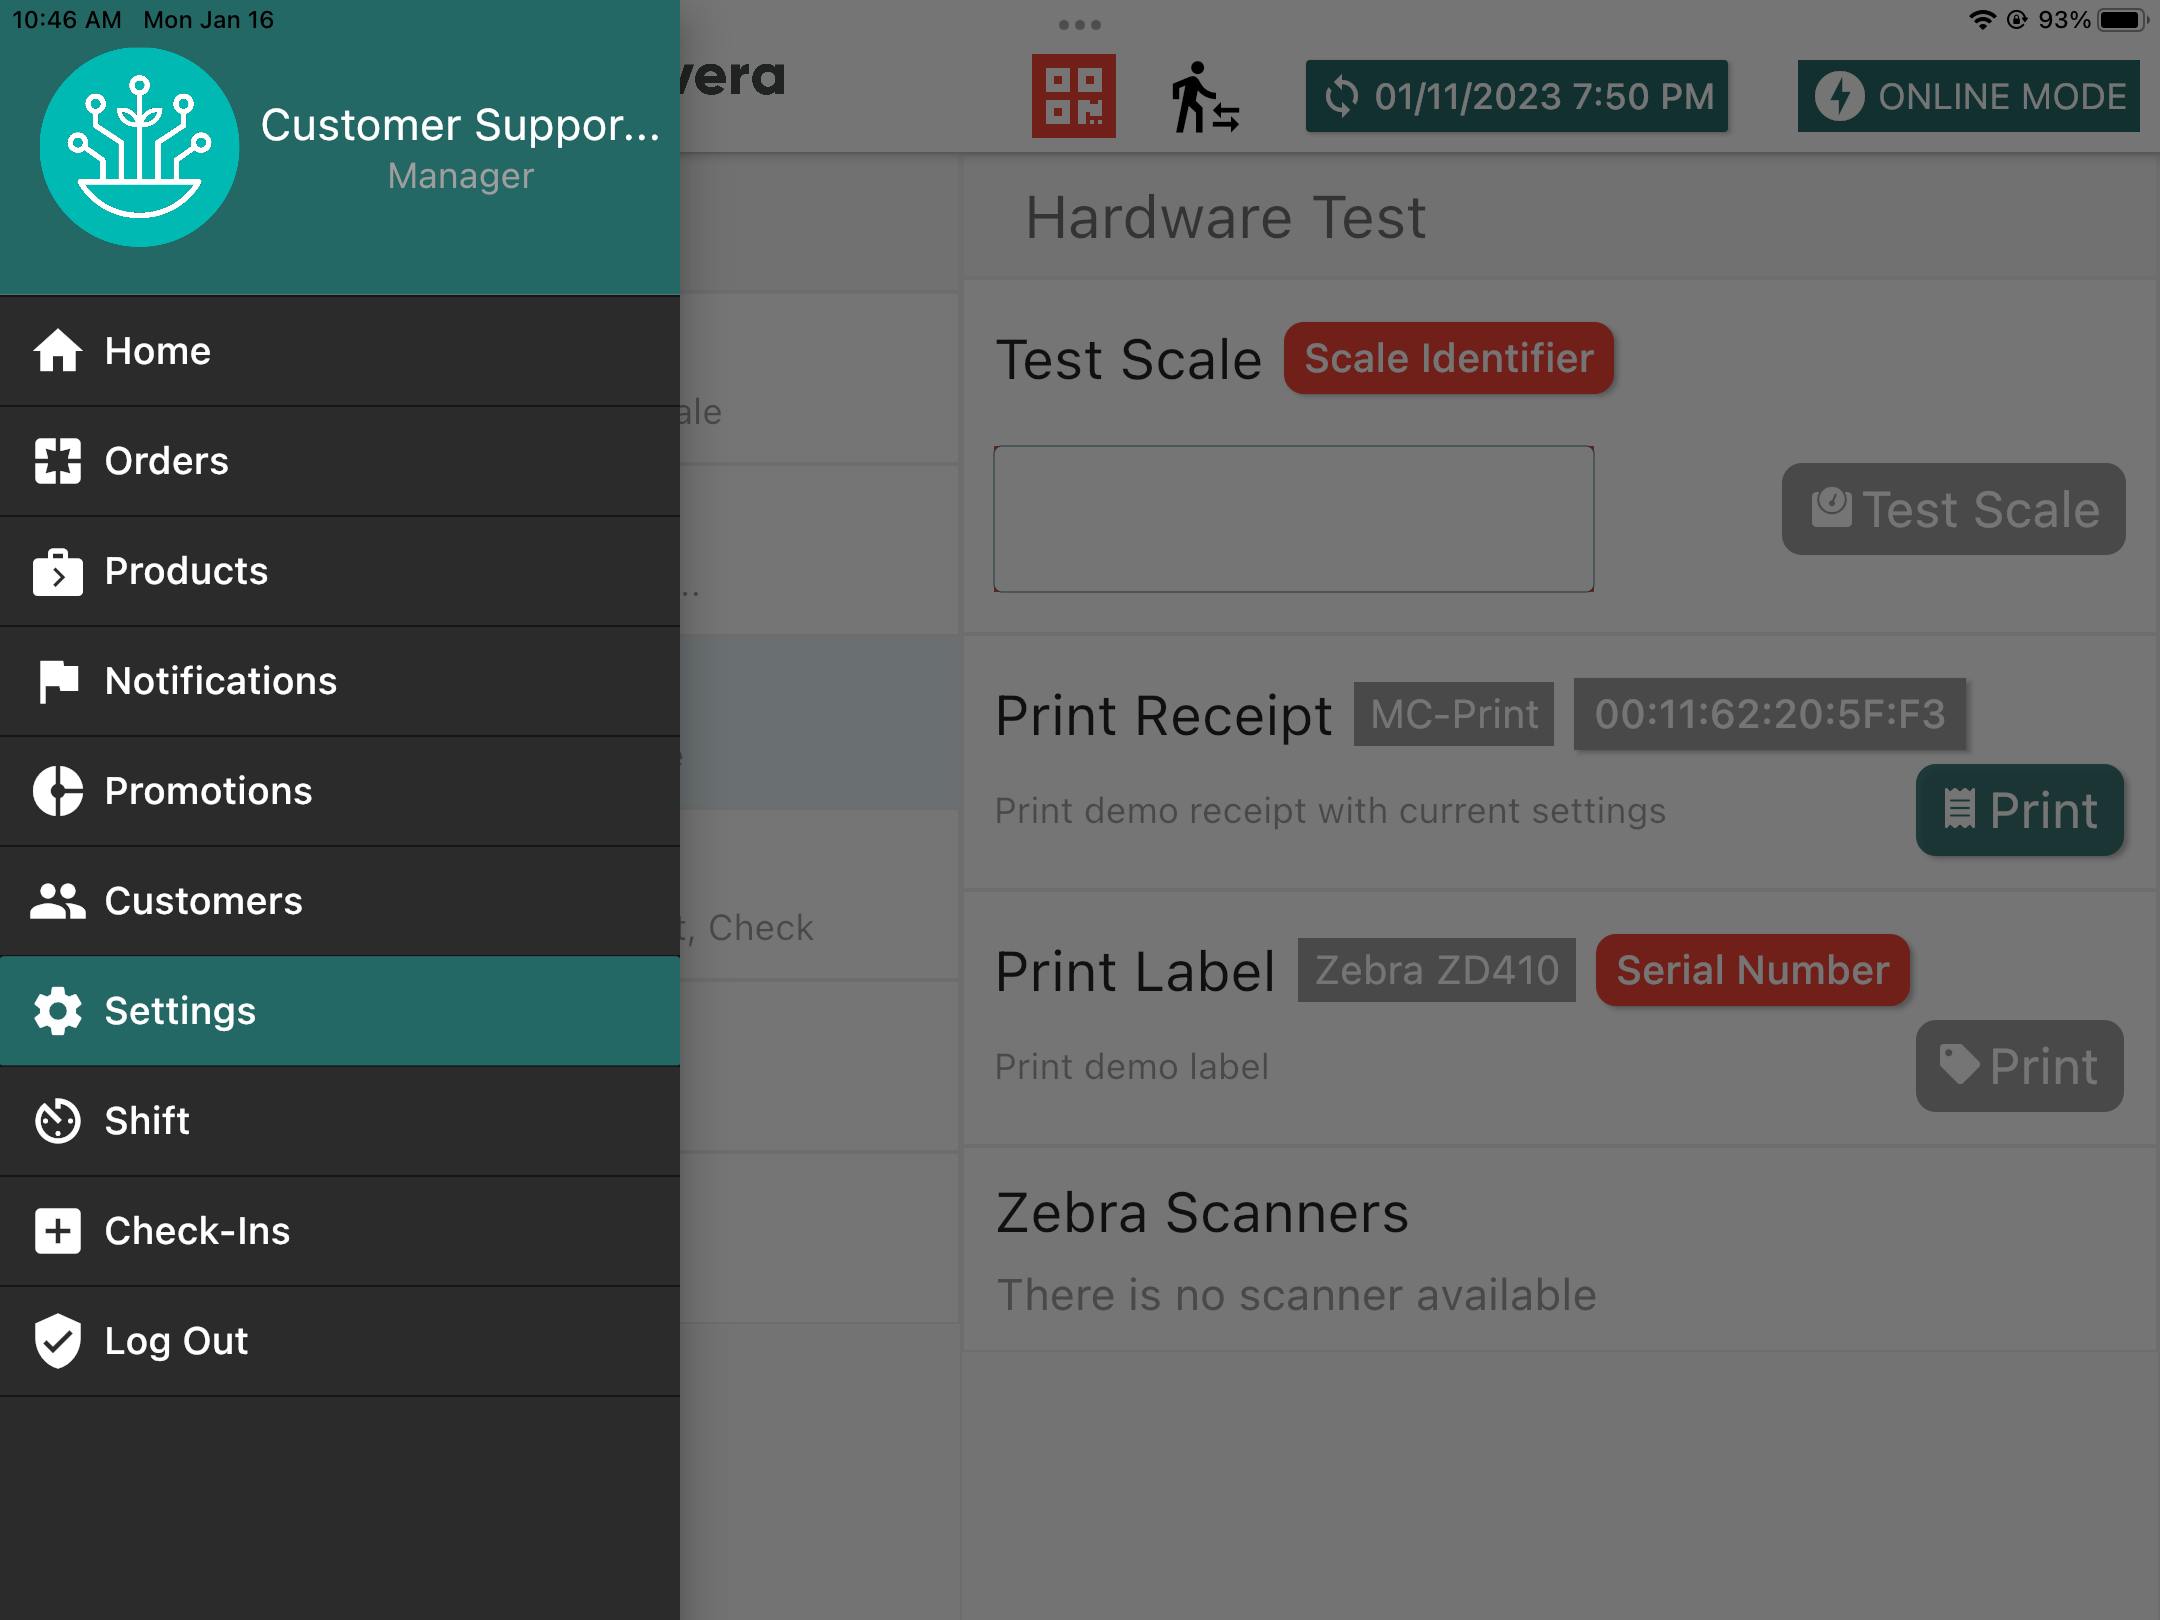
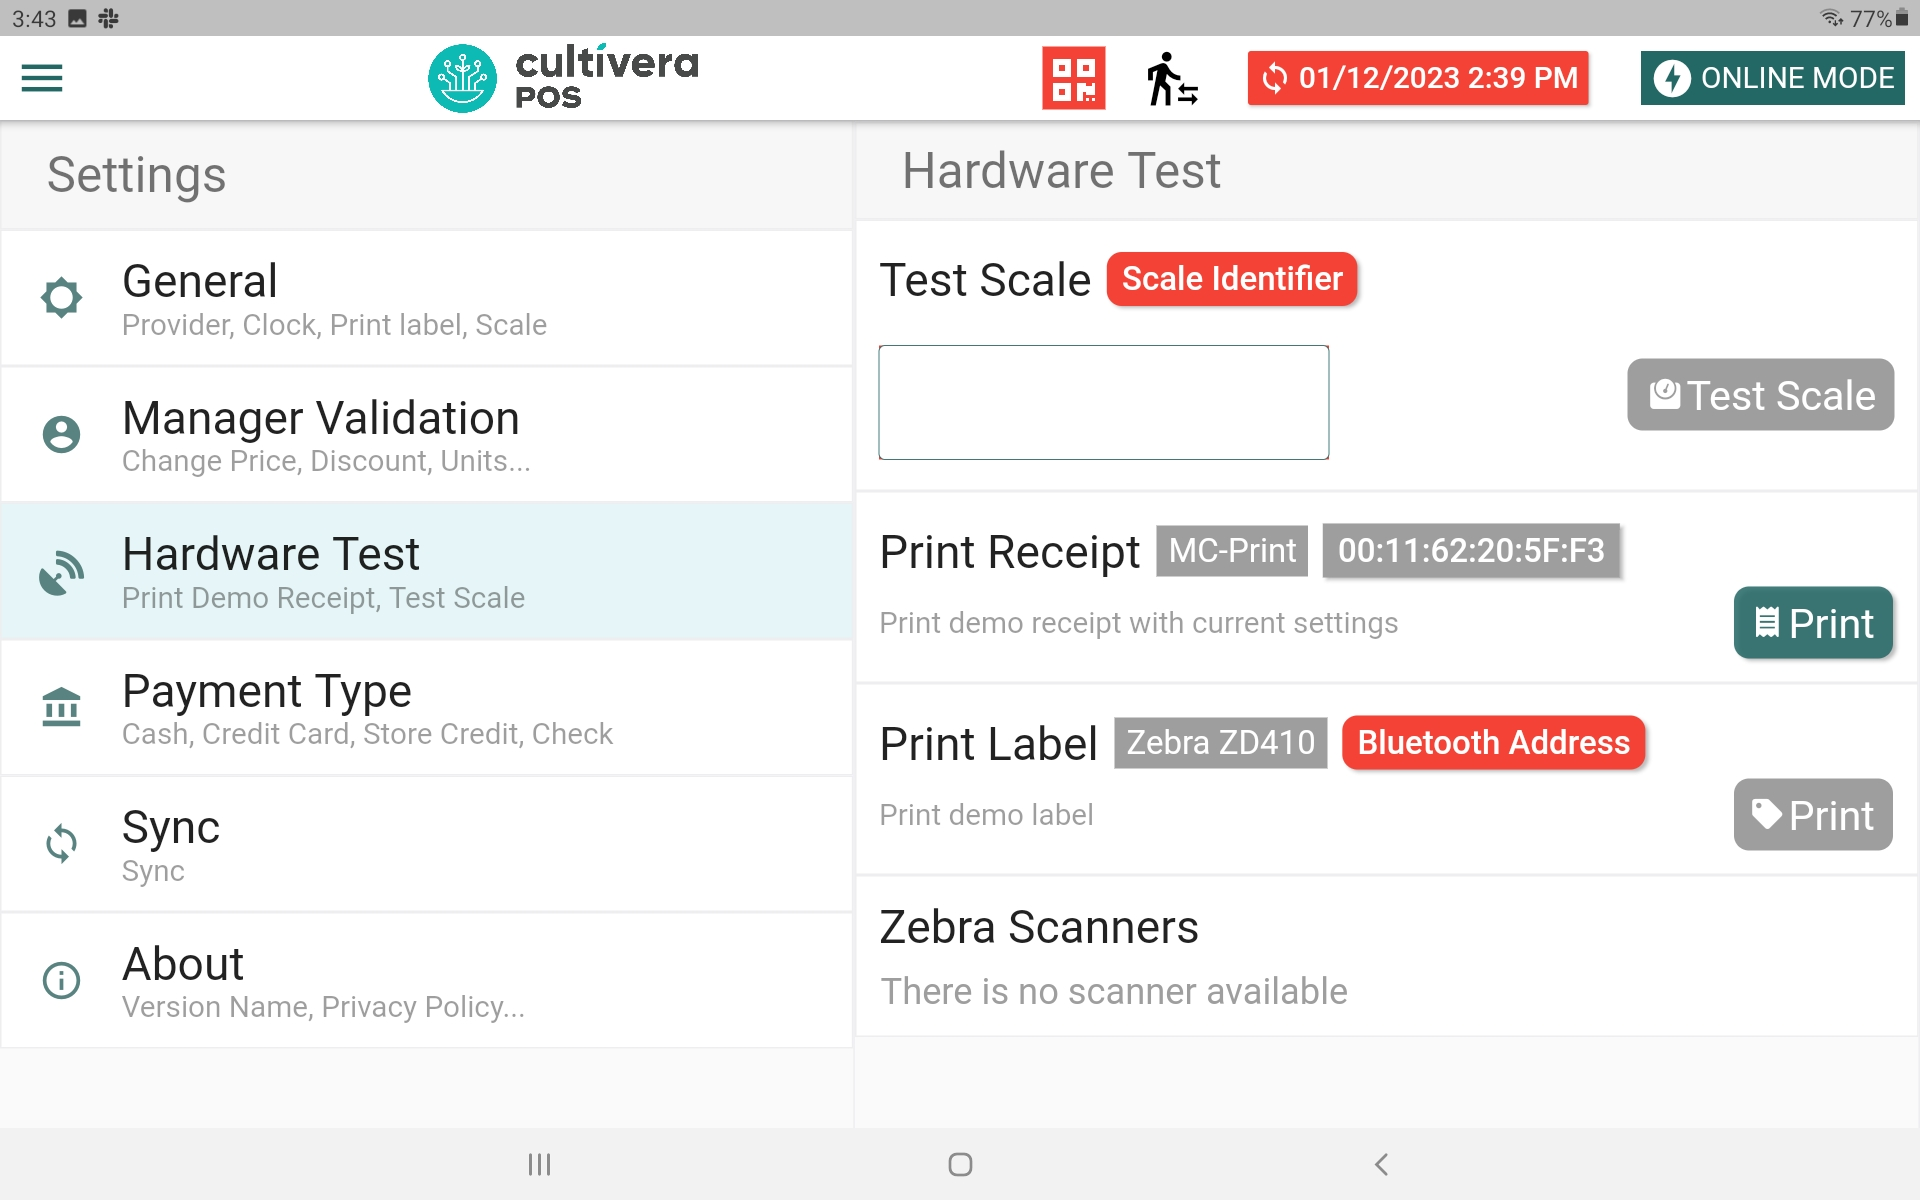
- Next, navigate to the settings page (Three horizontal lines in the upper left corner) at the Cultivera POS Terminal App.
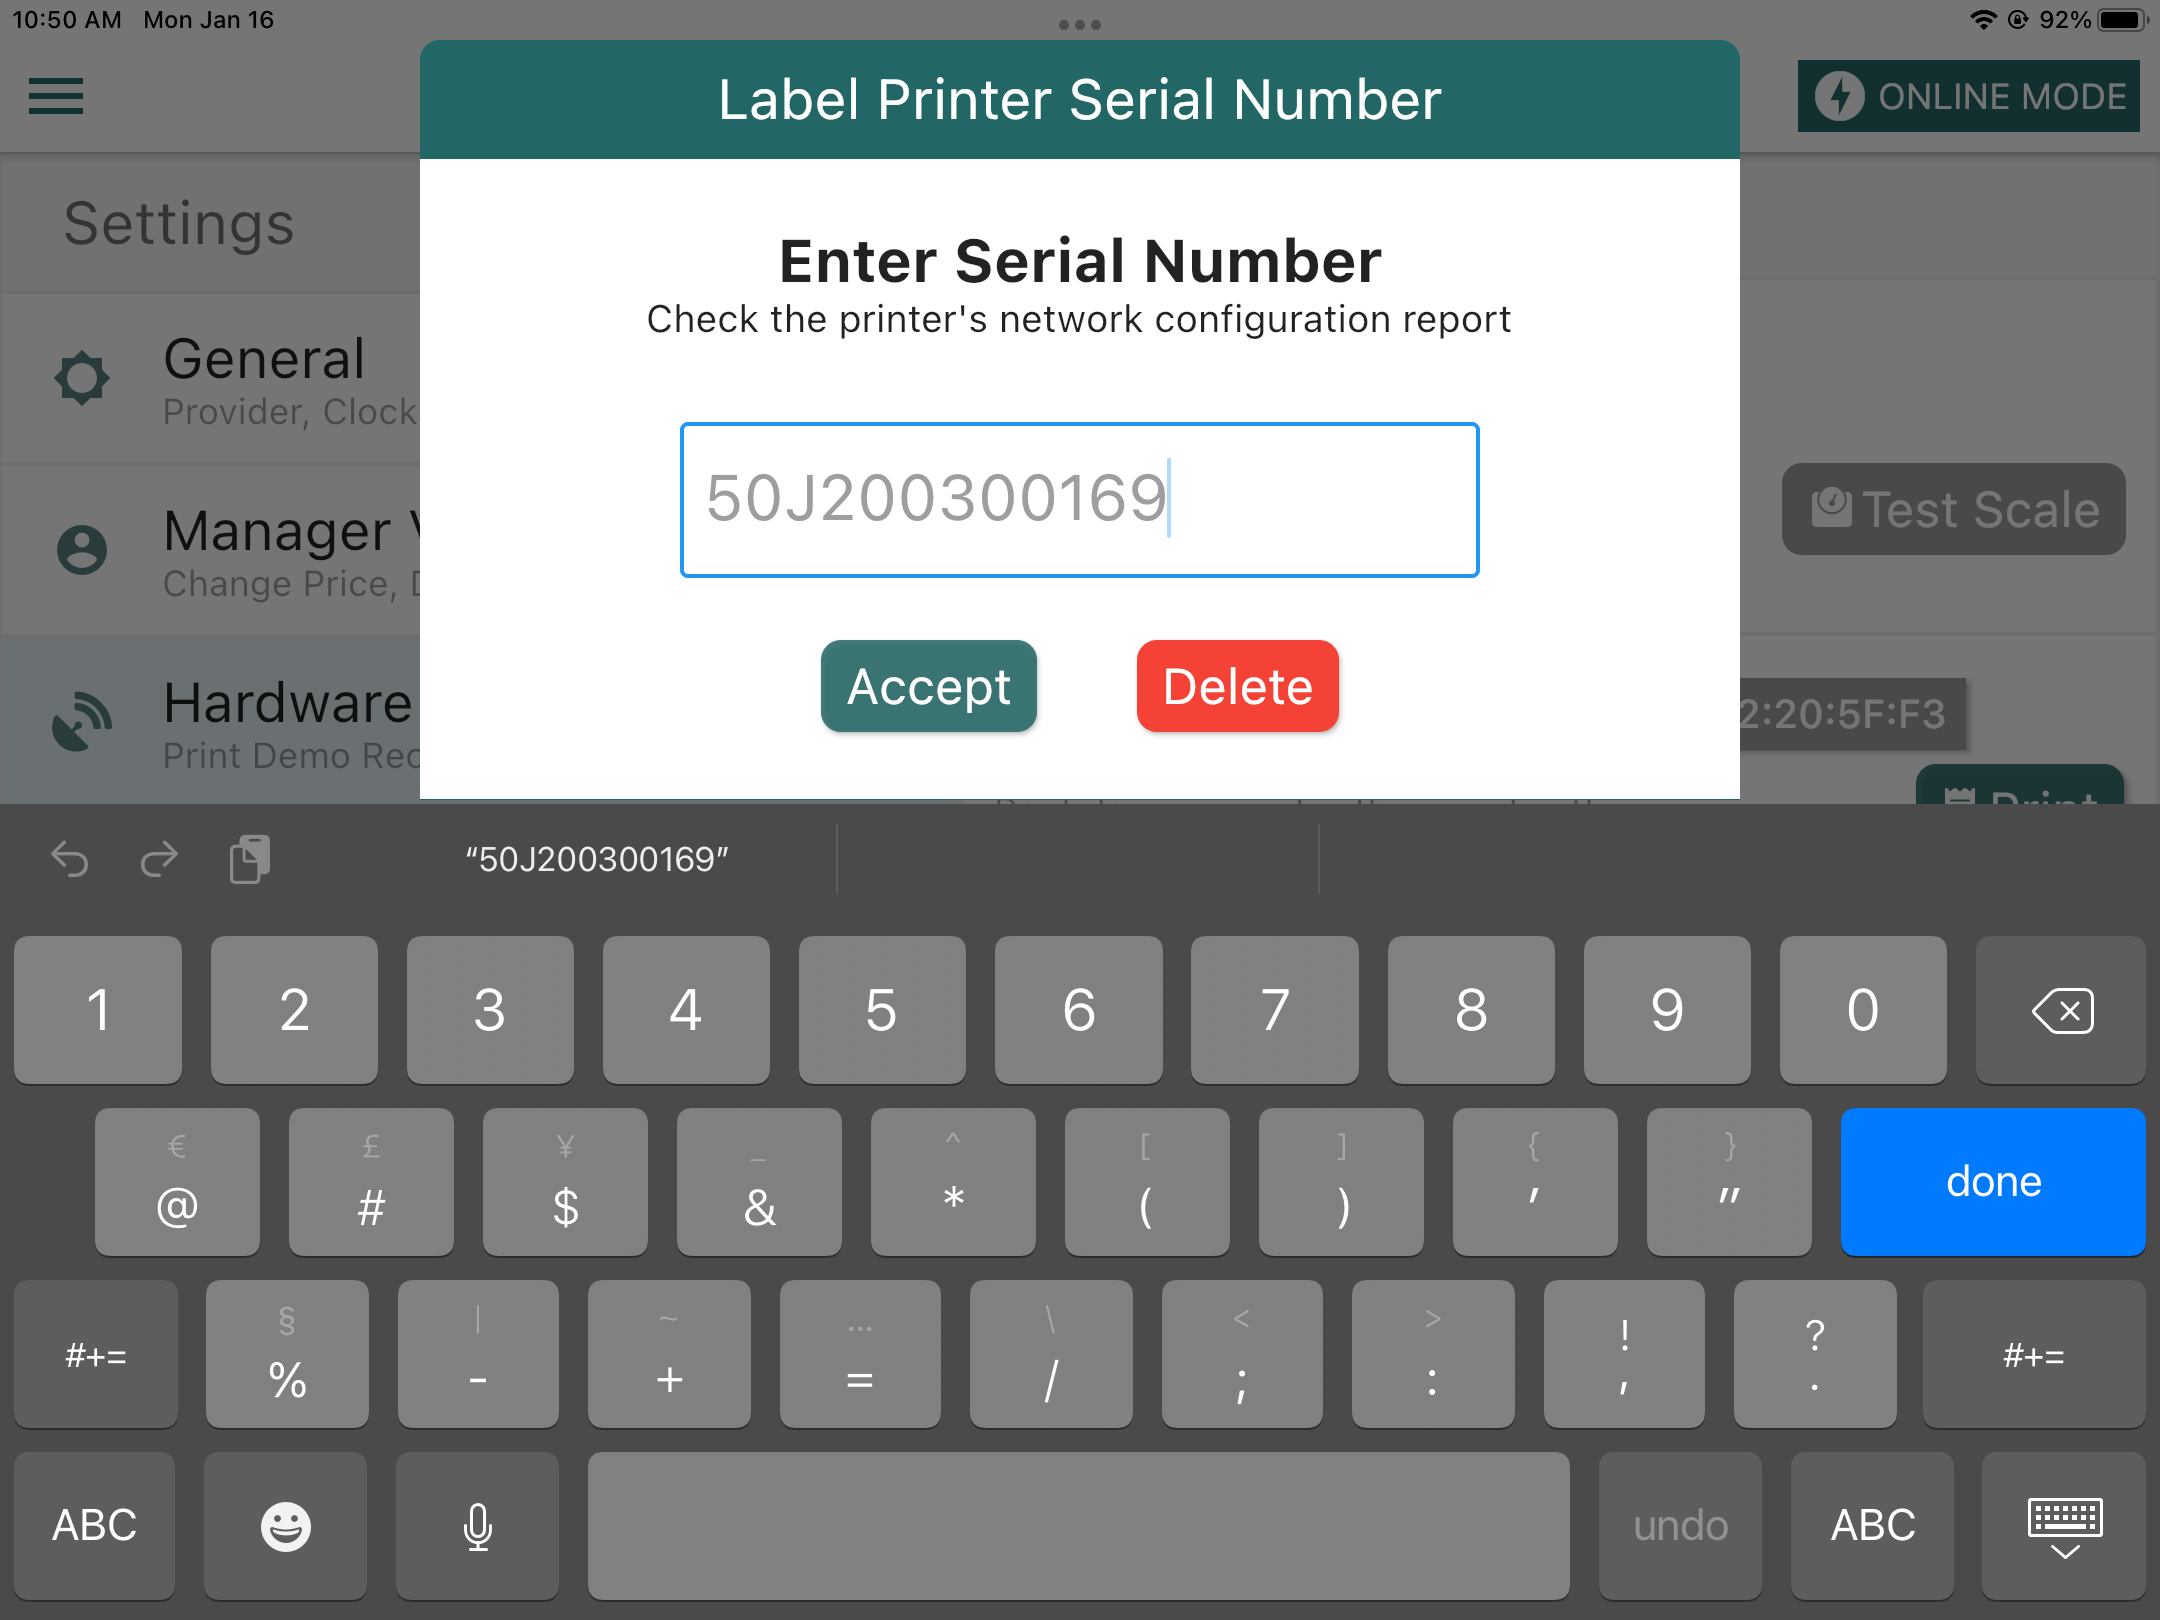
- After successfully pairing your printer to the iPad, you will need to enter the serial number from the Zebra printer device. Press the Serial Number button to input.
- After you've located the printers serial number, Enter it into the the Serial Number Field within the hardware page under settings.
- Once entered, you may perform a test print for your printer here by pressing the print button.
Connecting your Android tablet to the Zebra Label Printer via Bluetooth:
- To begin, set up your Zebra label printer and navigate to the location settings within the Administration module.
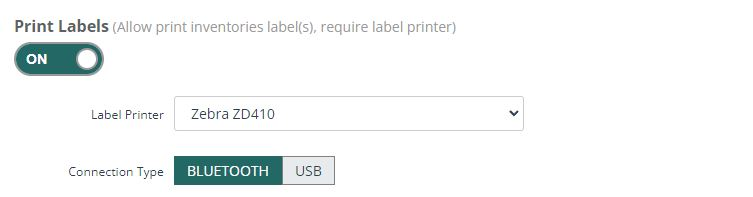
- Under the general settings, you can select the printer and connection type.
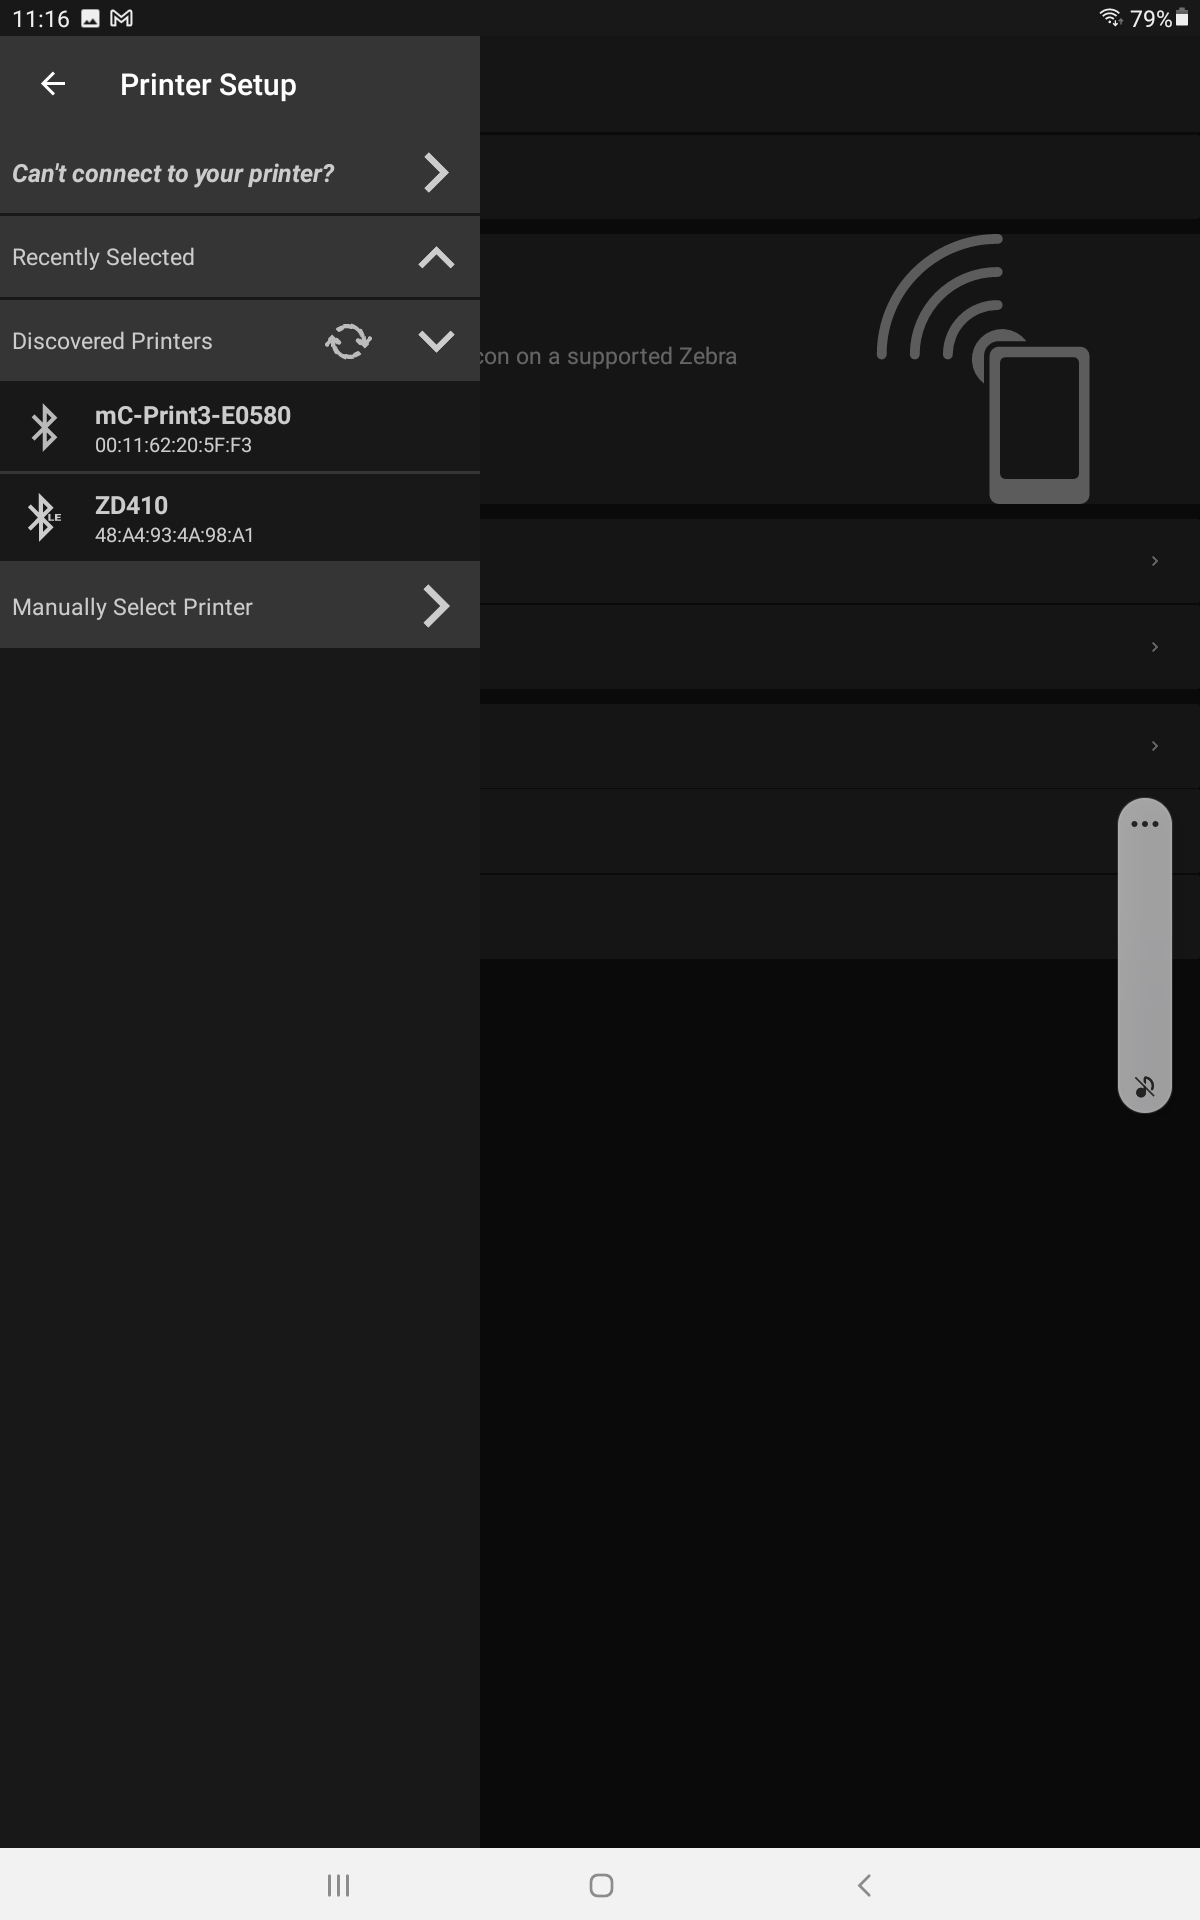
- You will need to discover the devices Bluetooth MAC address to connect the printer to the Cultivera POS app. You can obtain the MAC address needed by either printing a test page from the Printer, or using the Zebra Printer Setup app available in the Google Play Store. This walkthrough will provide steps for connection utilizing the Zebra Printer Set Up App.
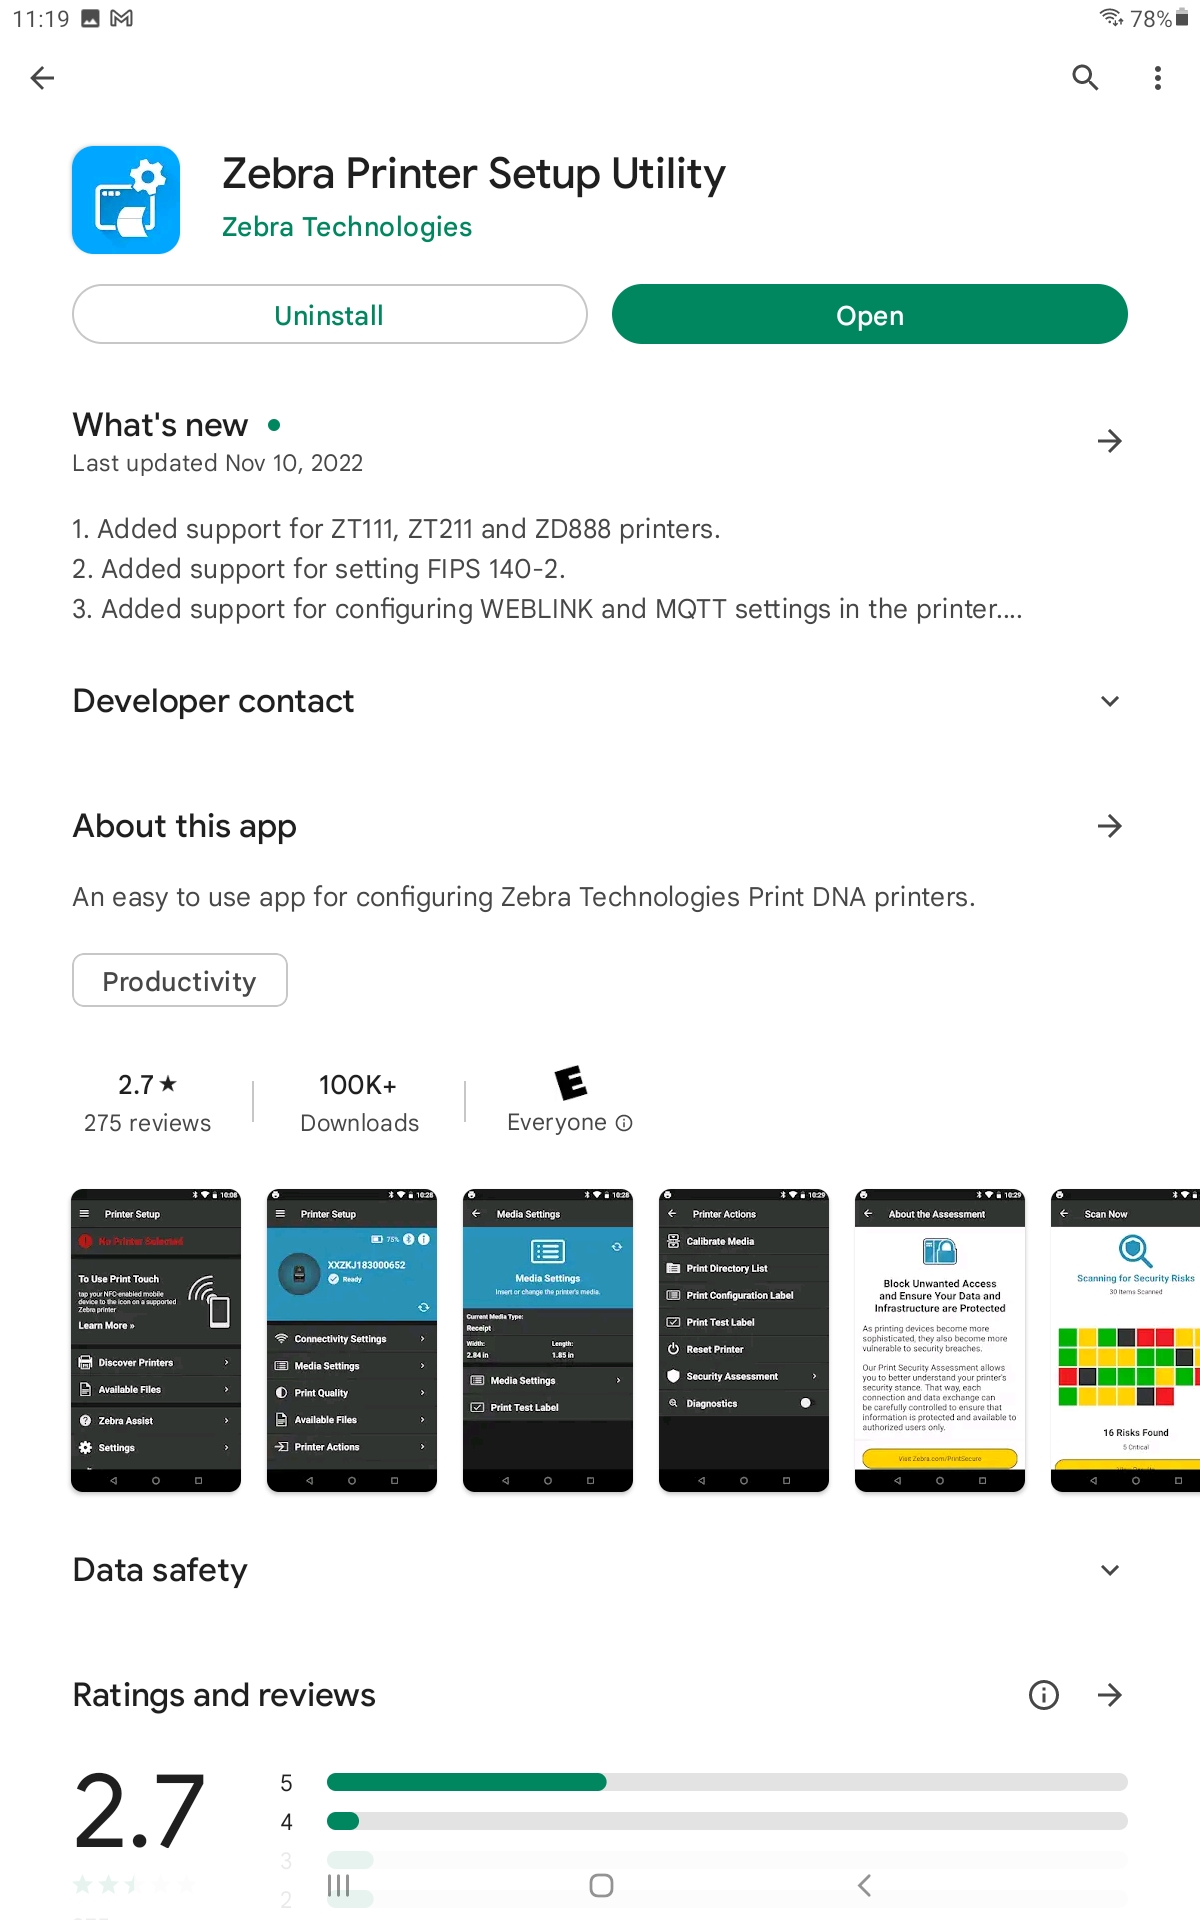
- Once downloaded, you may open the app to begin connection setup. Press the Printer Setup menu button in the upper left corner to locate your Zebra device.
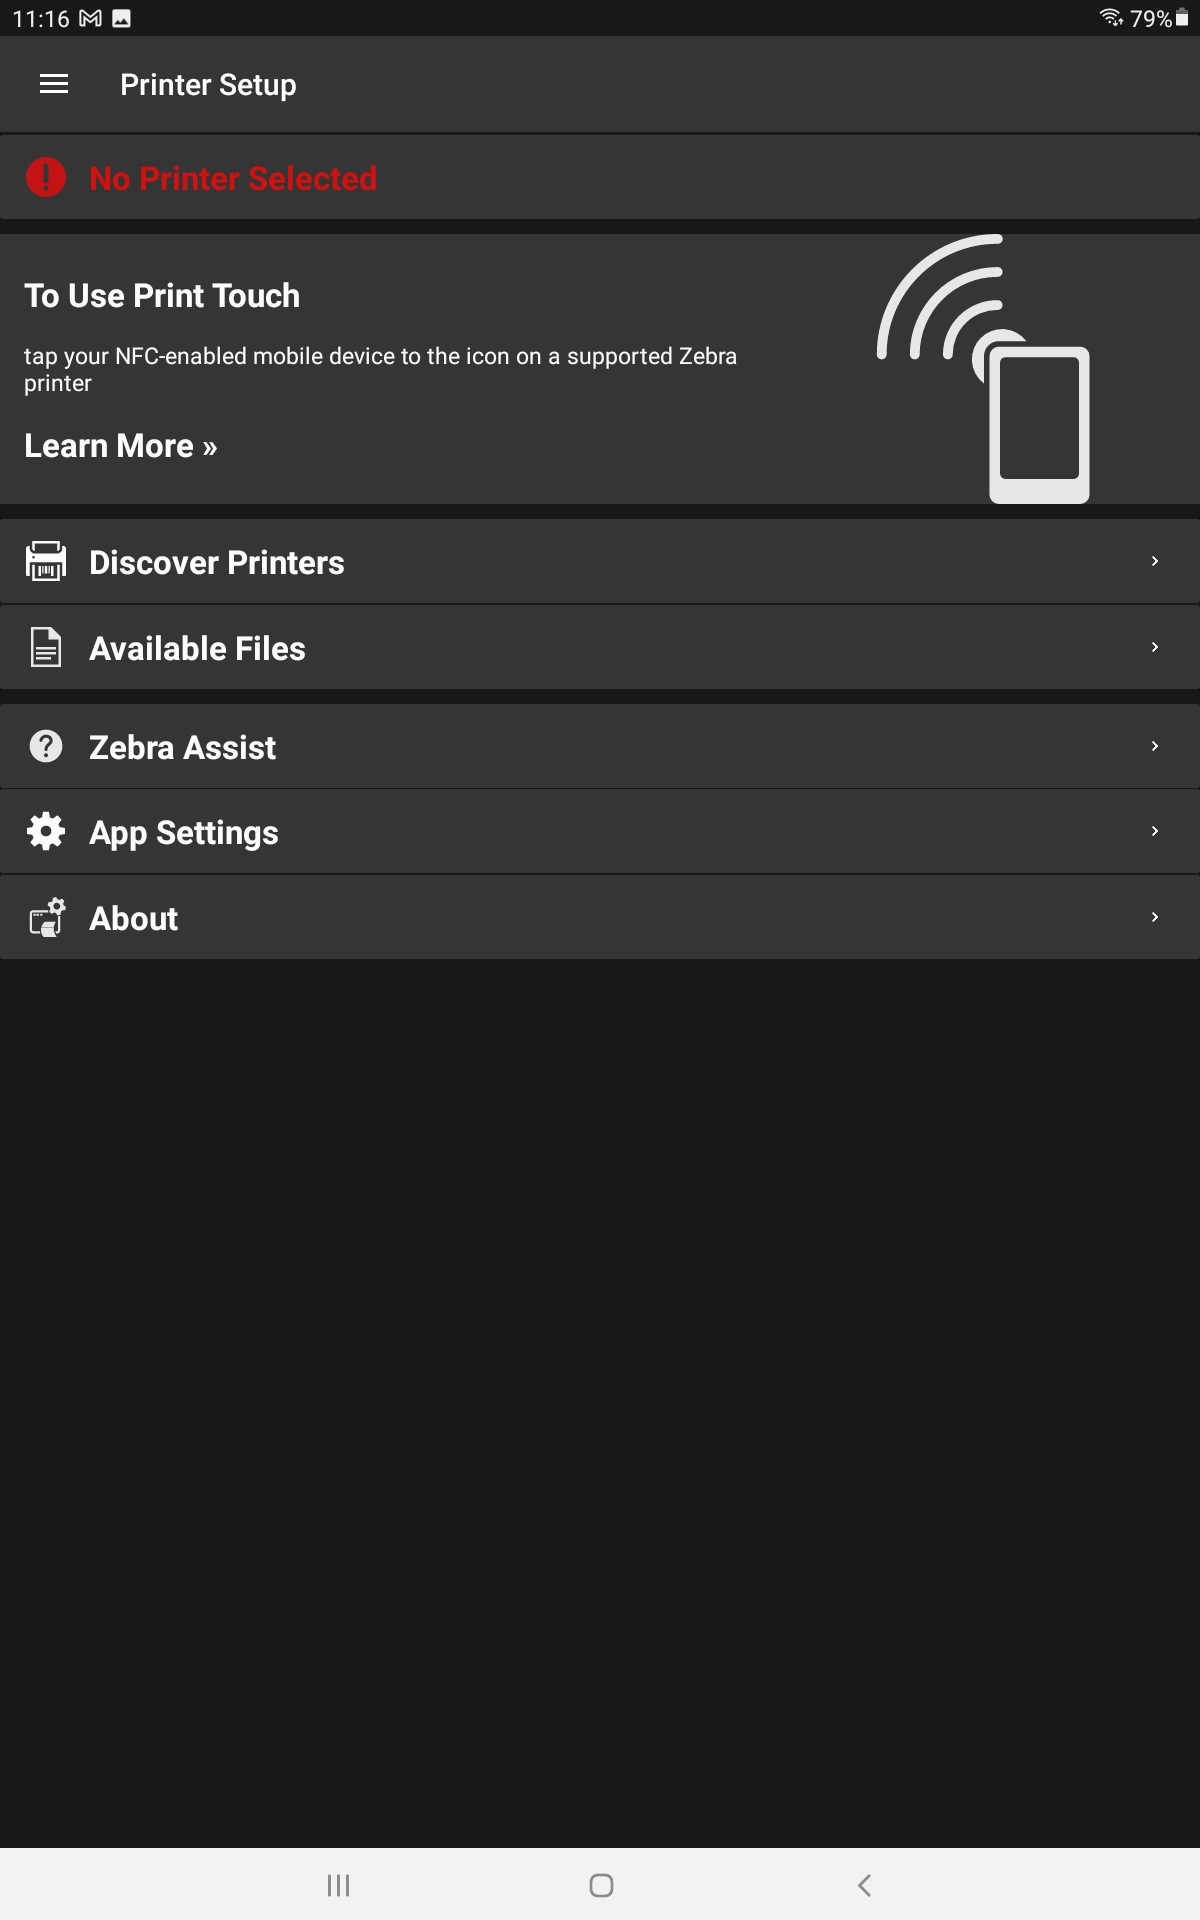
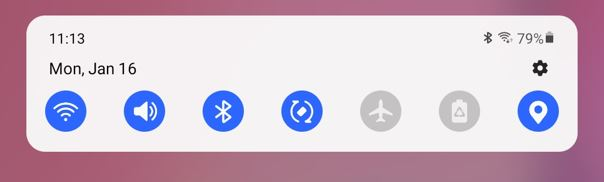
- In the printer setup page, you should now see your Zebra device. If not, make sure your Bluetooth is turned on in your tablet settings.
- If you're still not seeing a discoverable device, press and hold the feed button (In between the Pause and Cancel button) on your Zebra label printer for 3 seconds to initiate discovery mode. Once discoverable, Simply select the Zebra Printer device from the discovered devices.
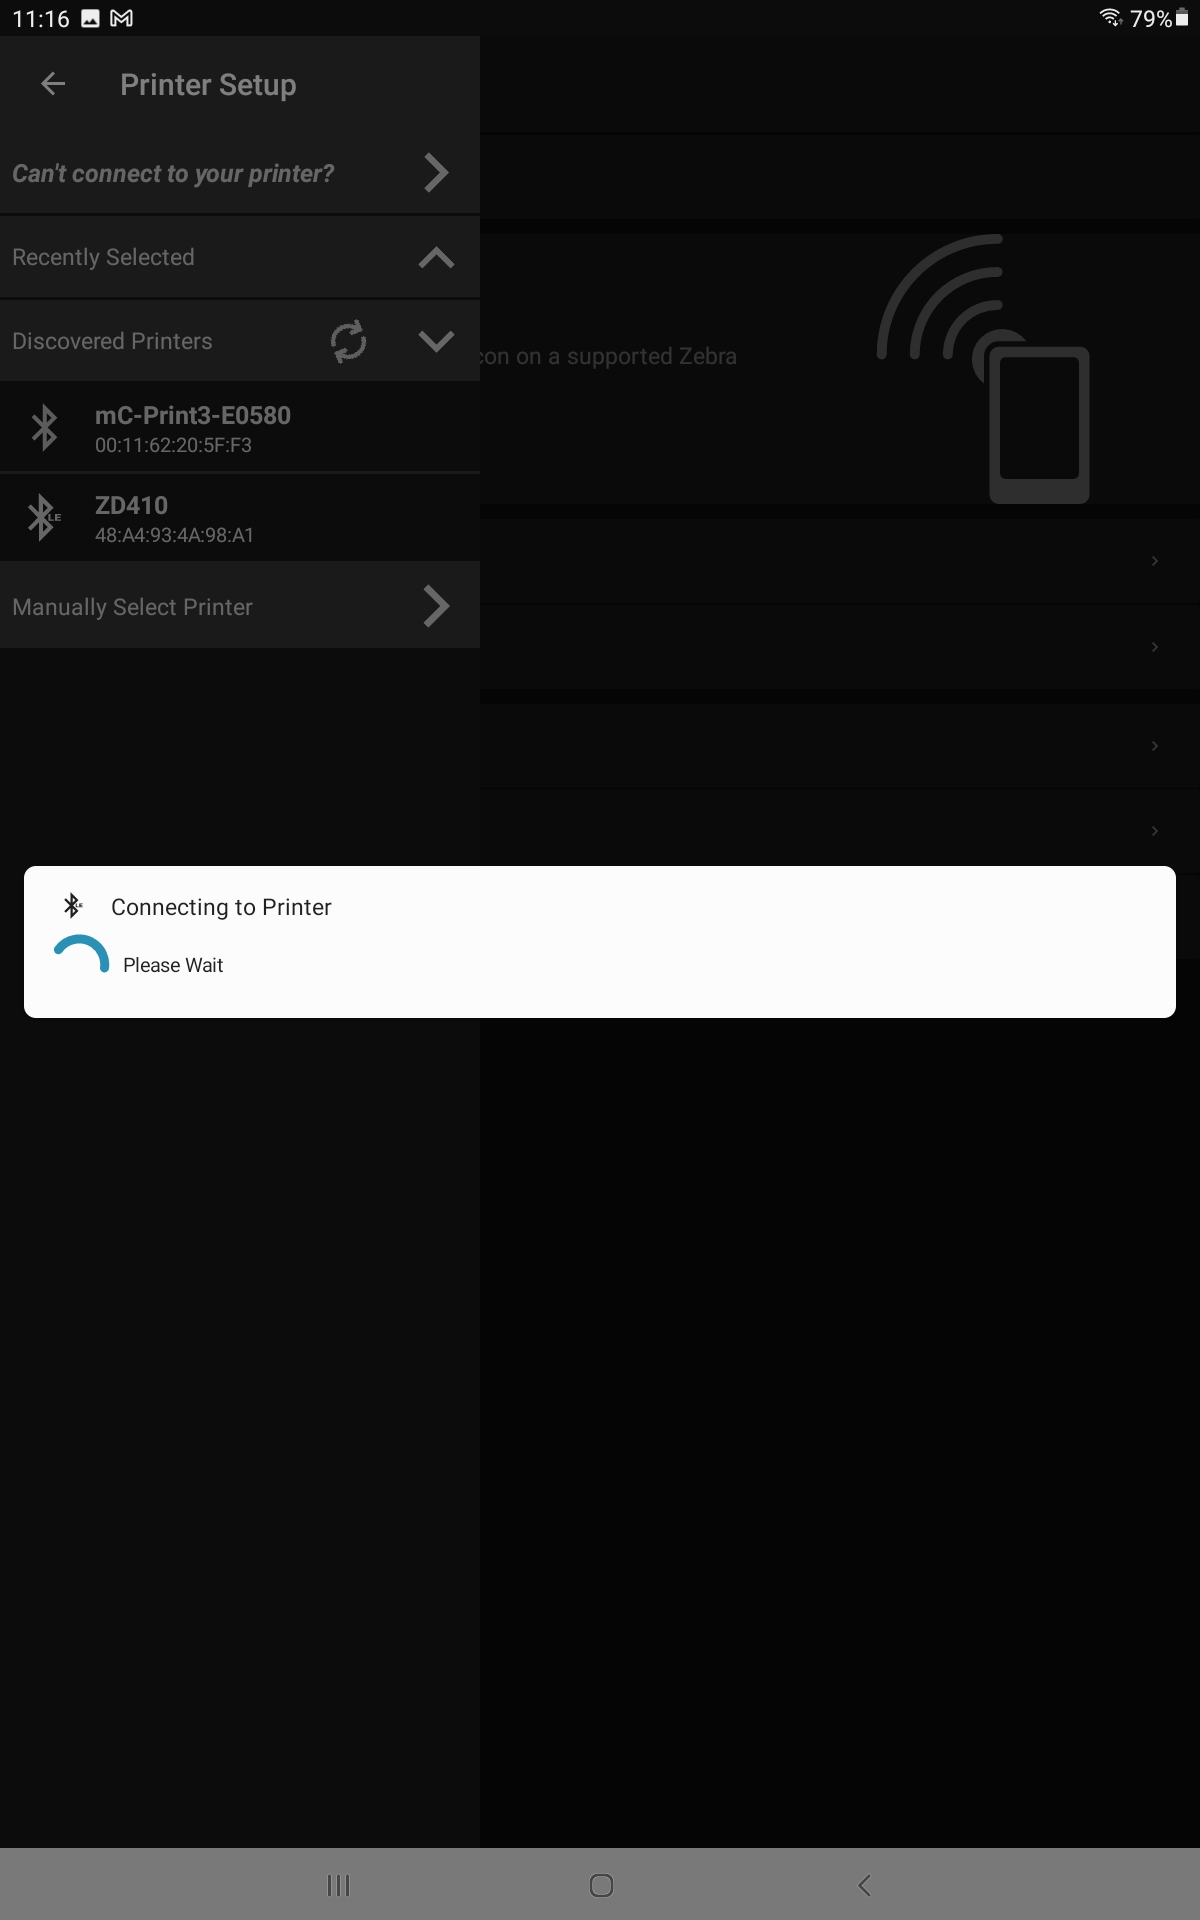
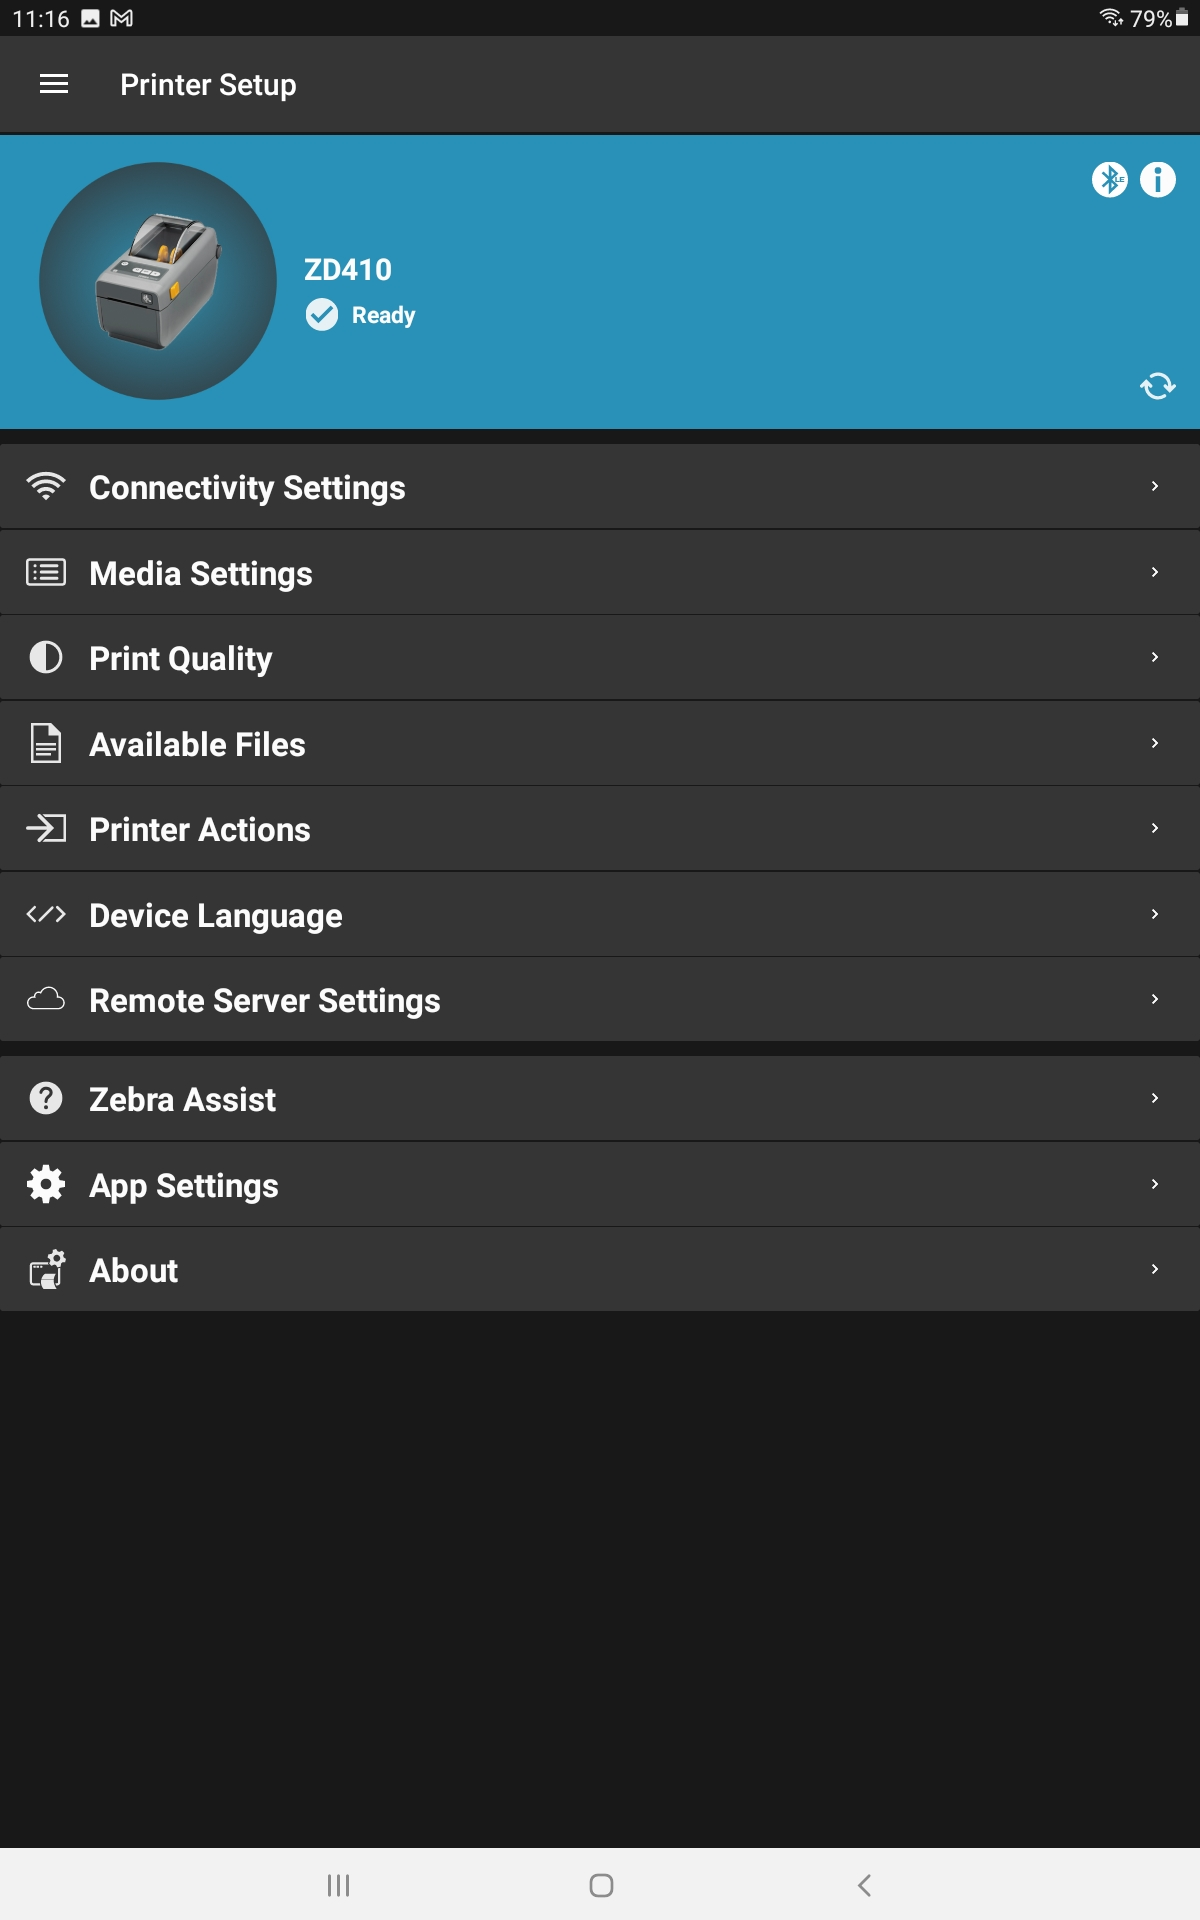
- After selecting the Zebra device, you should now see the device pairing. This may take a few moments. After the pairing is complete, you will be taken to the device information page.
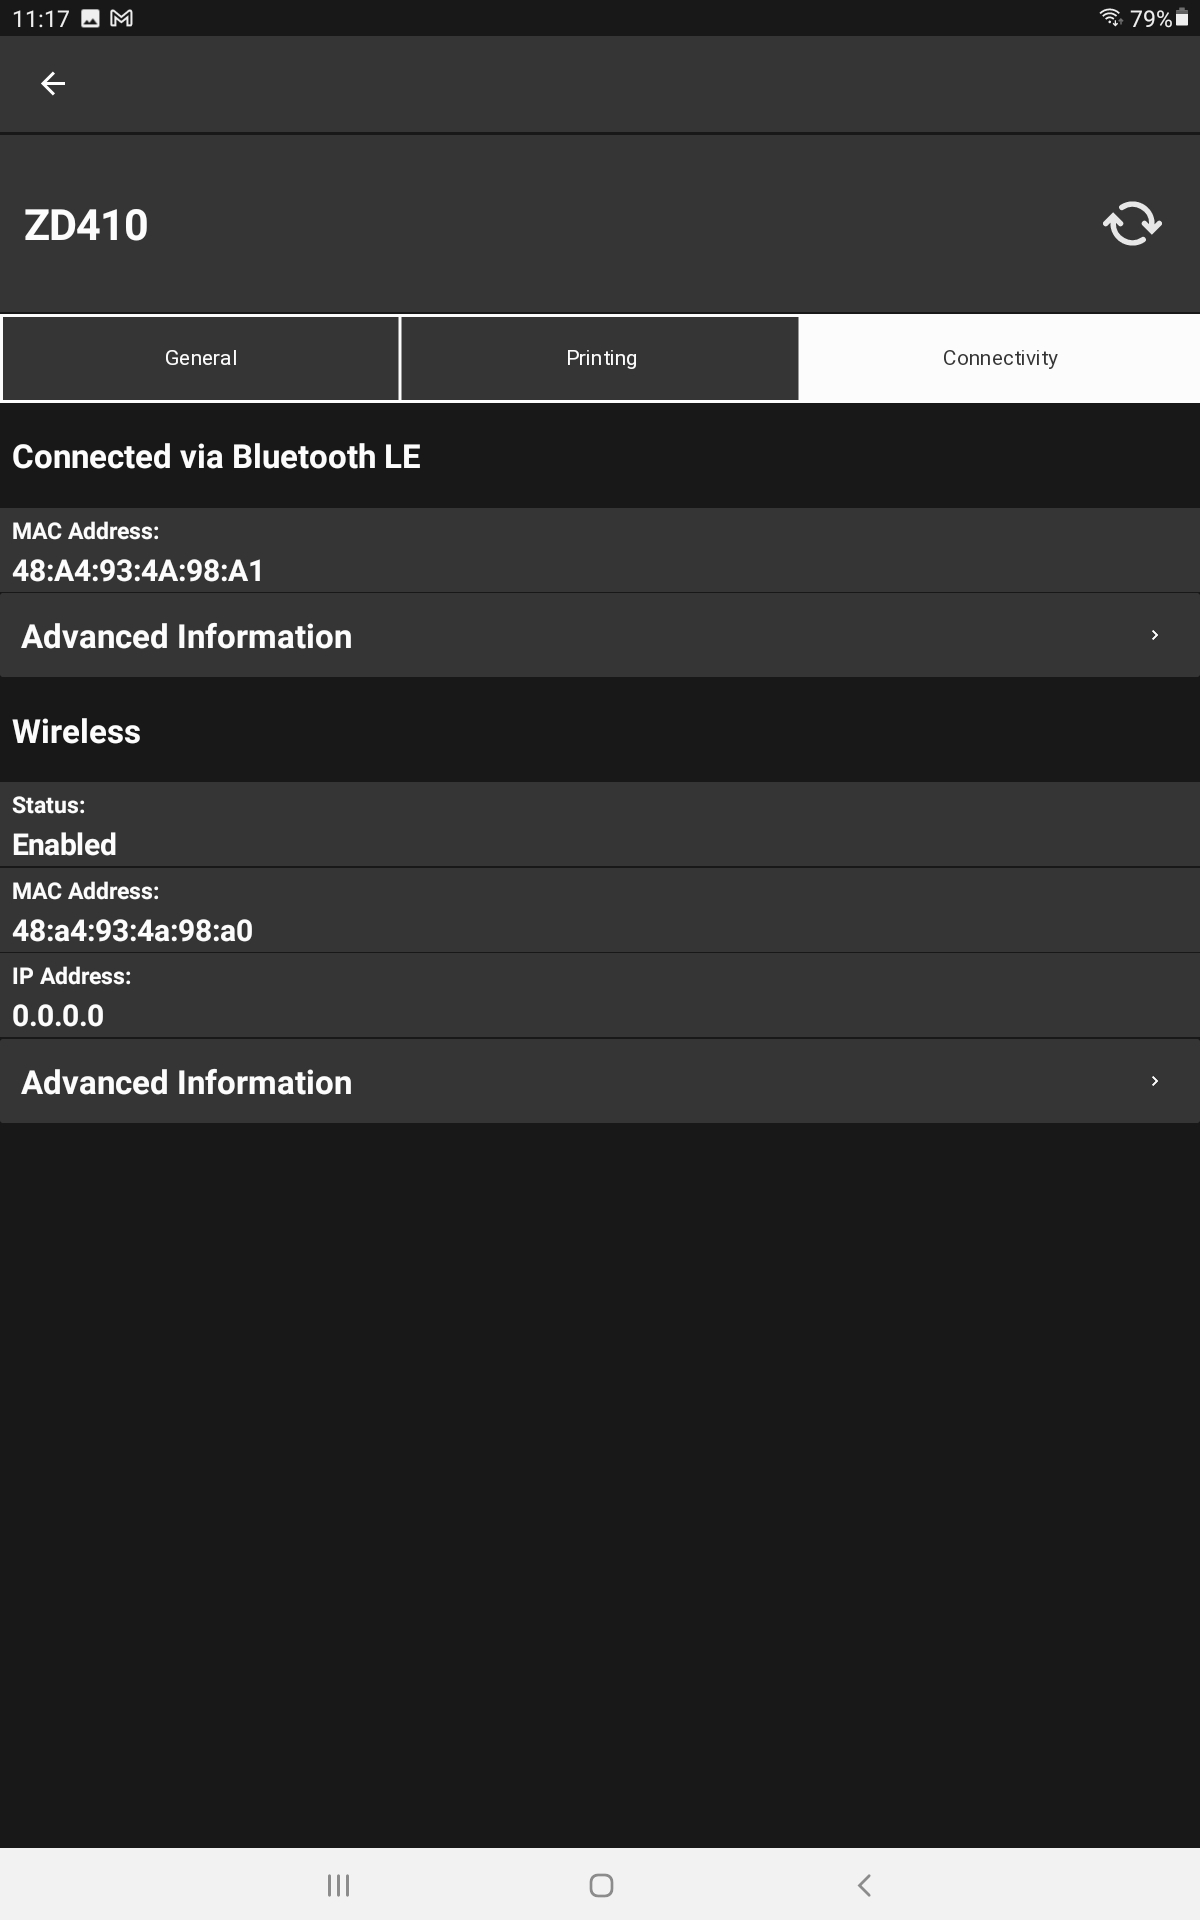
- From here, you can access the device info and find the Bluetooth MAC address needed to establish a connection with the Cultivera POS app on your Android tablet. Simply touch the device description to enter the connection details.
- After selecting the device, Select Connection to bring up your Bluetooth MAC address. You will need to input the address into the Bluetooth Connection field in the Cultivera POS app within the Hardware page in the terminal settings.
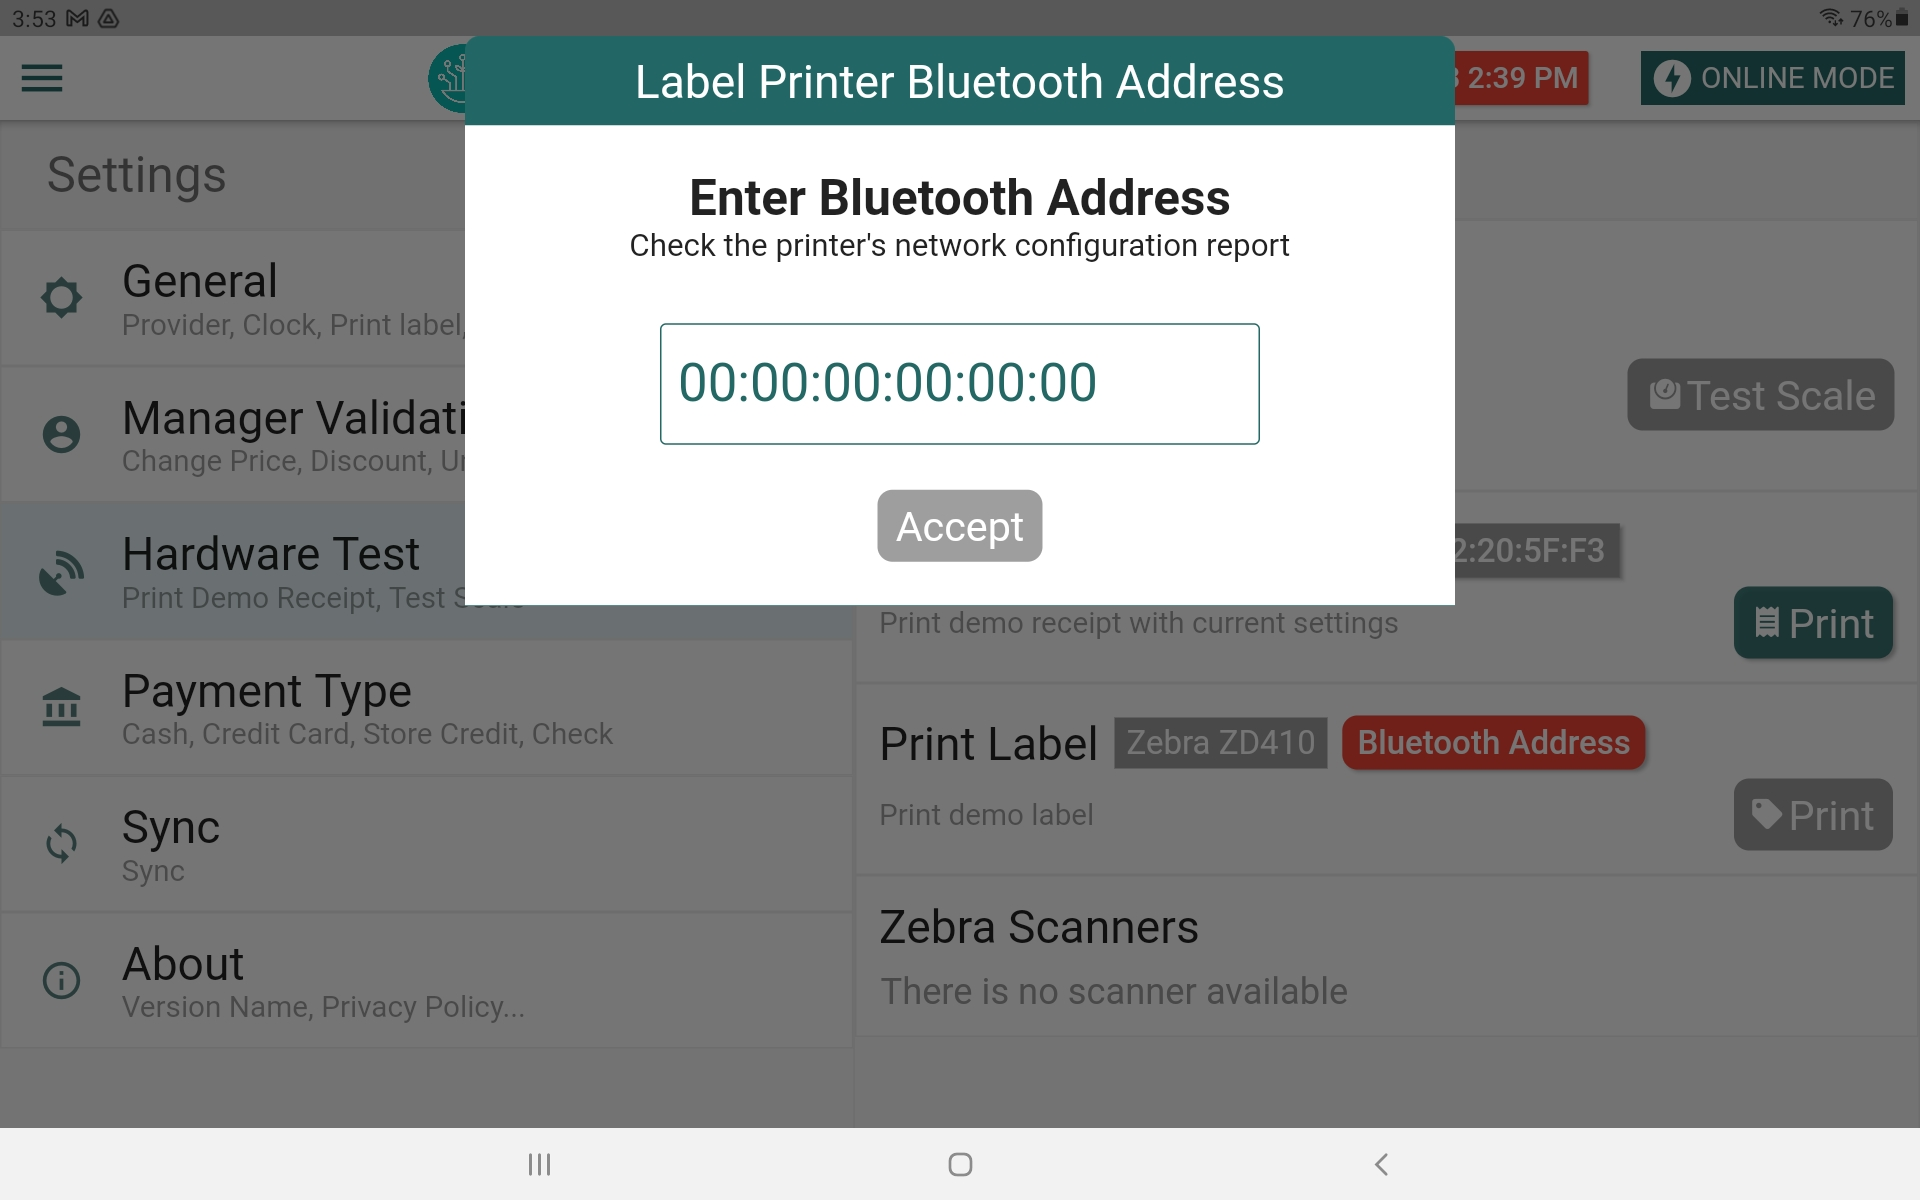
- Once the Cultivera POS app is open, press the menu button (three horizontal lines in the upper right corner) and Navigate to the Settings page. From here, select Hardware Test and press the red Bluetooth Address button.
- Now enter the Bluetooth MAC address you've gathered from one of the previously provided methods. Once complete, press the Accept button.
- Once your printer has been connected to your tablet and the Bluetooth MAC Address has been entered, you may now perform a test print from the Hardware page.
If you encounter any issues or if the printer still doesn't work as expected after resetting the device, it's advisable to contact Zebra's customer support (https://www.zebra.com/us/en/about-zebra/contact-zebra/contact-tech-support.html) or refer to the official documentation for troubleshooting guidance (https://www.zebra.com/content/dam/zebra_new_ia/en-us/manuals/printers/desktop/zd410d/zd410d-ug-en.pdf). They can provide specific assistance based on your printer's model and any unique issues you may be experiencing.