POS Onboarding: Administration Module > Location Settings
![]() Updated
Updated
Location Settings in the POS Administration Module
The Location Settings are where you'll tailor your Back Office to perfectly fit the needs of your business. This guide will walk you through each setting, explaining its function so you can configure your system to what suits your business best.
Please configure these settings within your newly created system and then let your Onboarding Rep know once it has been completed.
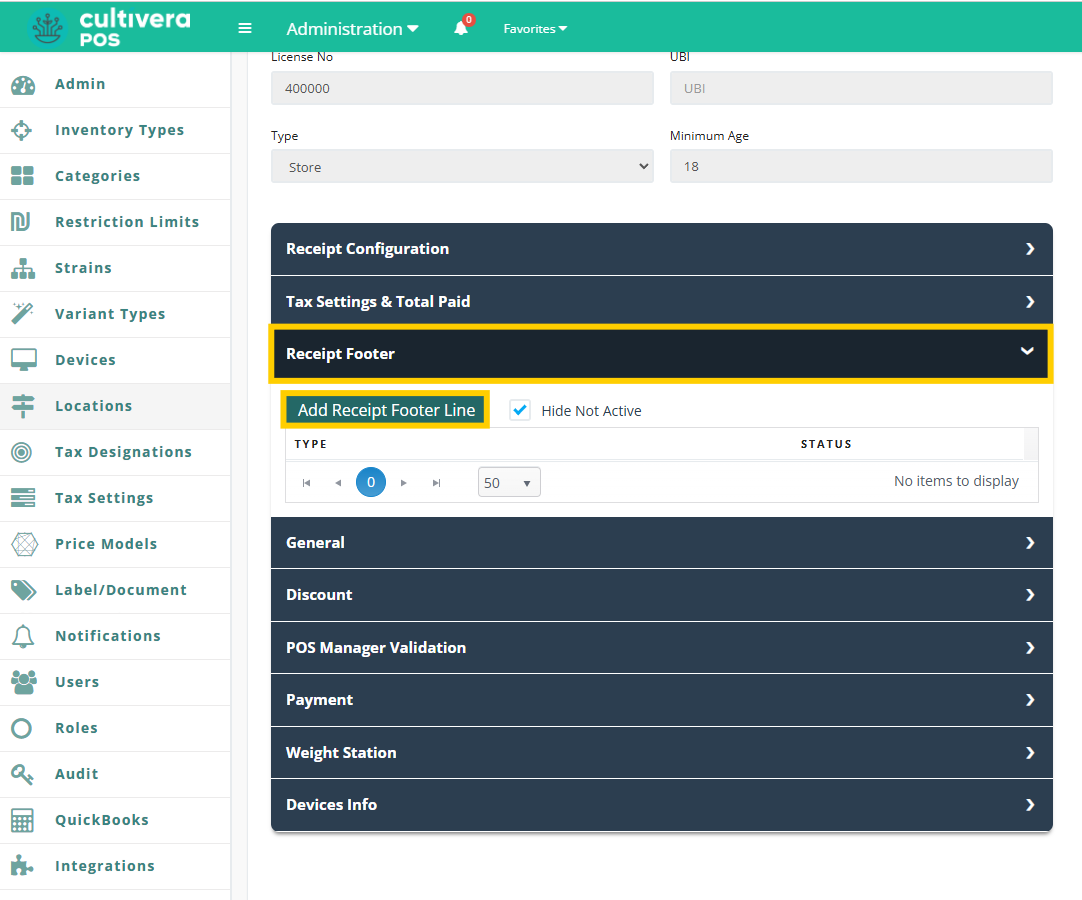
1) Receipt Footer
A receipt footer is the section at the very bottom of a printed or digital receipt.
While the main body of a receipt details the transaction (items purchased, prices, totals), the footer provides additional information that can be useful for both the customer and your business and is a dedicated space for important messages, branding, or practical details that enhance the customer experience or serve a business purpose.
Below are the steps to add or edit receipt footers.
- Navigate to Administration > Locations > select green Location link.

- Scroll down and select "Receipt Footer" > "Add Receipt Footer Line".
- Fill in the following fields and then select "Add" once complete.
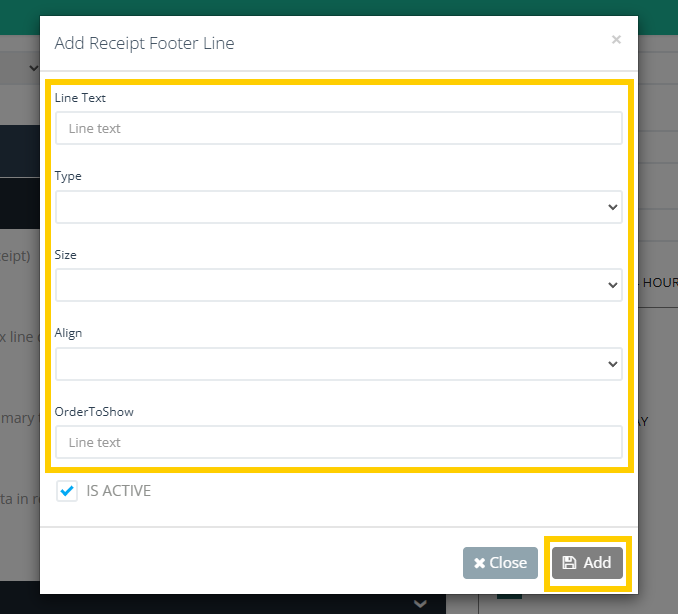
- You will then see your newly created footer displayed under "Receipt Footer".
- You can select the orange "Edit" button anytime you need to change or modify the footer.

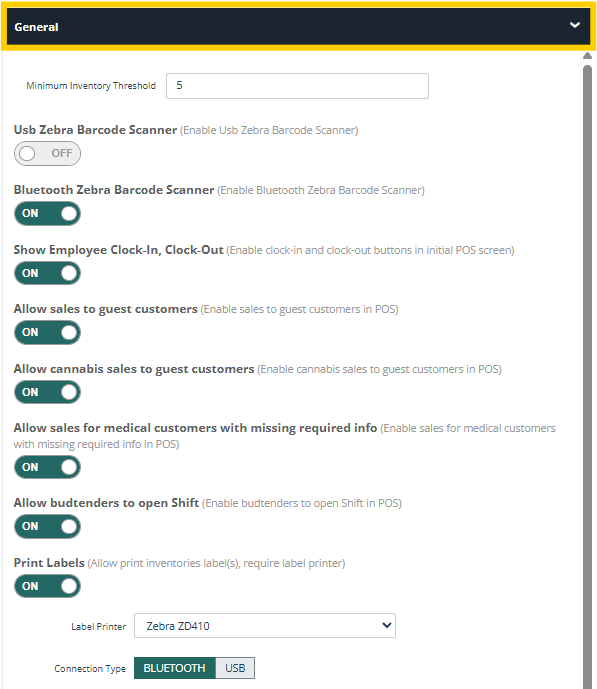
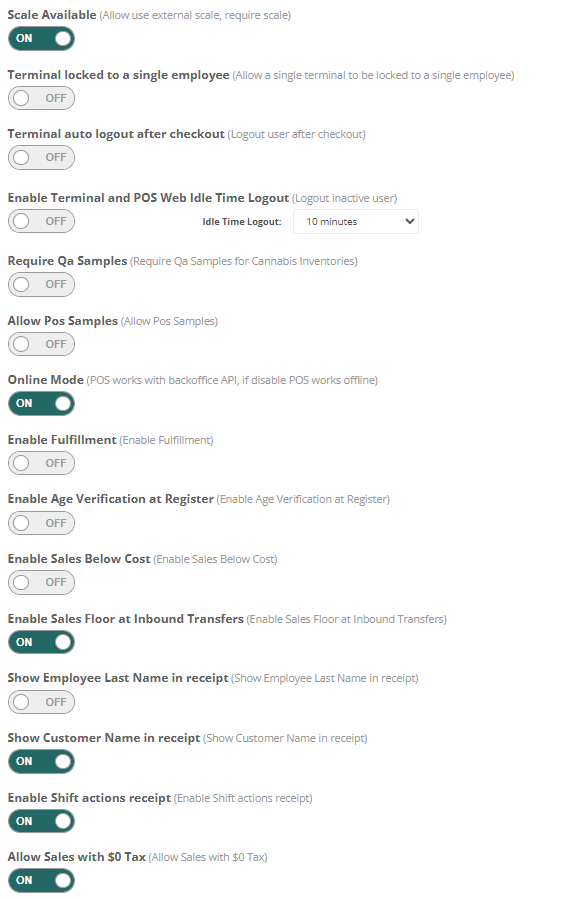
2) General
The General section features various toggles and input fields that control core operational behaviors and preferences. You can toggle these settings ON or OFF depending on the needs of your business.
If you have any questions regarding these toggles, please reach out to your Onboarding Rep for clarification.
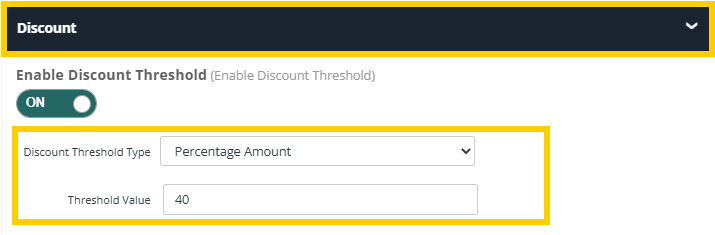
3) Discount Threshold
When toggled ON, the Discount Threshold controls the maximum discount that can be applied, preventing any discounts from exceeding the set limit. This can be configured as a Percentage amount or a Dollar Value amount.
4) POS Manager Validation
When toggled ON, the POS Manager Validation feature will require a Manager's PIN for approval whenever the specified function is being performed at the terminal.
When prompted, the Manager must input their unique PIN in order to proceed with the completion of the transaction.

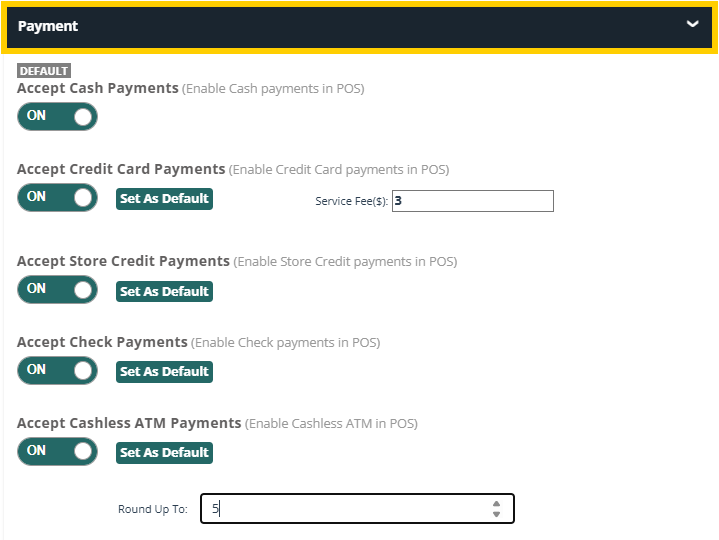
5) Payment
The Payment toggles will reflect what payment types will be available to select when processing a transaction at the terminal.