PRO (WA): Transfer Inbound (Manual Entry/JSON Import)
![]() Updated
Updated
Entering an Inbound Transfer in Cultivera
See the steps below to learn how to complete an inbound transfer of inventory via manual entry or a JSON link/file.
Creating a New Inbound Transfer Manually (without JSON Link/File)
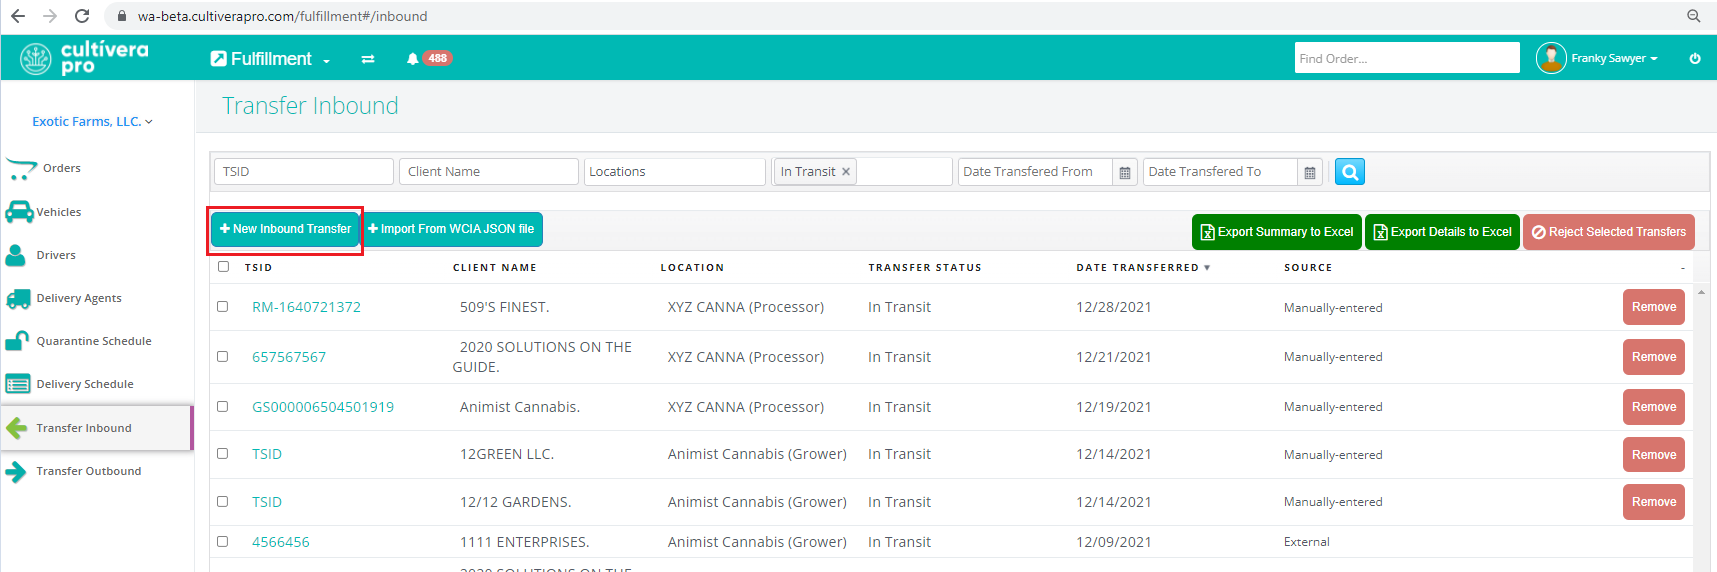
- Navigate to Fulfillment > Transfer Inbound and select "New Inbound Transfer".
- Select the "Transferred From" license (this will be the sending license) and the "Transferred To" (this will be your license that is receiving the Inbound Transfer). Then enter the Transfer ID/TSID and Date, and select "Create Transfer".

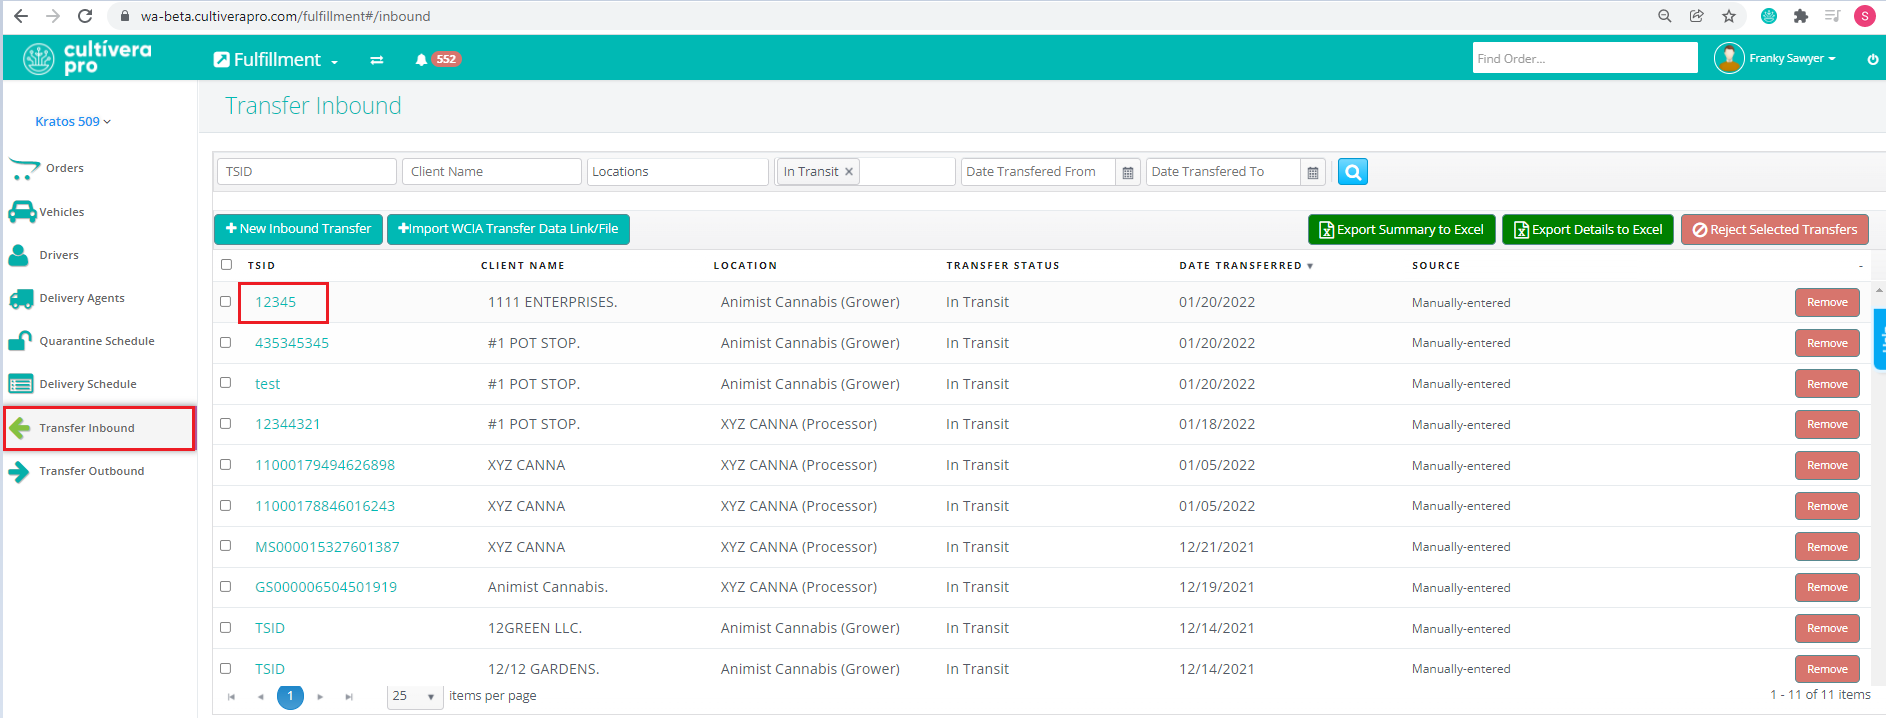
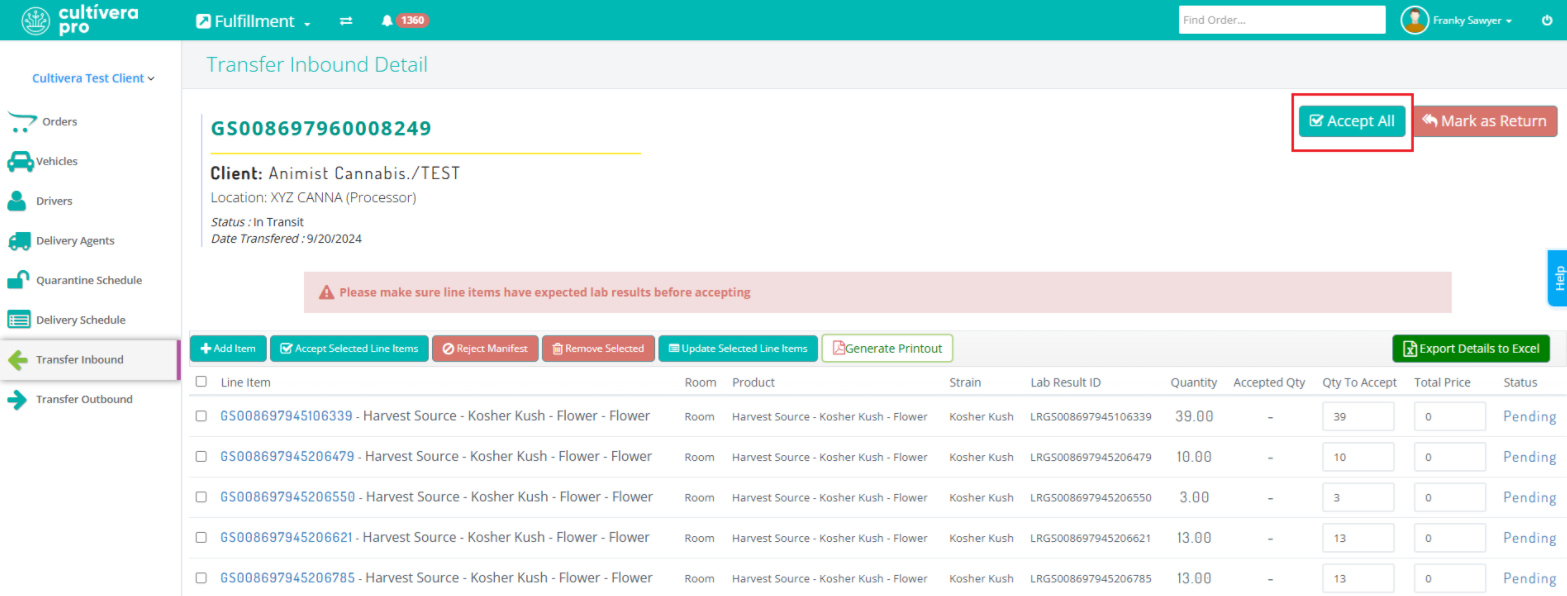
- Click on the TSID of the new Inbound Transfer to view the "Transfer Inbound Details" page.
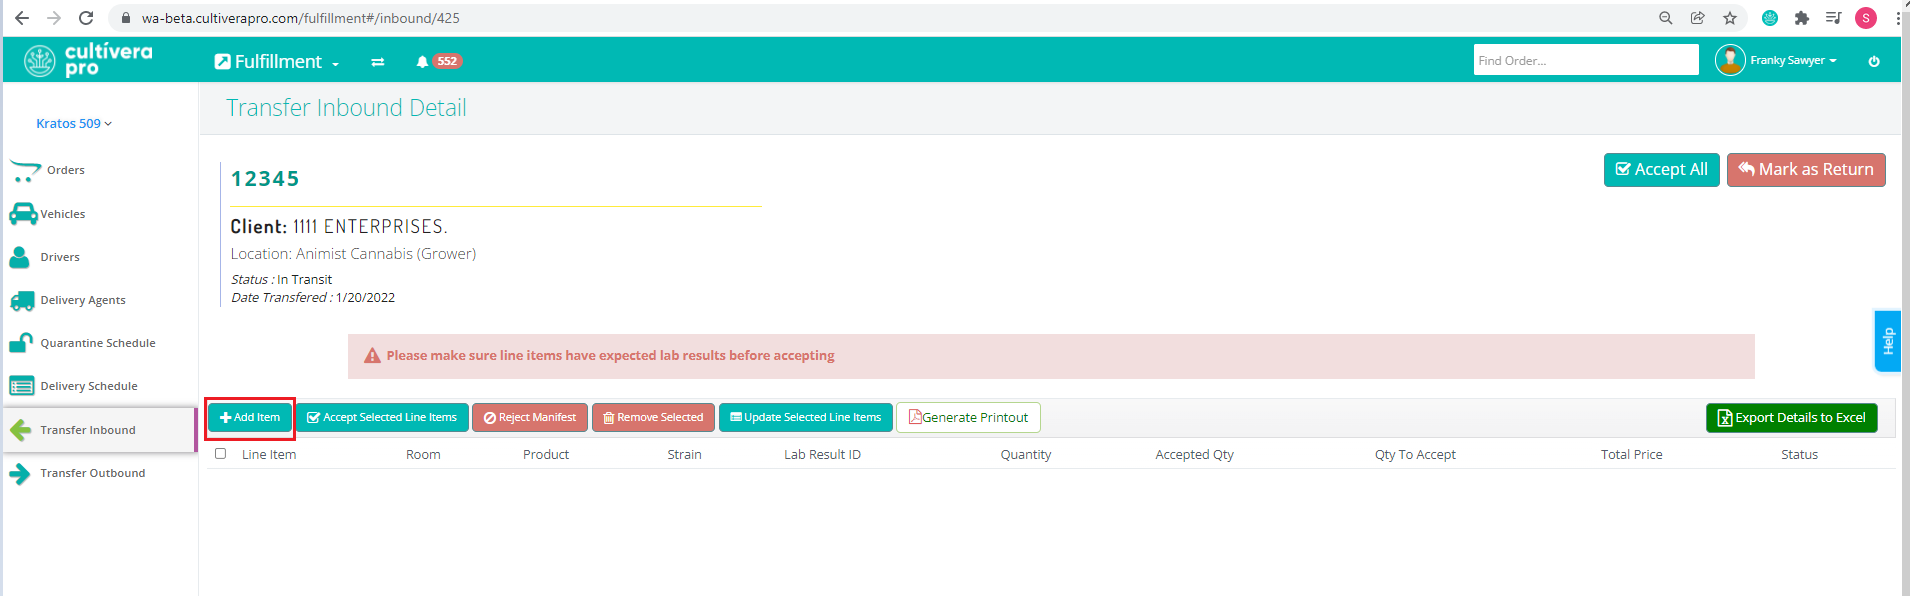
- Select "Add Item" to enter line items to the transfer:
- Enter the Product, Quantity, Total Price, and Inventory ID, then select "Save" (you can select "Save and Add More" if there are multiple line items that need to be entered for the transfer):
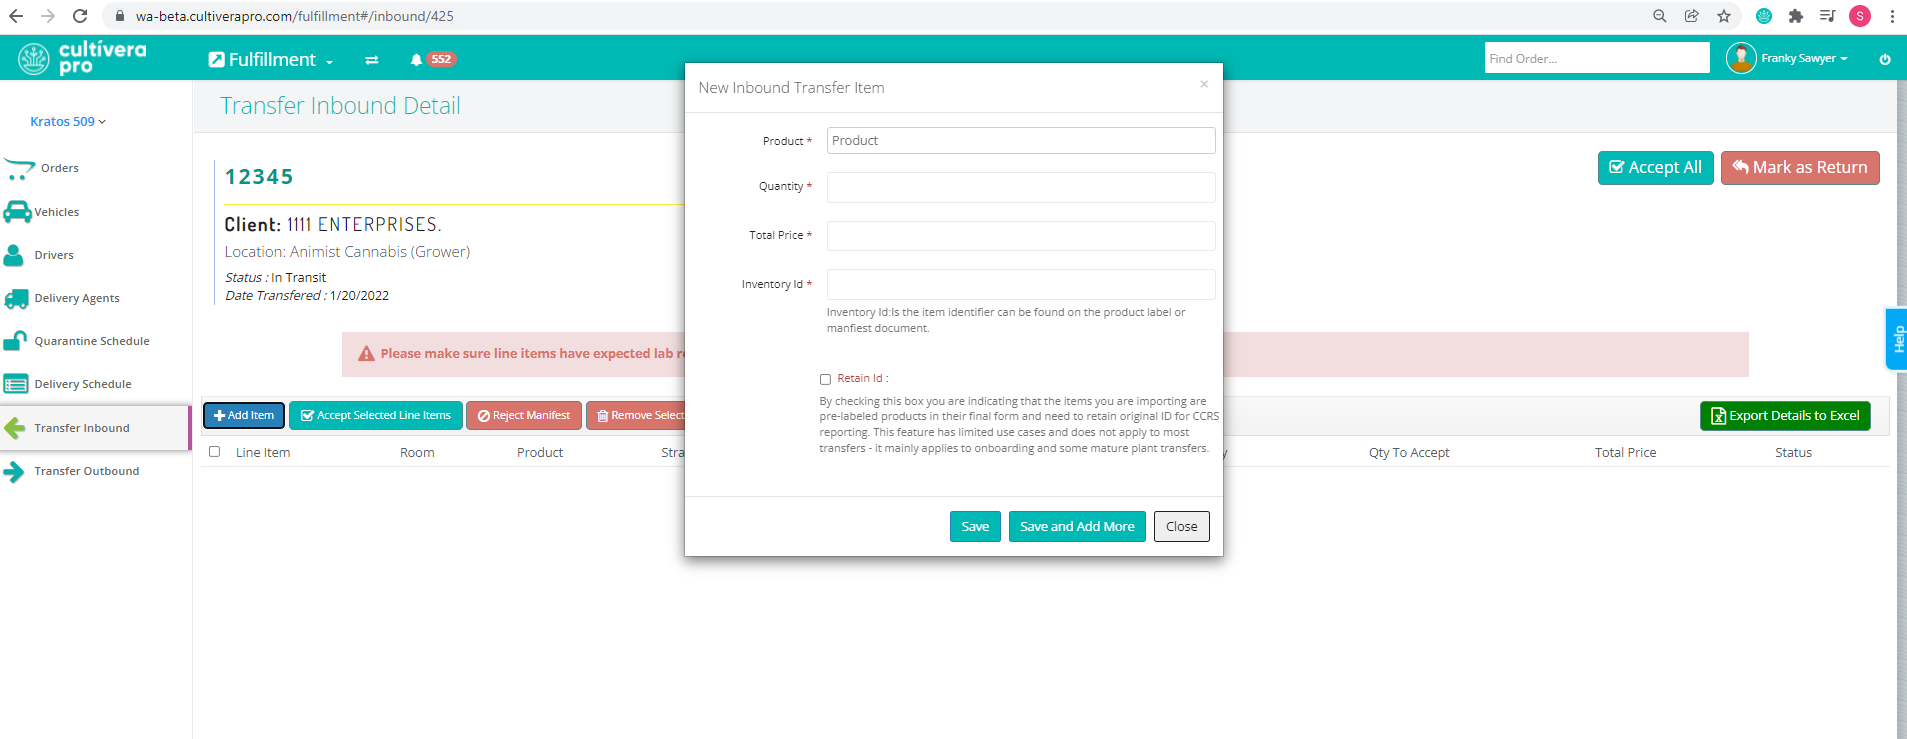
The "Retain ID" option that is now available for Inbound Transfers is intended to be used only for Onboarding purposes and for Inbound Transfers of Mature Plants that must retain the ID for CCRS reporting purposes.
The "Retain ID" option is not necessary/appropriate for "returning" inventory. Any material that is returned to you on an Inbound Transfer should have a new ID generated at the time you "Accept" the inbound transfer into Cultivera.
The "Retain ID" option is not necessary/appropriate for "returning" inventory. Any material that is returned to you on an Inbound Transfer should have a new ID generated at the time you "Accept" the inbound transfer into Cultivera.
- Select "Accept All" when all line items have been added to the transfer to receive the inventory in Cultivera:
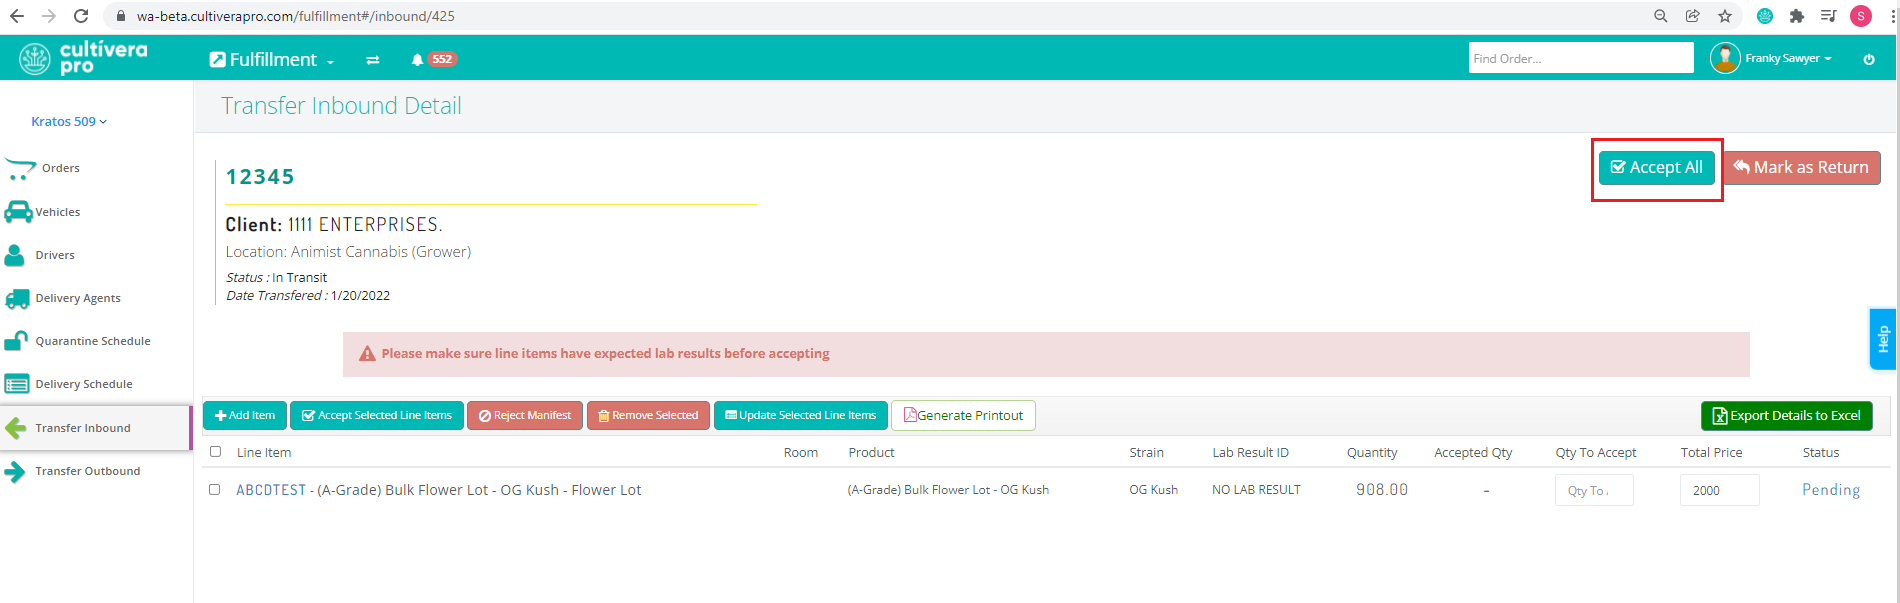
If a line item sent on an Inbound Transfer is partially accepted, enter the "Qty to Accept" to reflect the units you accepted from the transfer before selecting "Accept All".
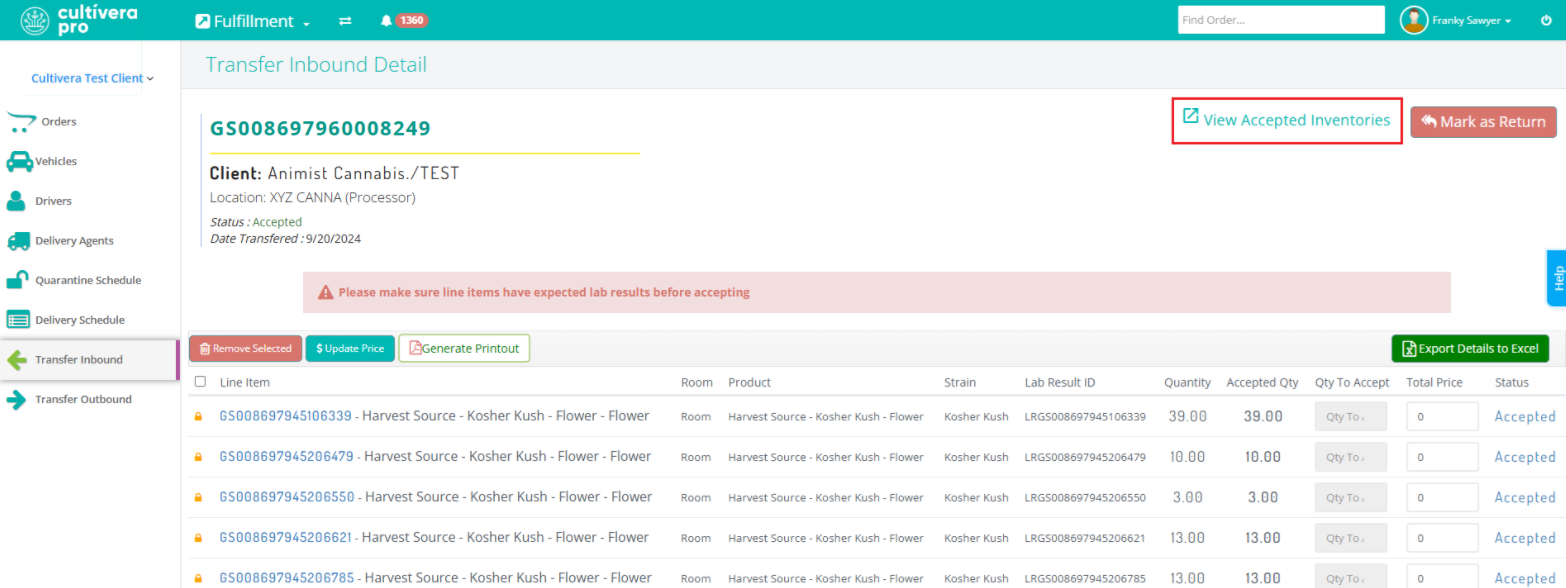
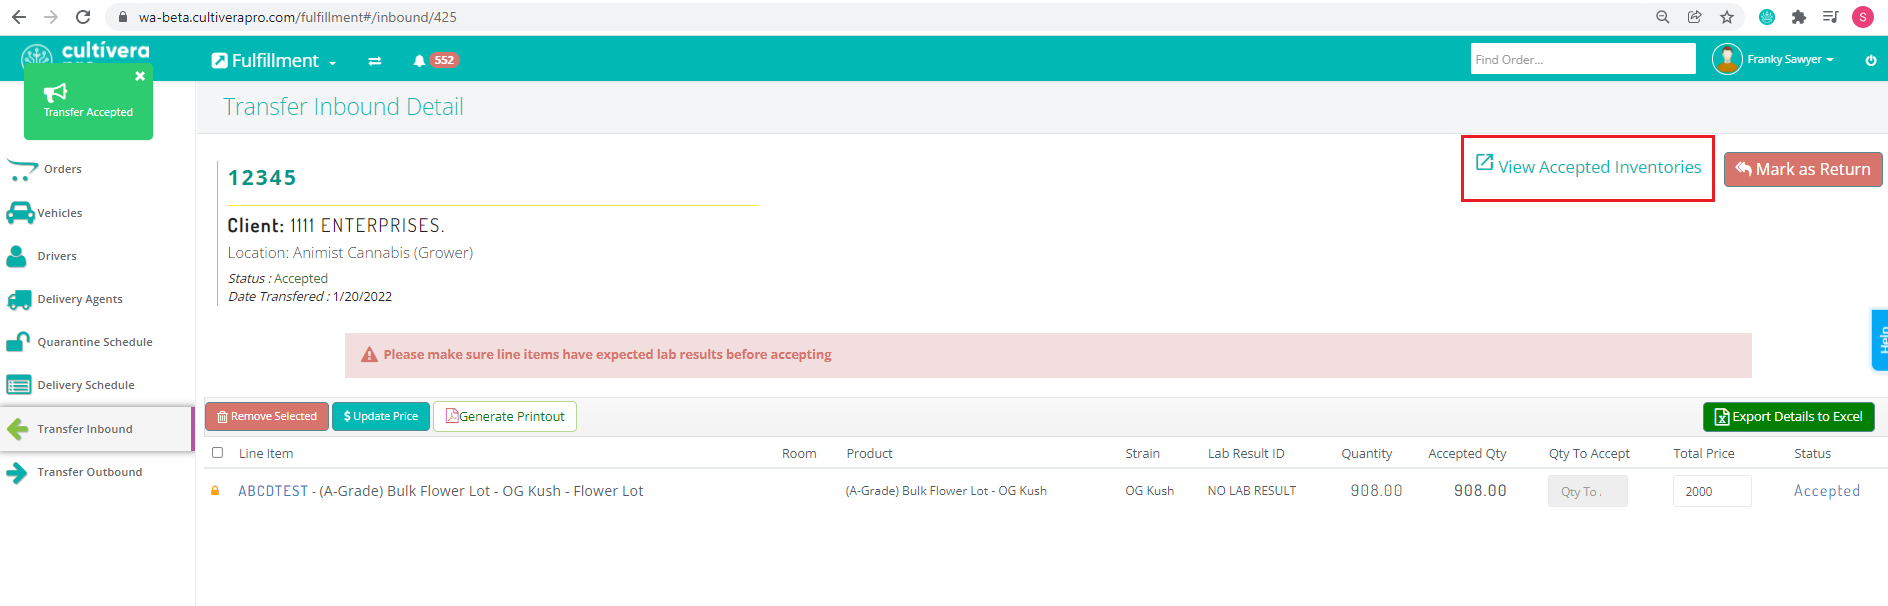
- You can select "View Accepted Inventories" to view the new Batches in Inventory Management > Batches:
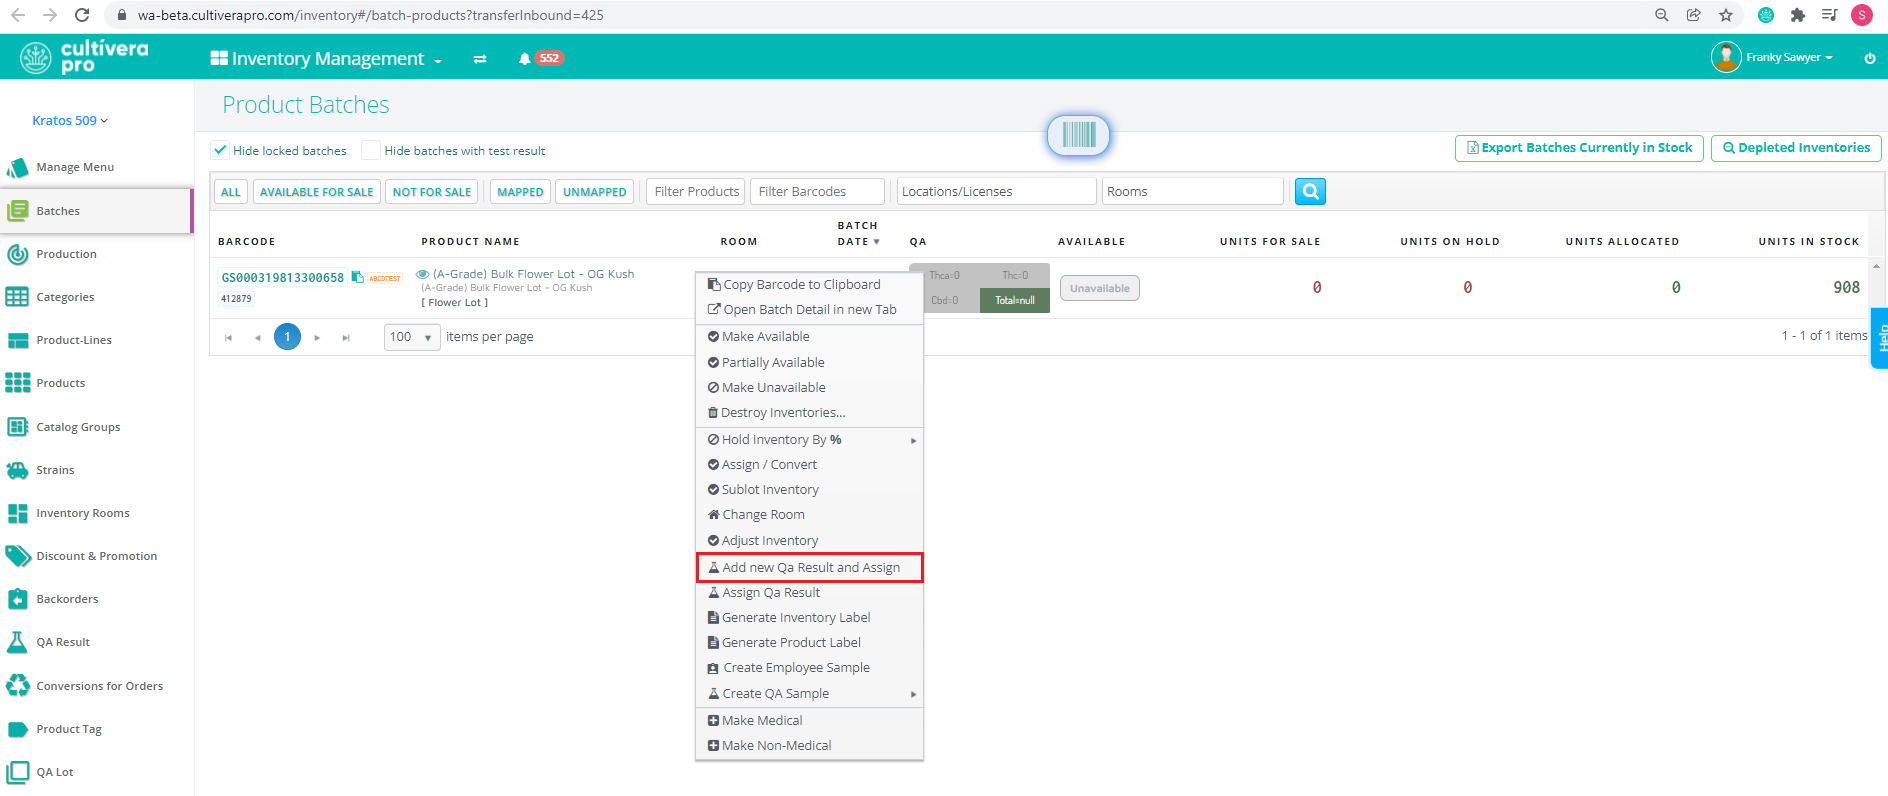
- Once the Batches have been accepted into your system, you can navigate to Inventory Management > Batches to right-click on a Batch and select "Add New QA Results & Assign" to manually assign the QA Results.
Please click here to view an article related to manually assigning QA Results in Cultivera.
Creating a New Inbound Transfer via JSON Link/File
If the client that you are receiving the inbound transfer from can provide you with the WCIA JSON Transfer Link/File for the manifest of the transfer, you can use that link/file to more easily upload the inbound transfer into your system to accept.
- Navigate to Fulfillment > Transfer Inbound and select "Import WCIA Transfer Data Link/File".
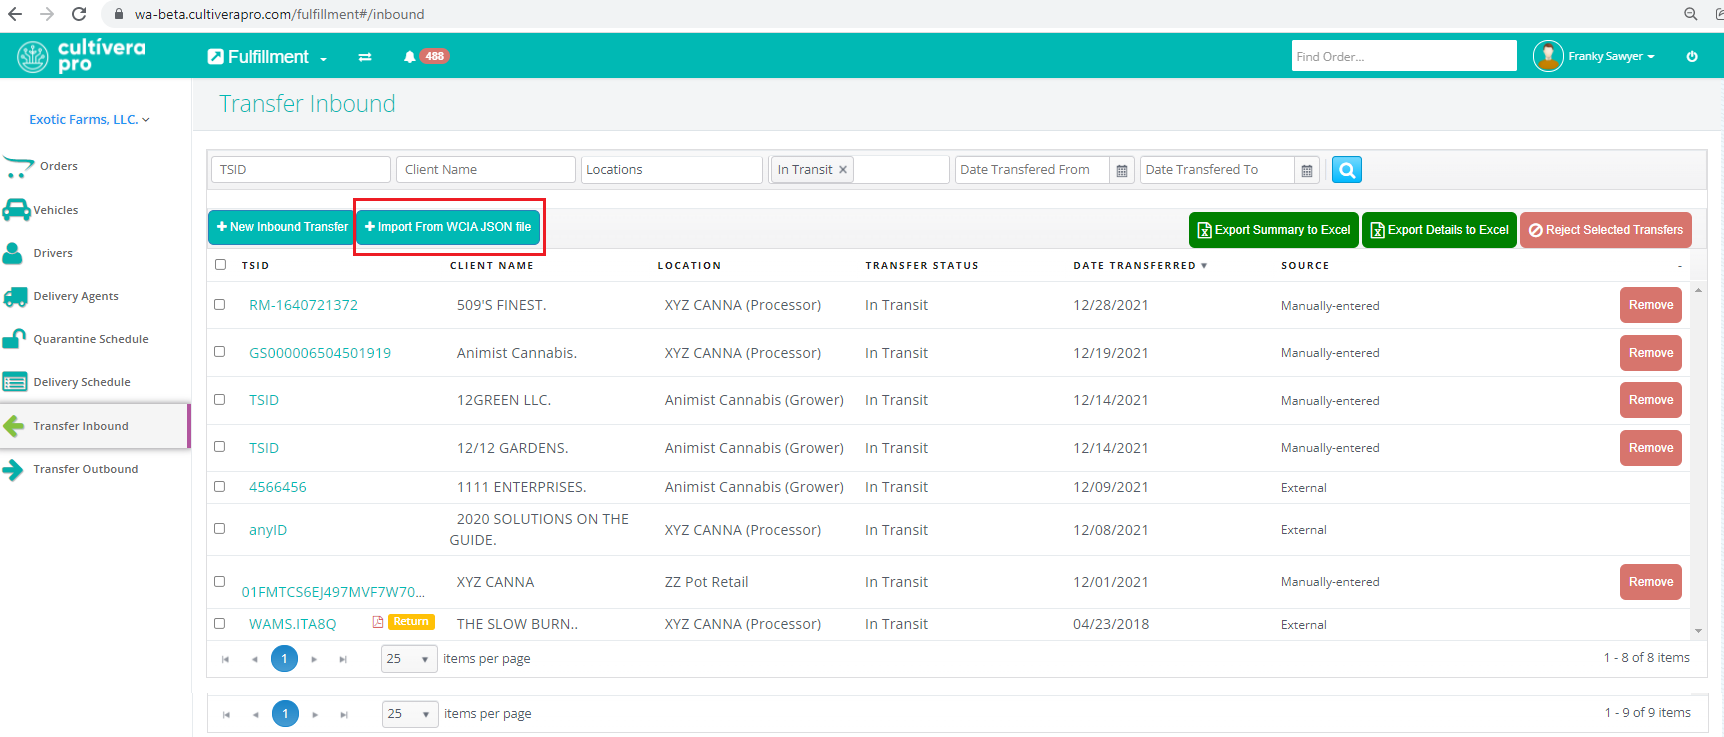
- Paste the JSON Link (URL), or select the JSON file provided to you by the sender of the transfer, then select "Import Transfer".

- Click on the TSID of the newly imported Inbound Transfer to view the "Transfer Inbound Details" page.
- Set the "Product" and enter the "Qty to Accept" for each line item on the Inbound Transfer.
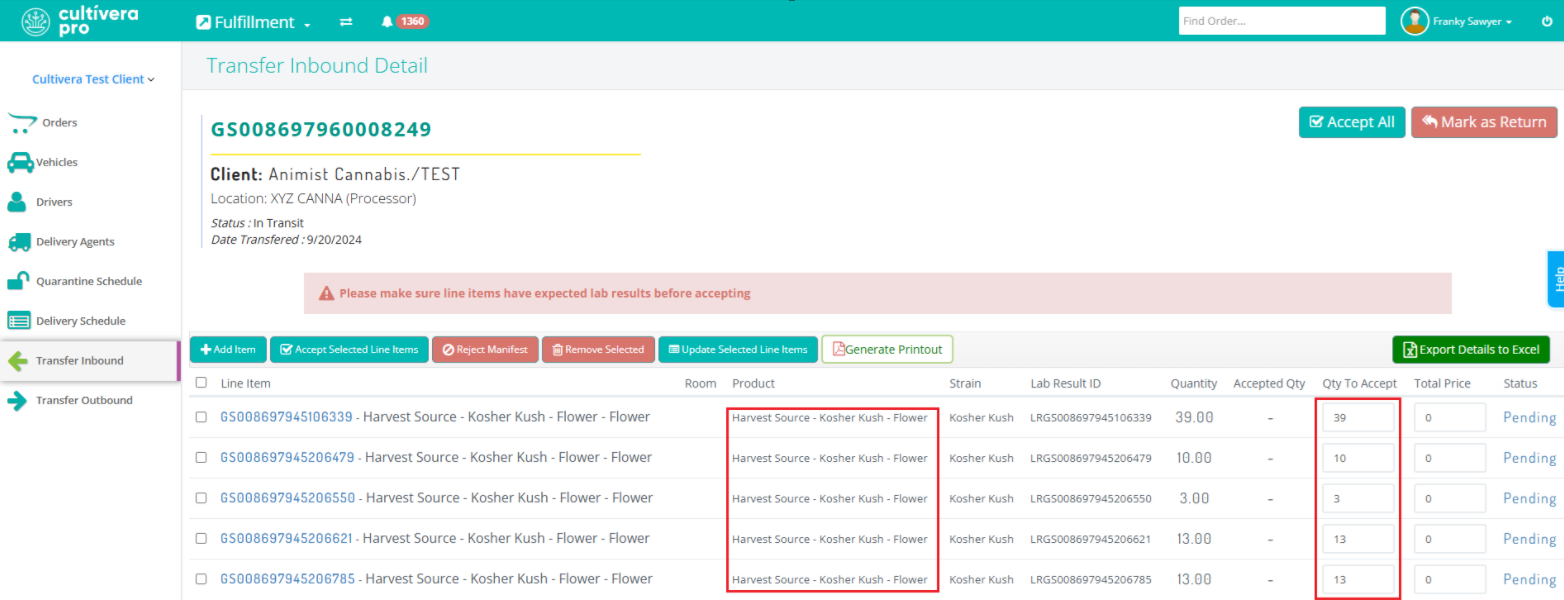
If a line item sent on an Inbound Transfer is partially accepted and/or rejected, enter the "Qty to Accept" to reflect the units you accepted from the transfer before selecting "Accept All".
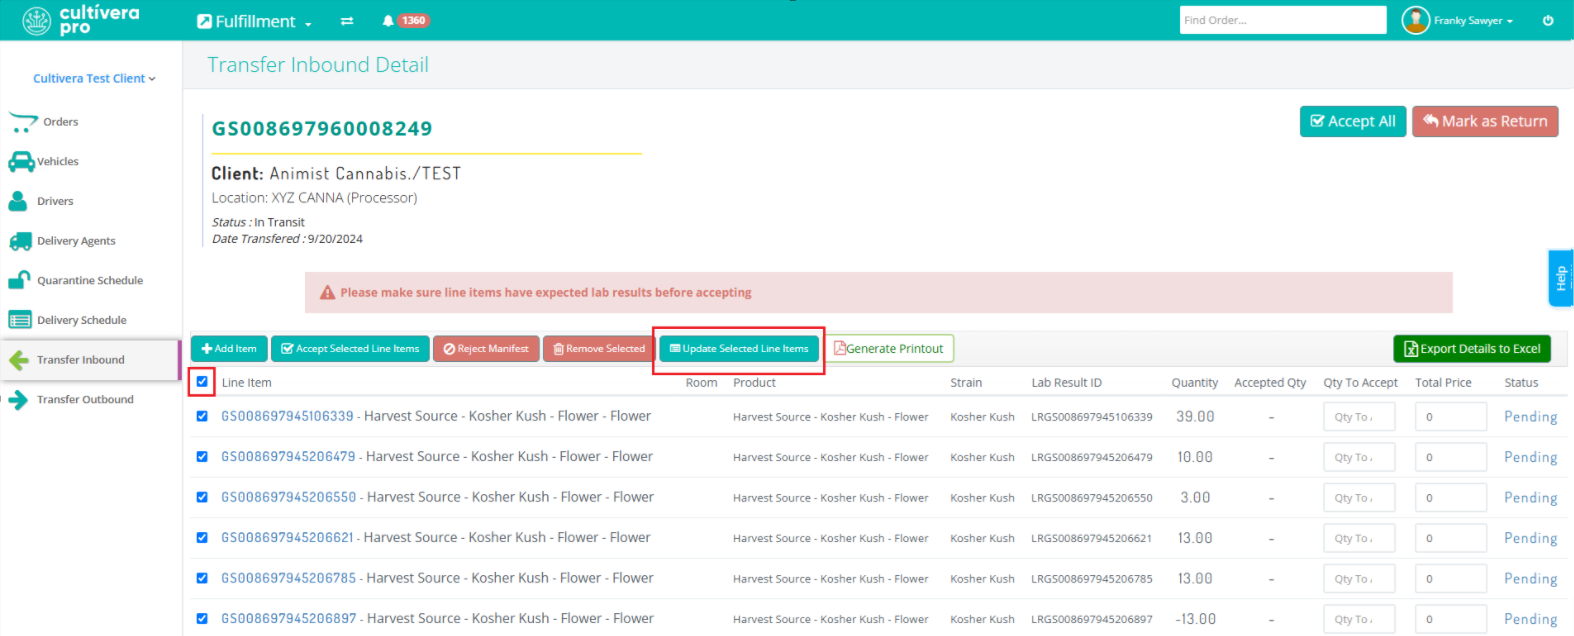
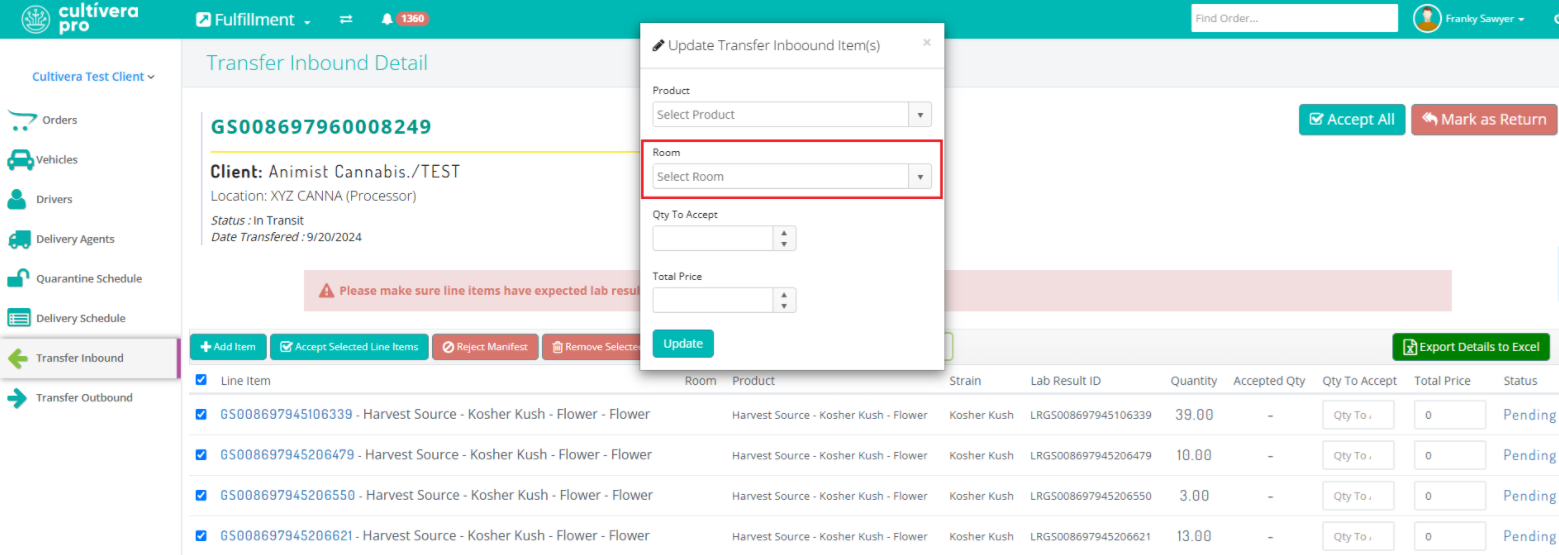
- Once the 'Product' and 'Qty to Accept' are entered for each line item, you can select the checkboxes next to each line item and then select 'Update Selected Line Items' to assign the intended Room.
- Select 'Accept All' to accept the transfer into your system:
- You can then select "View Accepted Inventories" within the Transfer Inbound Details page to view the accepted Batches in Inventory Management > Batches.