PRO (WA): Creating QA Samples & Manifesting to Testing Lab
![]() Updated
Updated
Creating & Sending QA Samples (WA)
In this article, we will go over how to easily make QA samples and send them to your chosen lab using Cultivera Pro in "stand-alone" mode (where you are not connected to a state traceability system).
Creating QA Samples
Begin in the Inventory Management module at the top left.
- From there, click on the Batches tab. Here you can search for the batch/batches you want to send off for QA by filtering for Flower, Flower Lot, Hash, etc. using the options at the top.
- Right-click on the line item and select “Create QA Sample” from the list.
- A popup will appear where you can enter the destination lab and sample weight to send. You can find the lab you want to use by typing in the lab name for options to appear. Once you select the "Create Mandatory Sample" button, the sample amount will be taken from the parent lot and allocated for QA.
Manifesting QA Samples
Now you will see a little flask icon on the parent lot line item. If you click on that icon, it will take you to the details for the sample you created. All QA samples are found in the QA Samples tab at the bottom left.
- On the sample details page, you can create a manifest by clicking the icon on the right for a single sample.
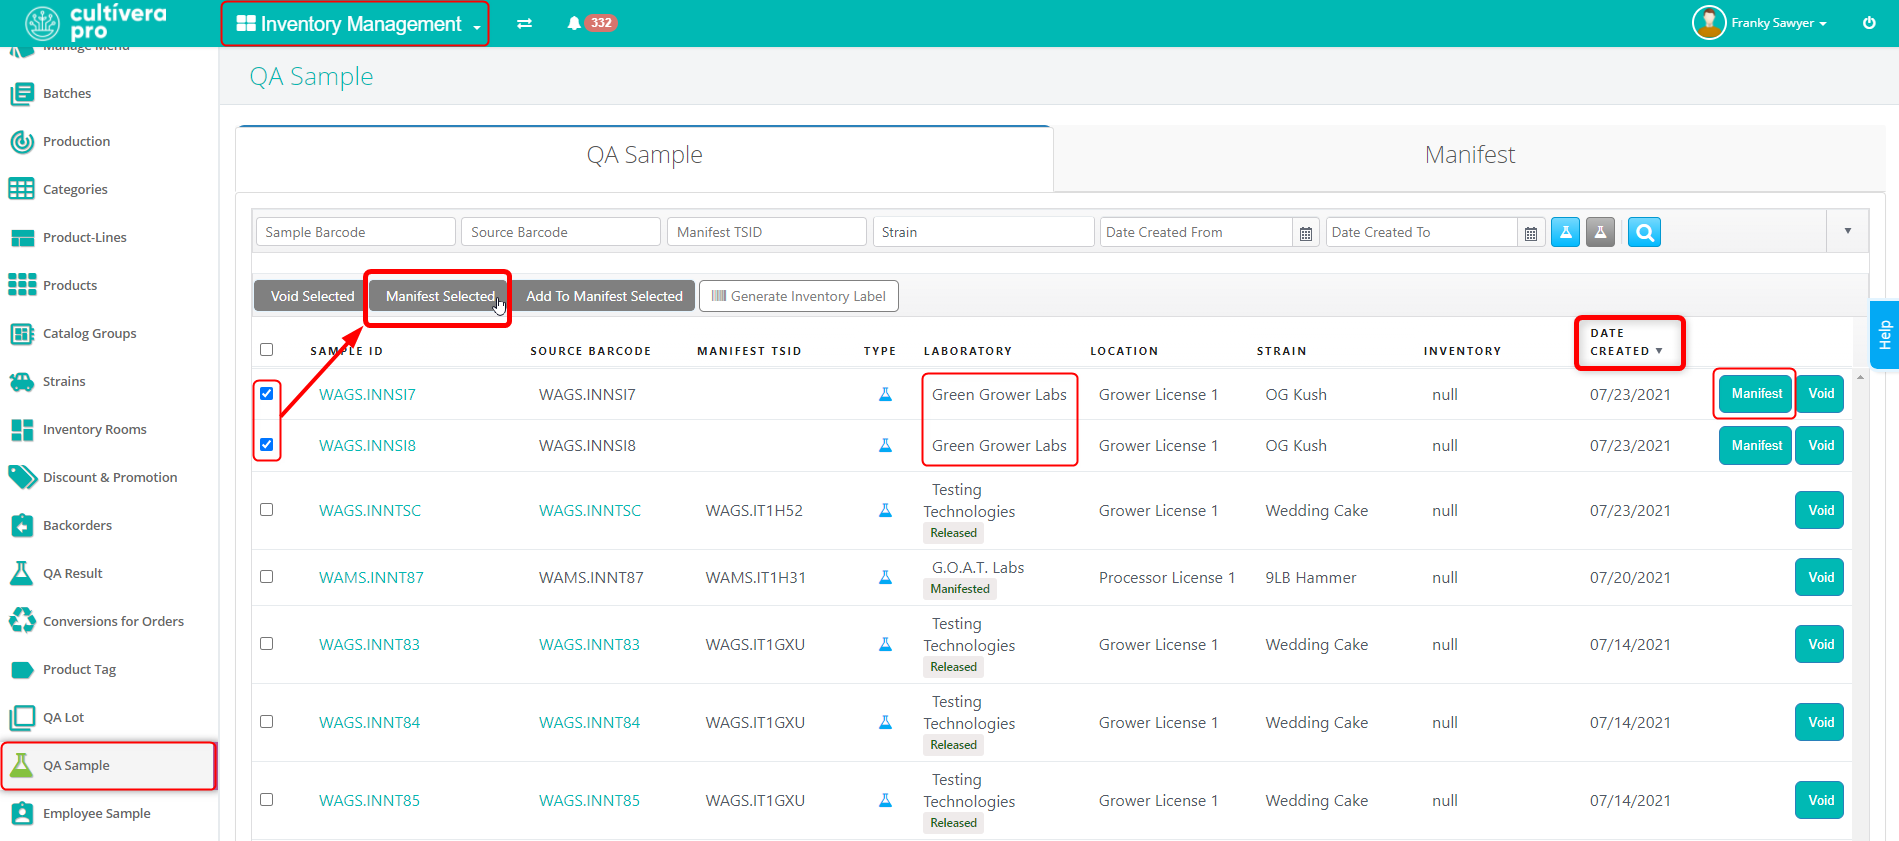
- If you need to create multiple samples to send to the lab, simply create all the samples you need in Batches, and click on the “QA Samples” tab at the bottom left. Your newly created samples will be at the top of the list.
- If you have multiple samples destined for the same lab, you will find them at the top of the QA Sample page. These can be manifested together. If you wish to send samples to different labs, use the Manifest icon on each line item.
- Select which samples you want to manifest in the checkboxes, then click Manifest Selected at the top. Set the manifest details as you would anywhere else.
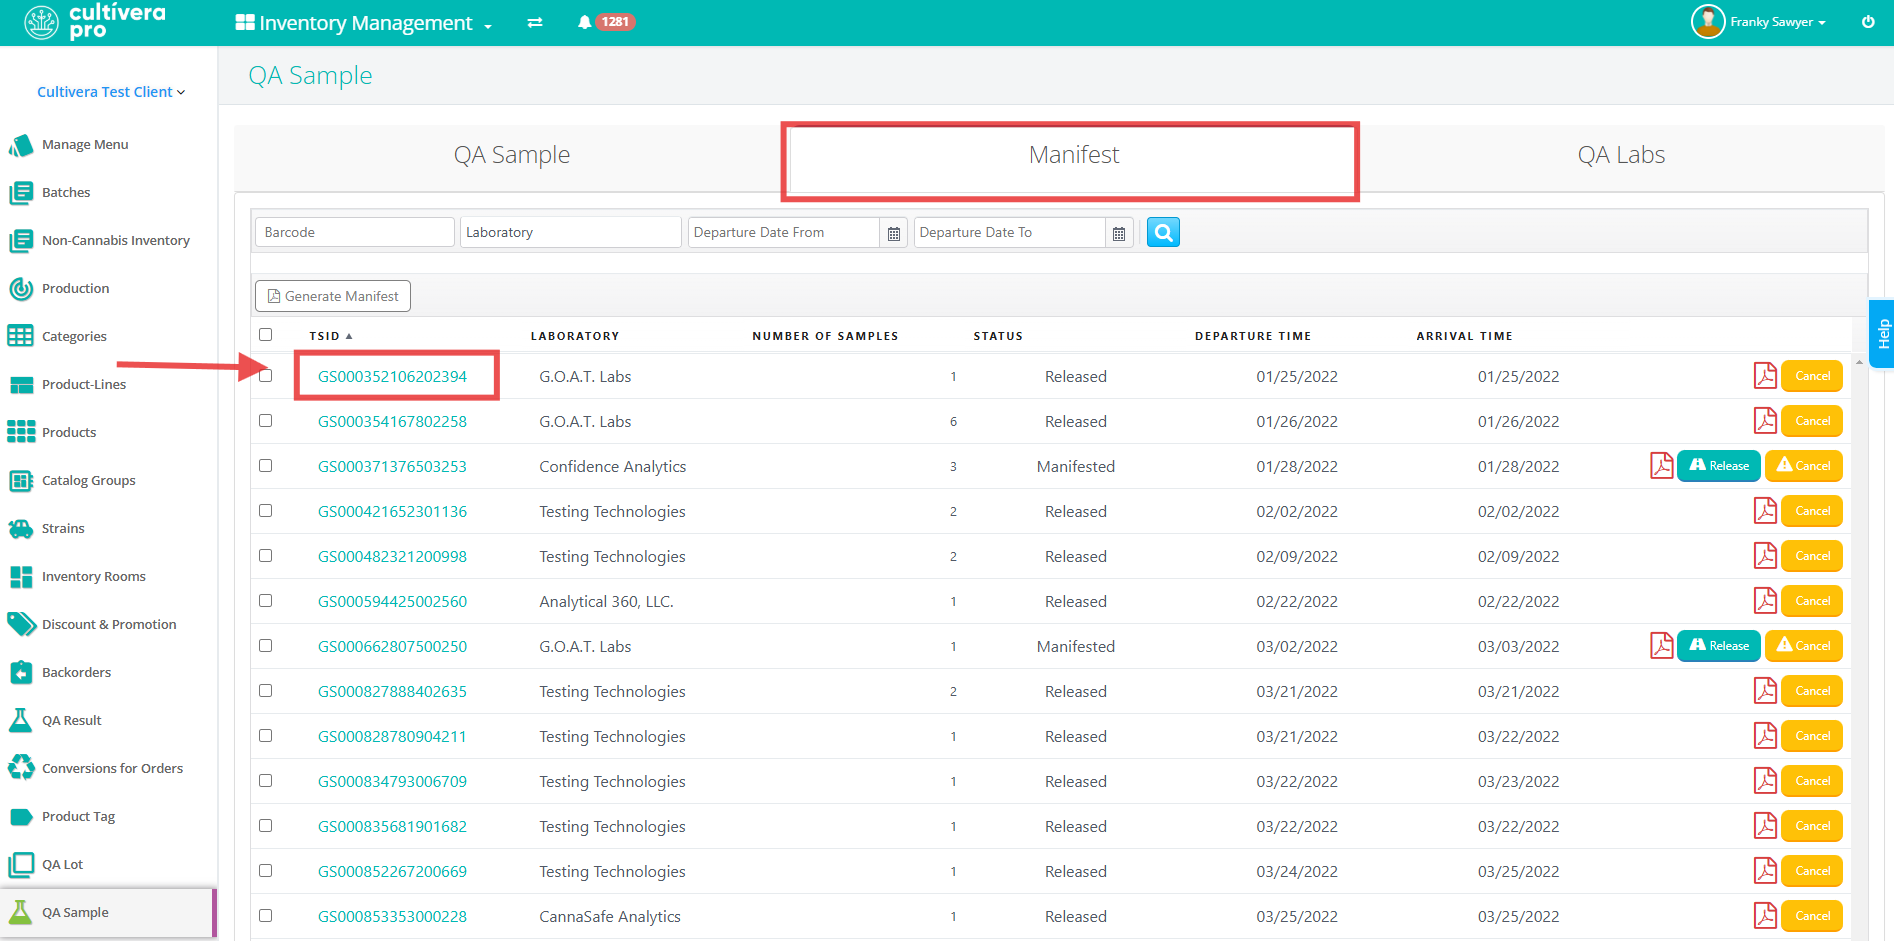
- After your QA Samples are Manifested, you will want to generate a JSON link to send to the lab for your transfer, which can be done by clicking on the Manifest tab, then click on the Manifest TSID to access the Manifest details.
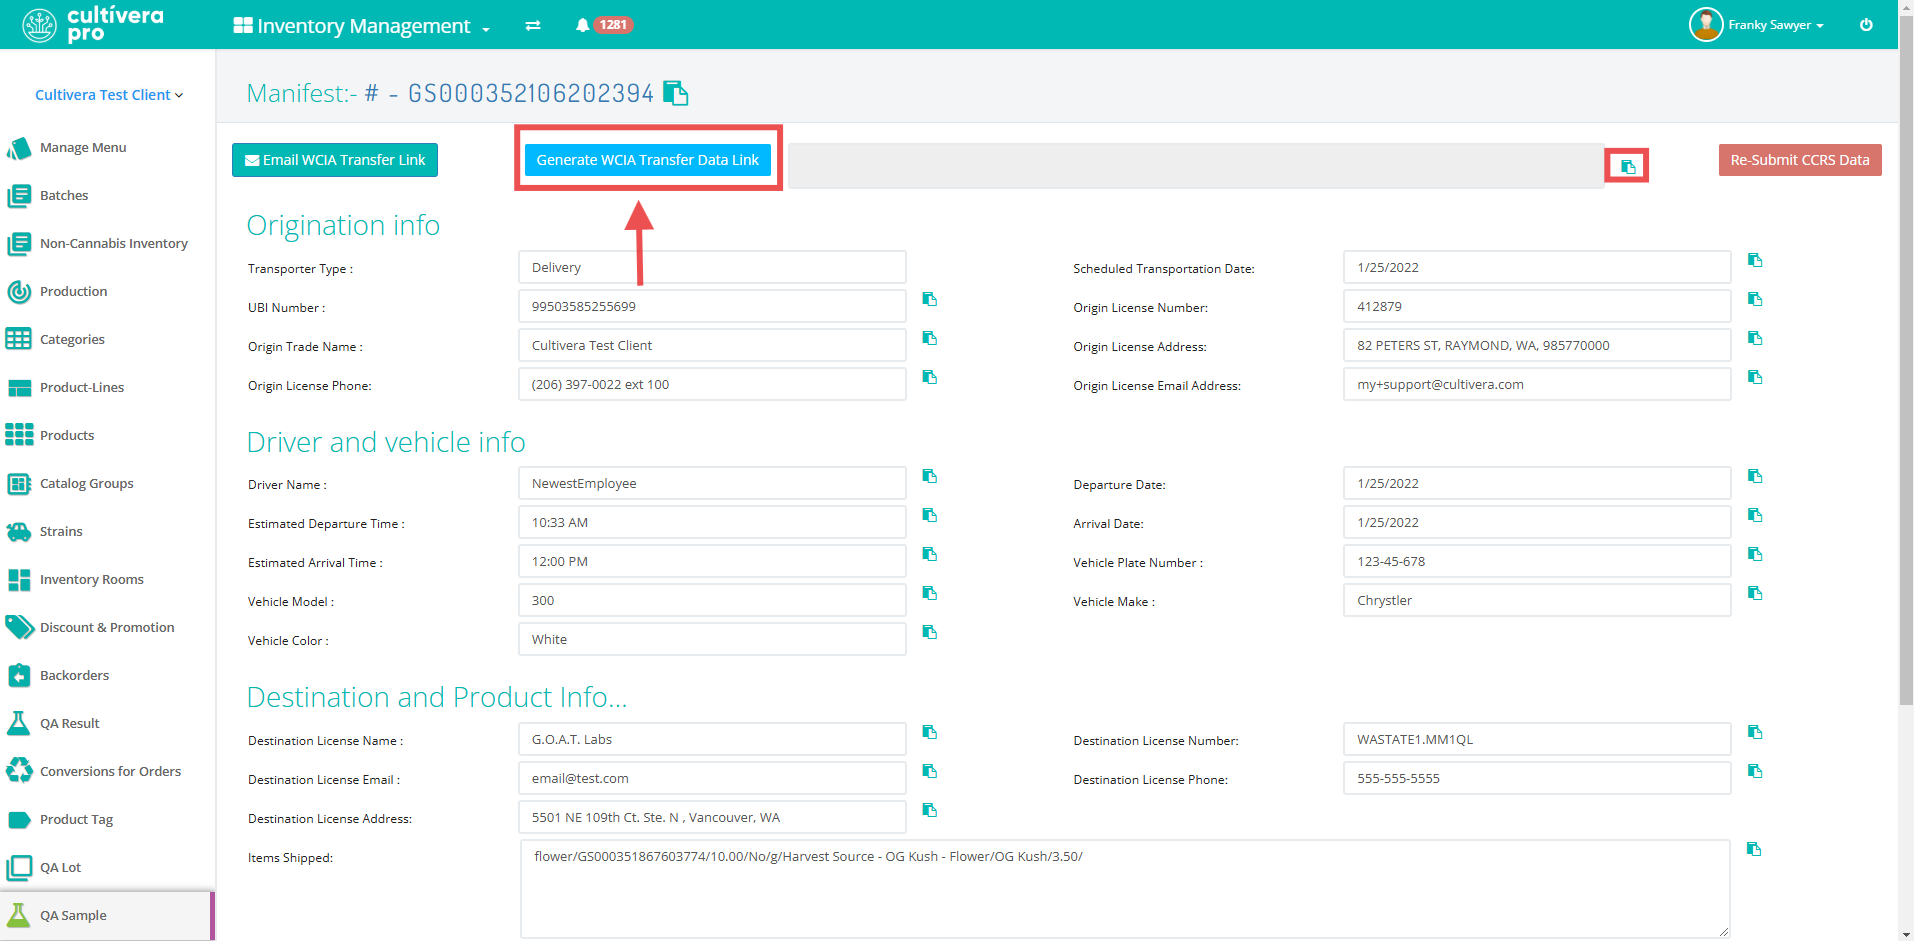
- Then on the Manifest details page click on the 'View Manifest Information' link at the top right corner.

- From here you can click the 'Generate WCIA Transfer Data Link" to generate your transfer JSON, then click the clipboard icon to the right to copy the link to paste it into your email.
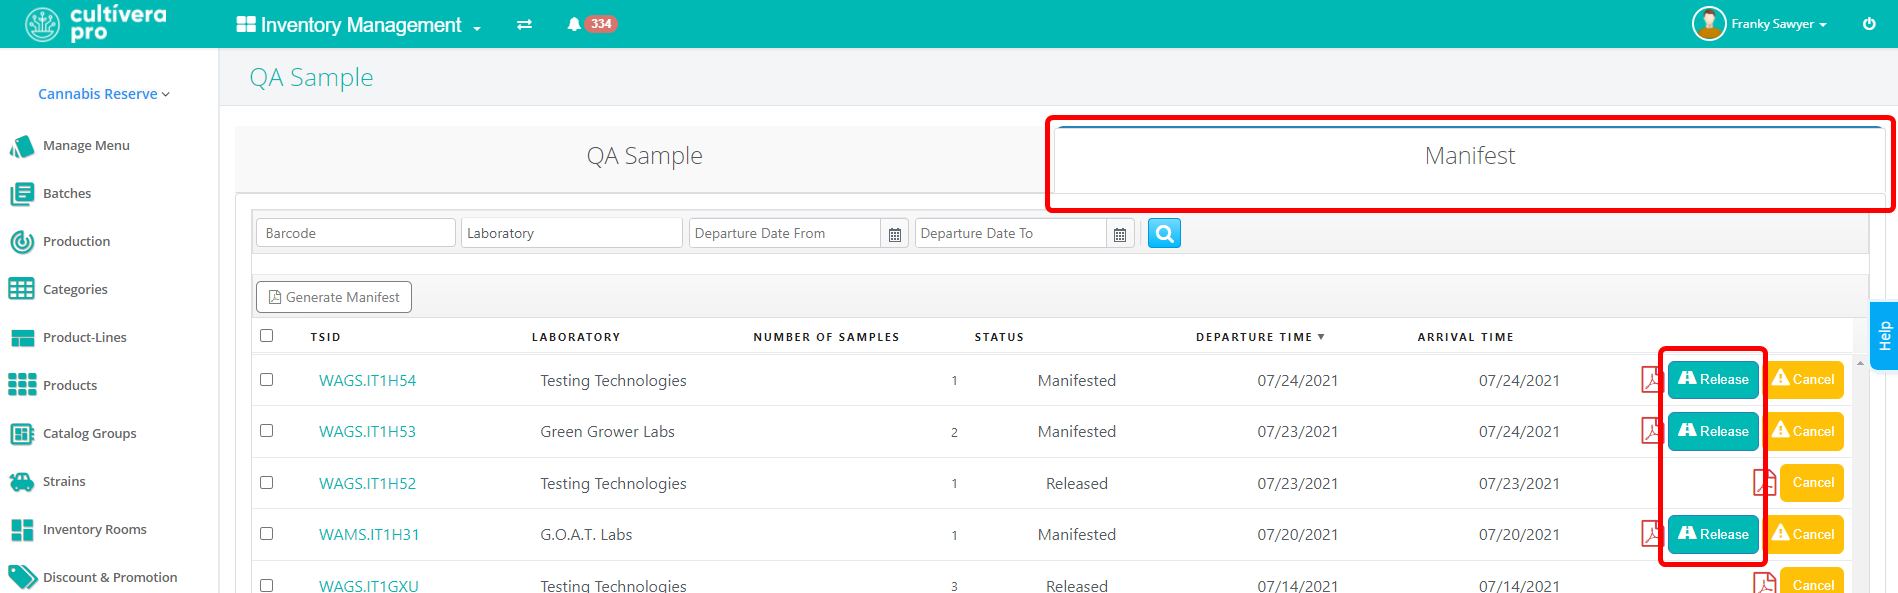
- Now that you have created the manifests you need, and generated your JSON links, you can "release" the Manifests by clicking the 'Release' button to send them off to the lab.
Congratulations! You have successfully created & sent QA samples for testing!
If you have any questions, please don’t hesitate to reach out to our support team at support@cultivera.com to clear anything up.