PRO: Inventory Management - Add & Assign QA Result / Assign Existing QA Result
![]() Updated
Updated
Adding & Assigning New QA Results
Use this workflow to "Add and Assign" and/or "Assign" existing QA results to a QA parent lot in Cultivera Pro.
If you reside in Washington State, please refer to the Importing QA Results via JSON Link/File (WA) self-help article for more information on this workflow.
Add New QA Results & Assign
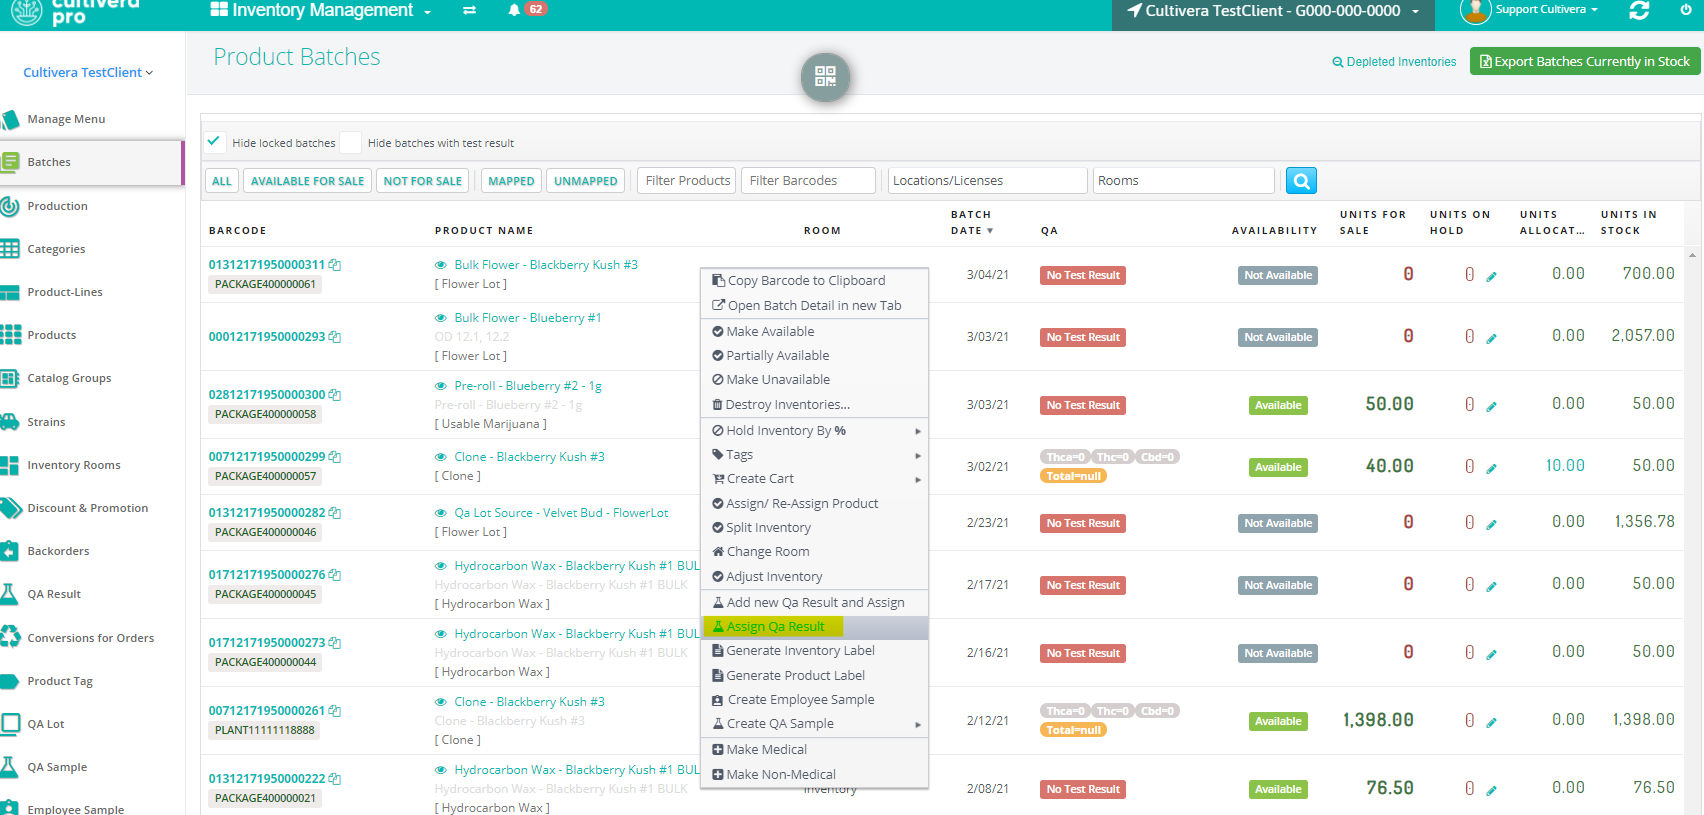
- Navigate to Inventory Management > Batches.
- Locate the QA parent batch you wish to assign the existing QA results too
- Then right-click and select “Add new QA result and assign” from the dropdown menu.
- In the pop-up window, enter the batch’s barcode (or METRC tag ID) in the “QA Lot TSID” field
- Then enter the Sample ID from your COA in the “Sample ID” field.
- Enter the date of harvest/date of manufacture and cannabinoid values.
- Click “Add Results”.
The results are now associated with the QA parent and will automatically transfer to any child lot resulting from a sublot or conversion from the QA parent.
Once the QA Result has been added and assigned to the intended QA Parent batch, the result can then be found under Inventory Management > QA Result. This is where you can right-click on the Result to add Terpenes, set farm info, or add the COA PDF file to the result.
Assigning an existing QA Result to a Batch
- Navigate to Inventory Management > Batches
- Right-click on the batch that the QA Result needs to be assigned to, and select "Assign QA Result".
- Enter the QA Result TSID to see the QA Result populate in the drop-down menu.
- Select the result from the dropdown menu, and select "Set Result".
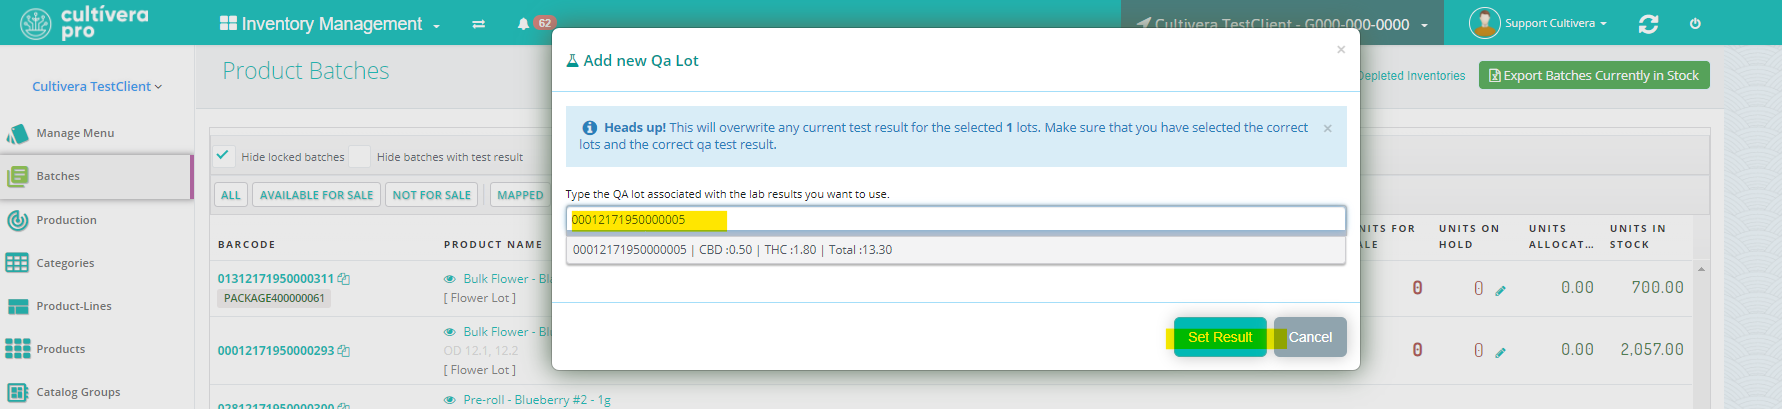
If you do not see the intended QA Result from the dropdown menu, please clear your browser's cache and cookies, then restart your browser and try again. You should then see that the result populates as an option from the dropdown menu after typing it in.