PRO (WA): Processing an Order in Cultivera
![]() Updated
Updated
Processing an Order in Cultivera
Users in Washington should follow these steps to create and process an Order from start to finish in Cultivera.
- Confirm the Product intended for sale is "Available" in Inventory Management > Manage Menu.
You can right-click on the Product (or highlight multiple products then right-click) to “Make Available”.
- Confirm the Batch you would like to allocate to the order or use as the Conversion Source Product is marked "Available" in Inventory Management > Batches.
You can right-click on any Batch to “Make Available”.
- Navigate to Sales > Accounts and toggle to "All Accounts" then filter for the company name or license number intended for the transfer.
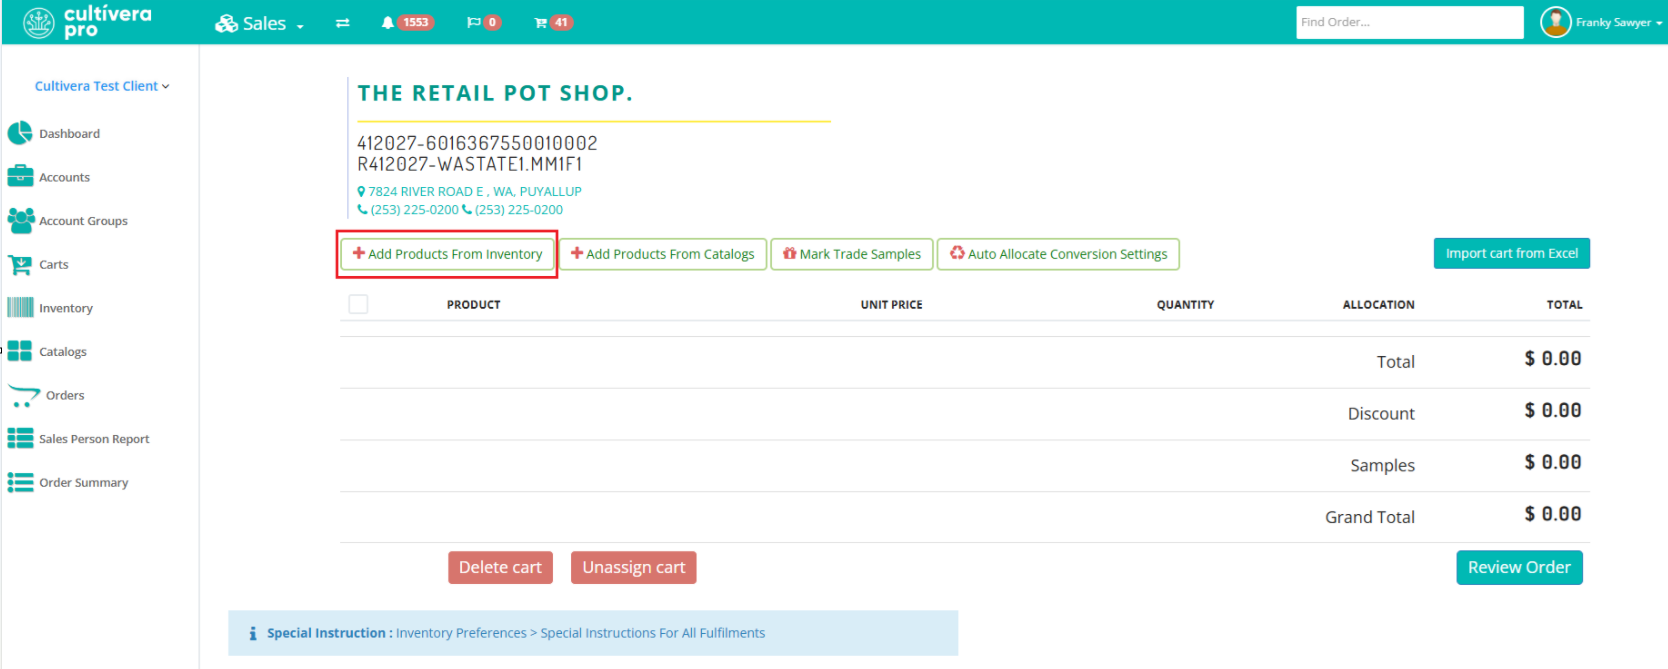
- Select the shopping cart icon to "Start New Cart".
- Once the new cart has been created, select "Add Products From Inventory":
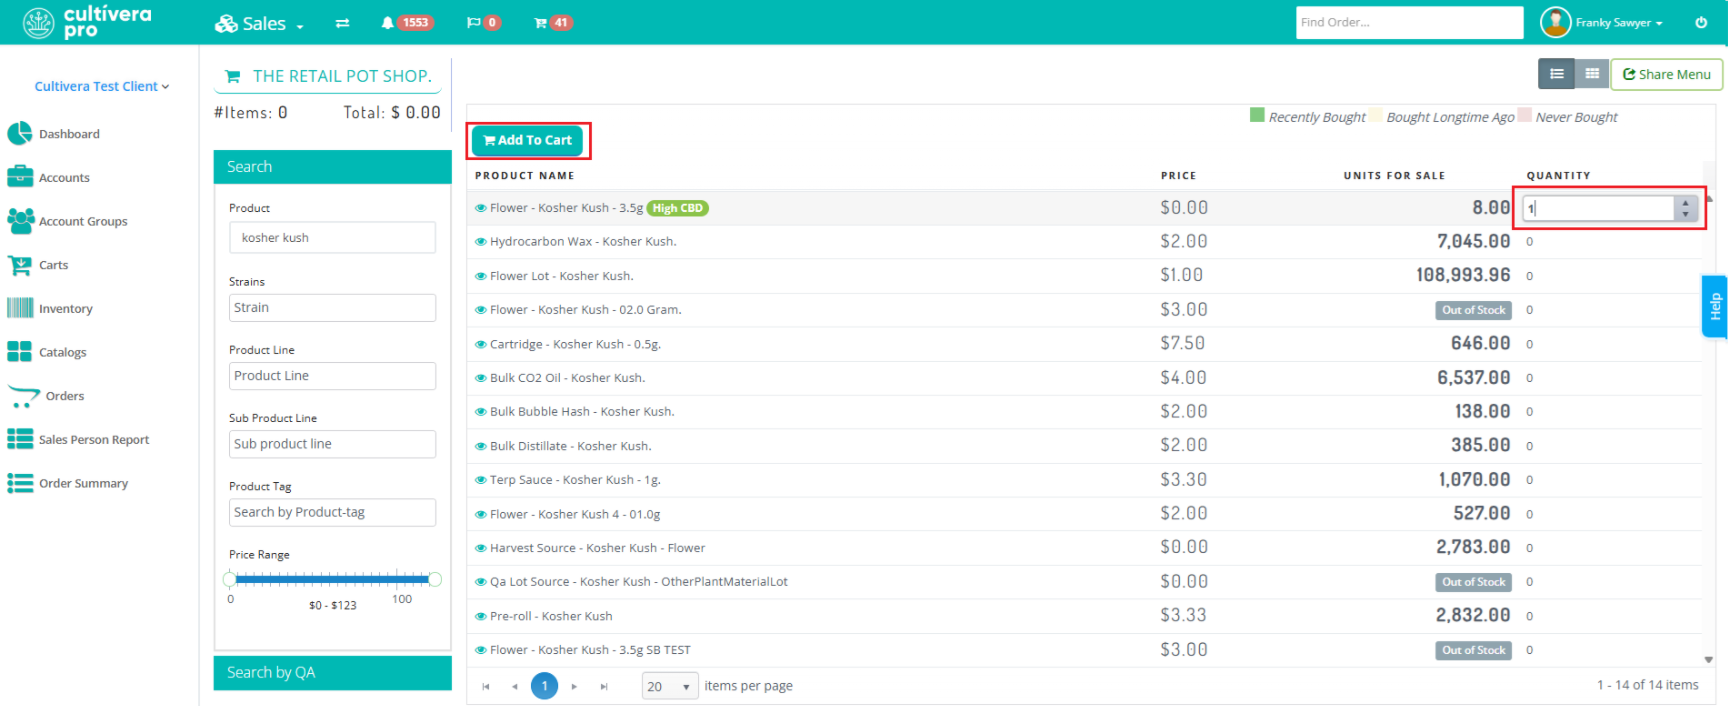
- Now you can begin adding line items to the cart:
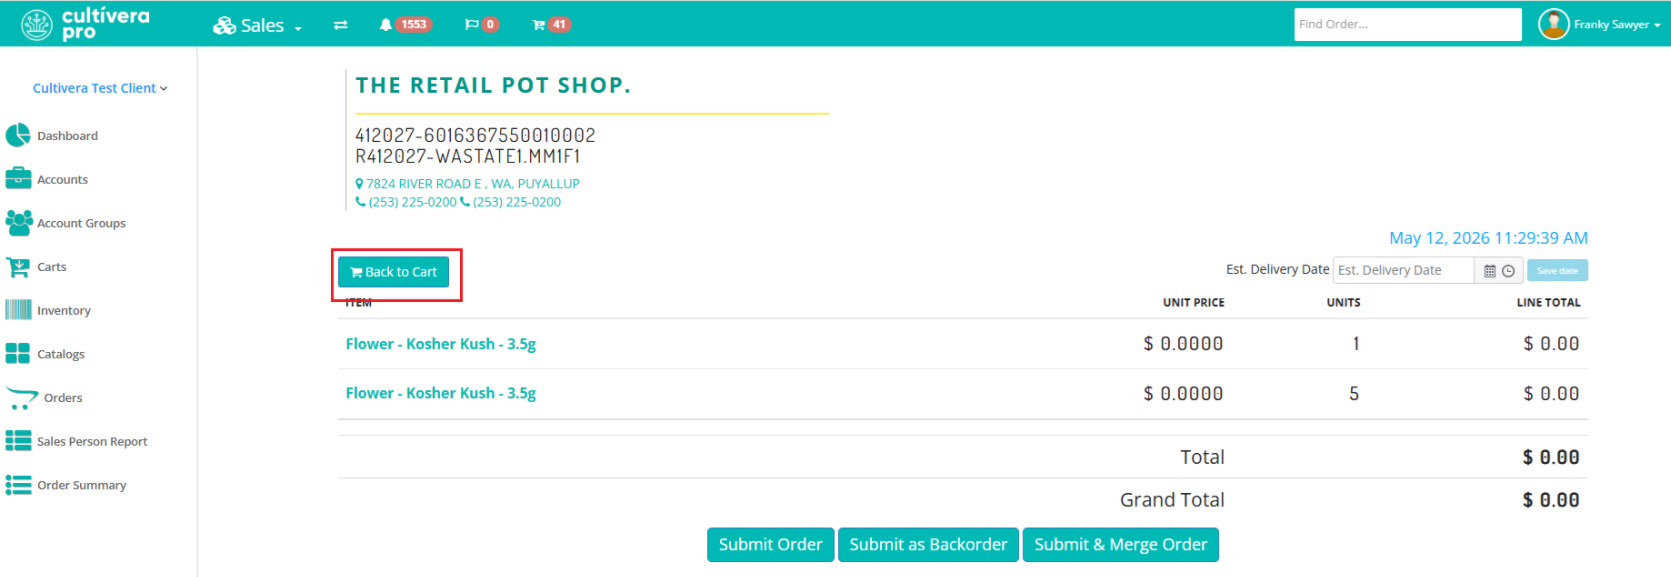
- Once all of the line items have been added to the Sales > Cart, select “Back to Cart”.
- Here you can select any "Sample" line items to then mark them as "Trade Samples" before reviewing and submitting the Cart as an Order.Trade Sample orders should be processed separately from normal cannabis orders.
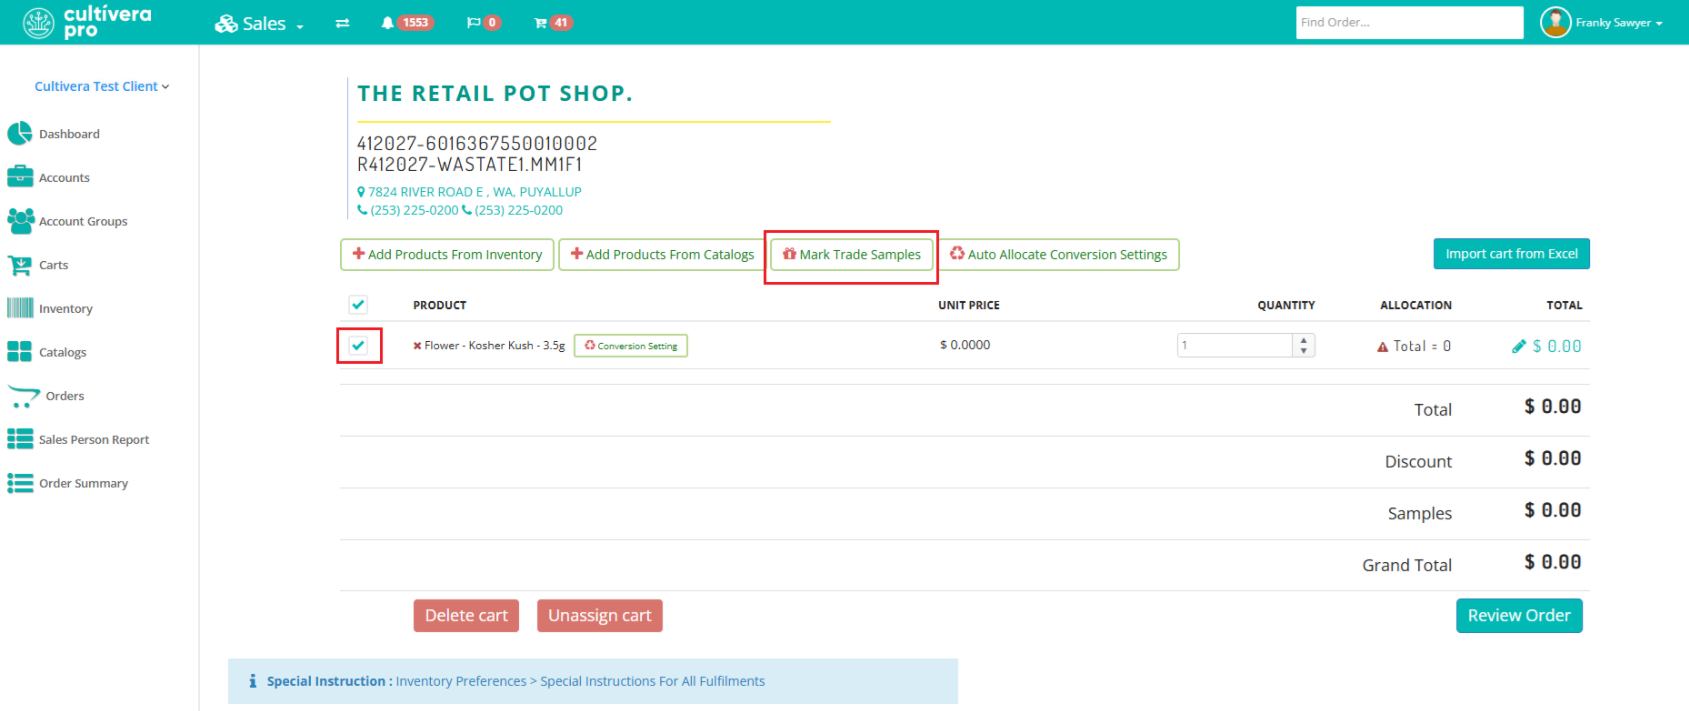
You can also set the "Conversion Setting" for each line item that is “Pack to Order” at this point, and before submitting the order. This would represent the bulk flower lot you are using as the Source Product for the finished good Product (in this example, bulk flower > 3.5g).
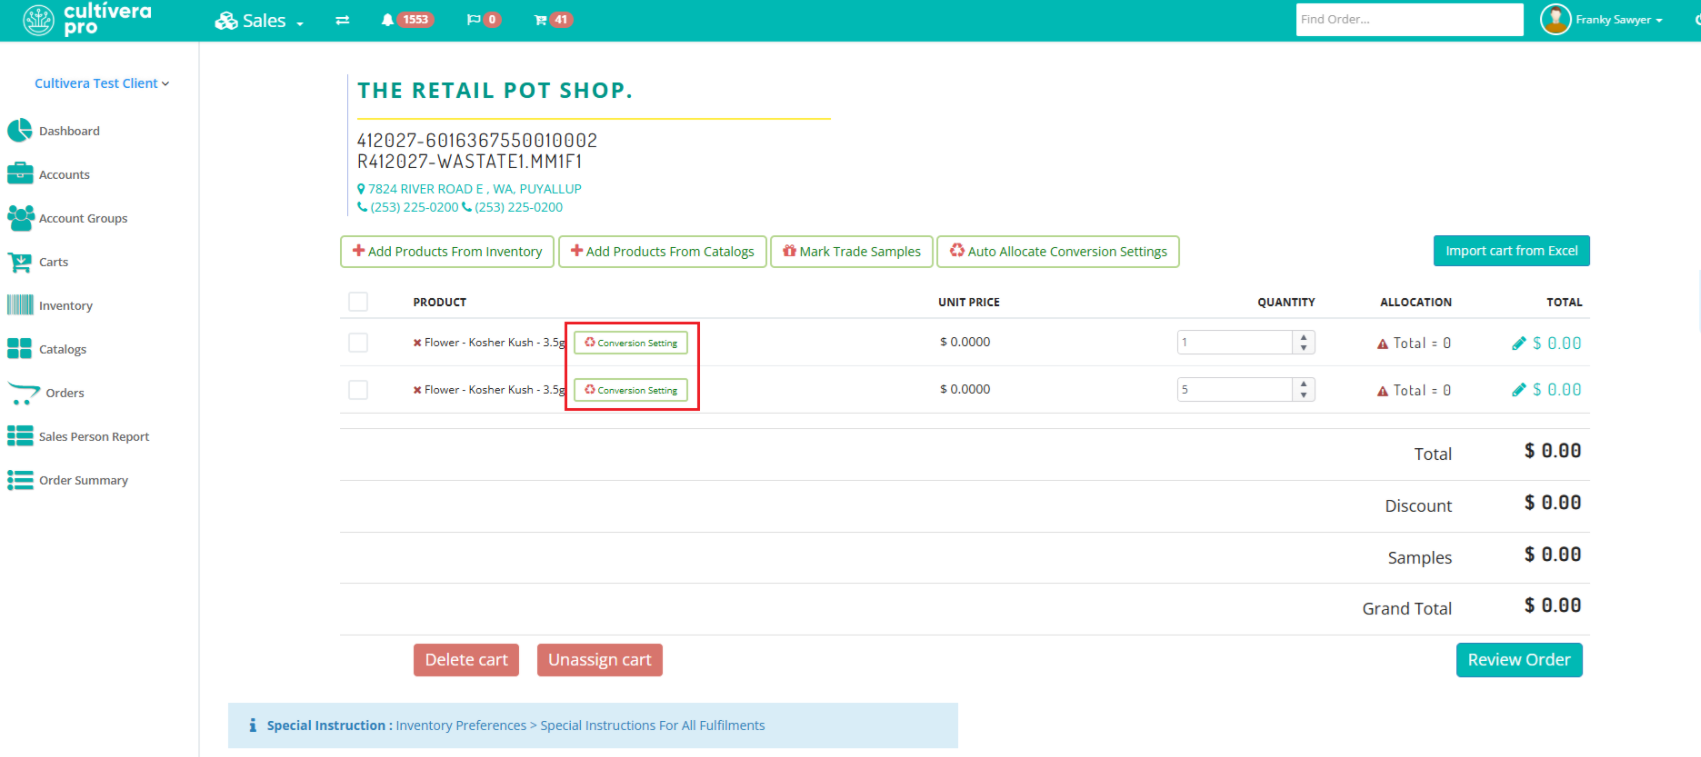
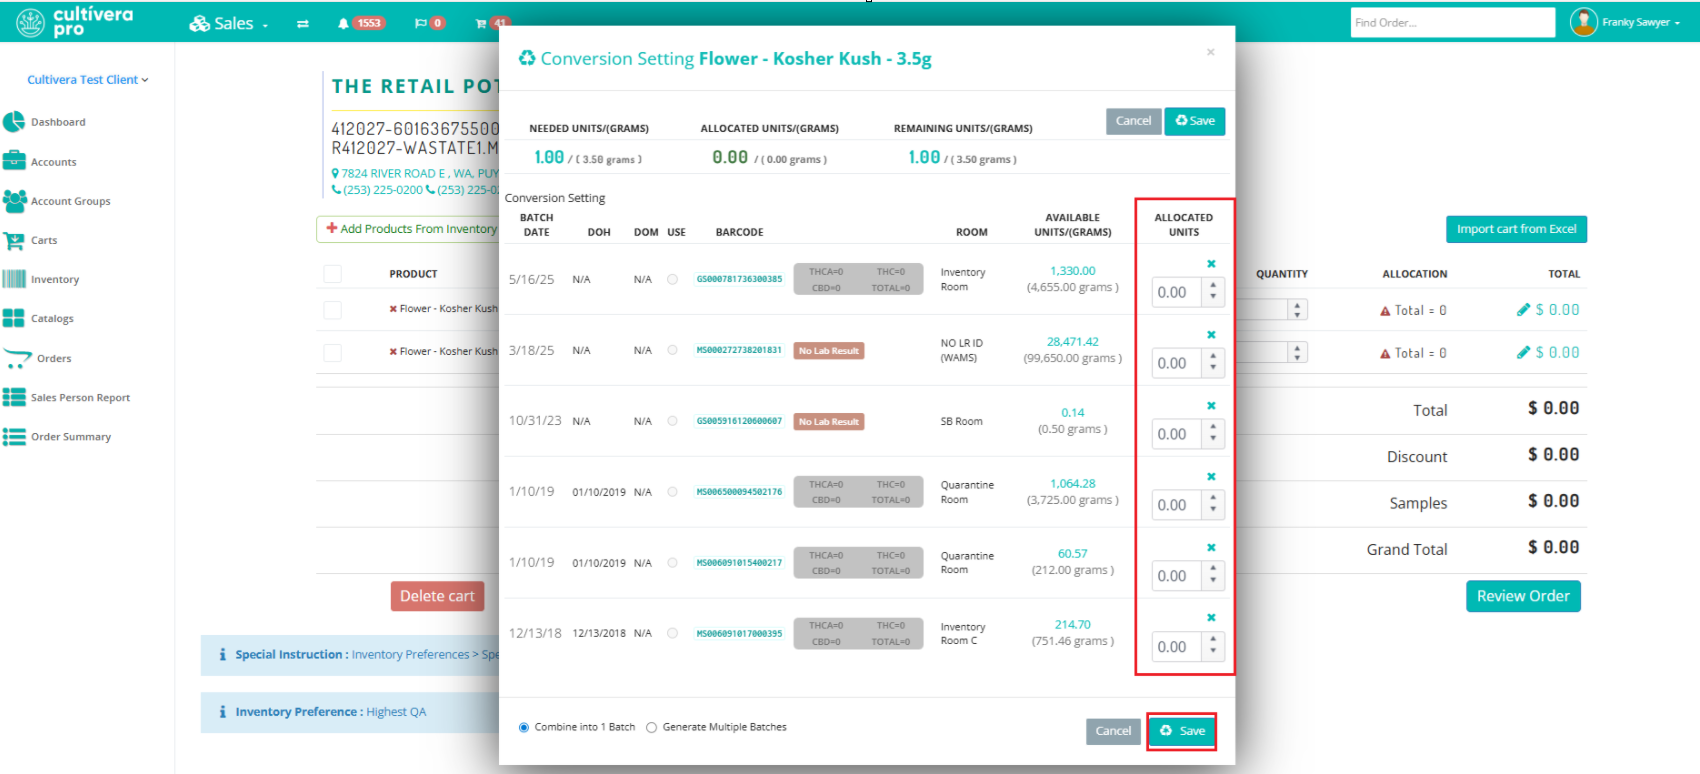
Otherwise, if you're working with prepackaged inventory, you can “Allocate” the line items accordingly on the Fulfillment > Orders > Order Details page.
- Next, you can select "Review Order":
- Then select "Submit Order".
If the line items on the order are "pack to order" then you can select "Submit as Backorder" to move forward.
You can also set the “Est. Delivery Date” on this page before submitting the order.
- If the line items are Pack-to-Order: Once the order has been submitted, you can navigate to Inventory Management > Conversions for Orders to convert the line items for the order.
Once all of the line items have been converted the order will show as "Sublotted".
- If you have instead allocated prepackaged Inventory to the order and do not need to complete any 'Conversions for Orders', then you can select either "Sublot" or "Skip Sublot" to fully sublot the order.
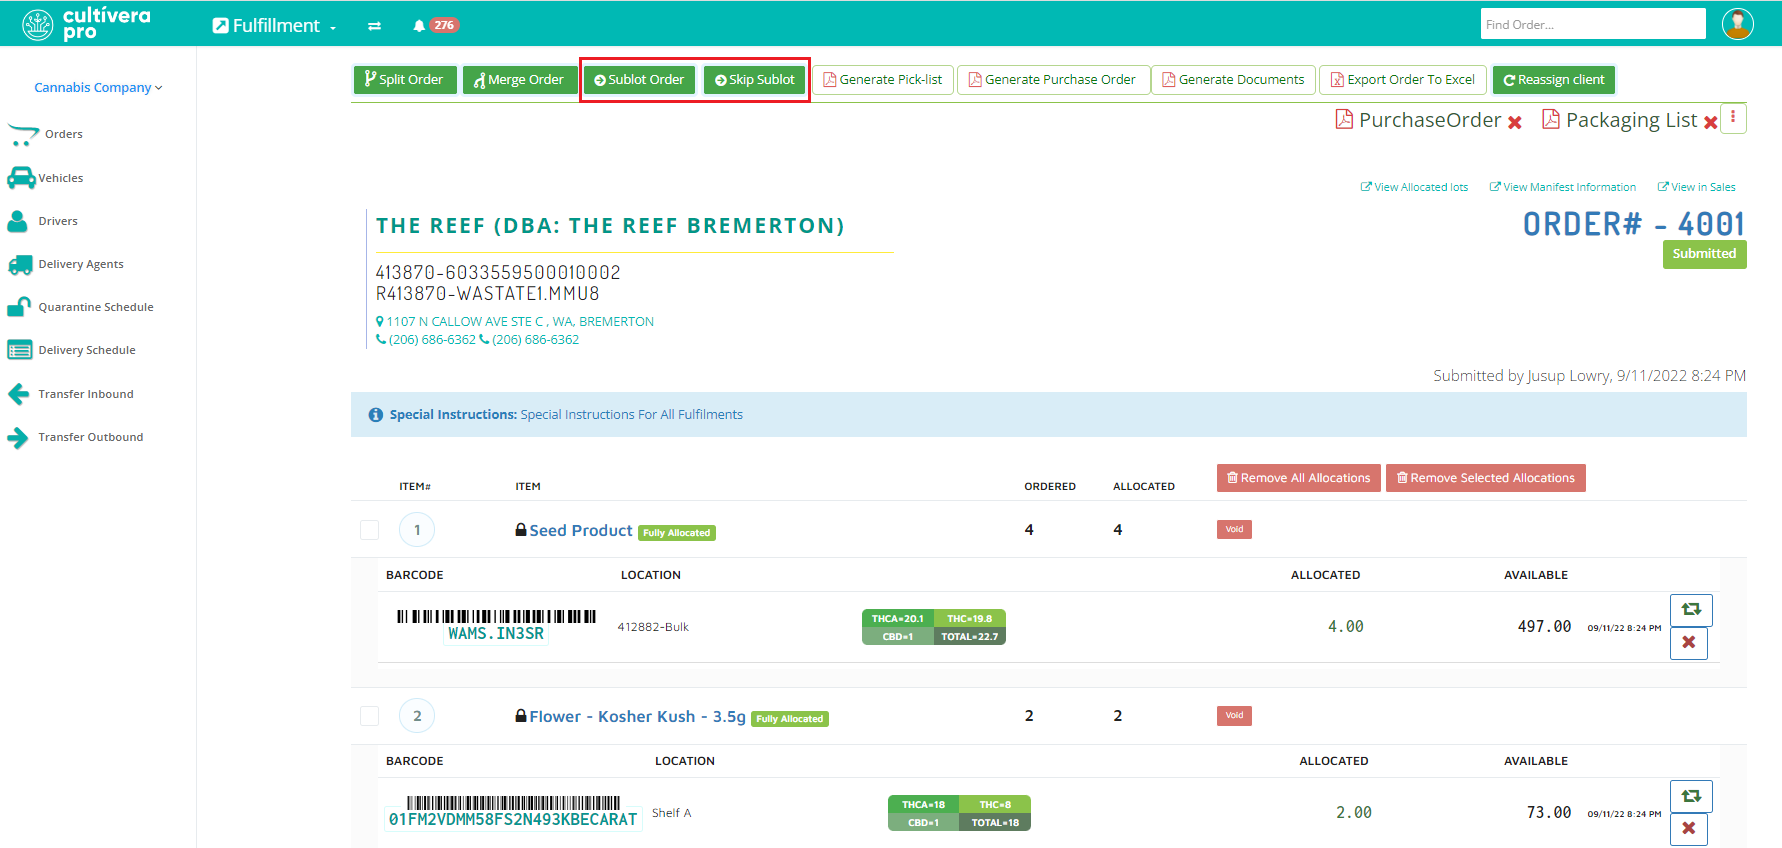
"Sublot" - changes the barcodes of the line items on the order
"Skip Sublot" - retains the allocated barcodes on the order
"Skip Sublot" - retains the allocated barcodes on the order
- After all line items on the order have been "Sublotted" you can then navigate back to Fulfillment > Orders and click on the Order # to view the Order Details page.
- From here, select Manifest > "Manifest Now" and fill out the manifest information as needed. Then select "Save & Manifest".
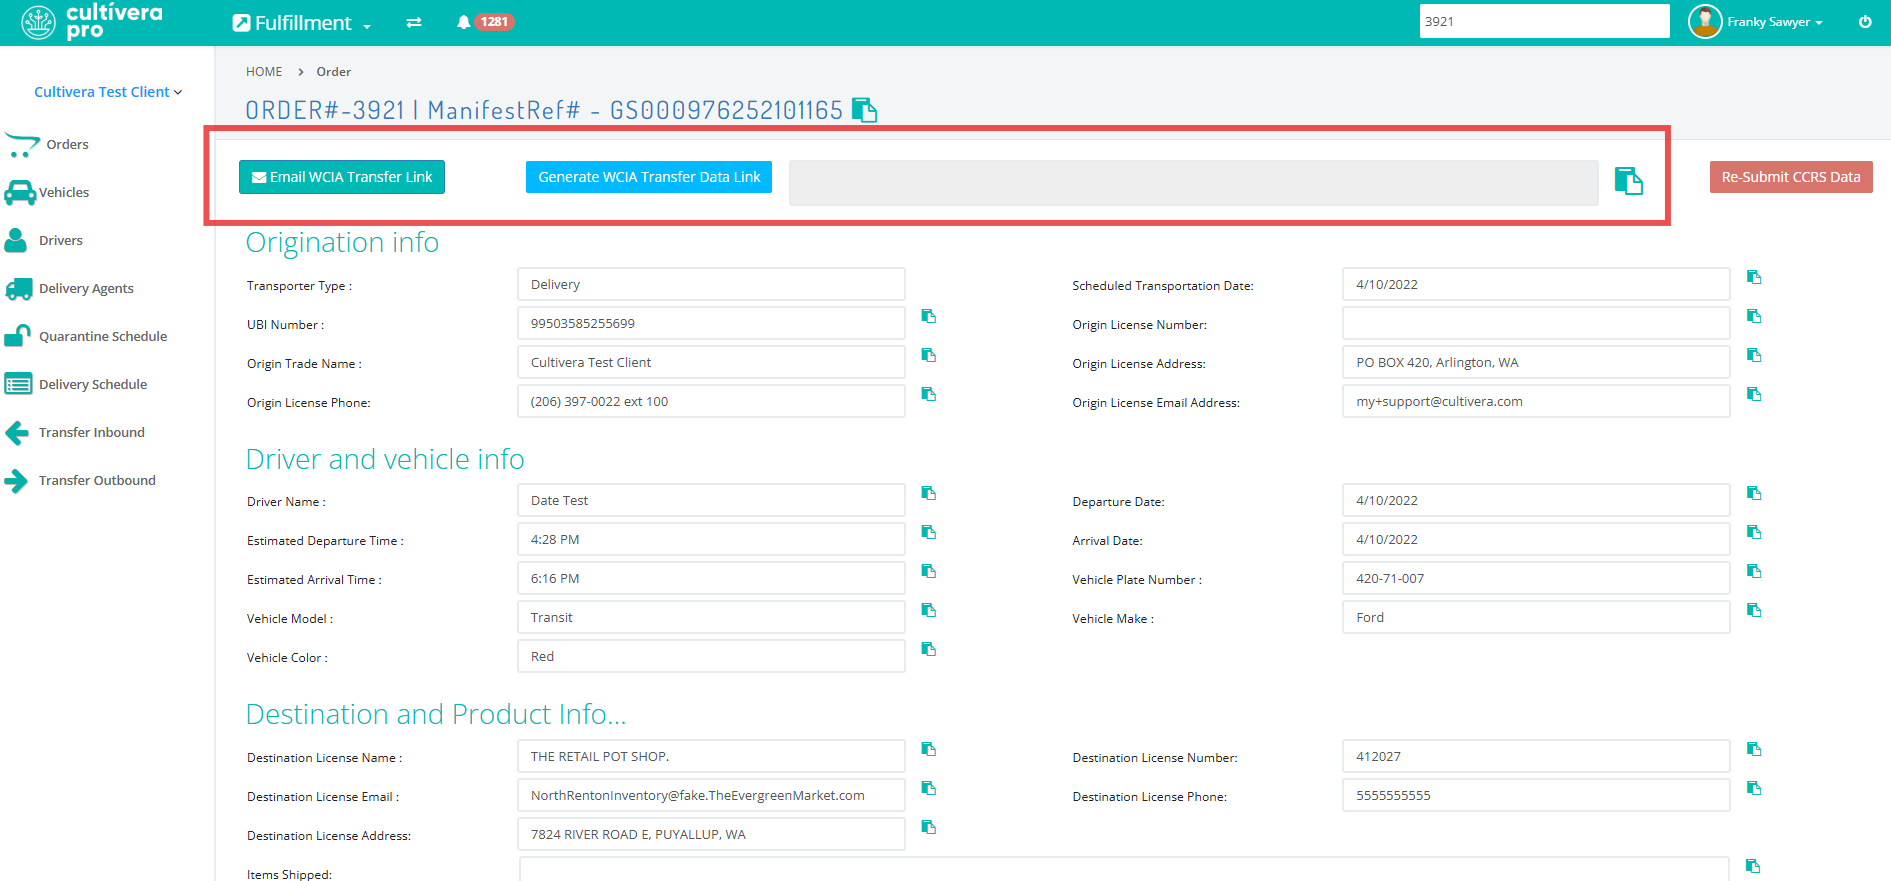
Be sure to double-check that the "Destination License Email" and "Destination License Phone #" are filled out before submitting the LCB Manifest.
- Next, click on "View Manifest Information" (above the Order #) to then generate the JSON link for the transfer, which can be emailed by selecting “Email WCIA Transfer Link”.
- Once the order has been manifested, you can then navigate back to Fulfillment > Orders > Order Details and select "Invoice".
You can “Email Invoice” once the order has been invoiced and can include the JSON transfer link at the time you email the invoice to the purchaser by checking the “Include WCIA Transfer Link” checkbox. You can also include any COAs associated with the order at the time you "Email Invoice" as well.
- The final step is to select "Release" once the transfer has left the facility to be delivered. This will place the order in Fulfillment > Transfer Outbound, where you can then mark the order as “Accepted”/”Rejected”.
There is no longer a state system in Washington that will automatically sync the recipient's accepted/rejected units, so please be sure to do this manually via Fulfillment > Transfer Outbound for outgoing transfers.
Please click here to view more information regarding the WCIA JSON transfer link.
Please click here to view more information regarding accepting/rejecting outbound transfers and updating invoices for orders that have been Released in your system.