PRO (WA): Updating Accepted/Rejected Units or Pricing on Outbound Transfers
![]() Updated
Updated
How to Update an Outbound Transfer in Cultivera
With the transition to CCRS in Washington state, the process for marking outbound transfers as Accepted/Rejected and returning inventory into your system has mostly remained the same.
Since the LCB cut away from Leaf Data, when you navigate to Fulfillment > Transfer Outbound, any accepted/rejected orders will not sync down into your system to indicate as such.
Please review this guide on how to manually update an Outbound Transfer in Cultivera after the transfer has been accepted/rejected by the recipient.
- Navigate to Inventory Management > Transfer Outbound to manually mark an order as accepted/rejected by clicking the "Mark Accepted" or "Mark Rejected" button.
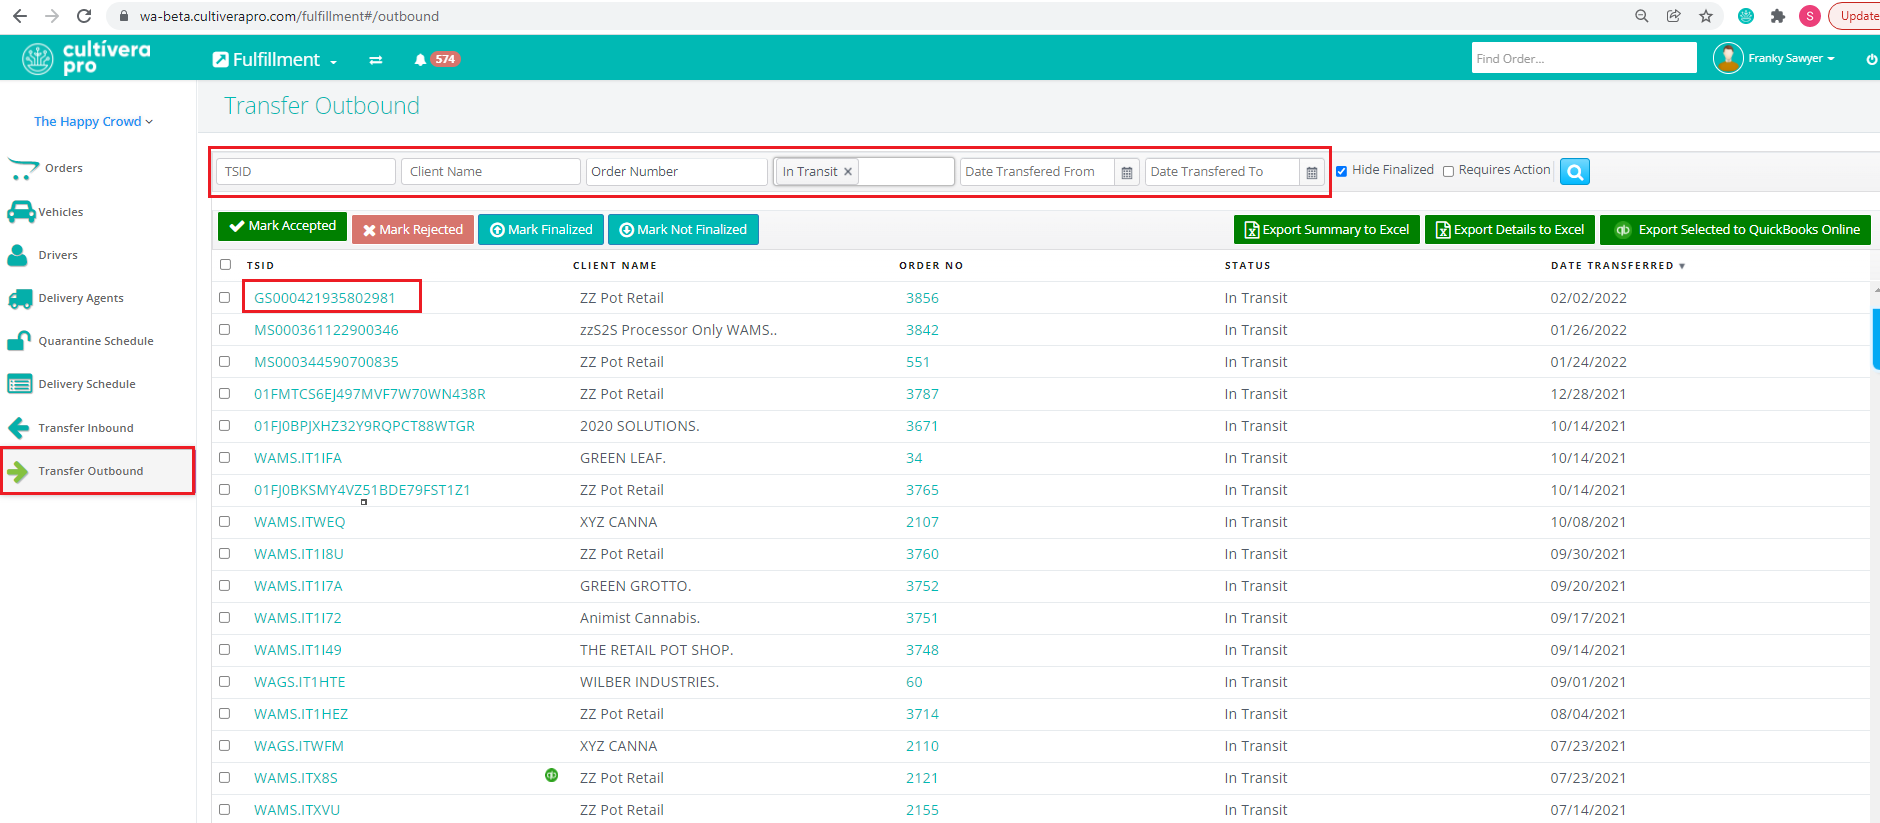
This can be done from the Fulfillment > Transfer Outbound or in a specific Transfer Outbound Details page. You can utilize the filter on the Fulfillment > Transfer Outbound page to search for the intended TSID, Client, Order #, etc as needed.

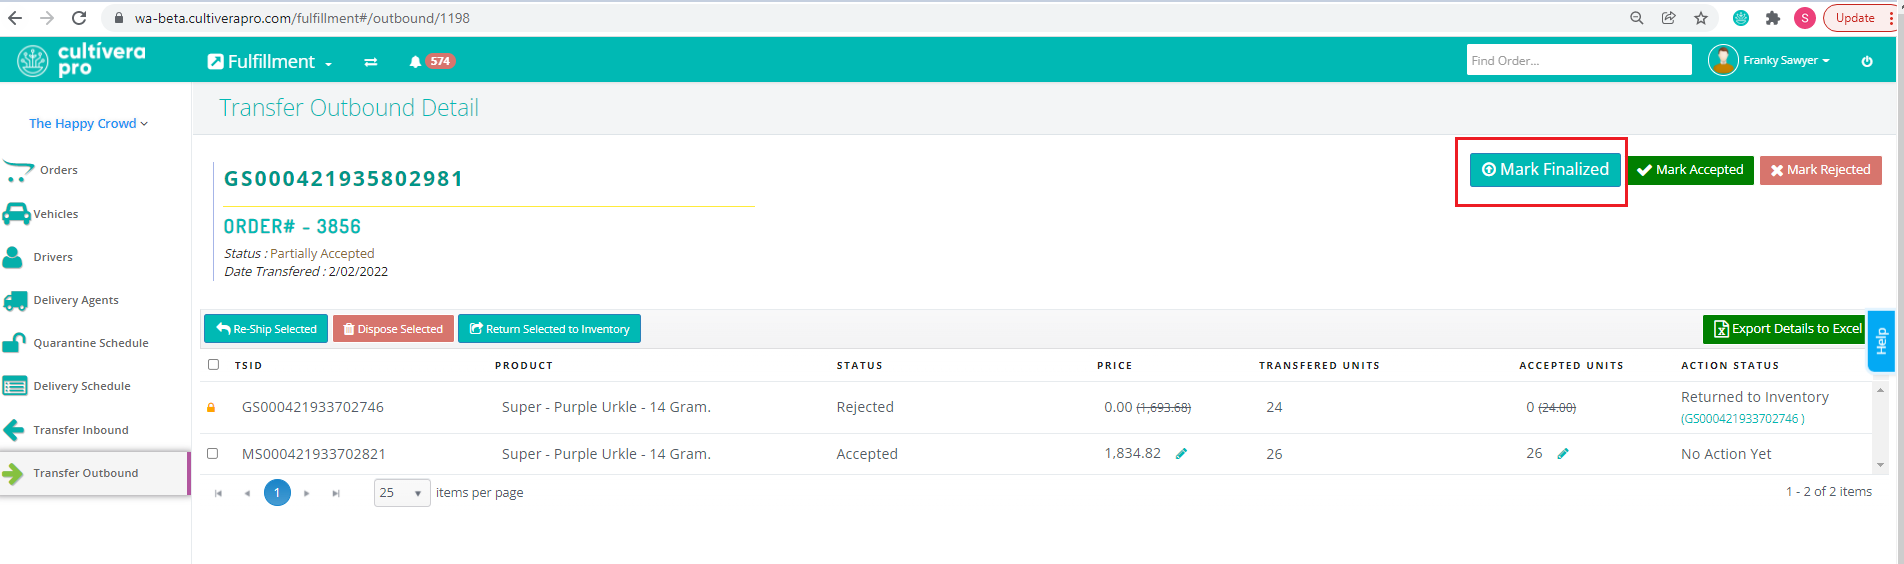
In the event an outbound transfer is only partially accepted, you will still need to navigate to the Transfer Outbound Details page and click "Mark Accepted" or "Mark Rejected". (Select "Accepted" if the majority of items on the order were actually accepted, and vice versa.)
- Once you click "Mark Accepted/Rejected'', you will see that each line item on the transfer will have a blue pencil icon show up next to the "Price" and "Accepted Units" for each line item.
You can click on this pencil icon to update how much of each line item was actually accepted, and update the price of the line item as well (if needed).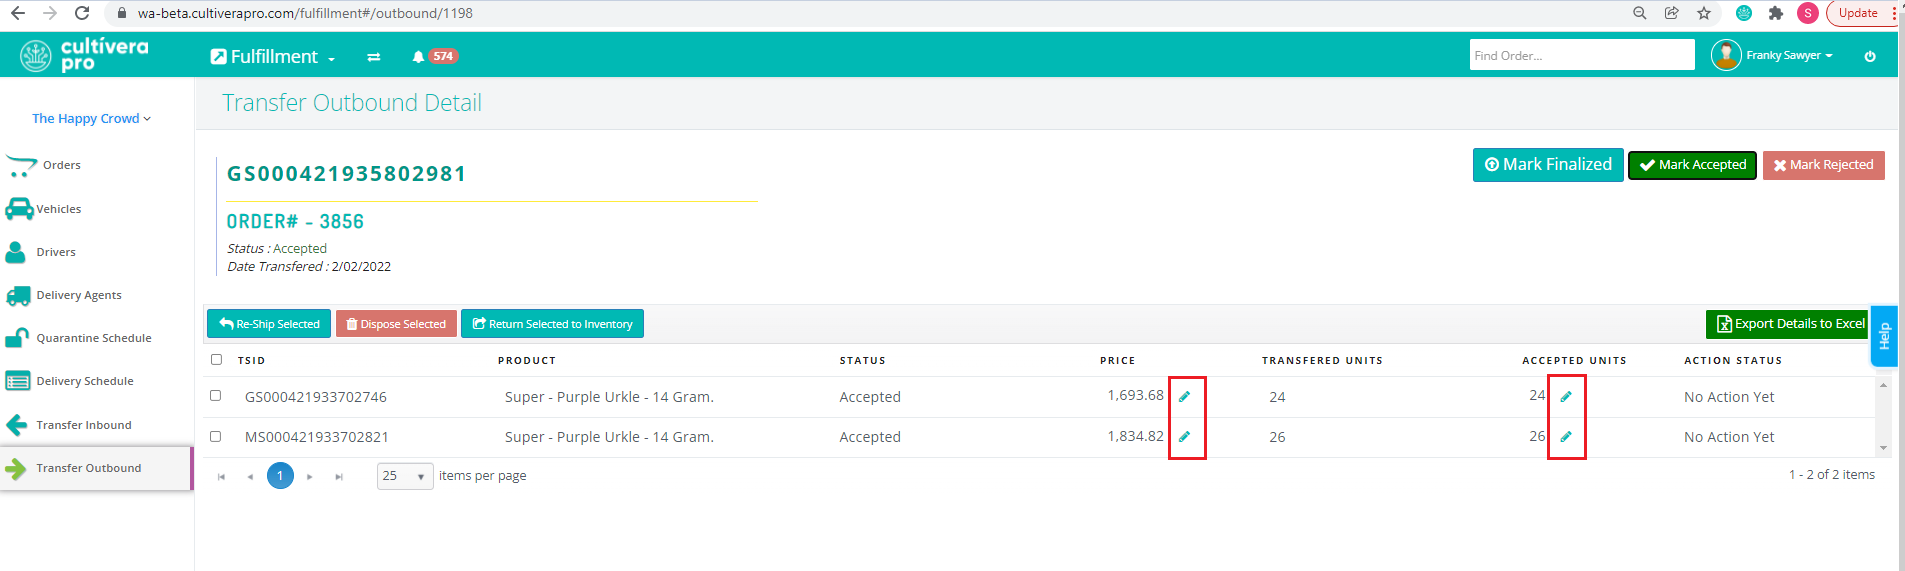 If you only need to update the pricing for the line totals to generate a new Invoice, you can update the Price column accordingly for the line items that need to be updated and then navigate back to Fulfillment > Orders > Order Details and regenerate the invoice to see the updated price.
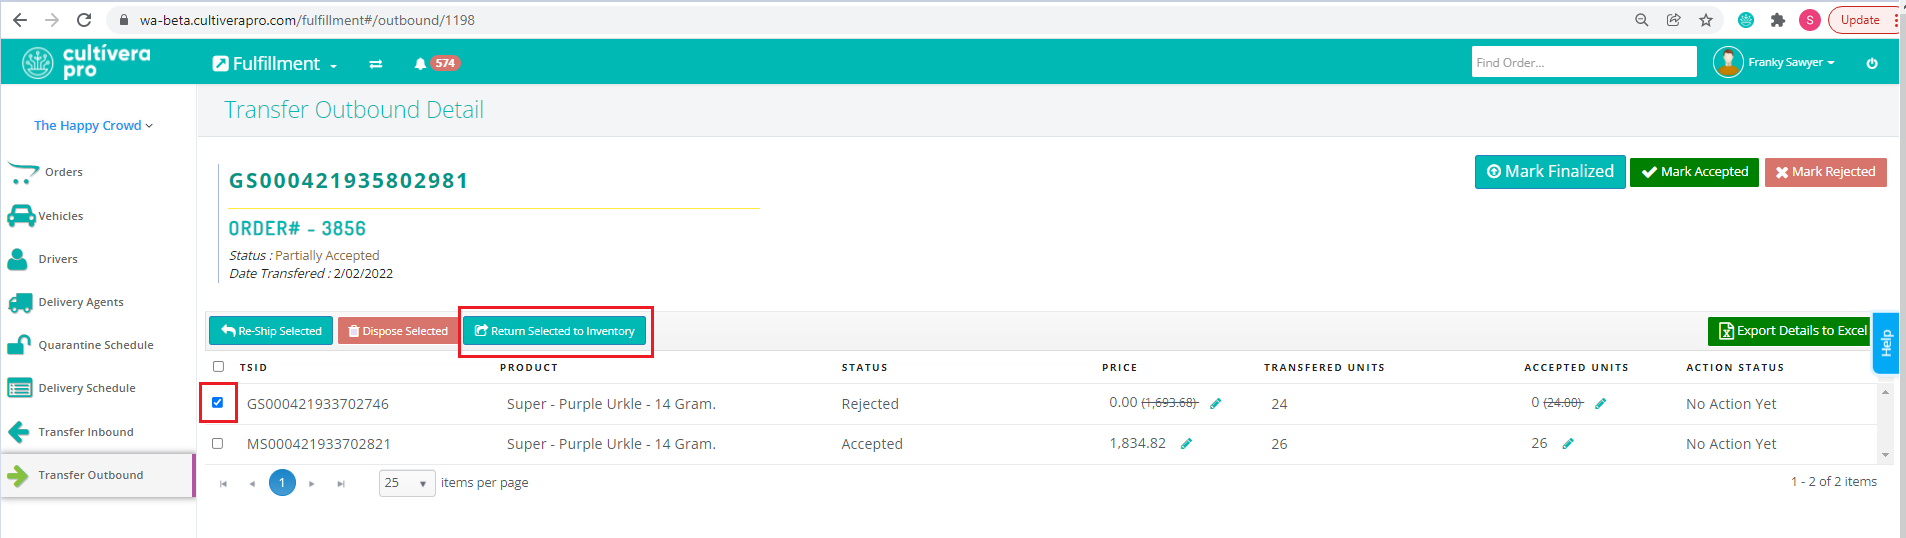
 - If needed, you can select the necessary line items that need to be returned to your inventory and then select "Return Selected to Inventory".
- After all necessary updates have been made to the outbound transfer, select "Mark Finalized".