POS - Inventory Management: Inventory Details
![]() Updated
Updated
POS Inventory Management: Inventory Details
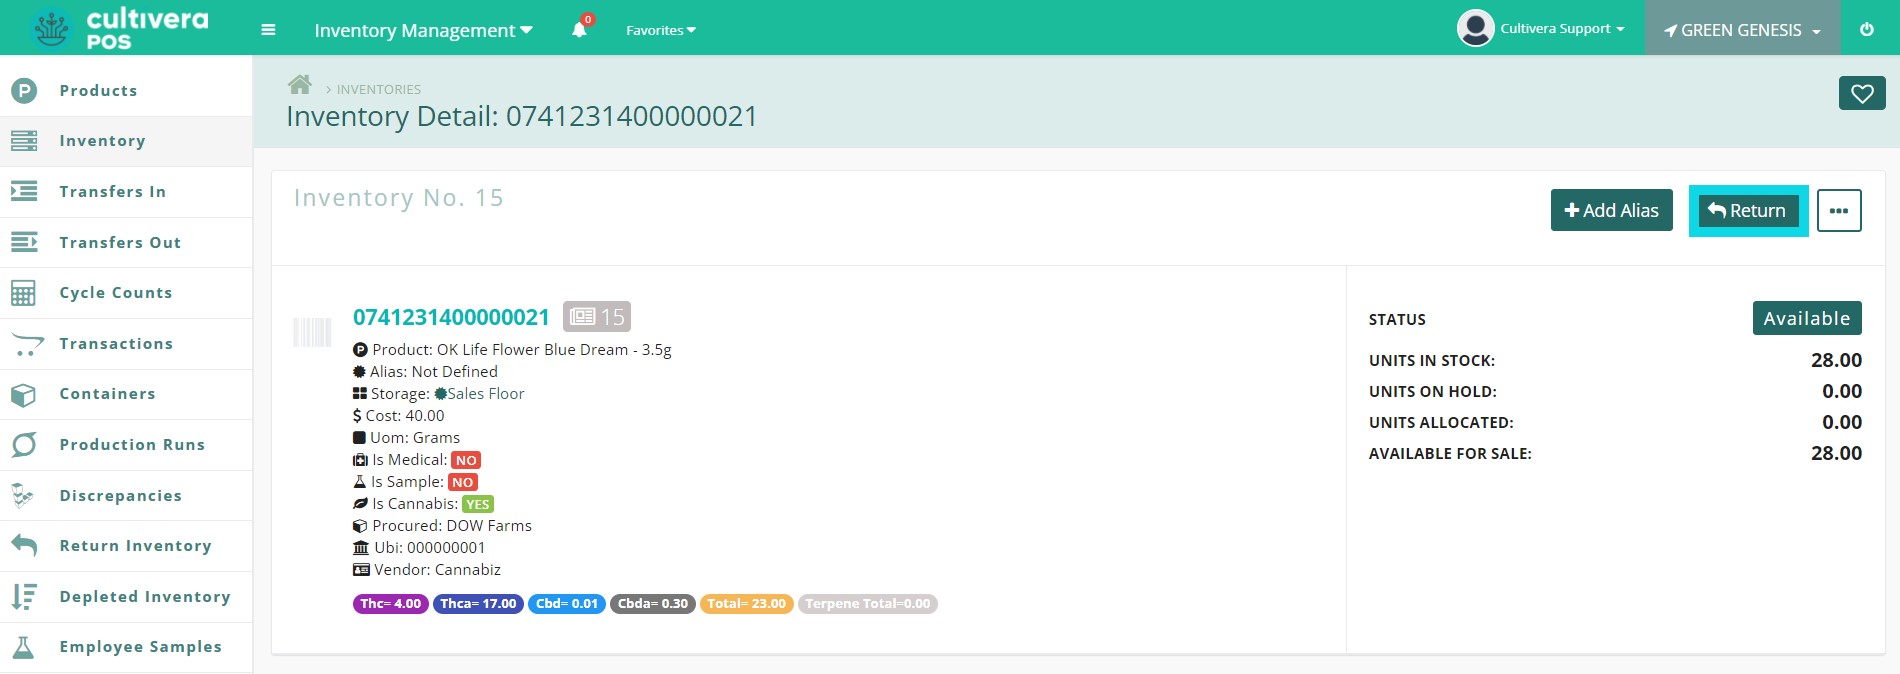
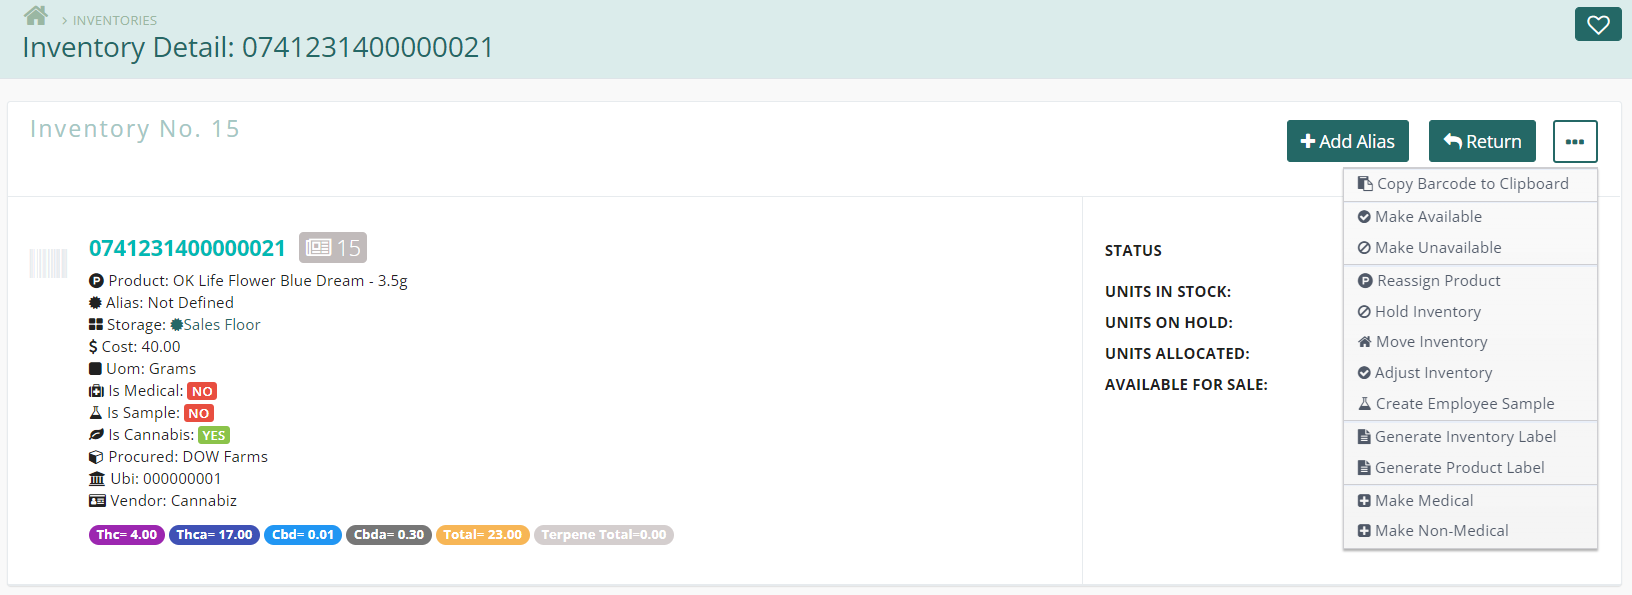
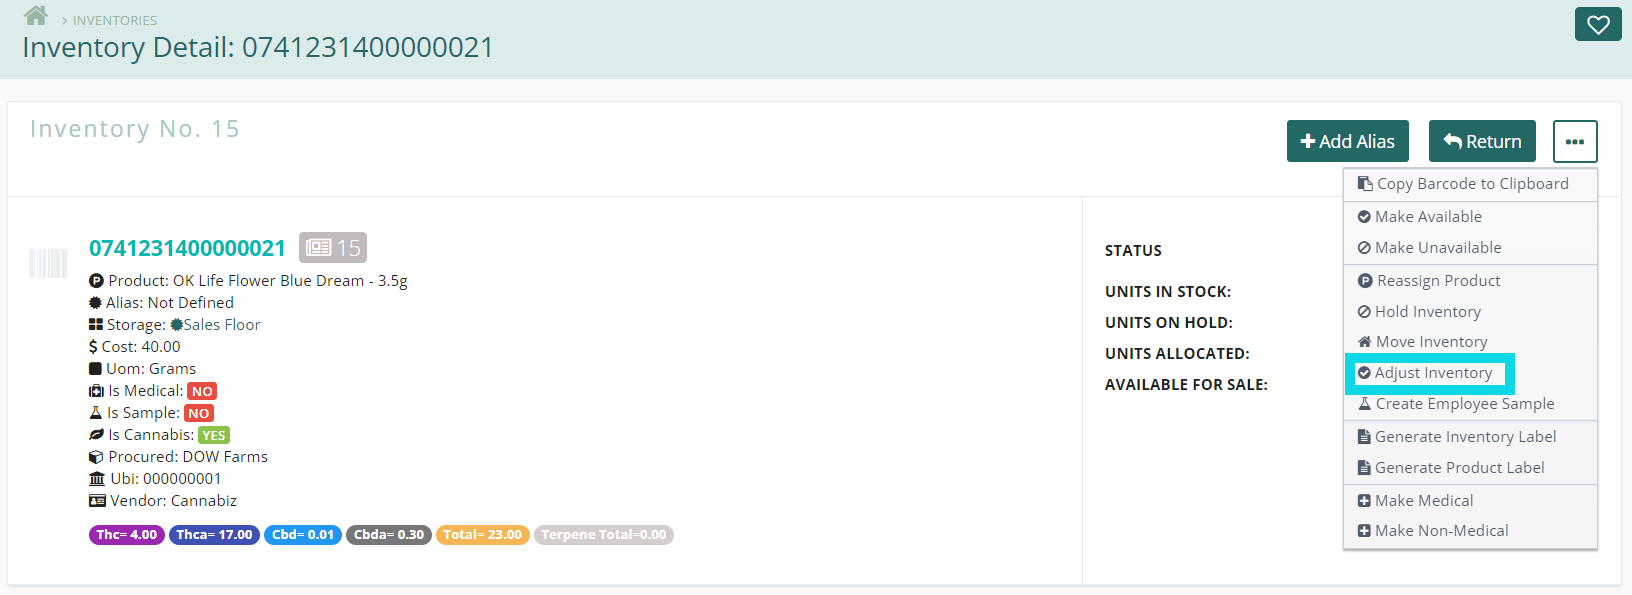
The Inventory Details page will provide insight into a variety of information pertaining to each barcode. This will list the product barcode number, what product the barcode is assigned to, storage locations, cost, unit of measurement, QA results, units in stock, and much more. You can also perform certain inventory actions from here including moving inventory locations, re-assigning products, and performing inventory actions like creating returns, adjusting inventory quantity, and generating labels.
- Log in to Cultivera Back Office.
- Navigate to the Inventory page within the Inventory Management module.
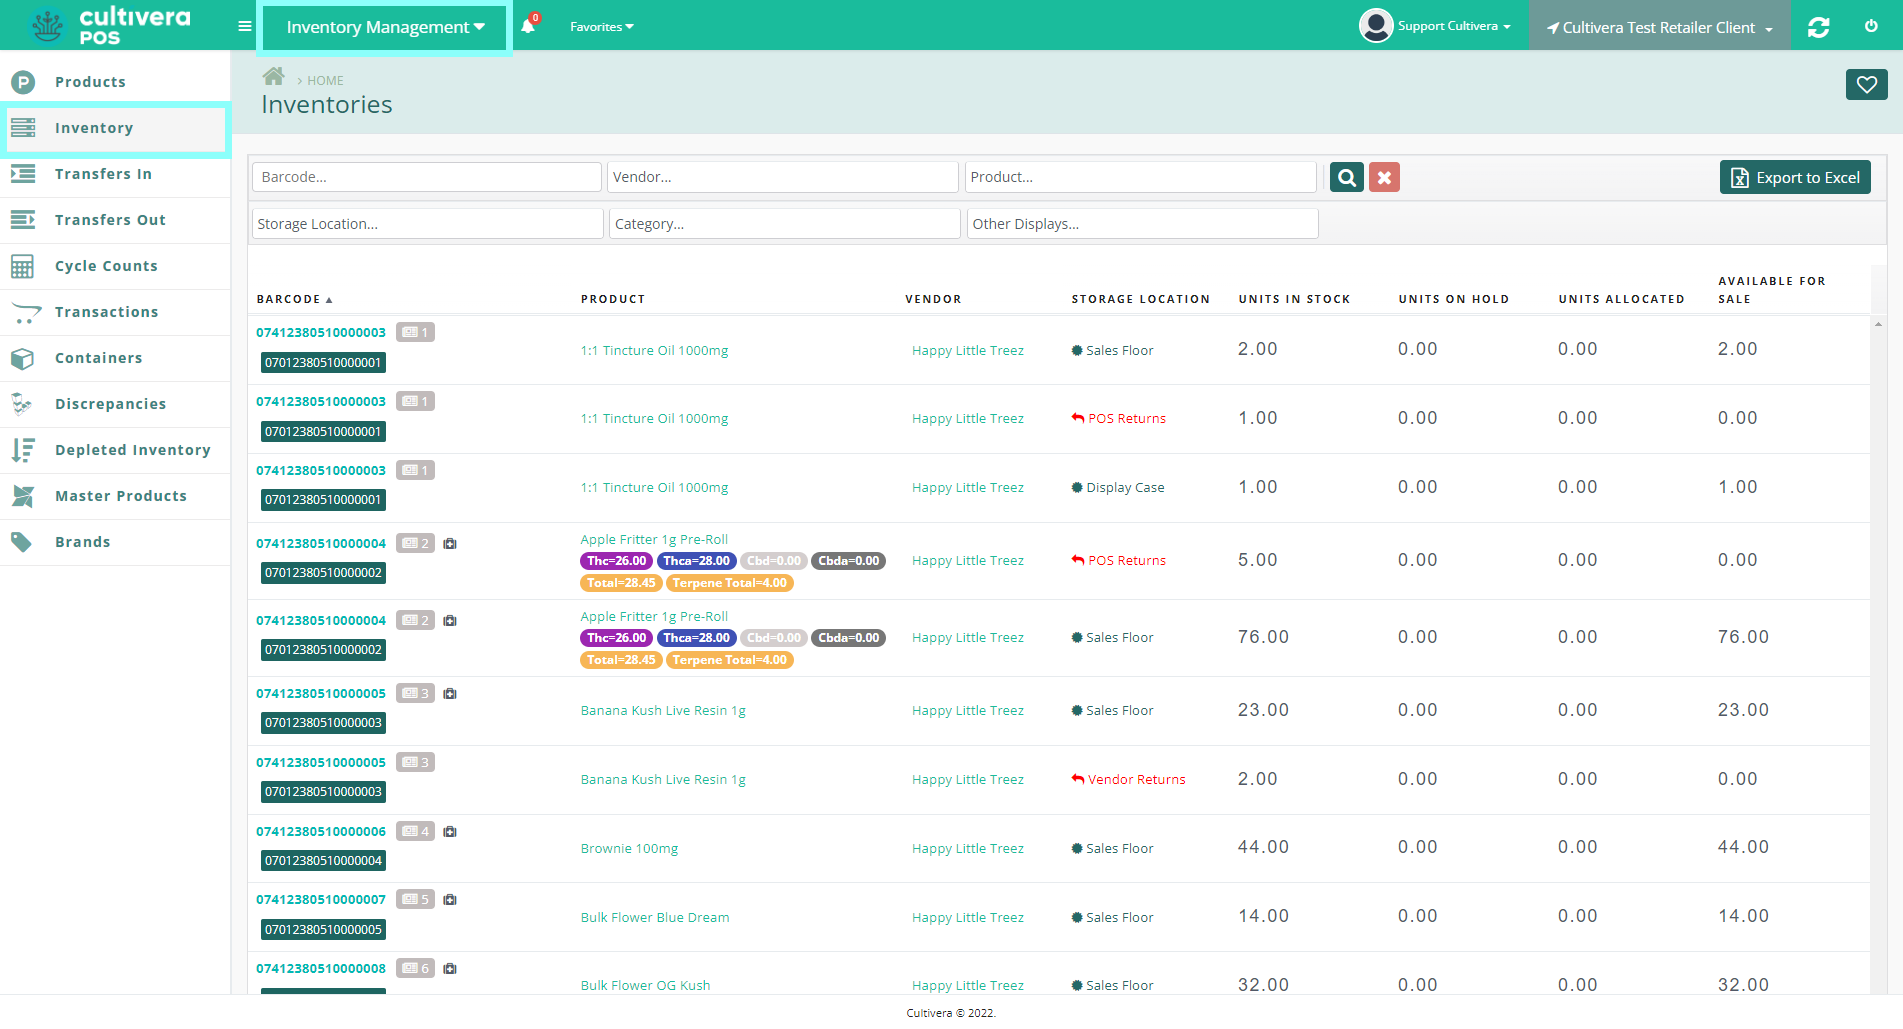
- Search for the desired product then click on the teal barcode to bring up the Inventory Detail page.
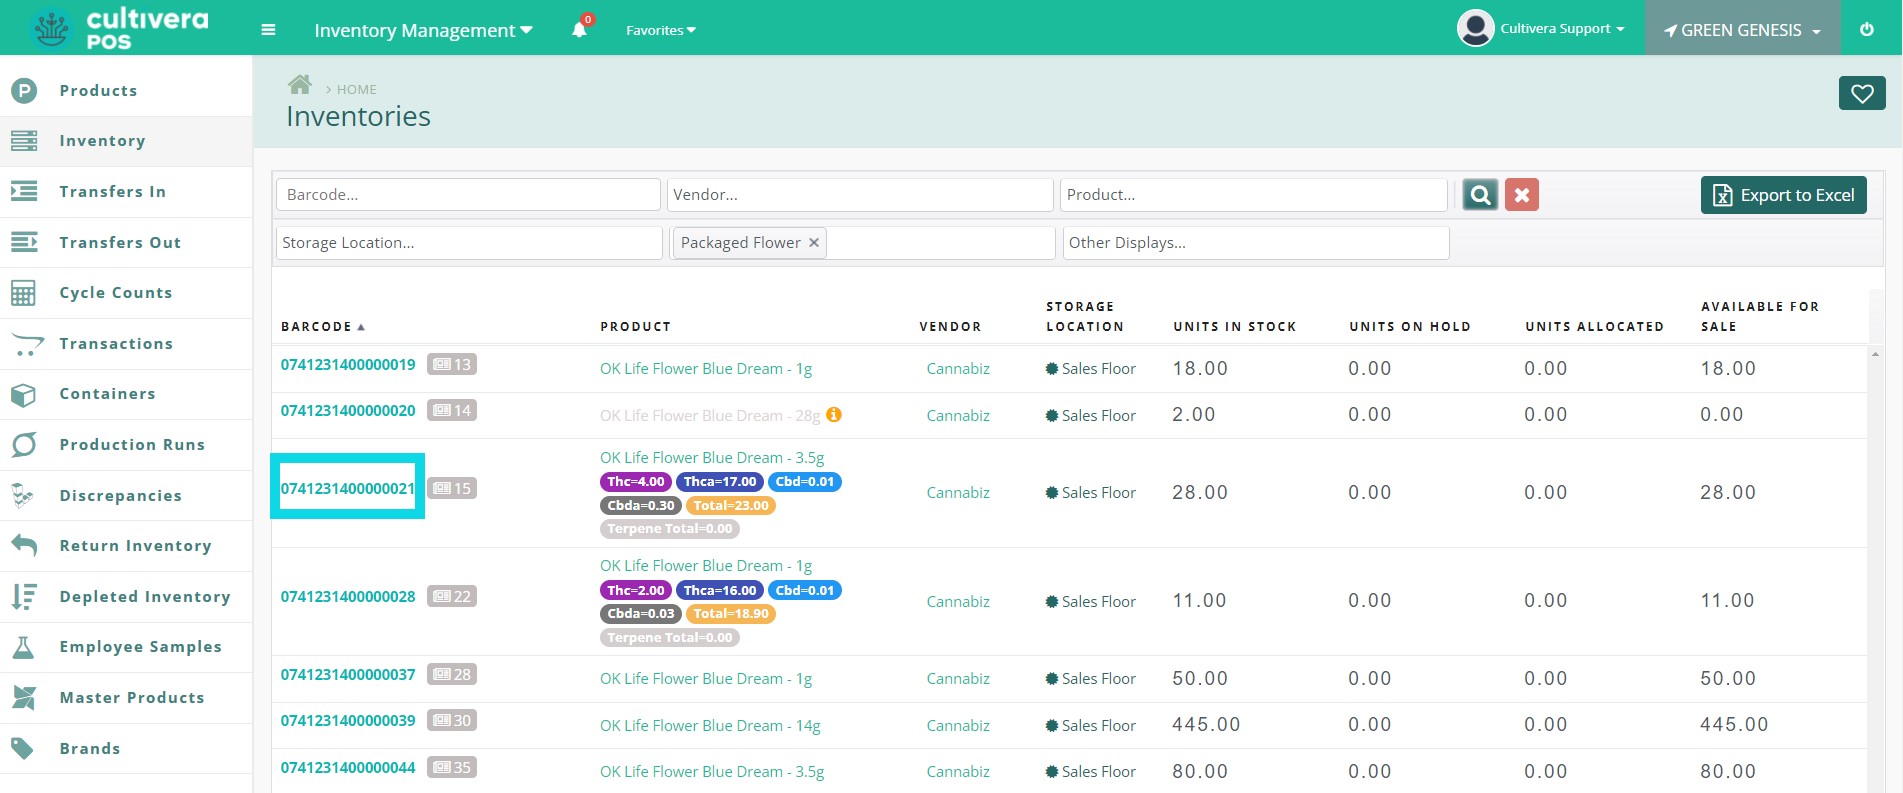
- From here, you can view details about the specific barcode and its assigned product.
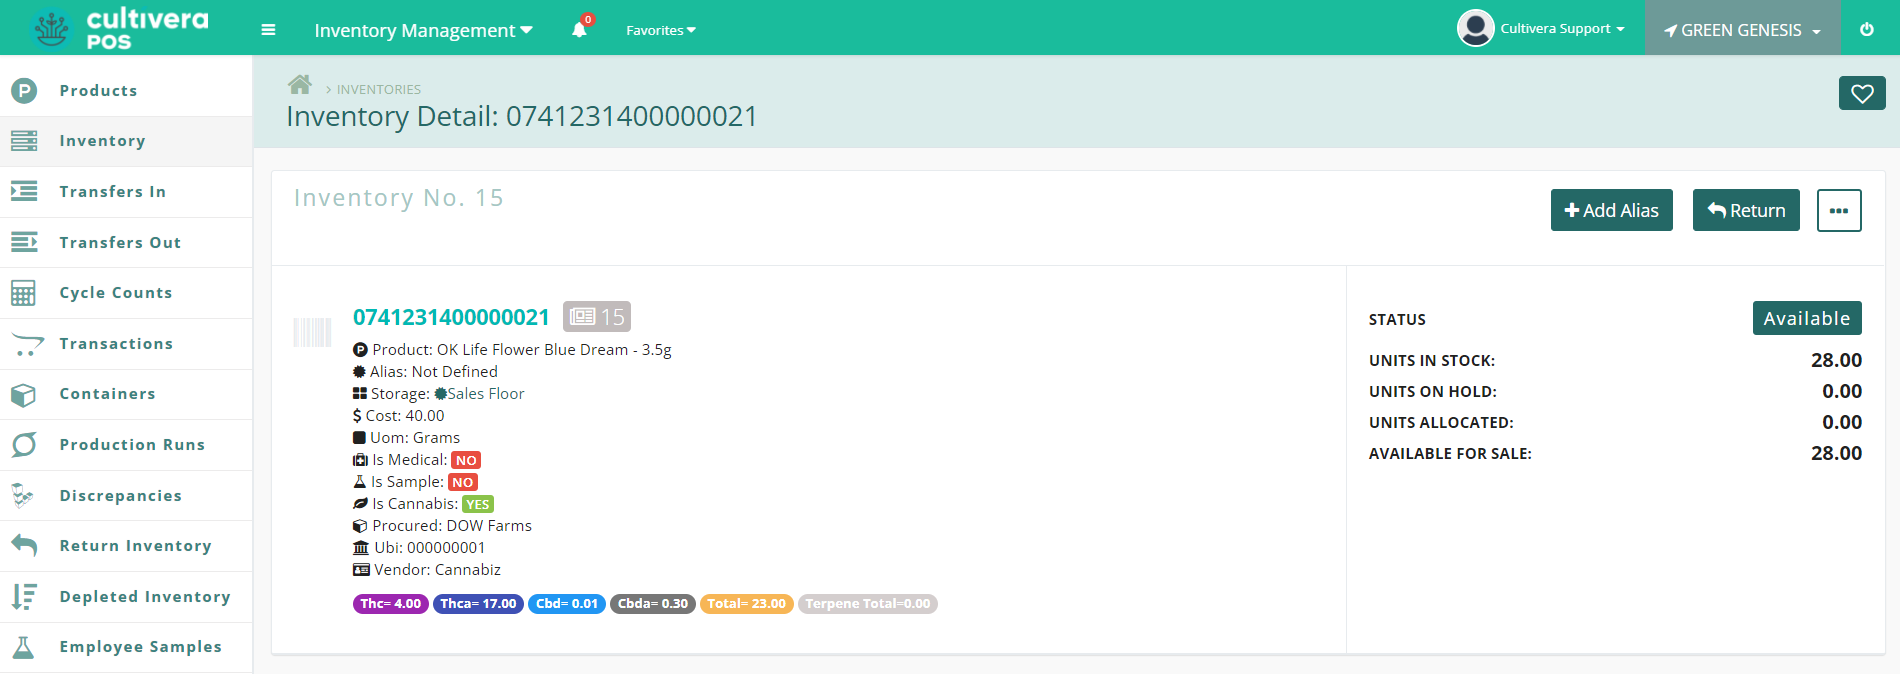
- From here, you can view details about the specific barcode and its assigned product.
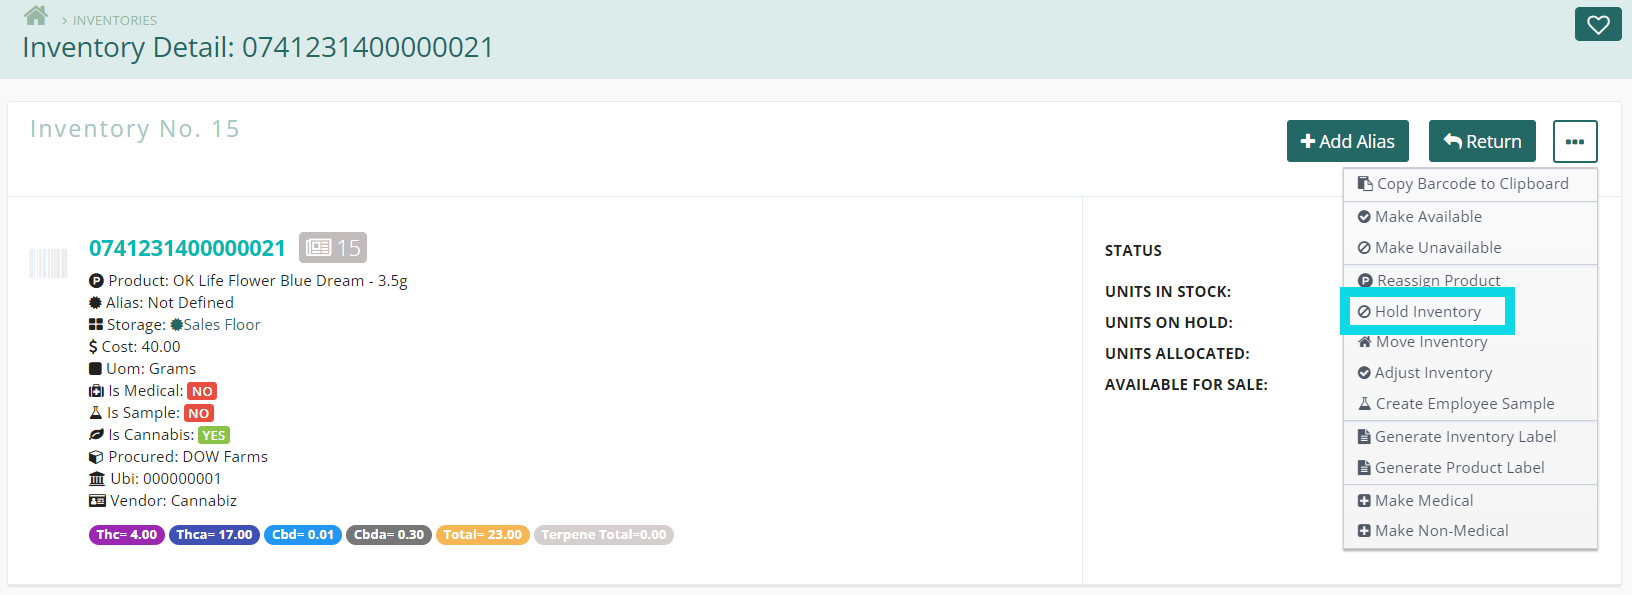
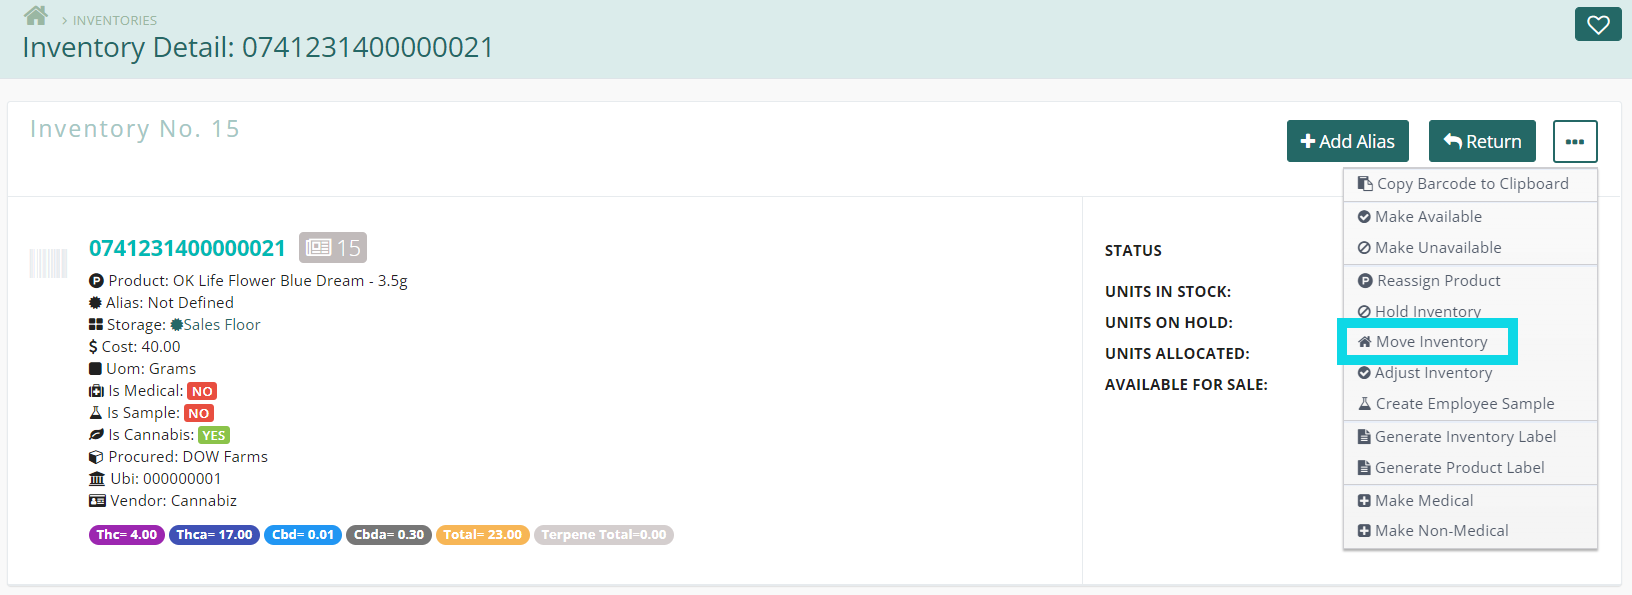
- To access Inventory Actions from the Inventory Detail Page, select the "Three Dots (...)" button.
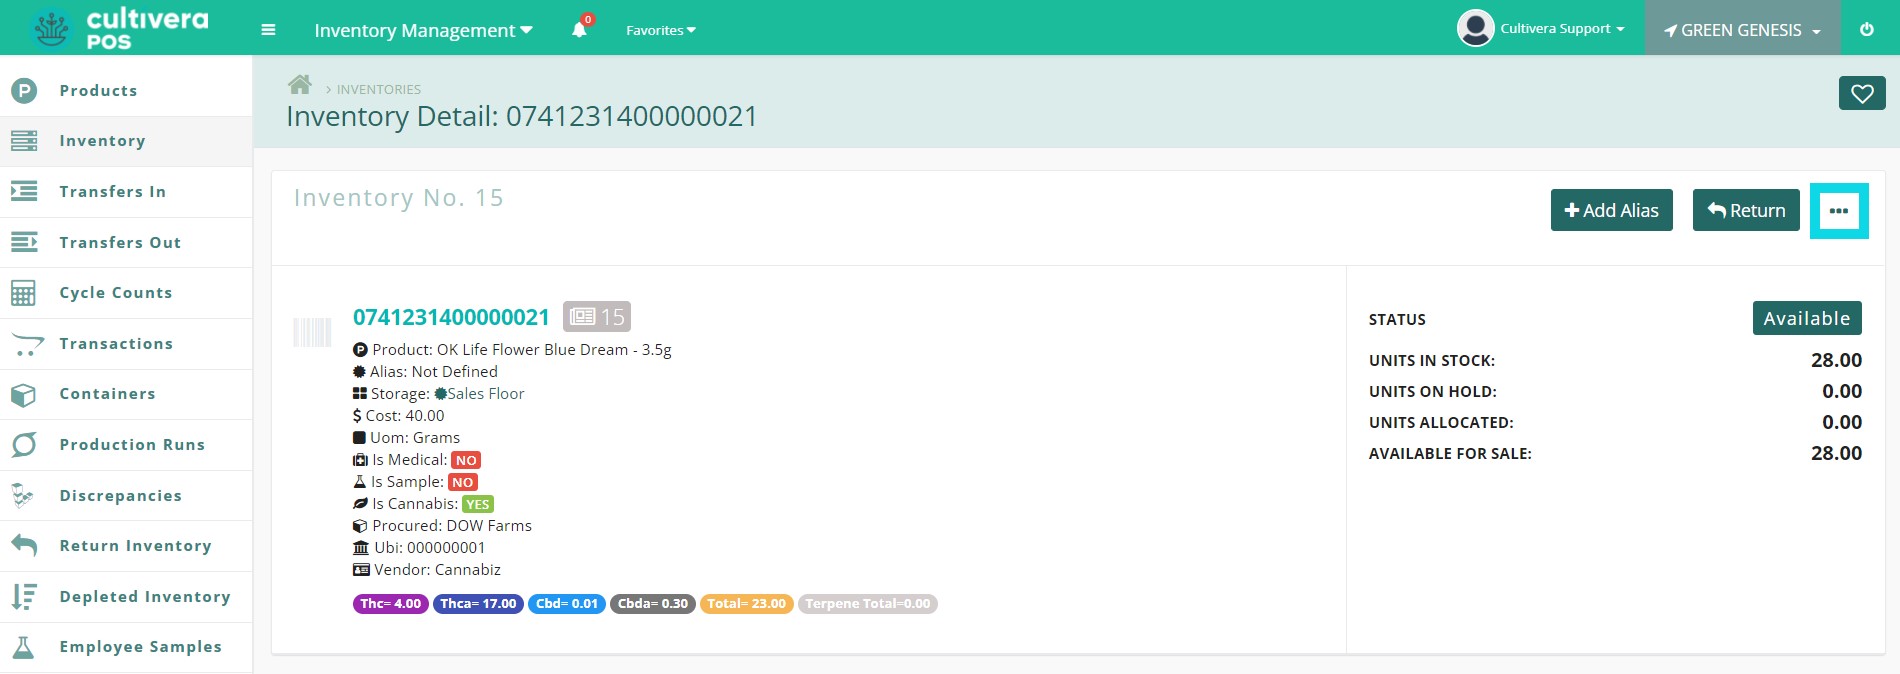
- This will show the Inventory Action Menu where you can perform a number of inventory actions.
- This will show the Inventory Action Menu where you can perform a number of inventory actions.
Details
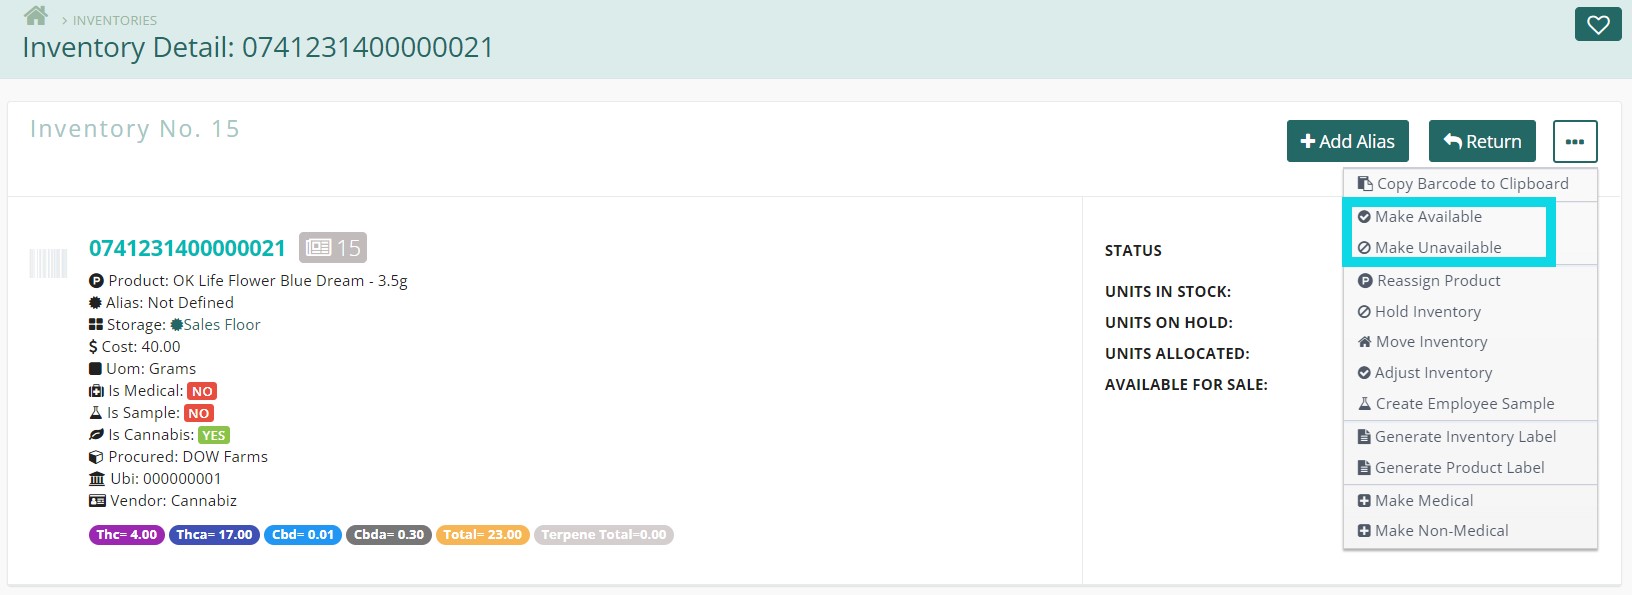
This menu allows you to Copy the Barcode to the Clipboard, Make Inventory Available/Unavailable, Reassign Products, Hold, Move and Adjust Inventory, Create Employee Samples, Generate Inventory or Product Labels, and Make Inventory Medical or Non-Medical.
- To make products available or unavailable, simply click the desired option from the Inventory Action Menu.
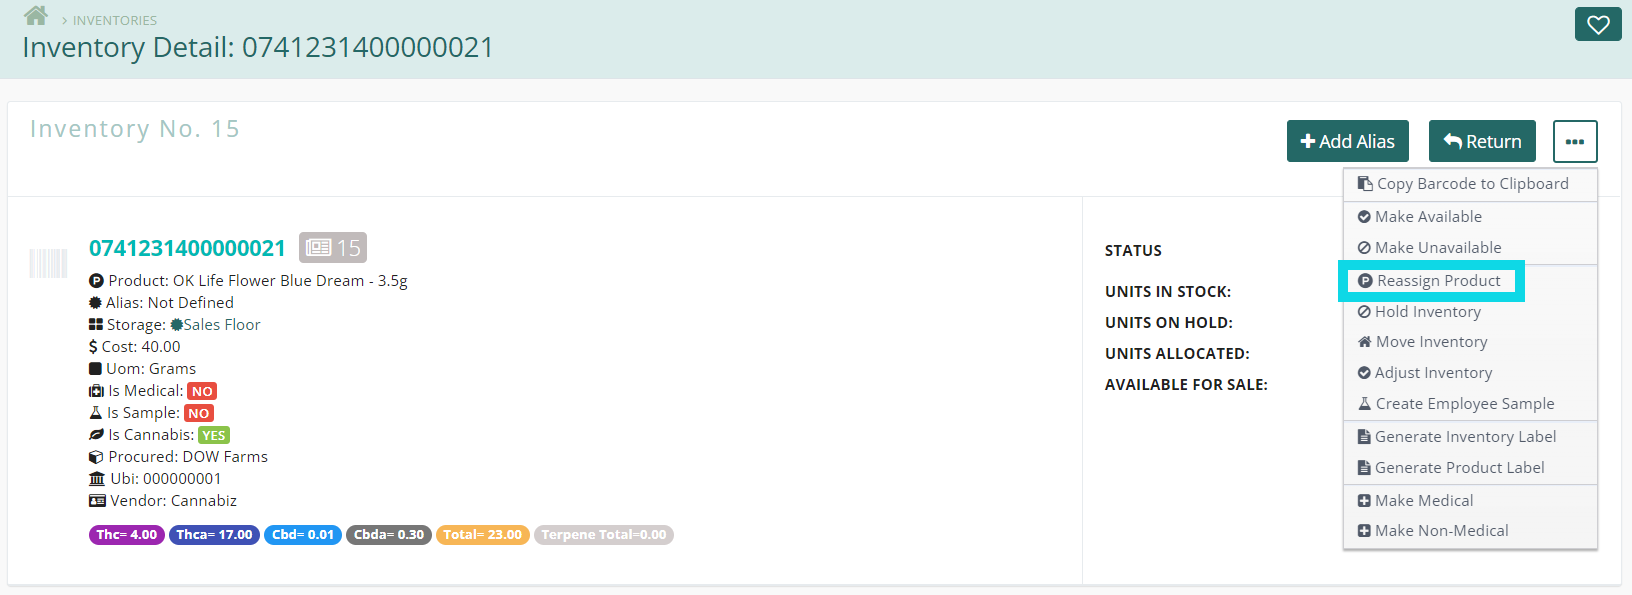
- To reassign the barcode to a different product, select "Reassign Product" from the Inventory Action Menu.
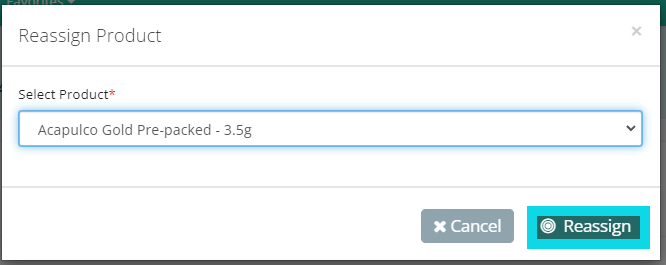
- Select the product from the drop-down menu and click the "Reassign" button.
- Select the product from the drop-down menu and click the "Reassign" button.
- To place the product assigned to this barcode on hold, click "Hold Inventory" from the Inventory Action Menu.
- Enter the number of units to hold, then select the "Hold" button.
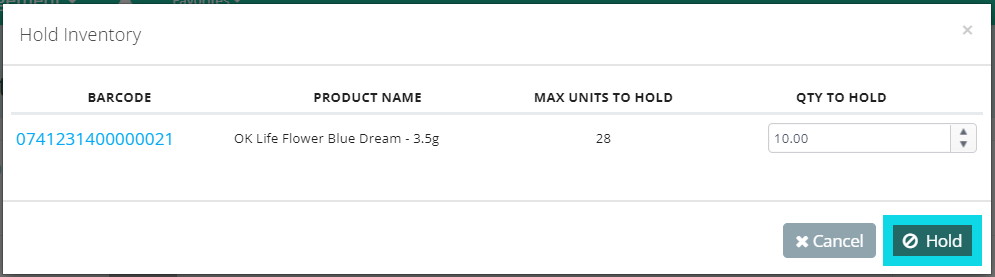
- Enter the number of units to hold, then select the "Hold" button.
- To move the product assigned to this barcode to a different room, click "Move Inventory" from the Inventory Action Menu.
- Select the destination room from the drop-down menu and enter the number of units to be moved, then click the "Move" button when complete.
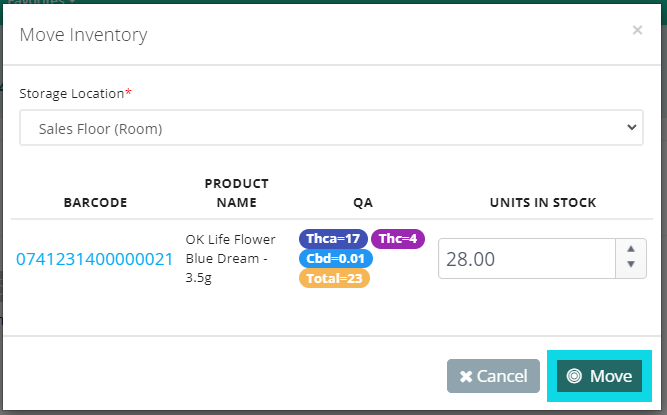
- Select the destination room from the drop-down menu and enter the number of units to be moved, then click the "Move" button when complete.
- To adjust the product quantity assigned to this barcode, click "Adjust Inventory" from the Inventory Action Menu.
- Select a Reason from the drop-down menu, leave a Memo to explain the adjustment, then enter the New Quantity on hand. Once finished, click the "Adjust" button.
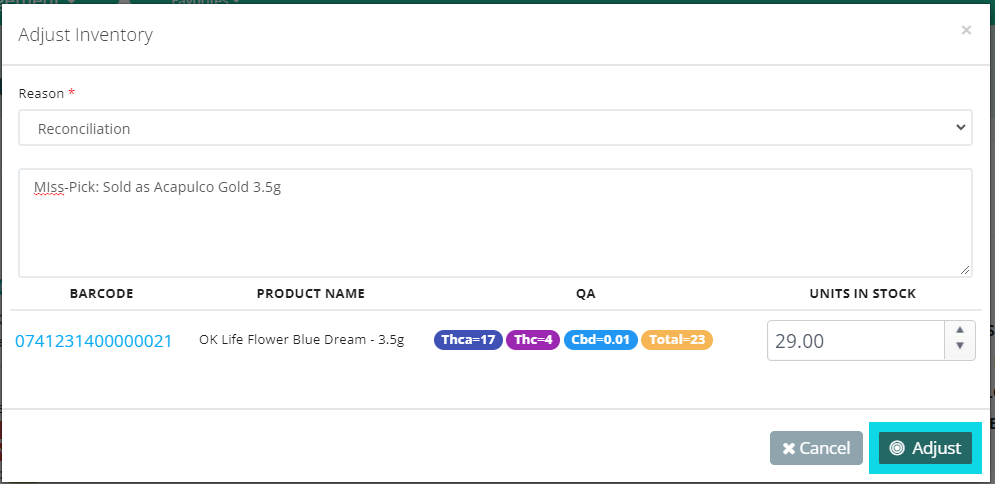
- Select a Reason from the drop-down menu, leave a Memo to explain the adjustment, then enter the New Quantity on hand. Once finished, click the "Adjust" button.
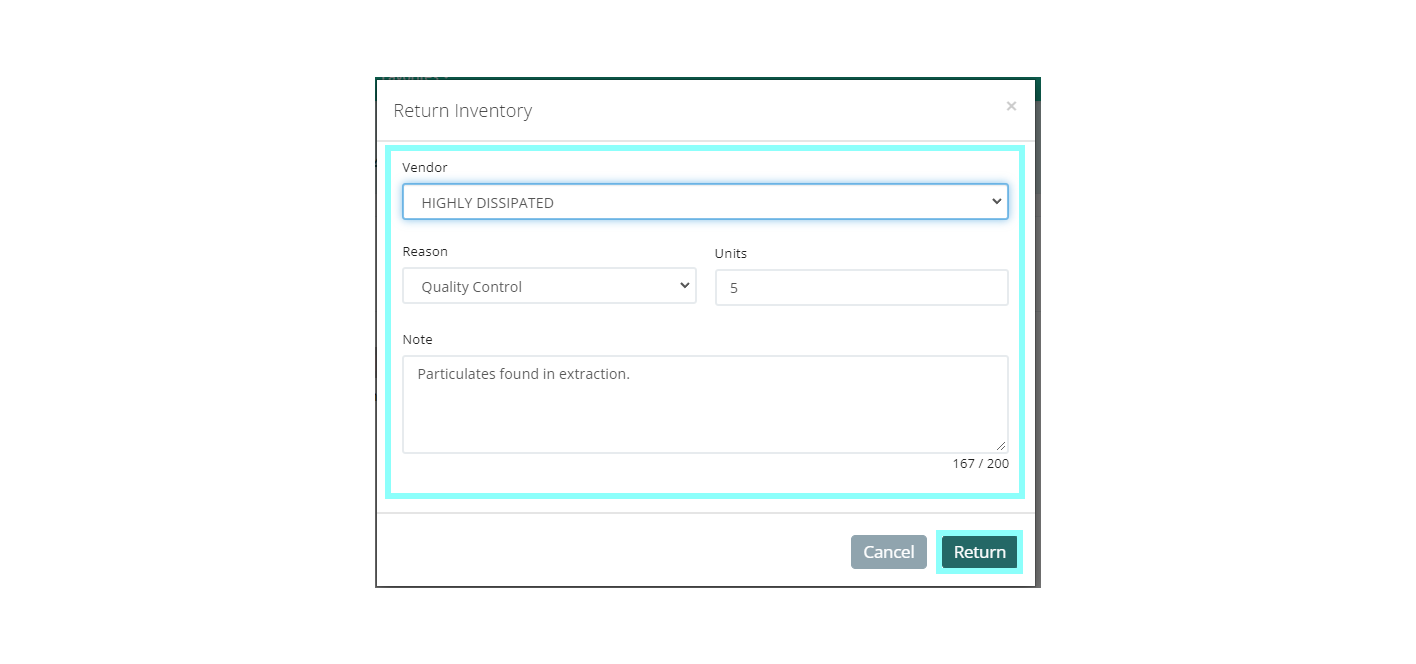
- To create a return, click on the "Return" button.