PRO (WA): How to Redo an Inbound Transfer (Accidental Intake Rejections)
![]() Updated
Updated
How to Redo an Inbound Transfer
If a line item (or multiple line items) are mistakenly marked as 'Rejected' on an inbound transfer that has already been 'Accepted' in your system, there is no way to edit the existing/accepted transfer.
This article is intended to teach you how to redo the intake by updating the JSON Link/File, which will allow you to then set the intended products, rooms, and accepted quantities for each line item before accepting it into your system.
We recommend appending "-2" (or a similar unique suffix) to the 'transfer_id'. This is necessary to ensure the re-import is processed successfully with a new Transfer Sale ID (TSID).
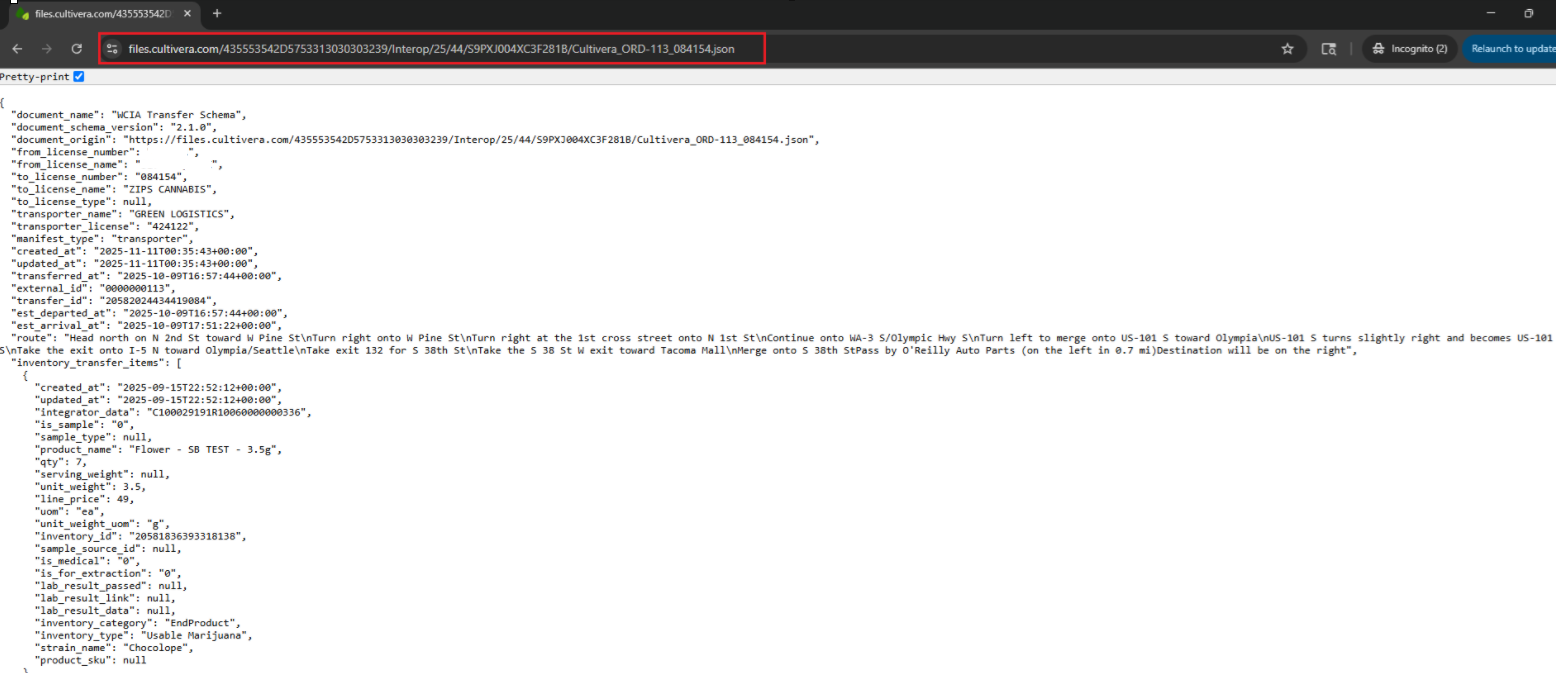
Below are the steps you can take to update the "transfer_id" on the JSON link/file:
- Open the JSON link in a new browser tab. Select "Ctrl + S" to save the webpage as a JSON File:
- Open the saved JSON File in Notepad, update the 'transfer_id', and then save the updated JSON file:

- The updated JSON File can then be used to import the transfer via Fulfillment > Transfer Inbound > "Import WCIA Transfer Data Link/File":

- Once the Inbound Transfer has been re-imported, you can click on the TSID to be redirected to the Transfer Inbound Details page, where you can set the intended Product, Room, and Accepted Qty for each line item before accepting the transfer in your system.
If you have any questions on this or any other workflow in Cultivera PRO, please email support@cultivera.com.