PRO (WA): How to Create Employee Samples
![]() Updated
Updated
Creating Employee Samples (WA)
An Employee Sample is a sample that is created from available inventory in your system intended for sampling by employees.
You can follow these steps to create Employee Samples on the Inventory Management > Batches page, and/or the Inventory Management > Employee Sample page.
This workflow may not be applicable in all states (i.e. Oklahoma METRC customers). Be sure to check your local laws regarding creating and distributing employee samples.
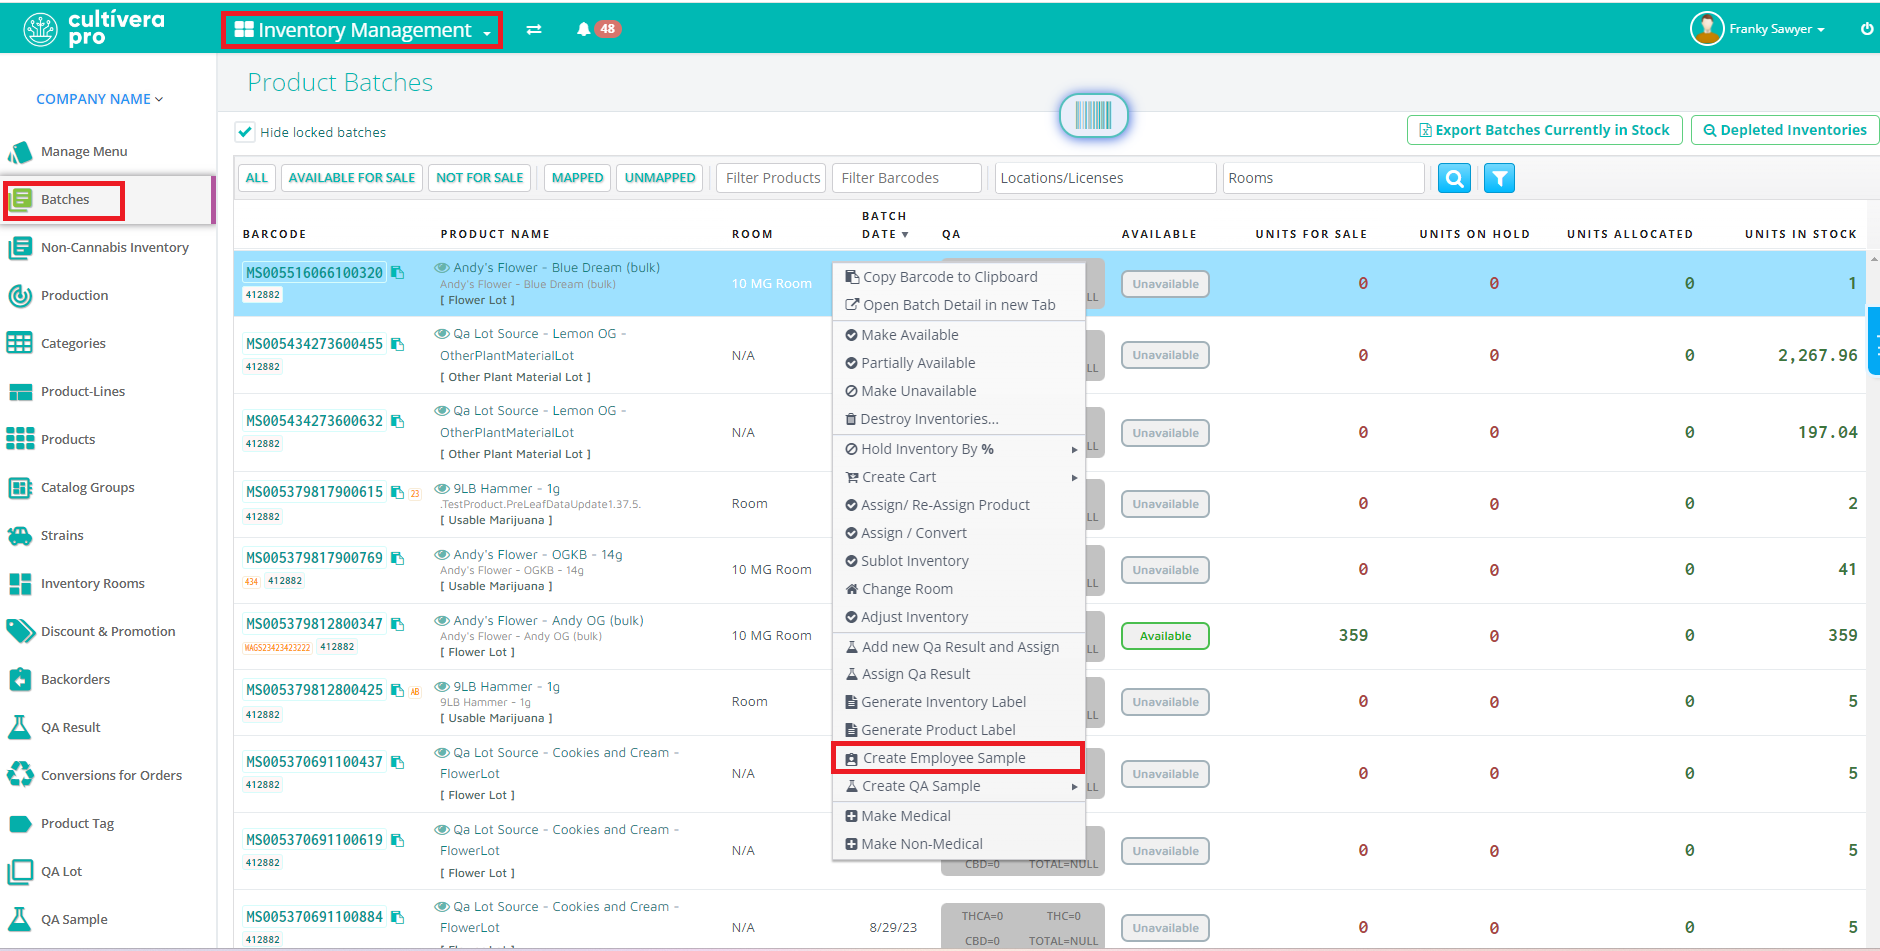
- To create an employee sample navigate to the batch you would like to create the sample from, right-click, and select "Create Employee Sample":
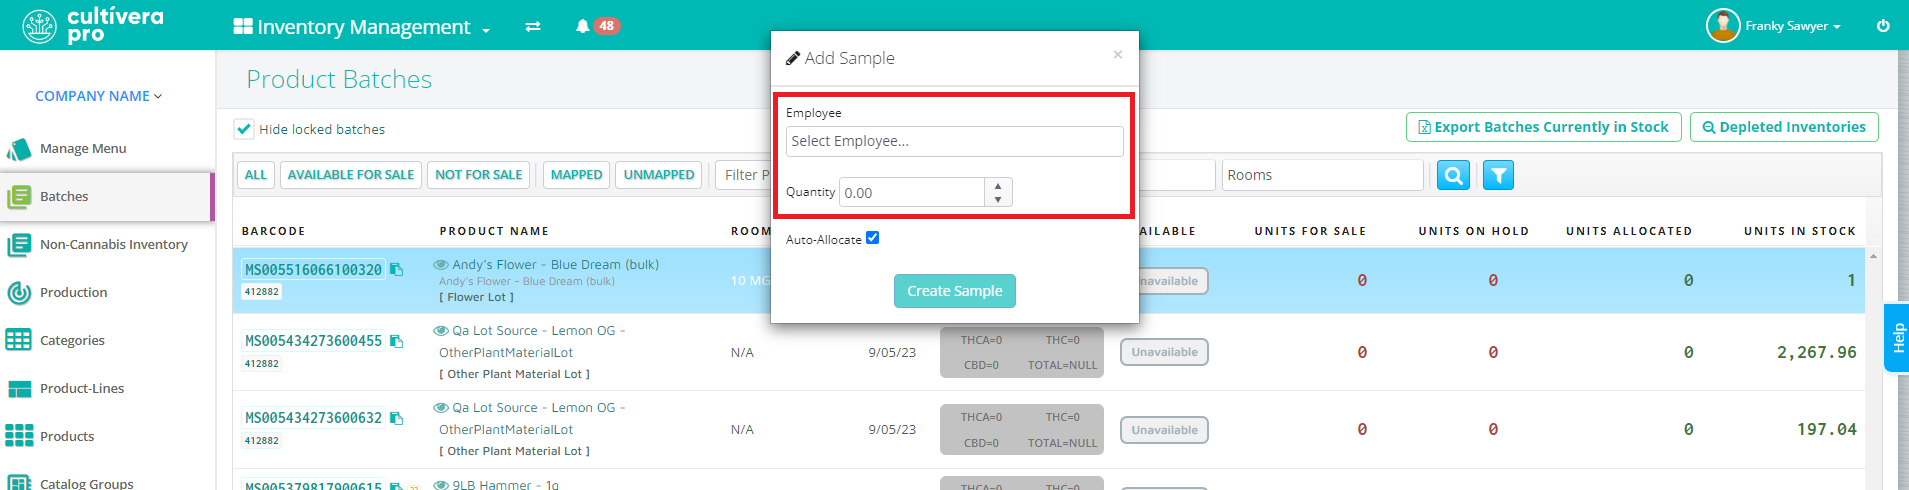
- A new box will appear that will have you designate the employee the sample is being created for and the quantity of the sample, then select "Create Sample":
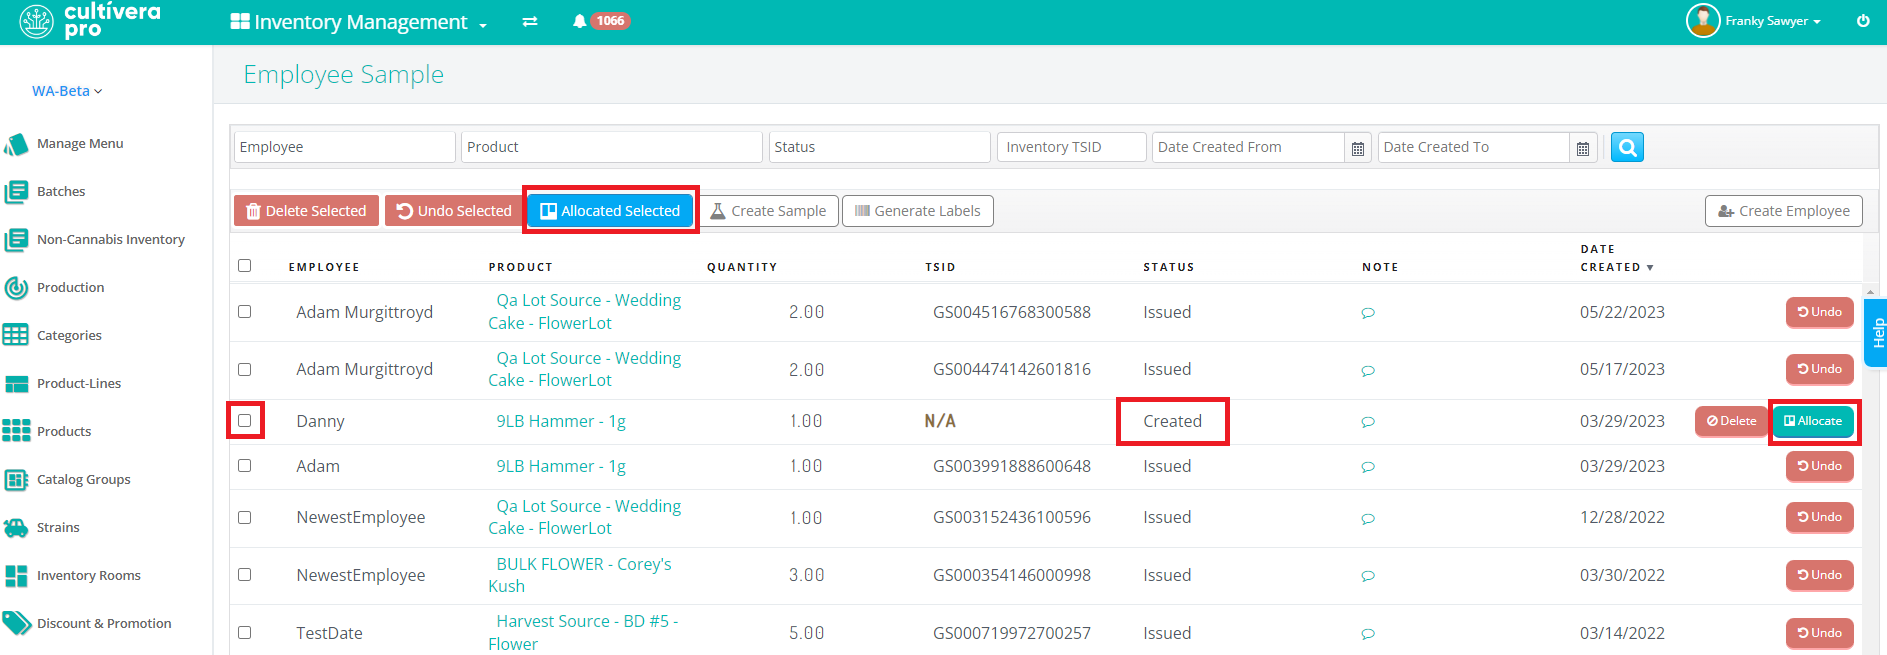
- You can then navigate to Inventory Management > Employee Sample to view a list of the samples created for employees along with the date created and quantity:
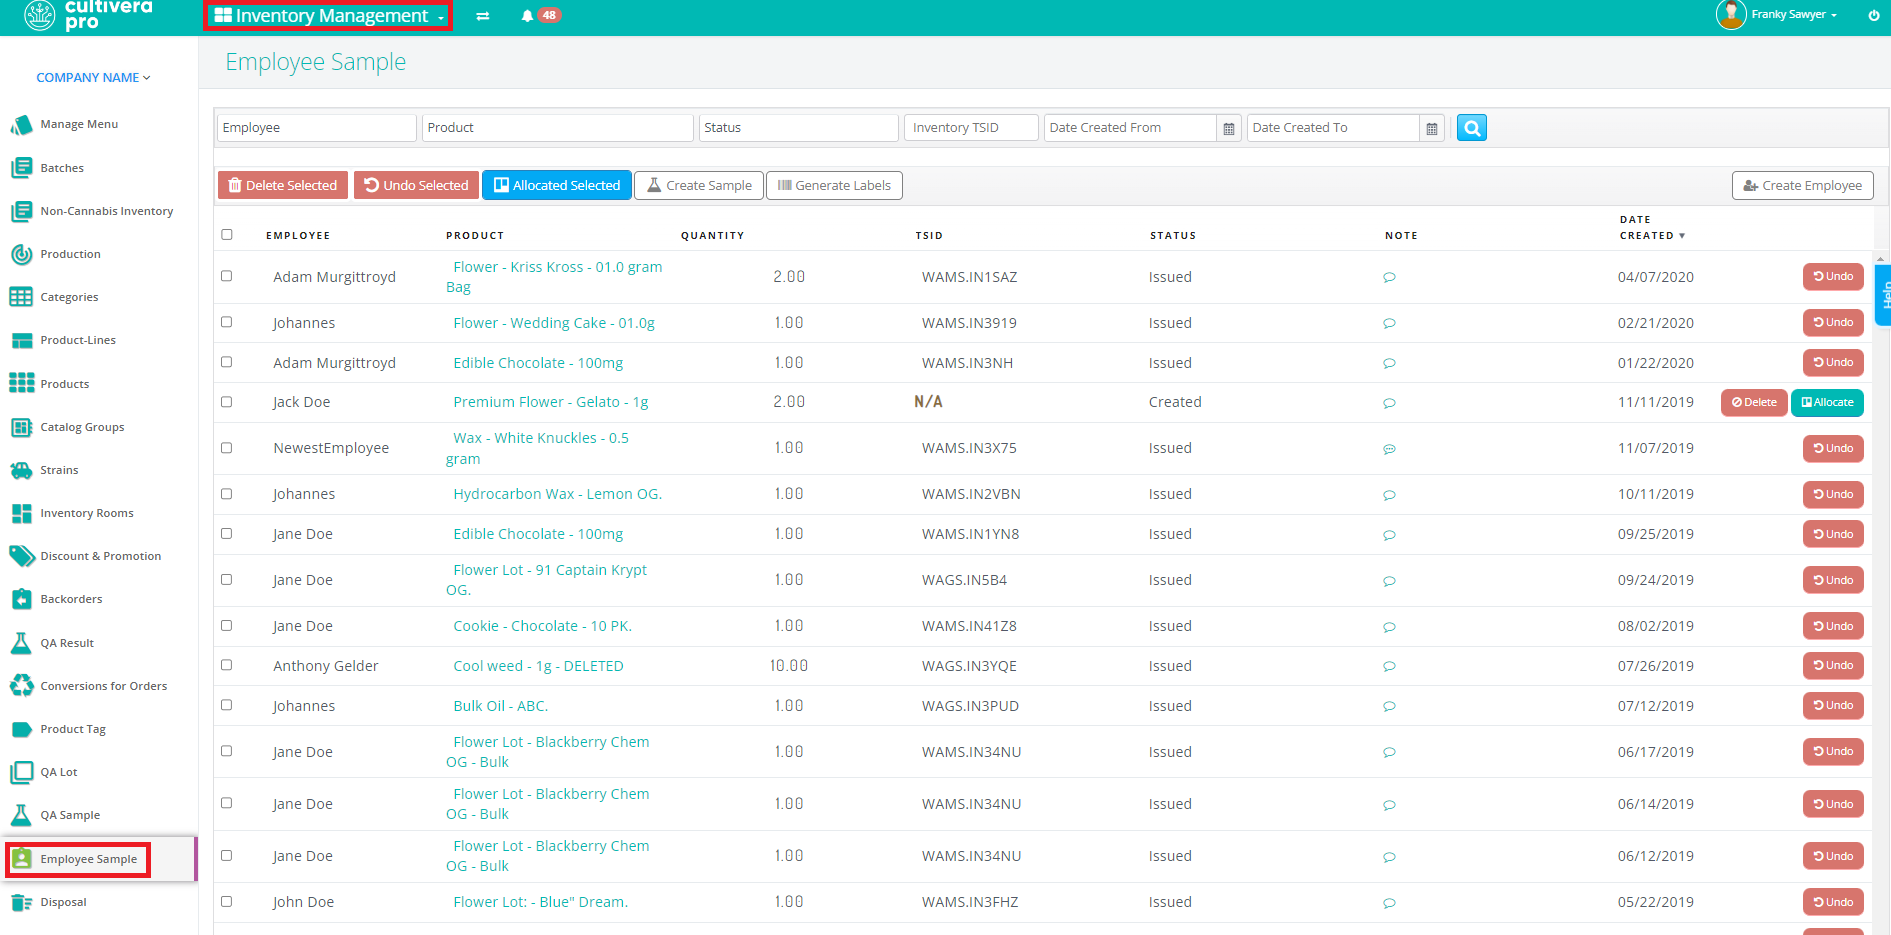
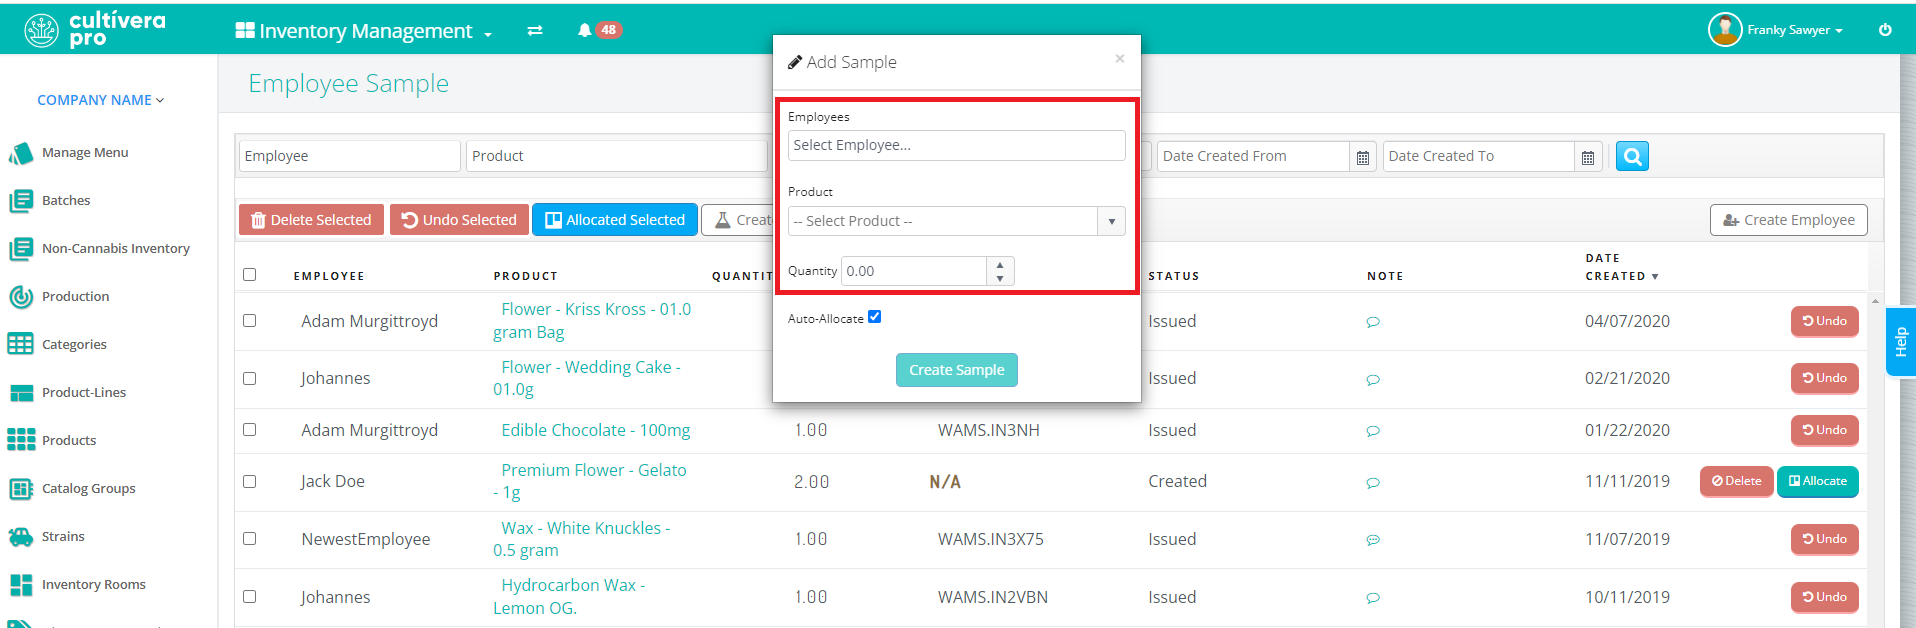
- Additionally, you can create an Employee Sample directly from this page by selecting "Create Sample" and assigning the Employee and Product for this sample, then select "Create Sample".
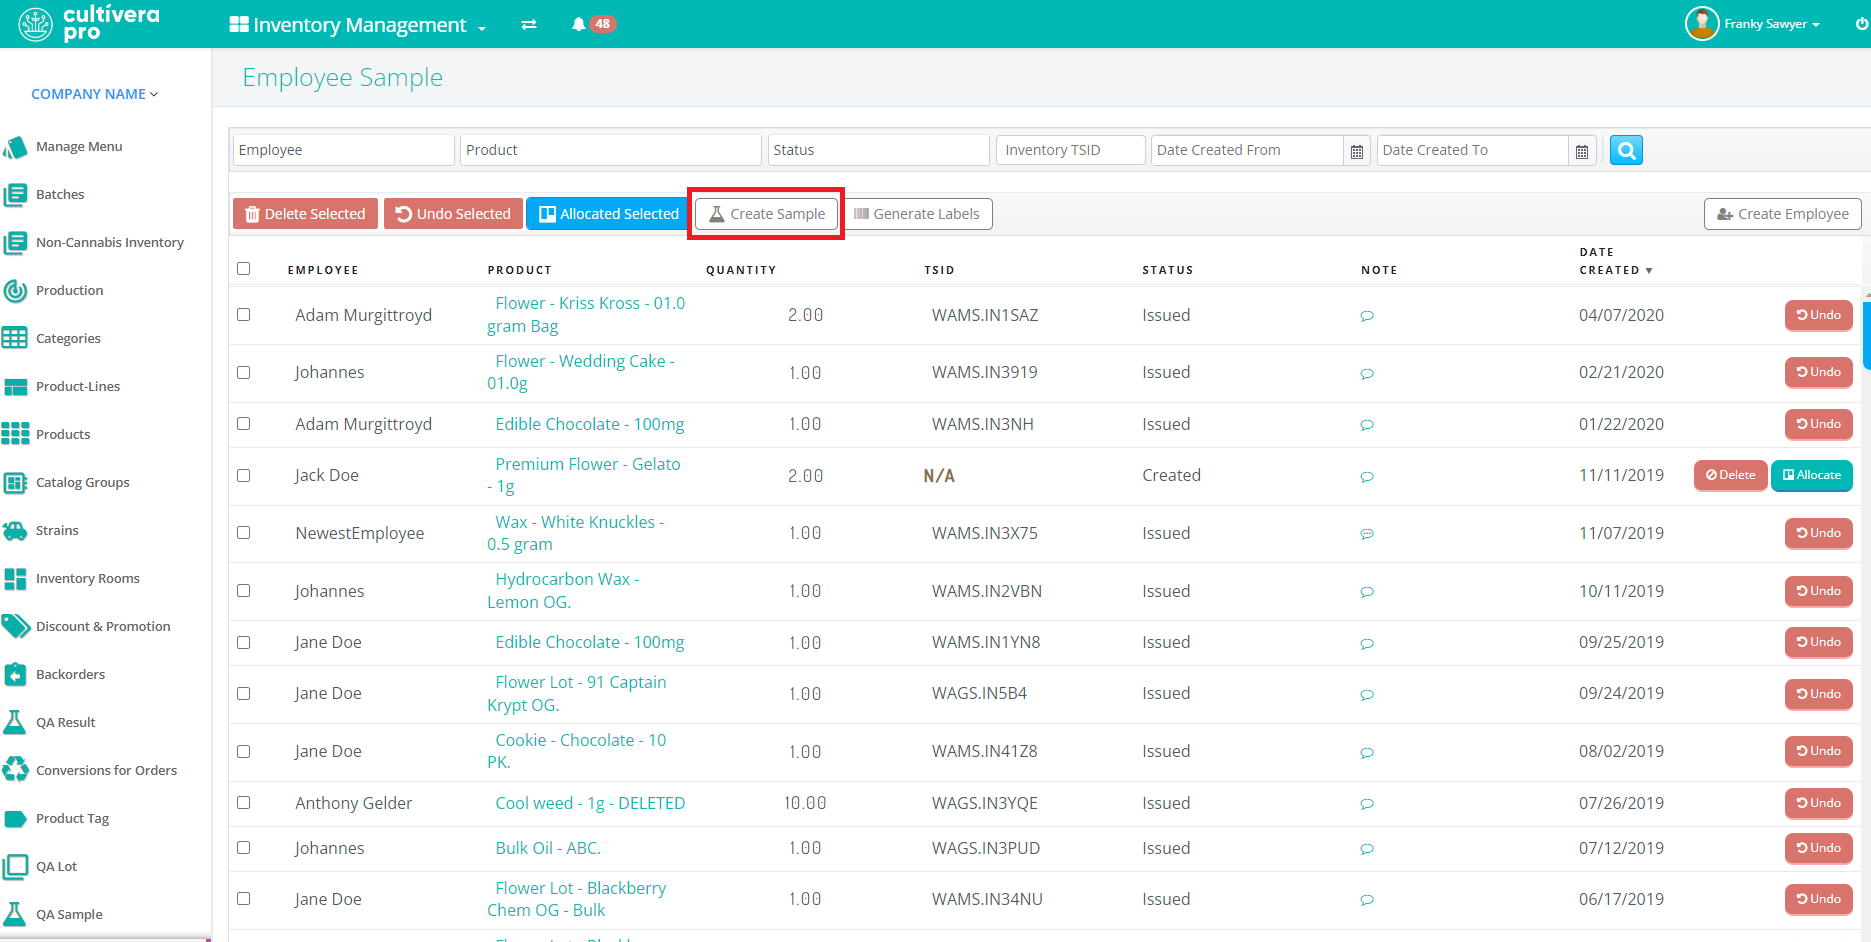
- A box will appear that will have you designate the employee the sample is being created for, the product, and the quantity of the sample, then select "Create Sample":
- Once an Employee Sample is 'Created' you will then want to be sure to "Allocate" units from a Product Batch, which can be done by selecting the sample line then clicking "Allocate Selected" at the top of the page. Or you can click the teal colored 'Allocate' button to the right of the sample line item. Once units have been allocated you will see the status of the sample will then be "Issued."
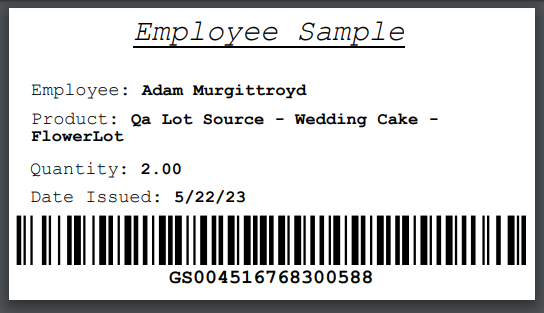
- Additionally, from the Employee Sample page, you can generate an employee sample label for tagging physical samples:

If you have any questions on this or any other workflow in Cultivera PRO, please email support@cultivera.com.