Cultivera Exchange (Seller): Listing Products on Cultivera Exchange
![]() Updated
Updated
How to List Products on Cultivera Exchange (from PRO/Exchange)
This guide outlines the process for listing your inventory from Cultivera PRO onto the Cultivera Exchange.
Listing from PRO:
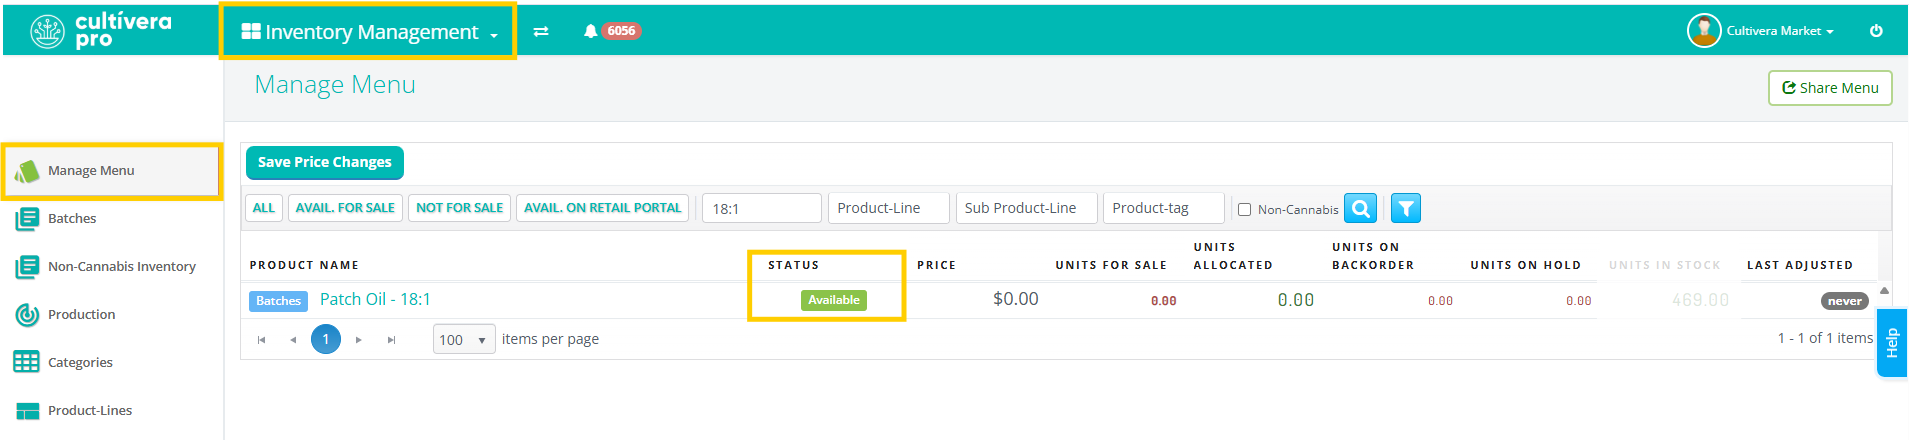
Step 1: Verify Inventory Availability in PRO
Before listing, ensure both the Product and the specific Batch are set to "Available" within your PRO system.
- Navigate to Inventory Management > Manage Menu.
- Locate the product and confirm its "Status" is green and marked as "Available".
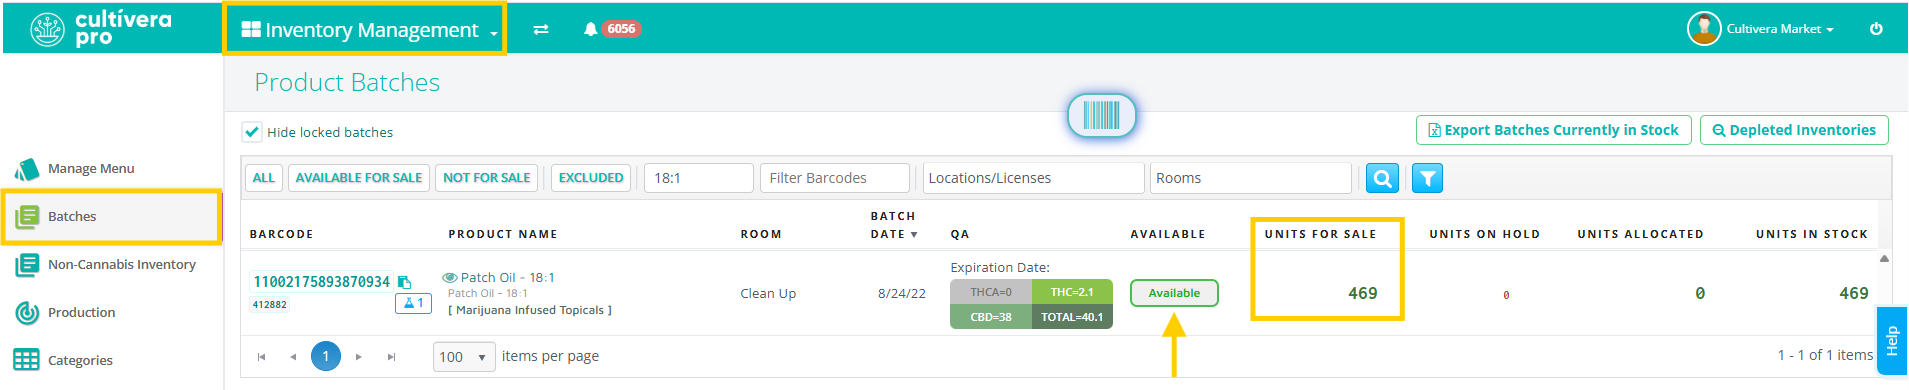
- Navigate to Inventory Management > Batches, and then locate and confirm that the specific Batch is "Available" and has units available for sale.
Step 2: Initiate the Listing
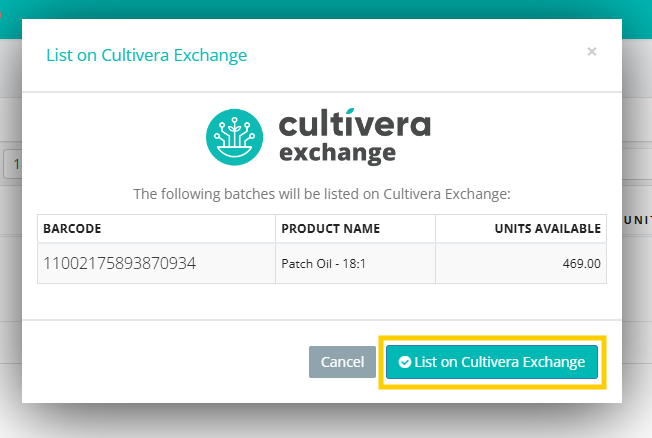
- Within the "Batches" page, right-click on the desired product row and select "List on Cultivera Exchange" from the drop-down menu.
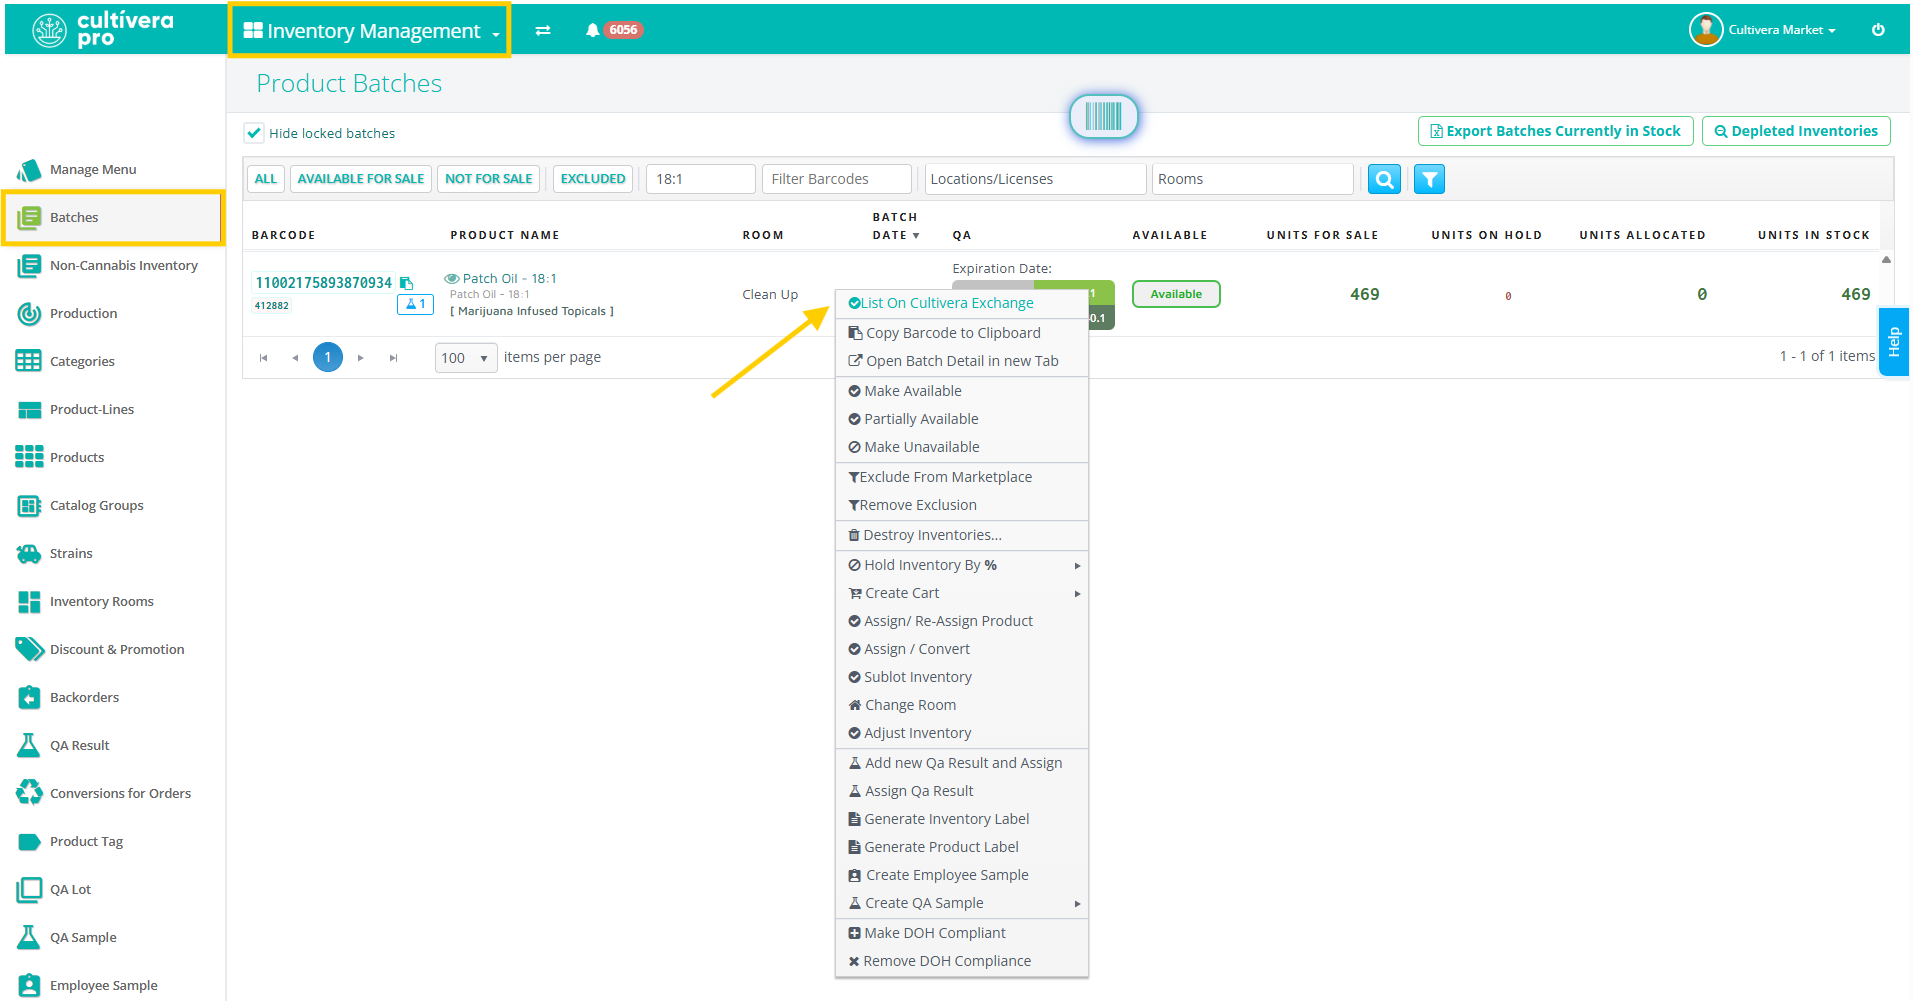
- Confirm the product and barcode, and then select "List on Cultivera Exchange". You will then be routed to Cultivera Exchange to complete the product listing.
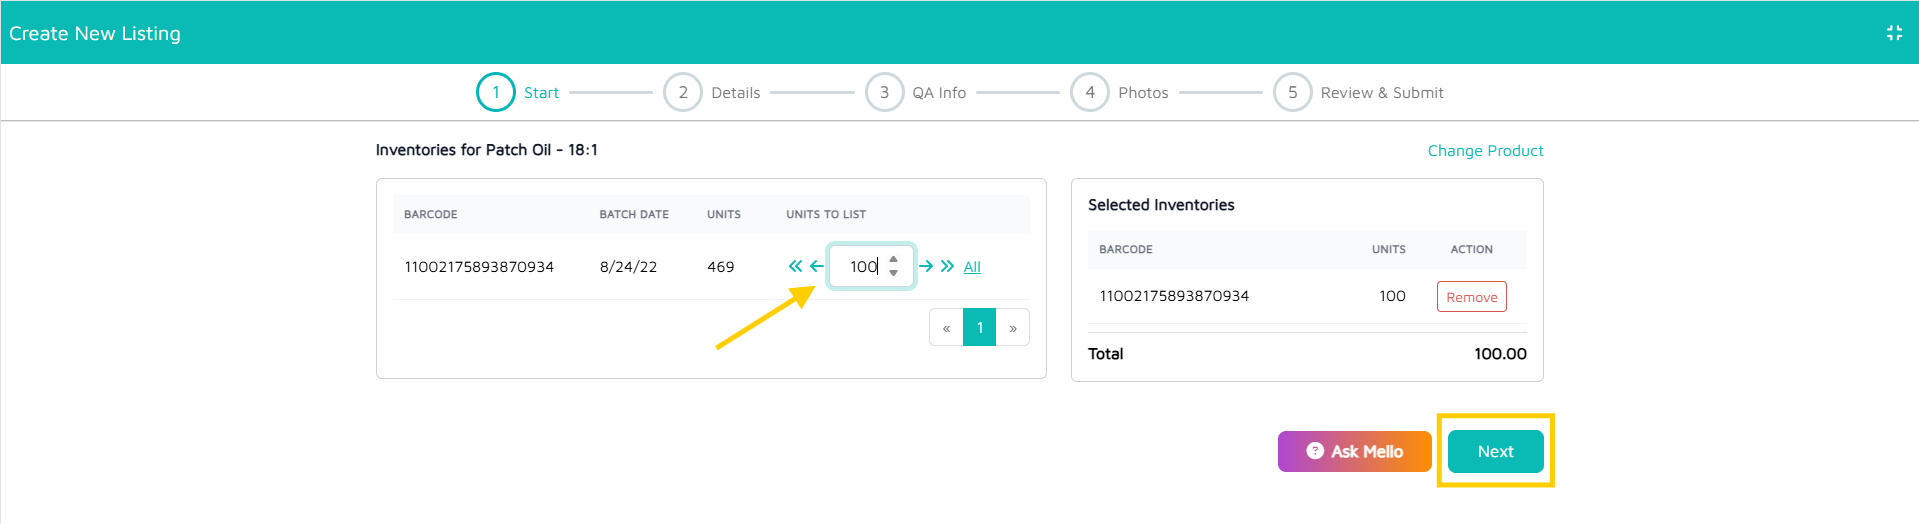
Step 3: Configure Listing Details
- Inventory Quantity: Enter the 'Units to List' and select "Next".
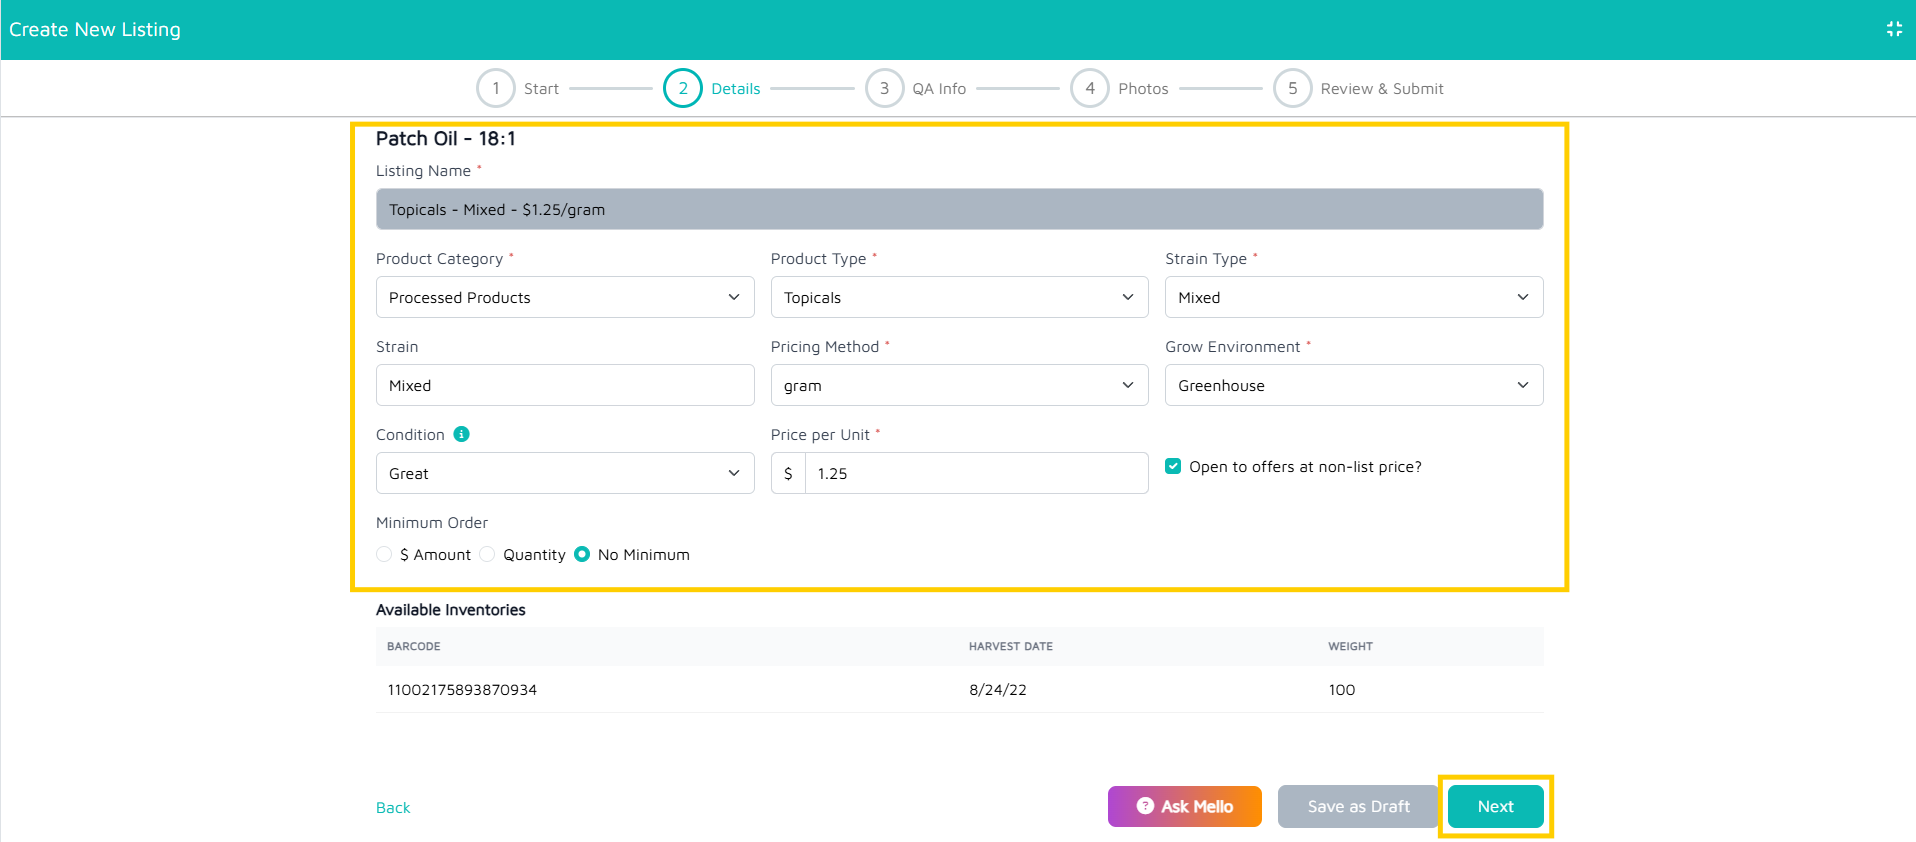
- Required Information: Fill out all mandatory fields. Note that required fields are typically marked with a red asterisk (*).
- Once complete, select "Next".
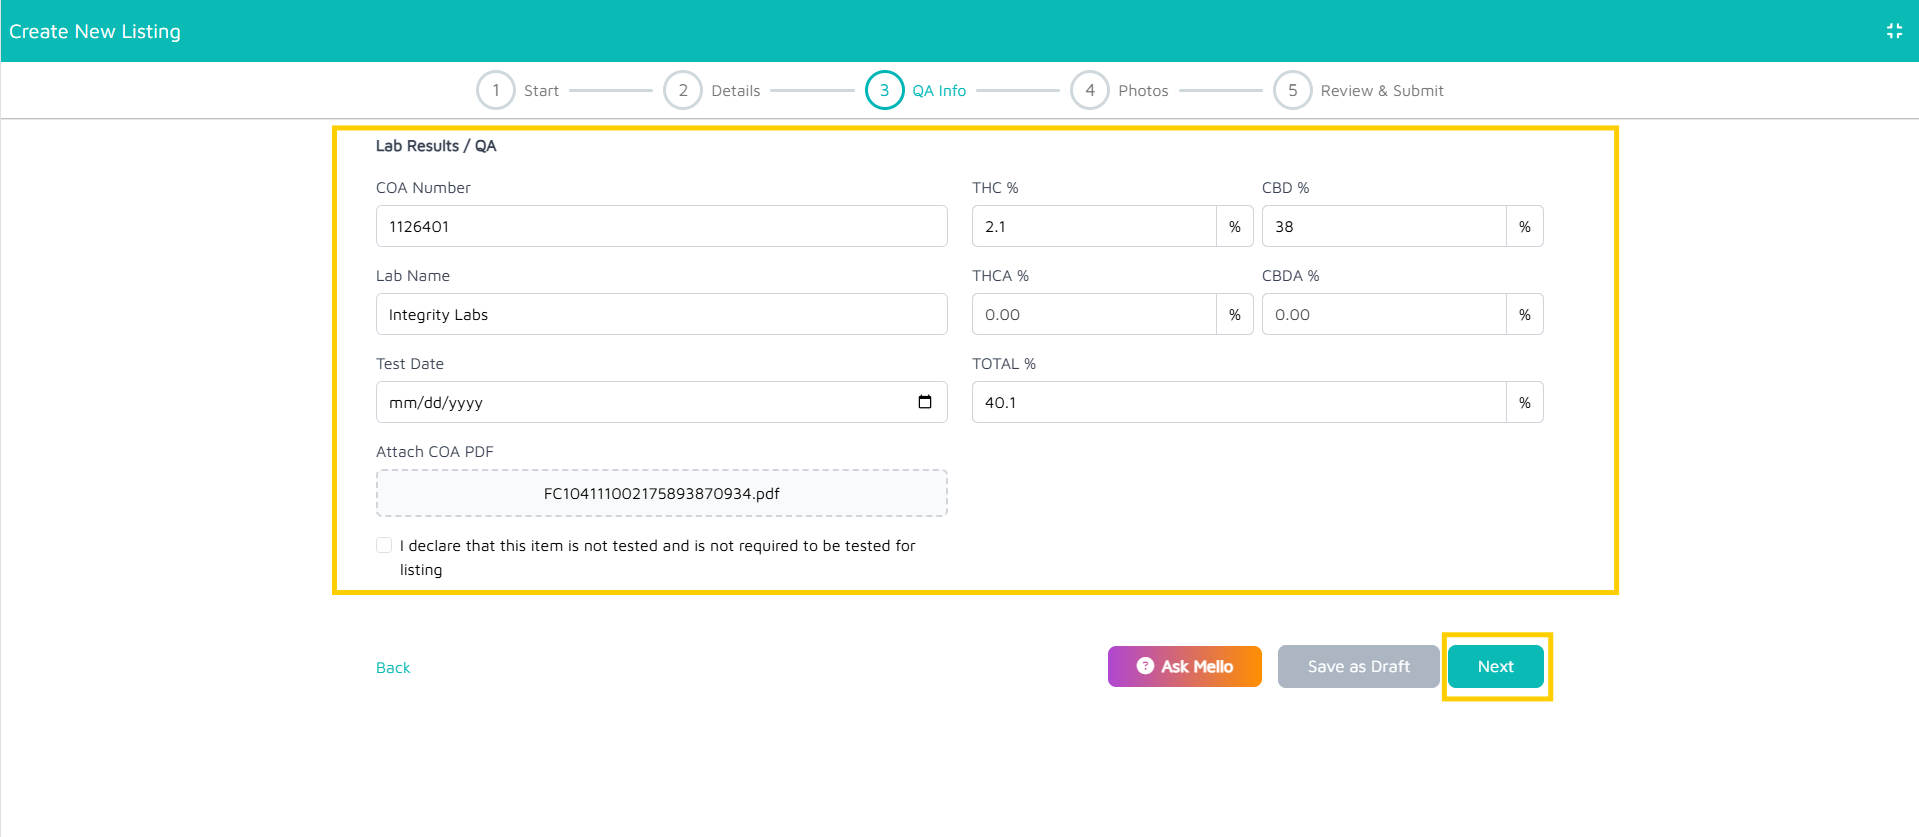
Step 4: Lab Results/QA
- Lab Results/QA: Enter the specific Lab Result Details for the batch, then select "Next".
Step 5: Listing Photos
- Upload Photos: You must upload 3 specific product photos to complete the listing:
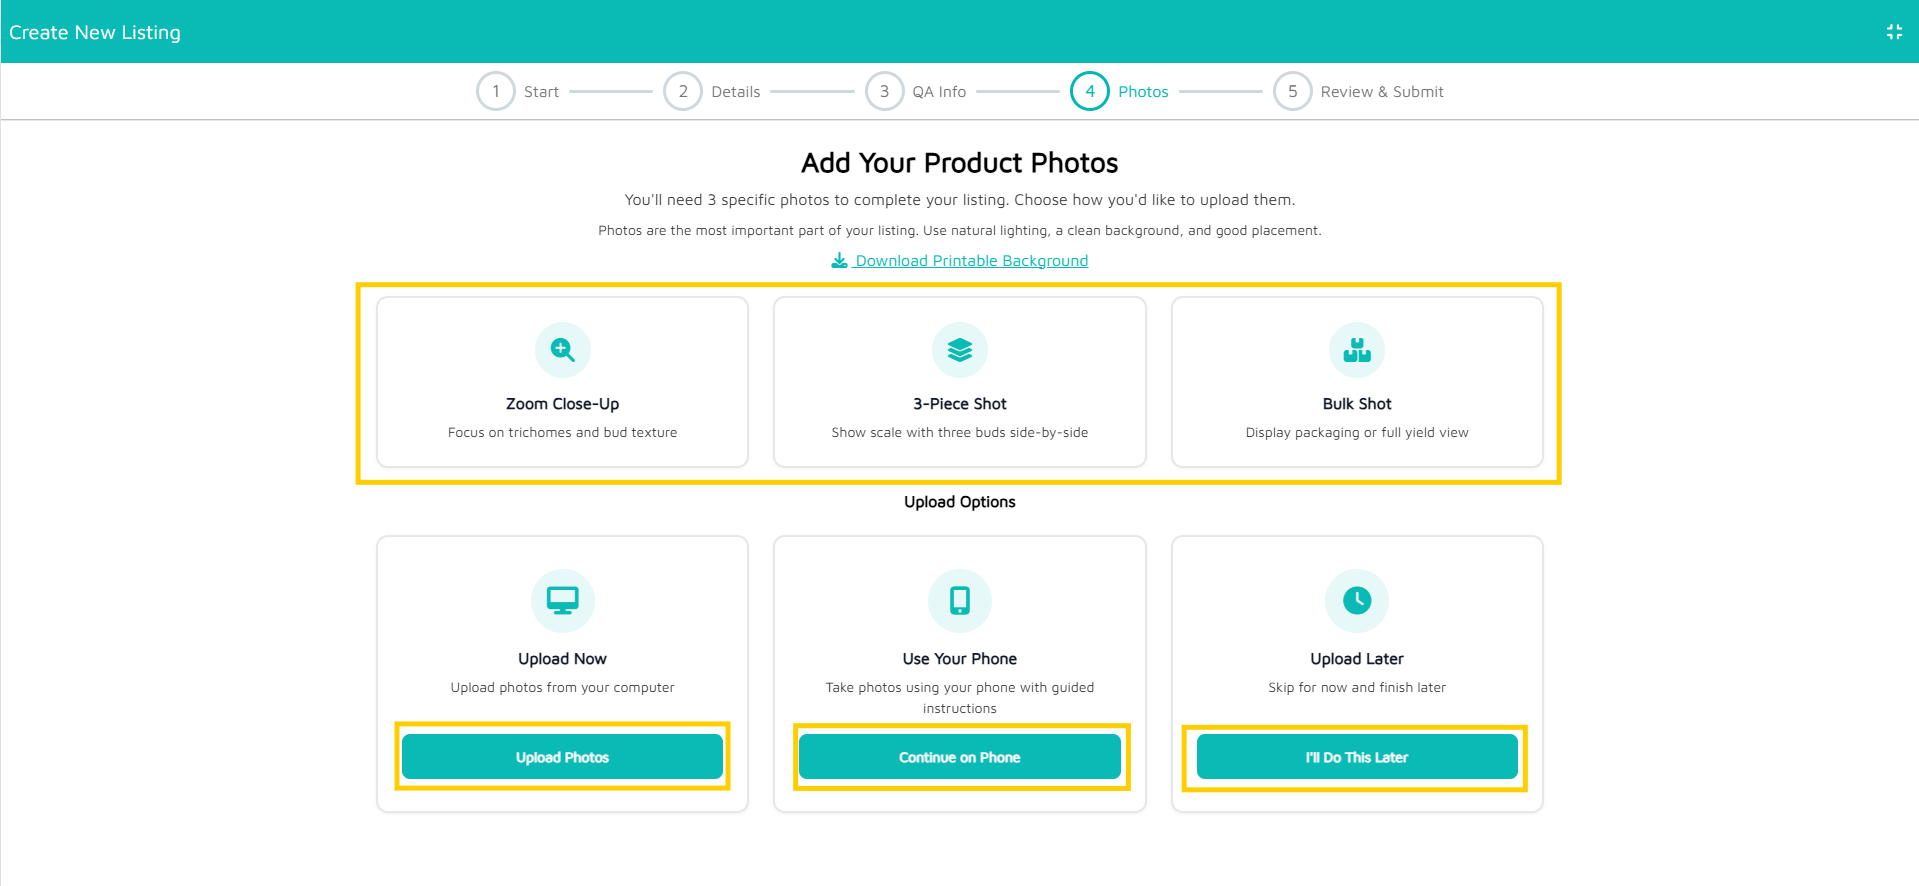
Zoom Close-Up: Focus on trichomes and bud texture
3-Piece Shot: Show scale with three buds side-by-side
Bulk Shot: Display packaging or full yield view
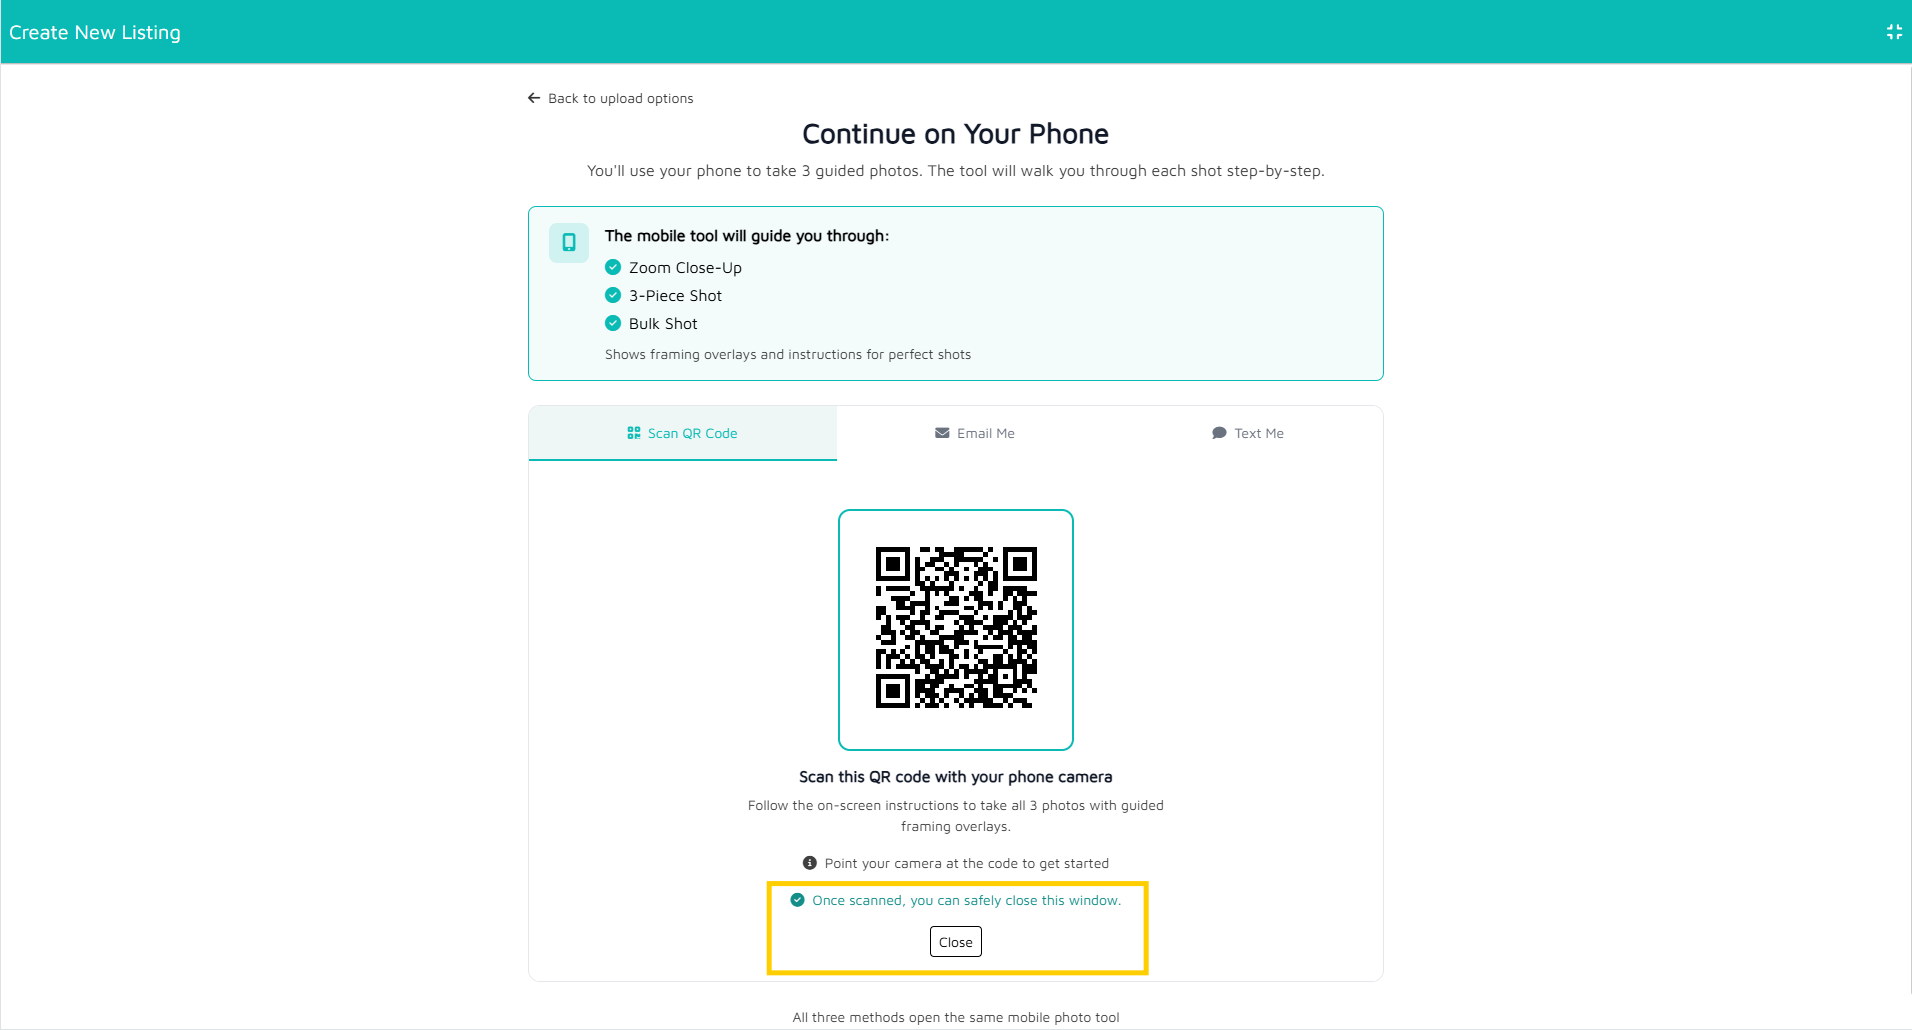
- Photos can be uploaded from your computer or phone and will be accompanied by guided instructions once the preferred upload method has been selected.
- If uploading photos from your phone, once all 3 photos have been uploaded, navigate back to the Cultivera Exchange site and select the "Close" button.
- The listing will reside in Listings > Drafts and will have a status of "Pending" while it's awaiting review by Mello Admin.
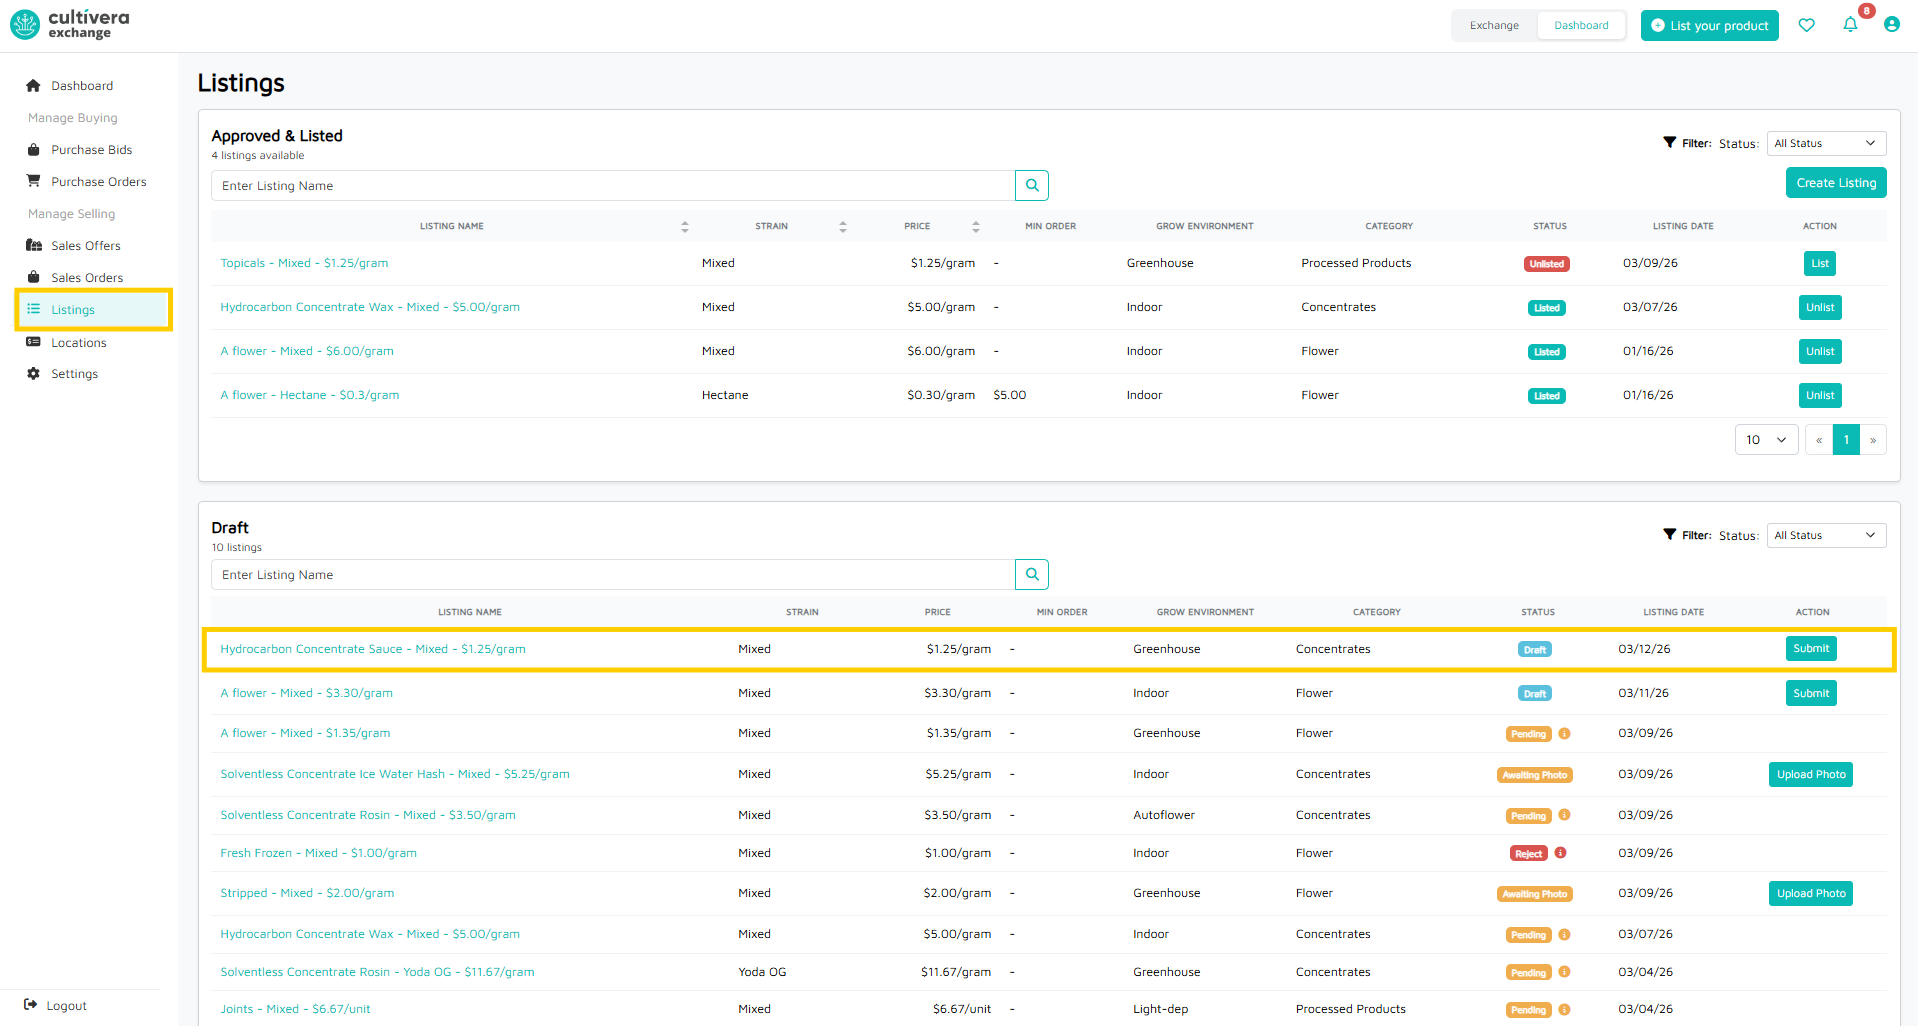
- If uploading photos from your computer, once all 3 photos have been uploaded, select "Submit".

- The listing will reside in Listings > Drafts and will have a status of "Pending" while it's awaiting review by Mello Admin.

Step 6: Final Approval
- Once the listing has been Approved by Mello Admin, the listing will be live and can be located within Listings > Approved & Listed.
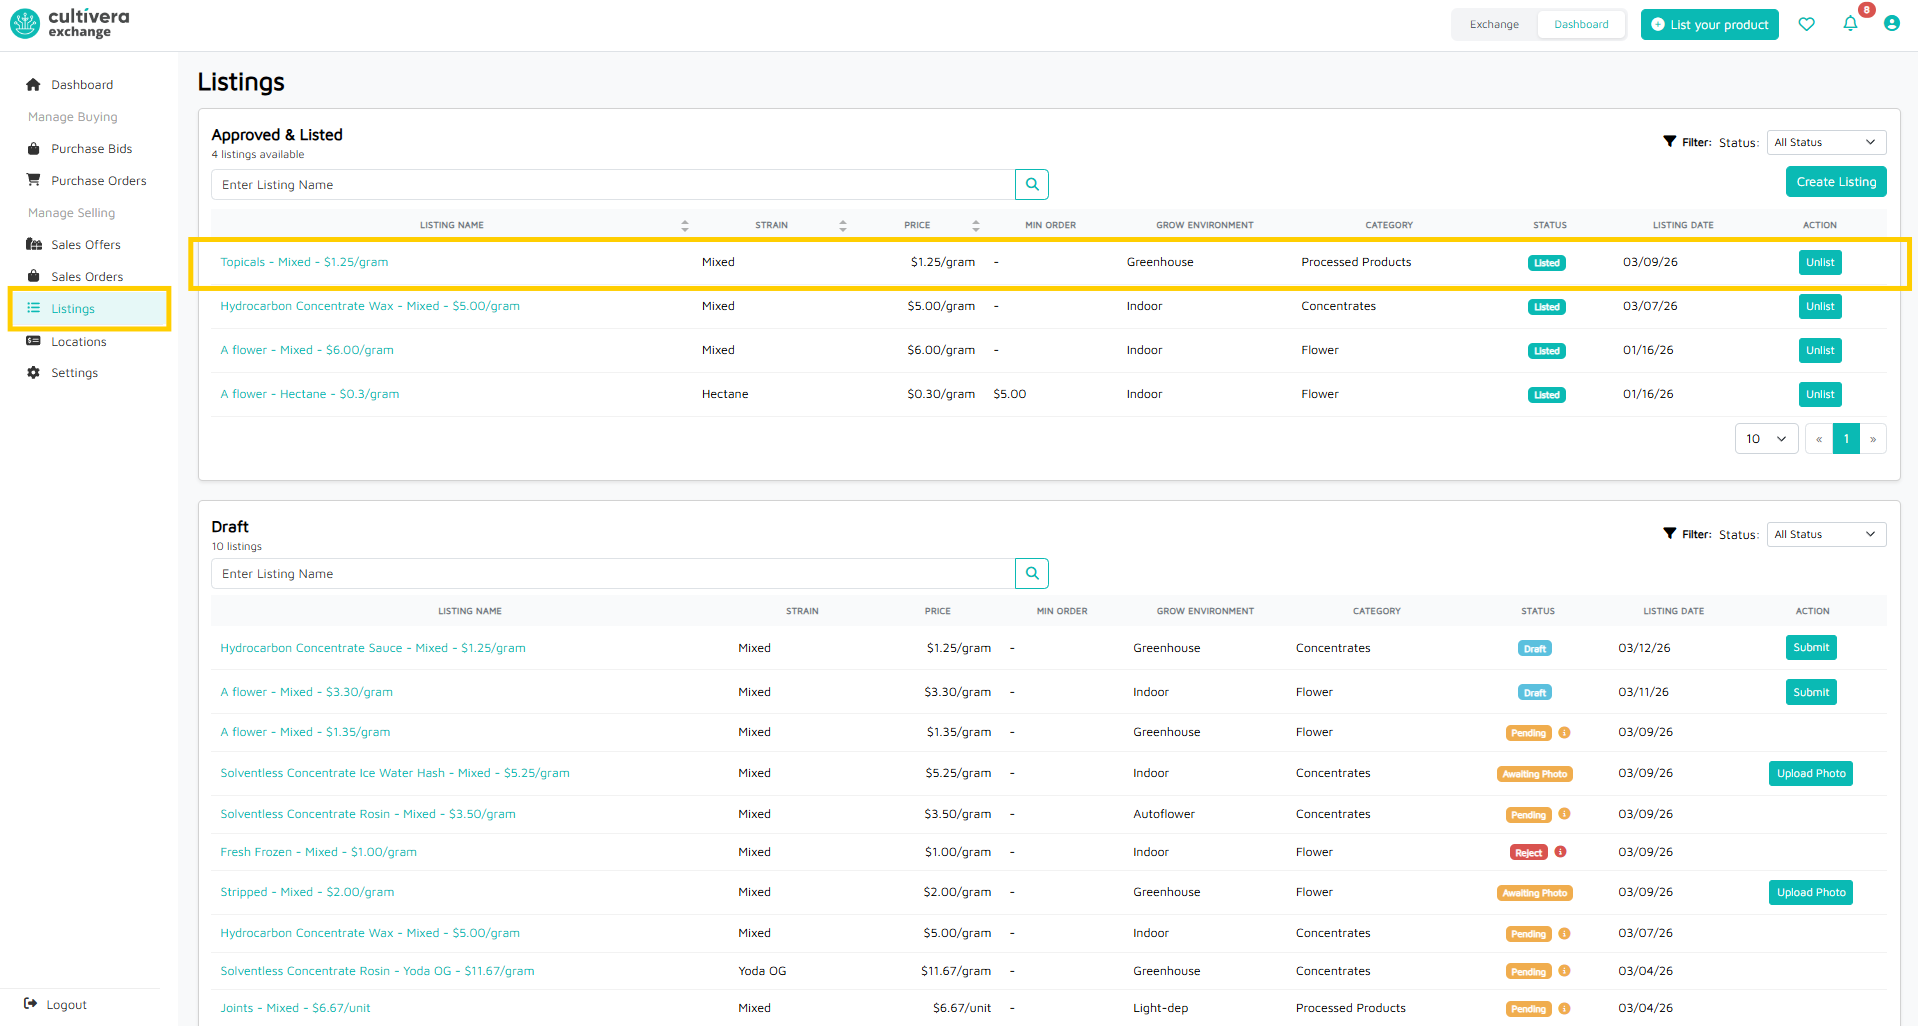
- Select the teal listing name link to view your newly approved Cultivera Exchange listing.


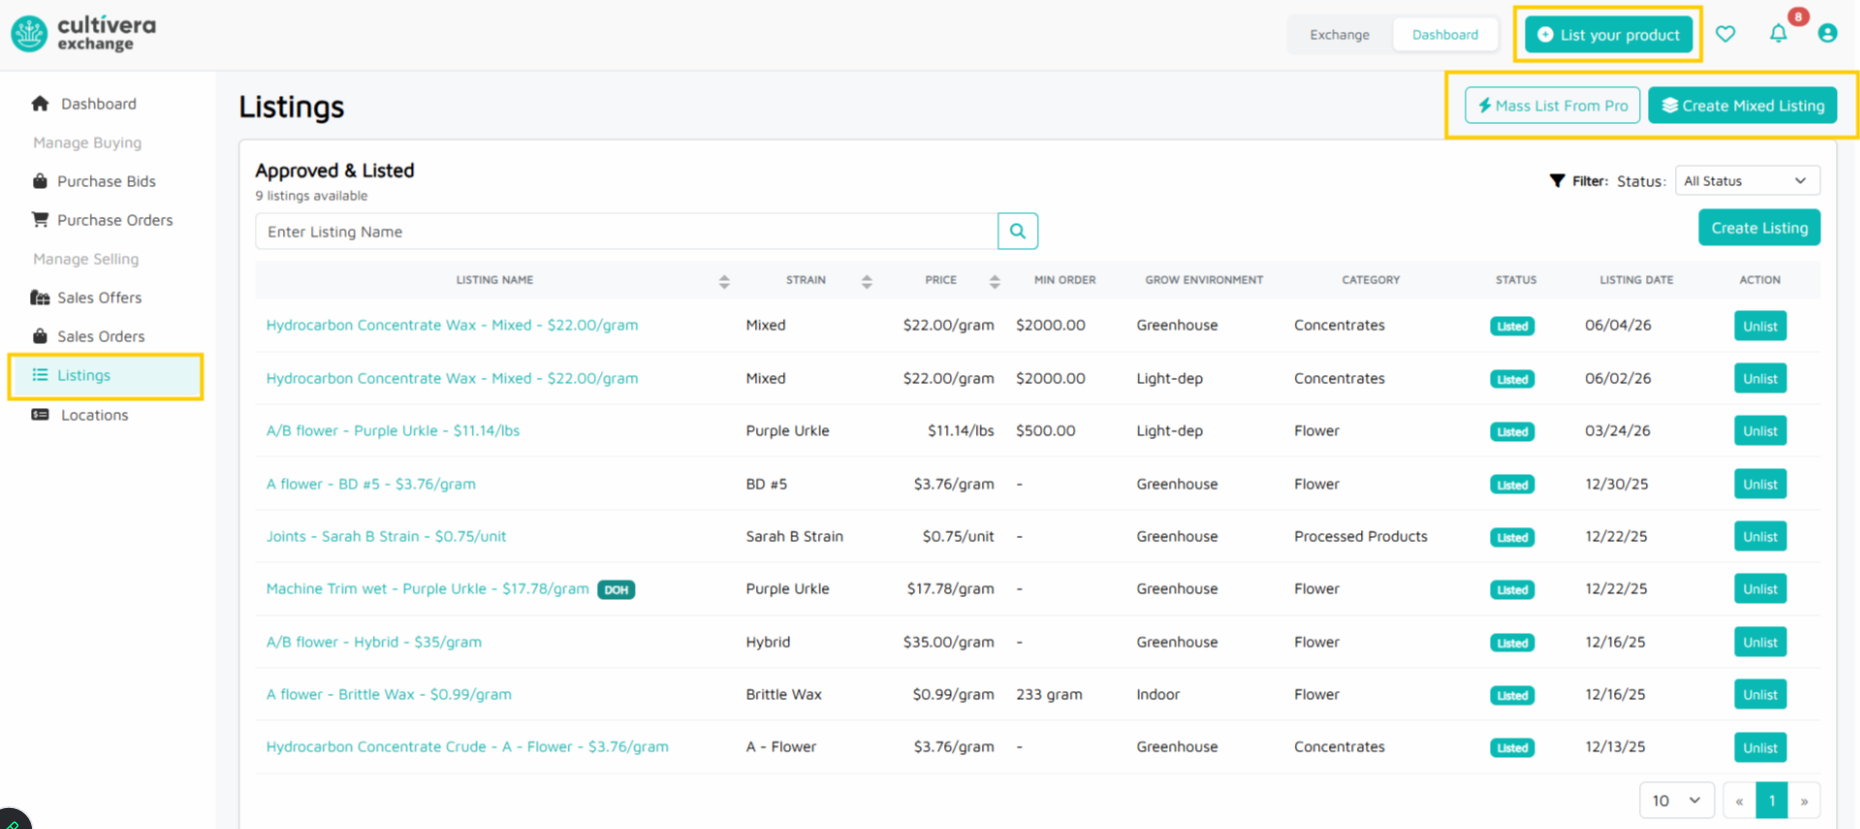
Listing from Exchange:
Listings can be created individually via "List Your Product". Alternatively, you can create multiple Listings via the "Mass List From Cultivera Pro" or create a mixed Listing via "Create Mixed Listing". Create a Listing using one of these three options.
Step 1: Choose Your Listing Method
Create a Listing using one of these three options:
- List Your Product - this allows you to create a single Listing.
- Mass List From Cultivera PRO - this allows you to create multiple separate listings in one step.
- Create Mixed Listing - this allows you to create a listing of multiple products in one step (the multiple products/strains are nested under this single "mixed" listing).
Step 2: Configure Listing Details
List Your Product -
- Select location
- Select product
- Select inventories
- Configure details (product category, type, strain, price, etc),
- Enter QA Info
- Add photos
- Submit to Mello Admin for approval
Mass List From Cultivera PRO -
- Select room
- Select productsProducts can be excluded from the Listing at this step (if desired).
- Set product details per product (product type, pricing, condition, etc.)
- Select "Create Draft Listings".
The new Listing(s) will be located under the Drafts section of the Listings page. Follow Step 3 to submit your drafts.
Create Mixed Listing -
- Select room
- Set Listing Info
- Pick Inventories
- Select "Create Mixed Listing".
The new Listing will be located under the Drafts section of the Listings page. Follow Step 3 to submit your drafts.
Step 3: Photo Upload / Final Approval
Mass Listings and Mixed Listings require a photo upload before final approval. Follow these steps to upload photos and submit your drafts.
- Select 'Submit' for the intended Listing(s) under the Drafts section
- Upload Listing photos
- Select "Submit" (this will trigger a message to the Mello Admin team to review/approve the Listing(s).
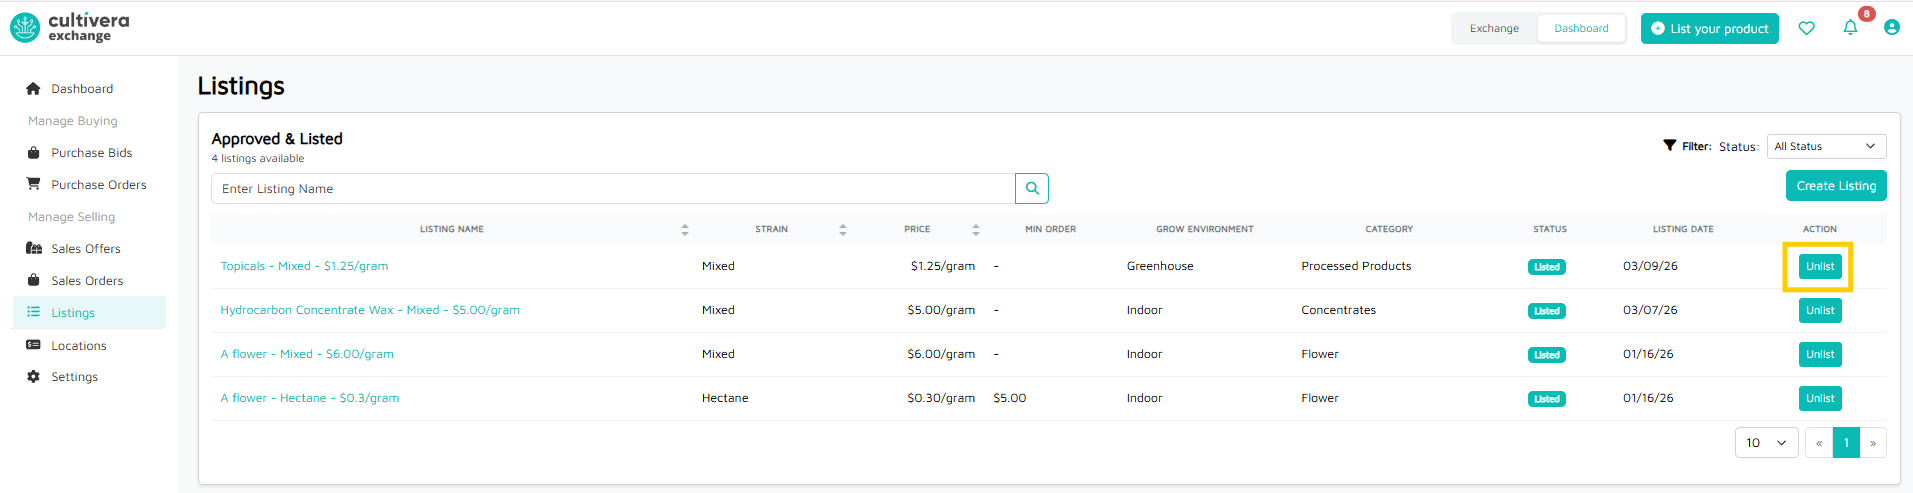
Unlist and Modifications
- To Unlist a product from Cultivera Exchange, navigate to Listings > Approved & Listed and select the teal "Unlist" button.
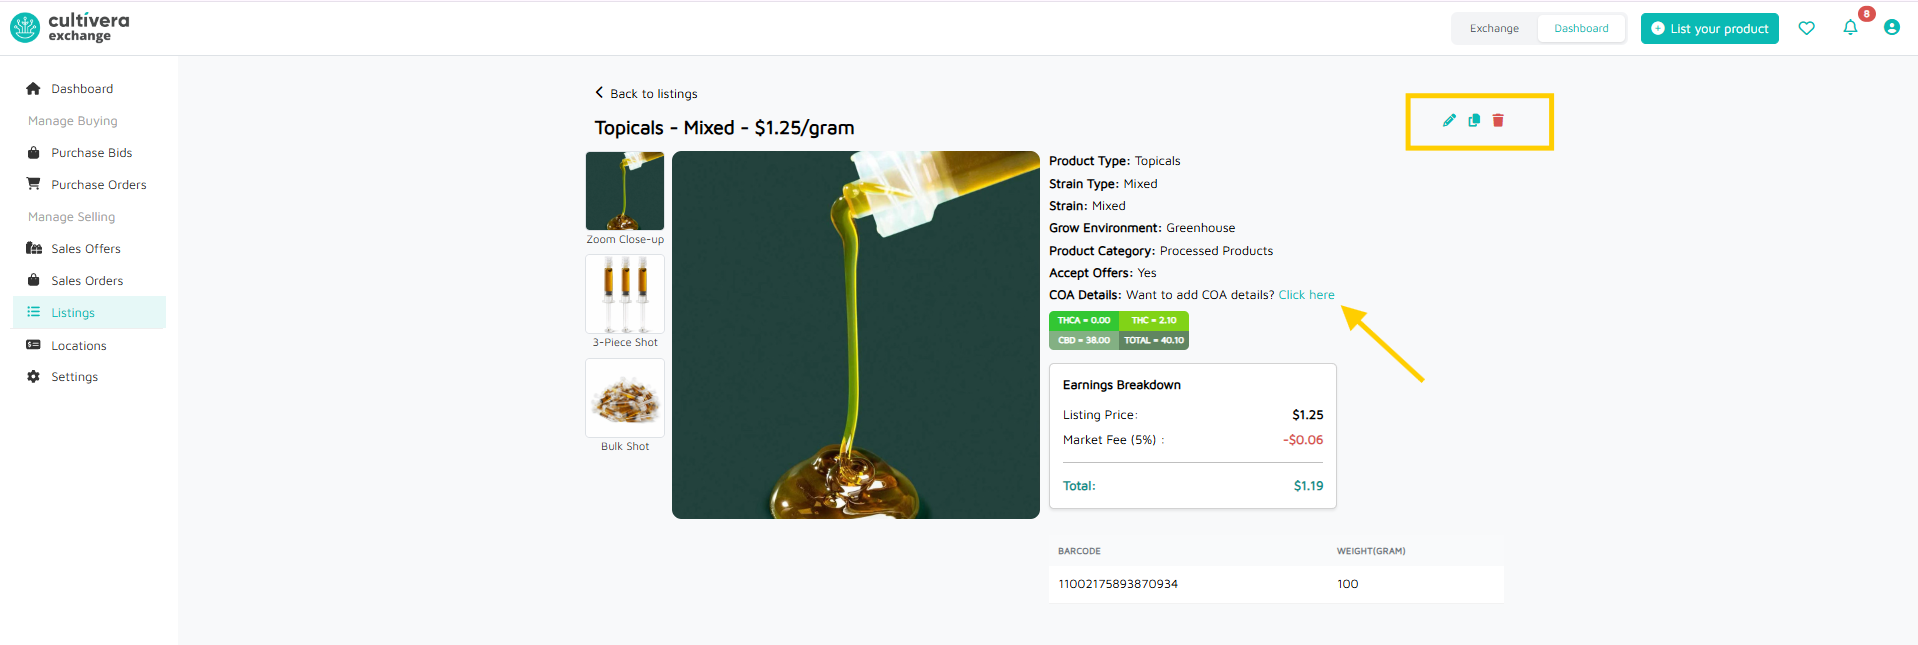
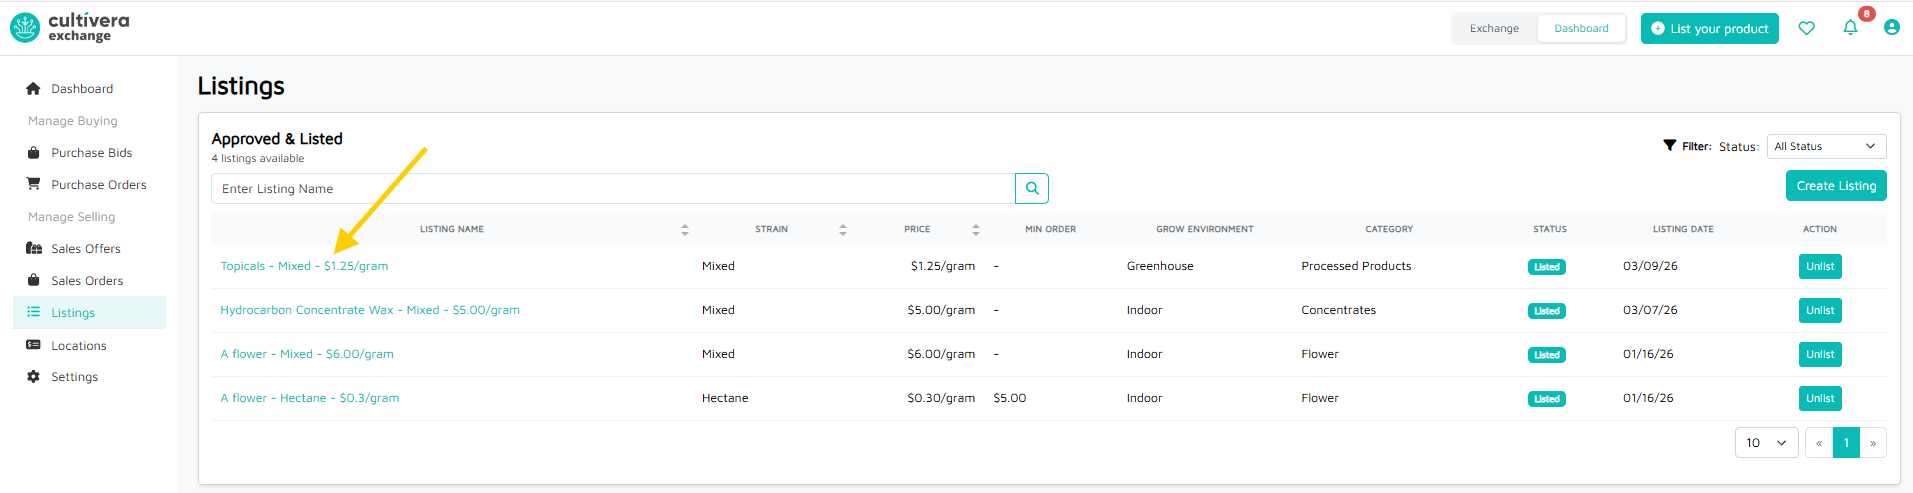
- To modify, clone, or delete a live listing, select the teal listing name link.
- Select the 'pencil' icon to modify the listing.
- Select the 'page' icon to clone the listing.
- Select the 'trashcan' icon to delete the listing.
- Select "Click here" to add COA details.