PRO: Fulfillment - Managing Drivers On A Manifest
![]() Updated
Updated
Managing Drivers On An Order Manifest
Follow this workflow to manage drivers on an Order Manifest.
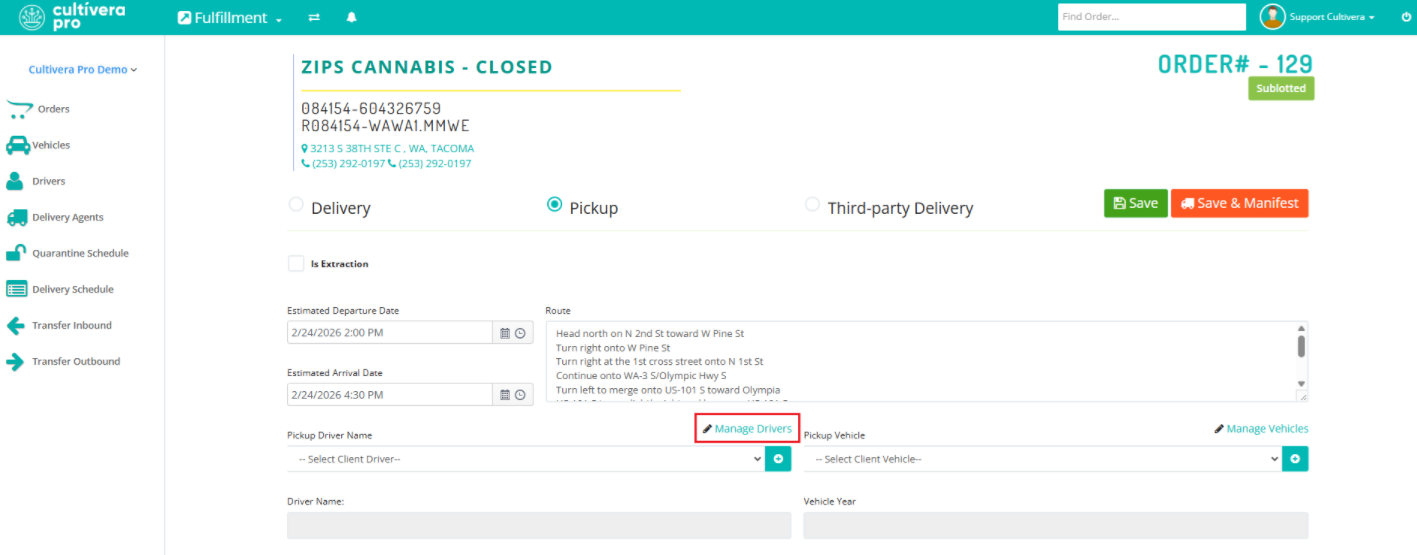
- While in the Fulfillment > Orders screen, click an open order number and make sure it has already been "sublotted" or "packaged".
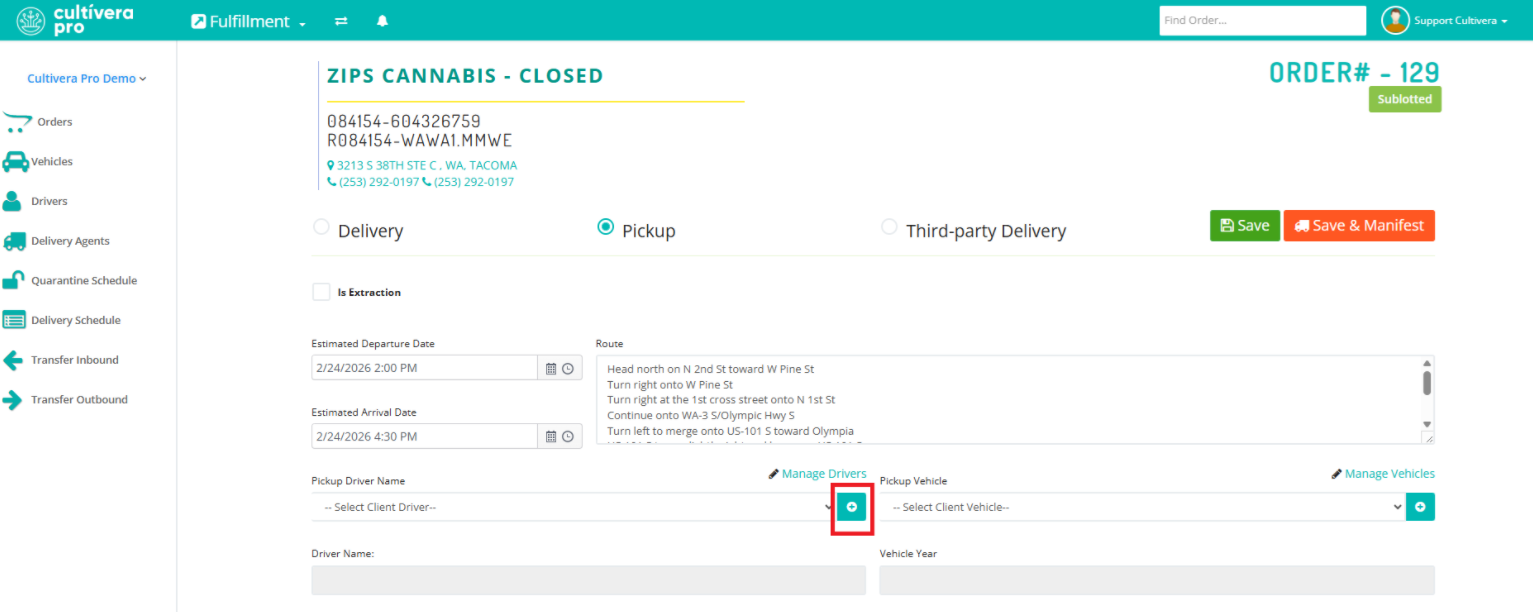
- Click on the "Manifest" button at the top of the order and note whether it will be for Delivery, Pickup, or will use a Third-Party Delivery service. The Estimated Departure and Arrival Dates need to be in the future, and the Route should fill in automatically, based on the addresses listed.
Notice the “Manage Drivers” link next to the drop-down field for "Driver/Employee Name".
Notice the teal '+' next to the Driver field. You can click on this to quickly add a new Pickup driver to your system.
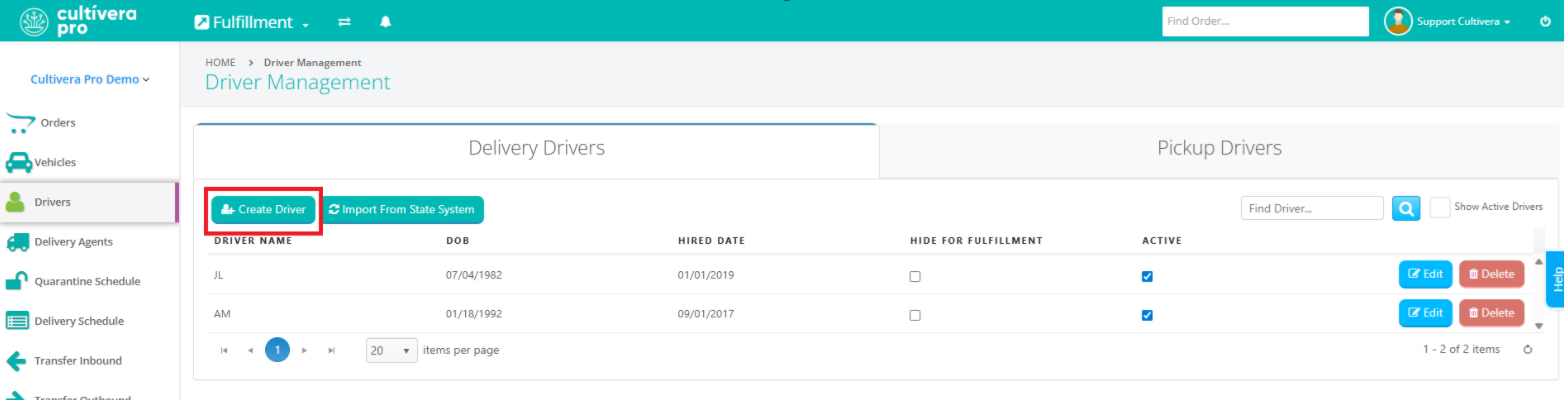
- Click the "Manage Drivers" link to navigate to the Fulfillment > Drivers screen, where you can create, edit, and/or delete drivers.
Note: You will not be able to delete a driver that has already been associated with a manifest.
Notice there are two tabs, one for Delivery Drivers and another for Pickup Drivers.
Note: When entering a Pickup Driver, you’ll also need to include the name of the client the driver works for.
Managing Pickup Drivers On A QA Sample Manifest
Follow this workflow to manage drivers on a QA Sample Manifest.
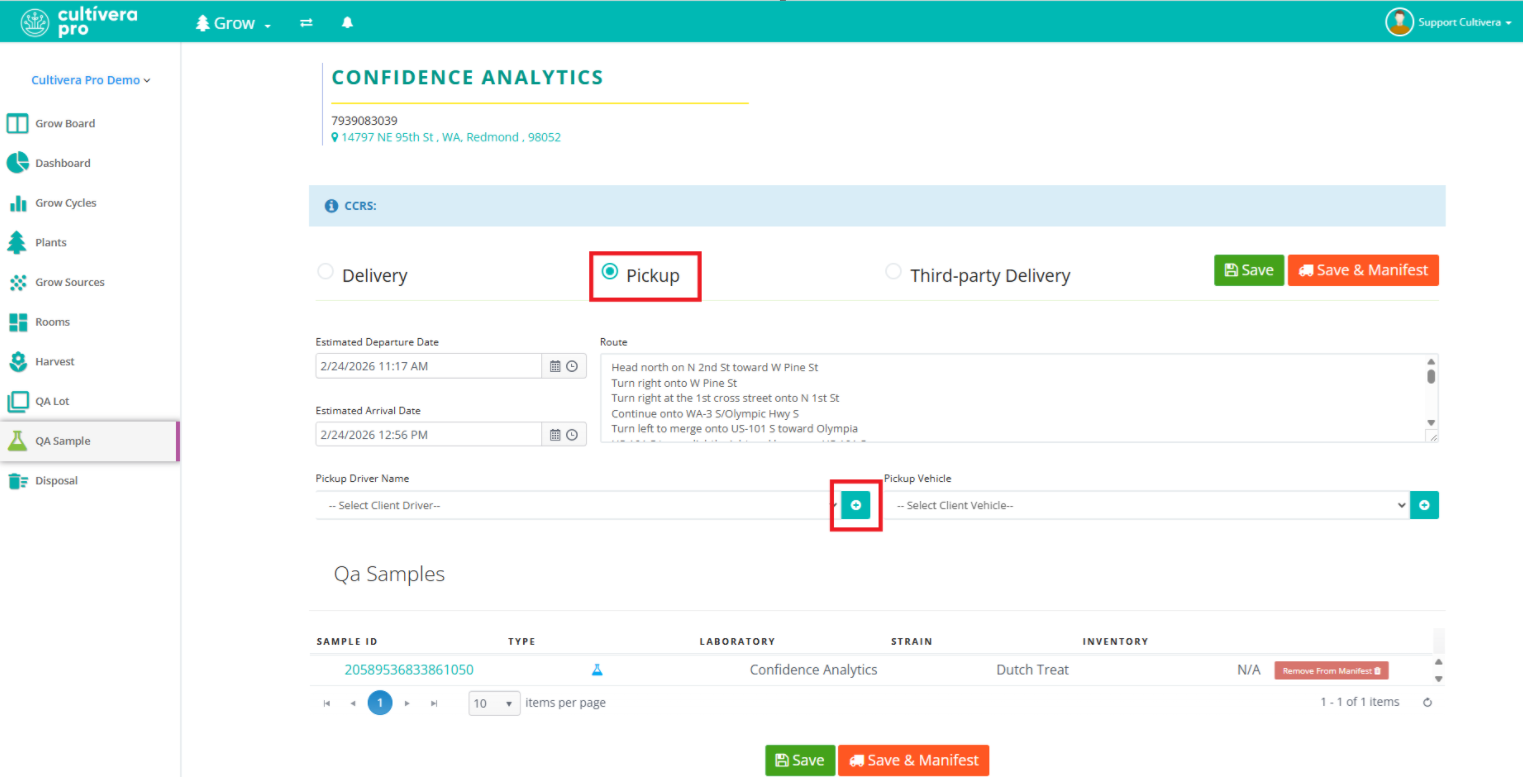
- While in the Inventory Management > QA Sample screen, select the QA Samples you wish to manifest, and select 'Manifest Selected'.
- On the "Manifest" page, determine whether it will be for Delivery, Pickup, or will use a Third-Party Delivery service. The Estimated Departure and Arrival Dates need to be in the future, and the Route should fill in automatically, based on the addresses listed.
- If the Driver is not available in the dropdown menu, click on the teal '+' to add the intended driver's information (once you 'Save' those details, the driver will show up in the dropdown menu).
How To Add A Driver
- Click the “Create Driver” button (be sure to confirm you're on the intended tab - Delivery Drivers vs Pickup Drivers)
- Fill in the information in the “Add Driver” window.
Note: Only check the “Hide for Fulfillment” box if you don’t want the driver to appear as an option when manifesting orders.
- Click “Create Driver”.
Editing Drivers
- Click the "Edit" button on the Fulfillment > Drivers page for the driver you wish to edit information for.
- Make any necessary changes and click "Update Driver".
Please reach out to support@cultivera.com if you have any questions or requests. Thanks!