Star Micronics TSP100/143III (LAN/Ethernet) Windows Setup Guide (Cultivera POS Web)
 Updated
TSP100/143III (LAN/Ethernet) Windows Setup Guide (Cultivera POS Web)
This guide walks through installing and configuring a Star Micronics TSP100/143III (LAN/Ethernet or WiFi) receipt printer on a Windows PC or laptop for use with Cultivera POS Web.
Before starting, confirm:
- Printer is powered on
- Ethernet cable is connected to router/modem and receipt printer
- Windows PC is on the same network
- Admin privileges to install drivers
Install the futurePRNT Driver
Download and install the Star driver package:
Installation Steps:
- Download the Full or EXE version
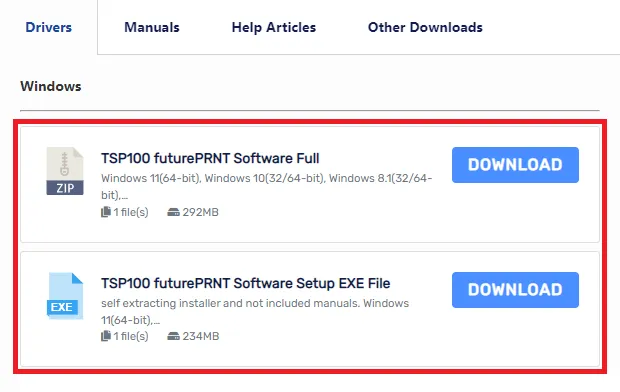
- Extract the ZIP (if applicable)
- Open the Setup folder > run Setup.exe
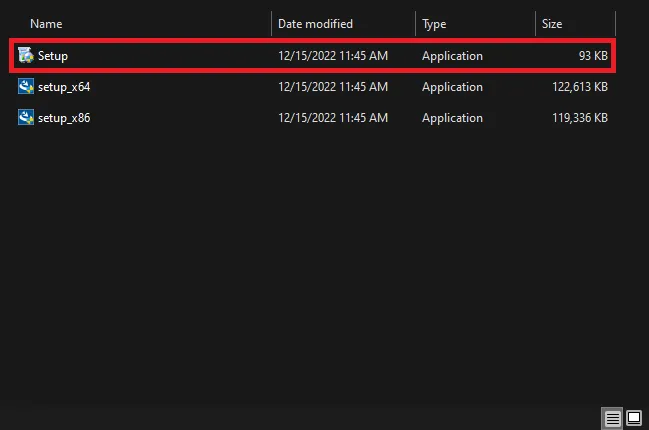
- Click through:
- Accept agreement
- Select Typical install
- Click Install > Finish
This installs the required driver and configuration utility.
Get Printer IP Address
- Power off the printer
- Hold the Feed button while powering on
- Print the self-test receipt
- Locate:
- IP Address under Current IP Parameters Status
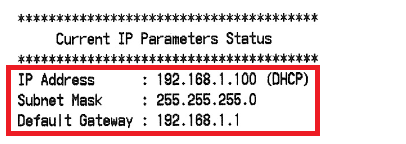
- IP Address under Current IP Parameters Status
This IP is required for network setup.
Add Printer via Network
Option A: Auto-Discover (Recommended)
- Open:
- LAN & Bluetooth Setup Tool
- Allow it to search for printers
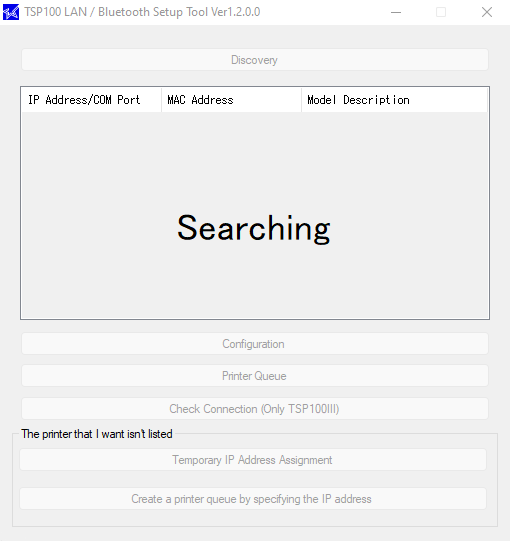
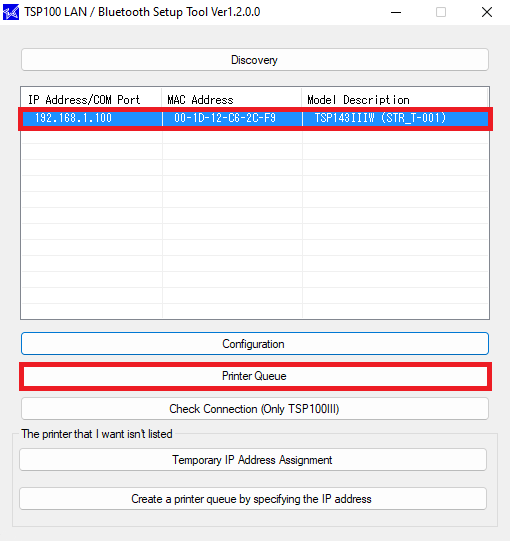
- Select your TSP100 when it appears
- Click Printer Queue
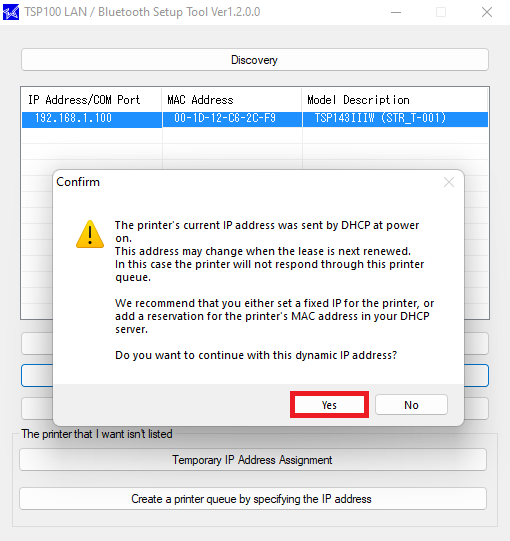
- Accept DHCP IP (or configure static if needed)
- Click:
- Print Test Page > Apply
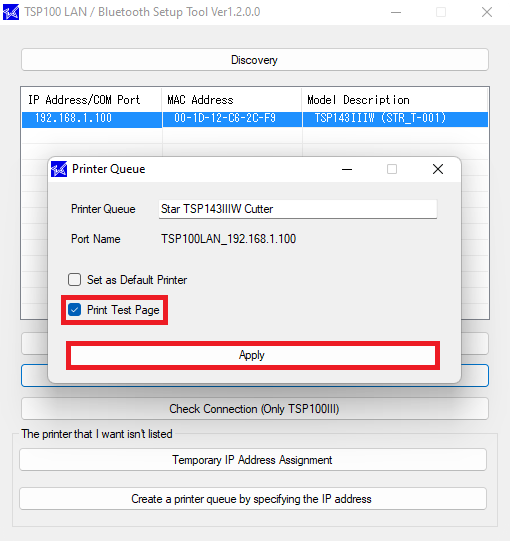
- Print Test Page > Apply
A Windows test page should print, confirming that setup is complete.
Option B: Manual IP Setup (If Not Found)
If the printer does not appear in the list:
- Open LAN & Bluetooth Setup Tool
- Select:
- Create a printer queue by specifying IP
- Enter:
- Printer model (Ex: TSP100)
- IP Address (from self-test page)
- Click Apply
A test print should occur within a few seconds.
Verify Printer in Windows
- Go to:
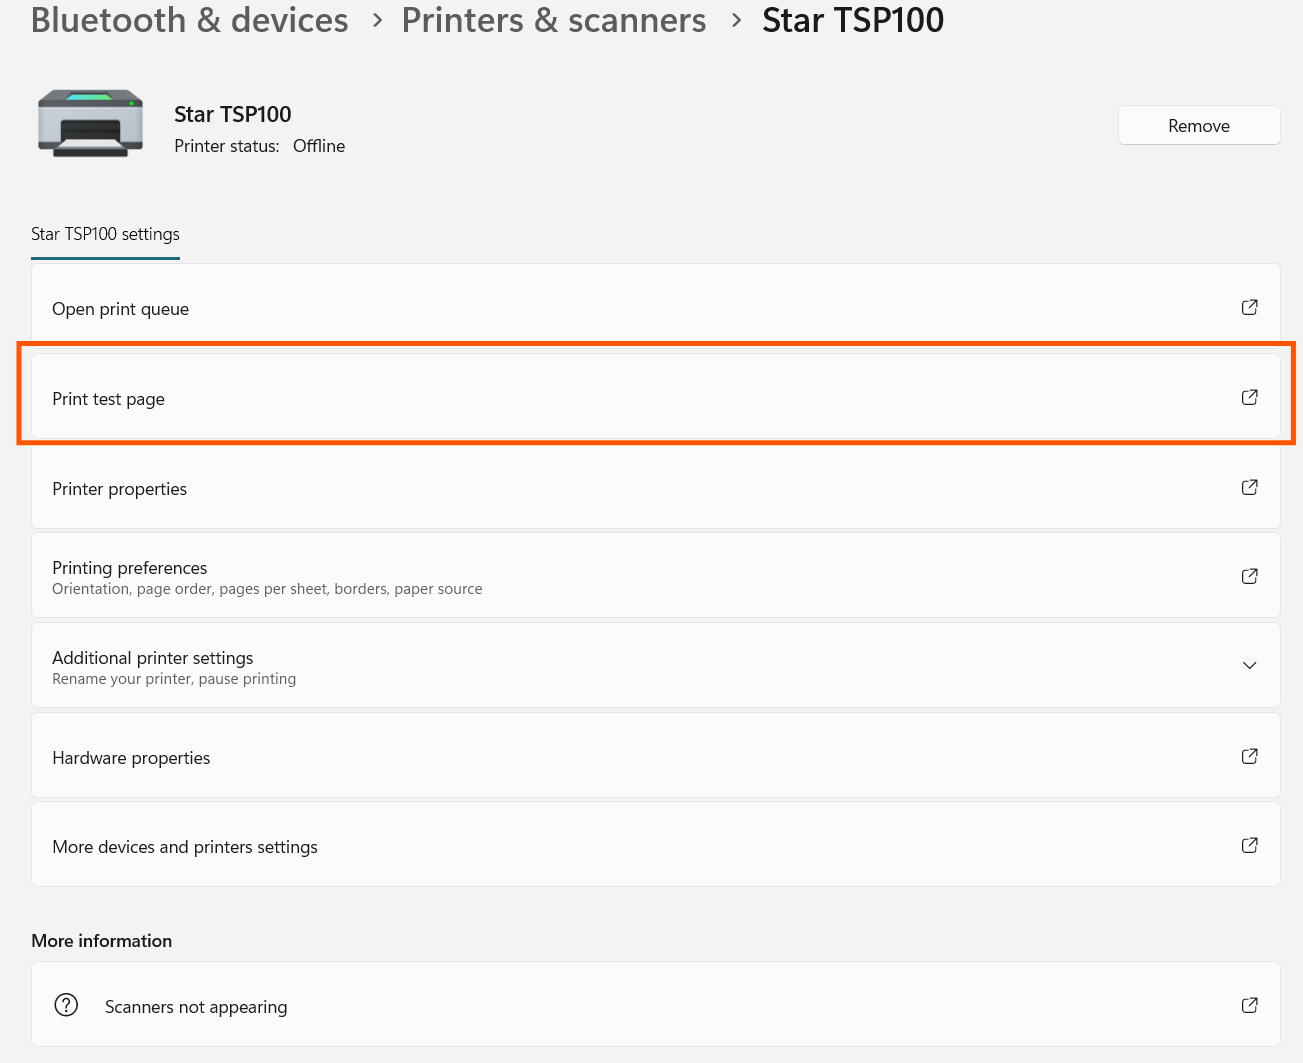
- Control Panel > View Devices and Printers > Printers & Scanners
- Confirm the printer is listed
- Left-click Device > Print a Test Page
Use Printer in POS Web
- Open your POS Web module
- Initiate a print action (receipt, or Shift X/Z Report)
- In the Print Preview screen:
- Select your printer from the Destination dropdown
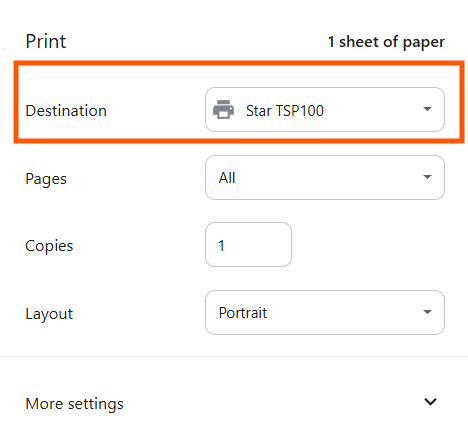
- If not visible:
- Click See more and select it from the full device list
- Select your printer from the Destination dropdown
Adjust Print Settings (Printer Feeding Excess Paper)
In the Print Preview window:
- Open More settings
- Uncheck Headers and footers
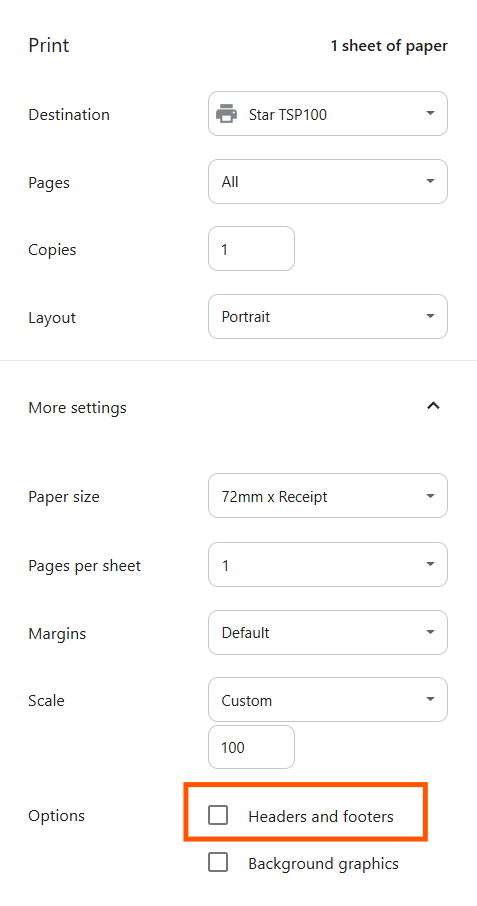
This prevents any extra paper usage on receipts.
Congratulations! You've successfully set up your WiFi receipt Printer.
If you encounter any issues or if the printer still doesn't work as expected, it's advisable to contact Star Micronics customer support (https://starmicronics.com/star-micronics-technical-support/) or refer to the official documentation (https://starmicronics.com/support/products/tsp100iii-support-page/) for troubleshooting guidance. They can provide specific assistance based on your printer's model and any unique issues you may be experiencing.
