Star Micronics MCPrint3 & TSP100/143III Setup Guide for LAN Setup (Android and iPad Terminals)
 Updated
Star Micronics MCPrint3 & TSP100/143III Setup Guide for LAN Setup (Android and iPad Terminals)
Terminal (iPad & Android) Network Setup Guide for Cultivera POS
This guide walks through connecting a Star Micronics MCPrint3 or TSP100/143III receipt printer to a tablet (iPad or Android) using a LAN/Ethernet network connection.
Before starting, confirm:
- Printer is powered on
- Ethernet cable is connected from printer > router/modem
- Tablet is connected to the same network
- Cultivera POS app is installed and logged in
Connect Printer to Network
- Plug Ethernet cable into:
- Printer
- Router/modem
- Power on the printer
- Wait 30–60 seconds for network initialization
Print Network Configuration (Test Slip)
This step is required to obtain the printer’s network details.
- Power off the printer
- Hold the Feed button
- Power the printer back on while holding Feed
- Release after printing begins
On the printed slip, locate the Network Configuration / Current IP Parameters section:
- IP Address > used for Android
- Printer MAC Address > used for iPad
Configure Device Settings in Back Office
- Log into Cultivera Back Office
- Navigate to:
- Administration > Devices
- Select the terminal/device
- Configure the following in the general drop-down menu:
- Printer Model:
- MCPrint (for MCPrint3), OR
- TSP100 (for TSP100/143III)
- Connection Type:
- Select WiFi
- Click Update Settings
- Terminal device must be manually synced to update
Enter Printer Network Info on Terminal
The address must be entered exactly as it appears on the slip (including capitalizations if present).
- Navigate to Terminal Settings > Hardware Test within the POS app
- Enter the following based on device type:
- Android:
- Enter IP Address (from test slip)
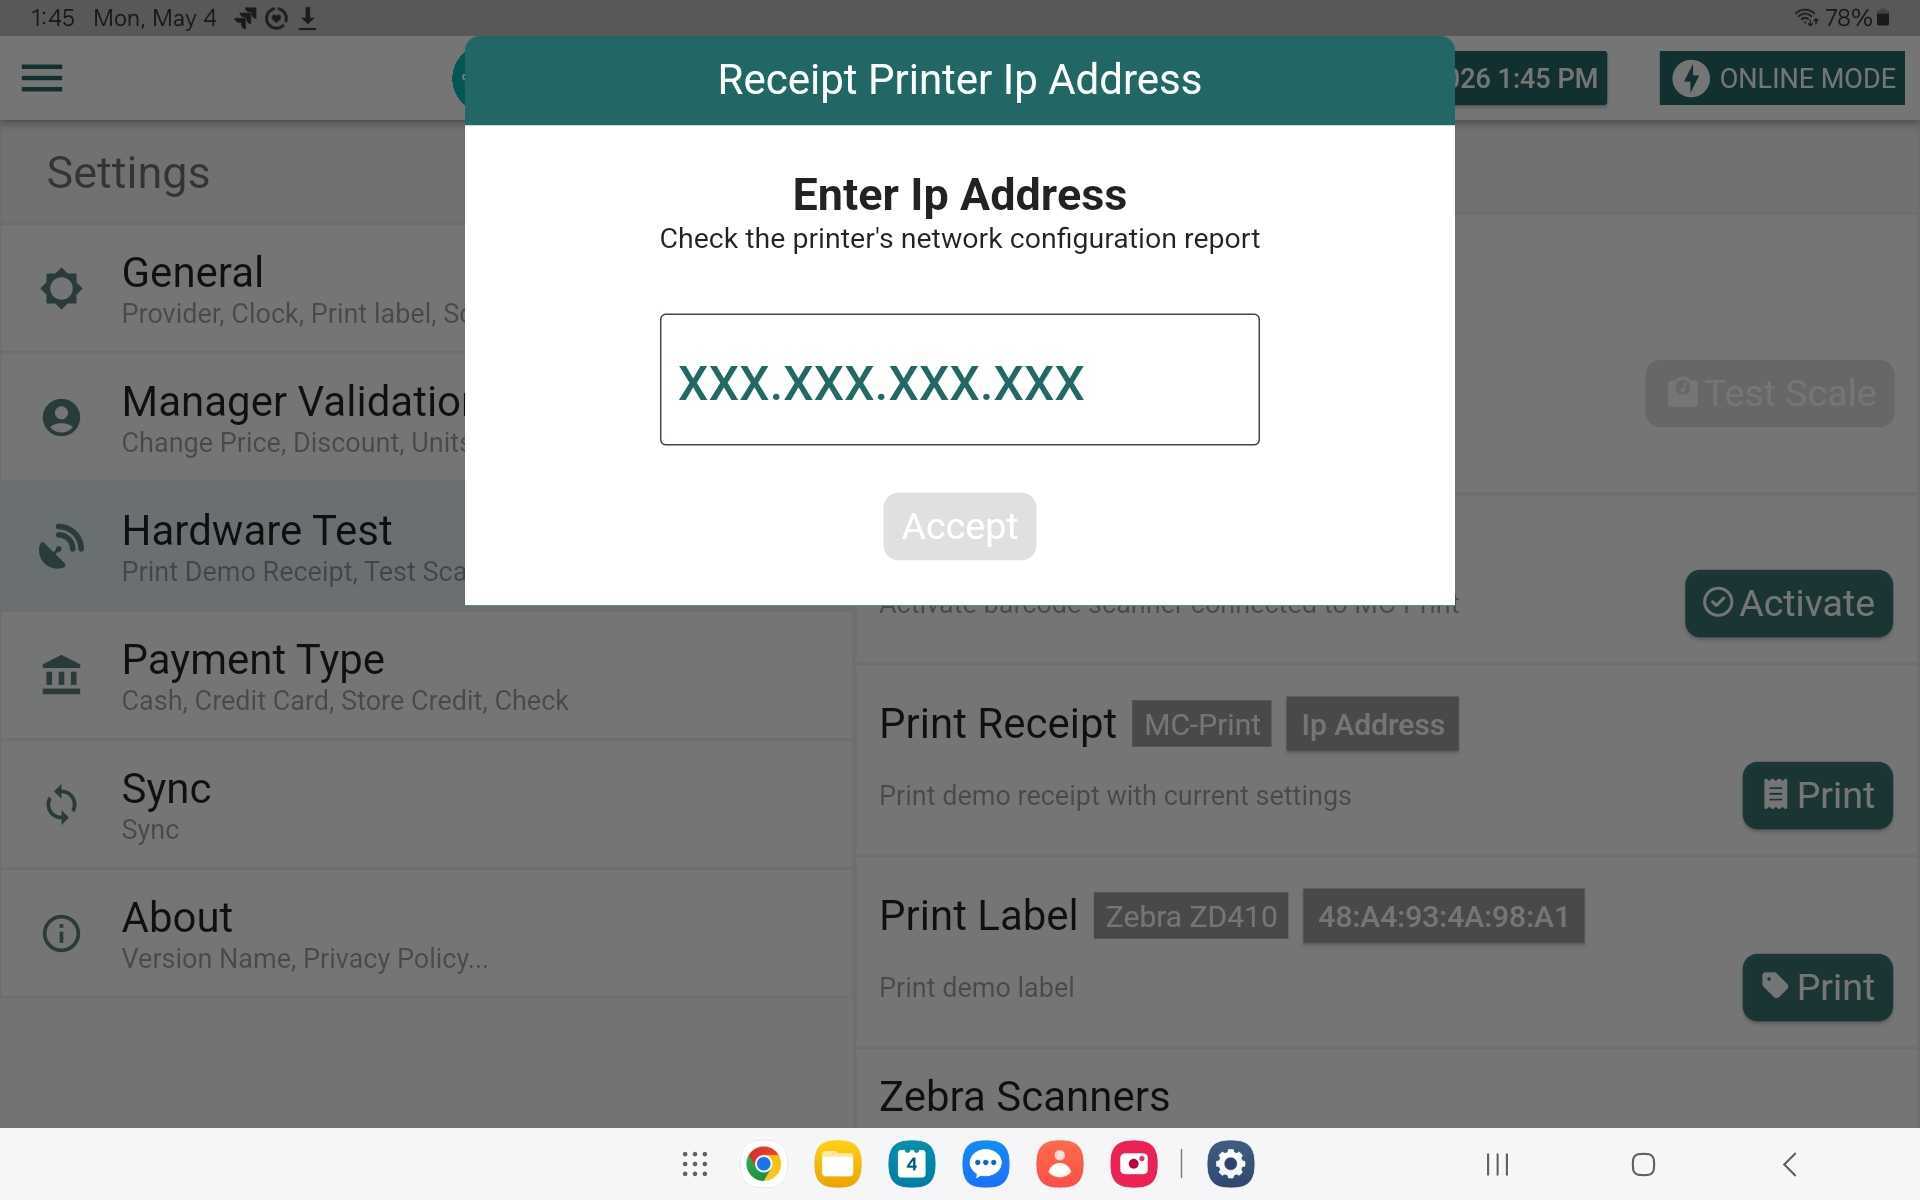
- Enter IP Address (from test slip)
- iPad:
- Enter MAC Address (from test slip)
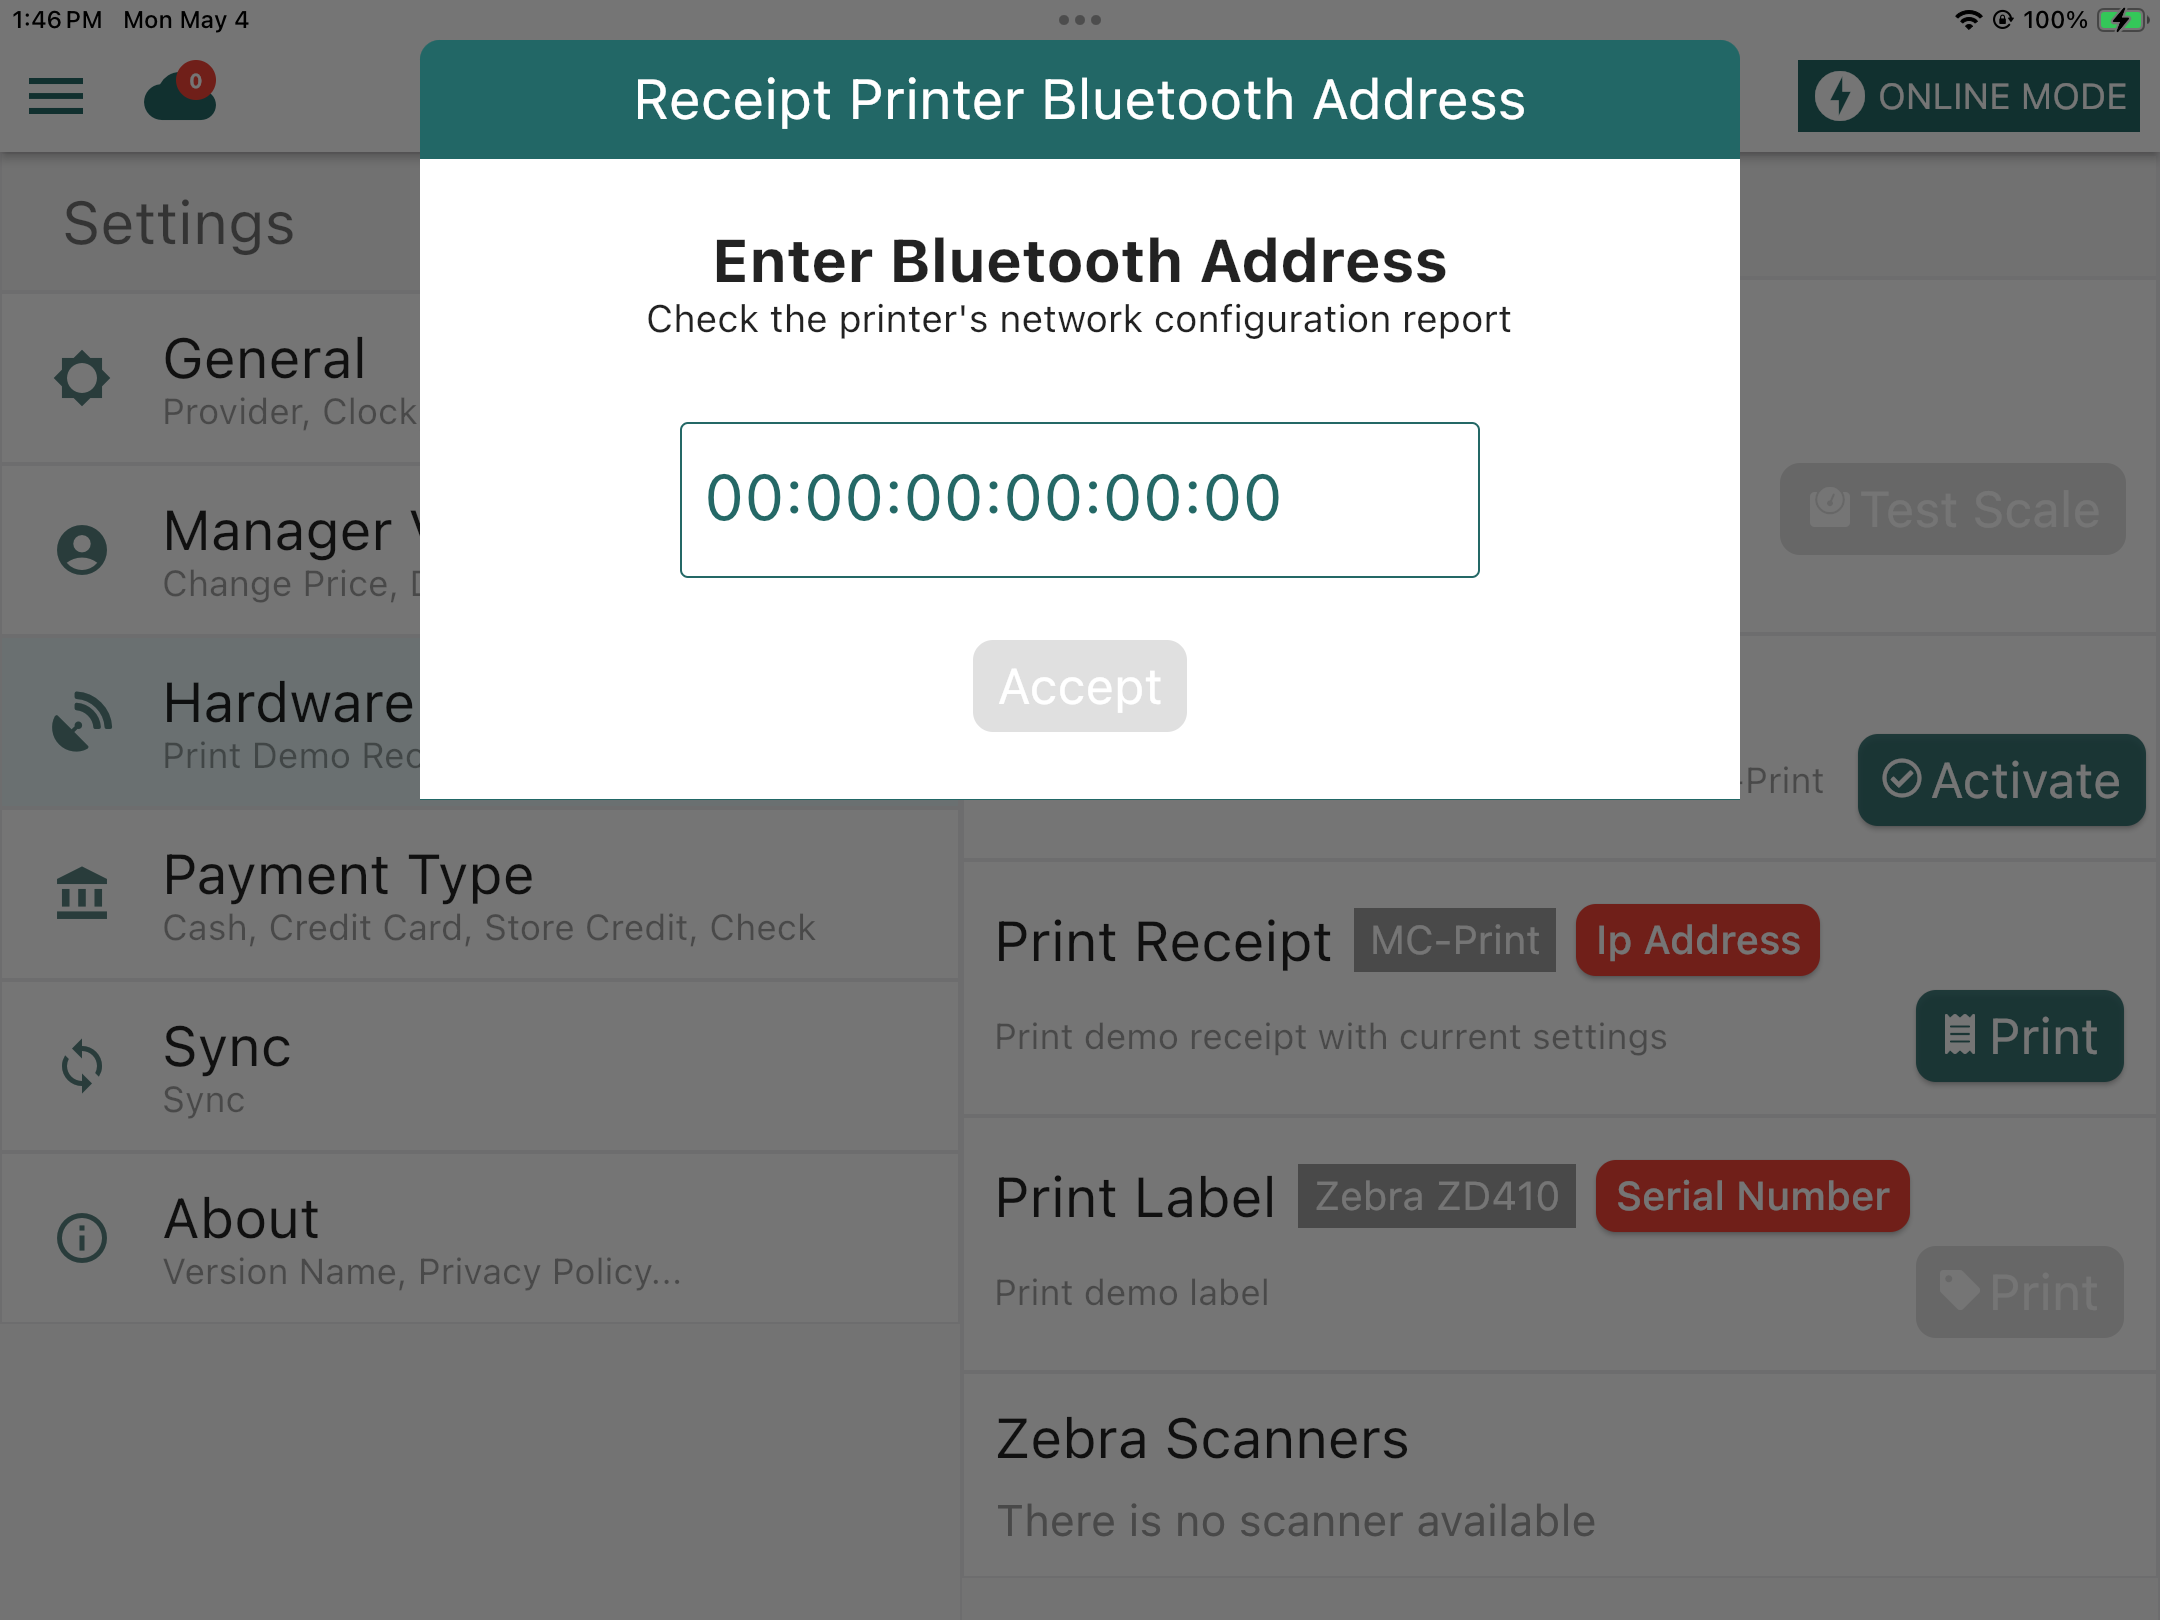
- Enter MAC Address (from test slip)
- Save settings
Test Print
- Tap Print from the Hardware Test page
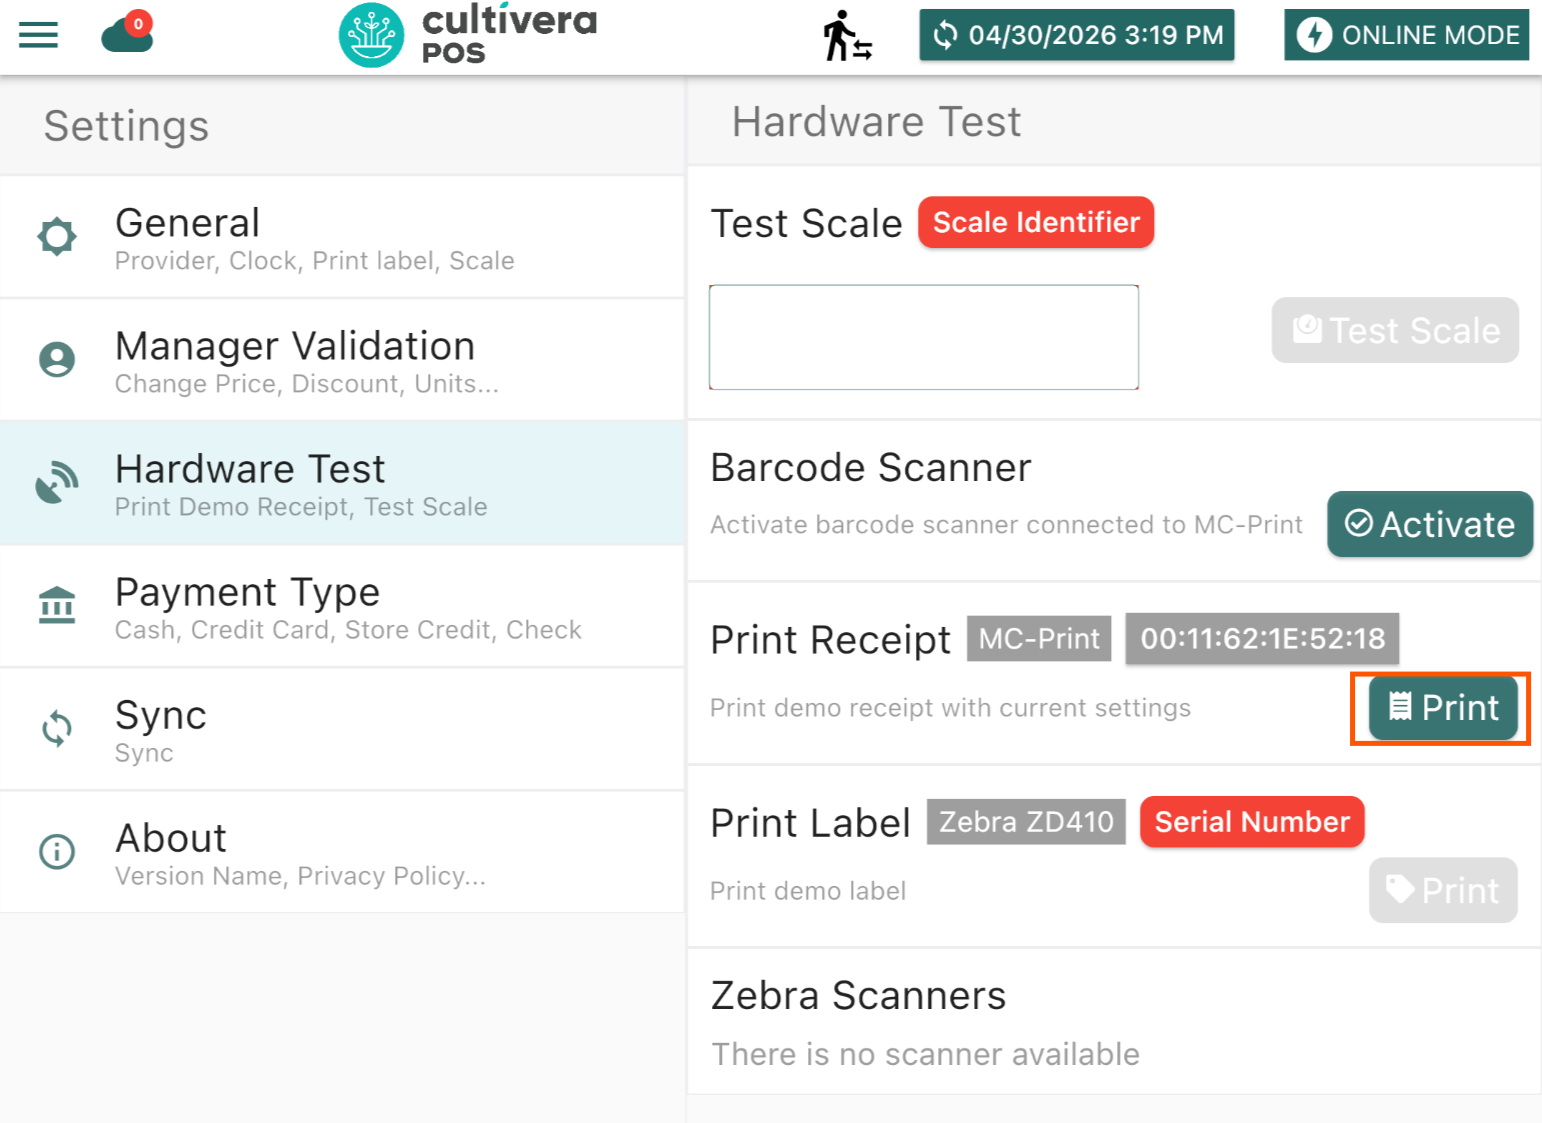
- A receipt should print within a few seconds
If nothing prints:
- Close and re-open the POS app
- Retry test print
Once the test print succeeds, the printer is fully configured.
If you encounter any issues or if the printer still doesn't work as expected, it's advisable to contact Star Micronics customer support (https://starmicronics.com/star-micronics-technical-support/) or refer to the official documentation for troubleshooting guidance (https://starmicronics.com/support). They can provide specific assistance based on your printer's model and any unique issues you may be experiencing.
