POS - Terminal Sales: Terminal Discounts and Loyalty Point Redemption
![]() Updated
Updated
POS Terminal: Discounts and Loyalty Point Redemption
Discounts and Promotions are assigned in the Back Office. How they appear at the Terminal is determined by the association in the Back Office. This document is an overview of how discounts are applied.
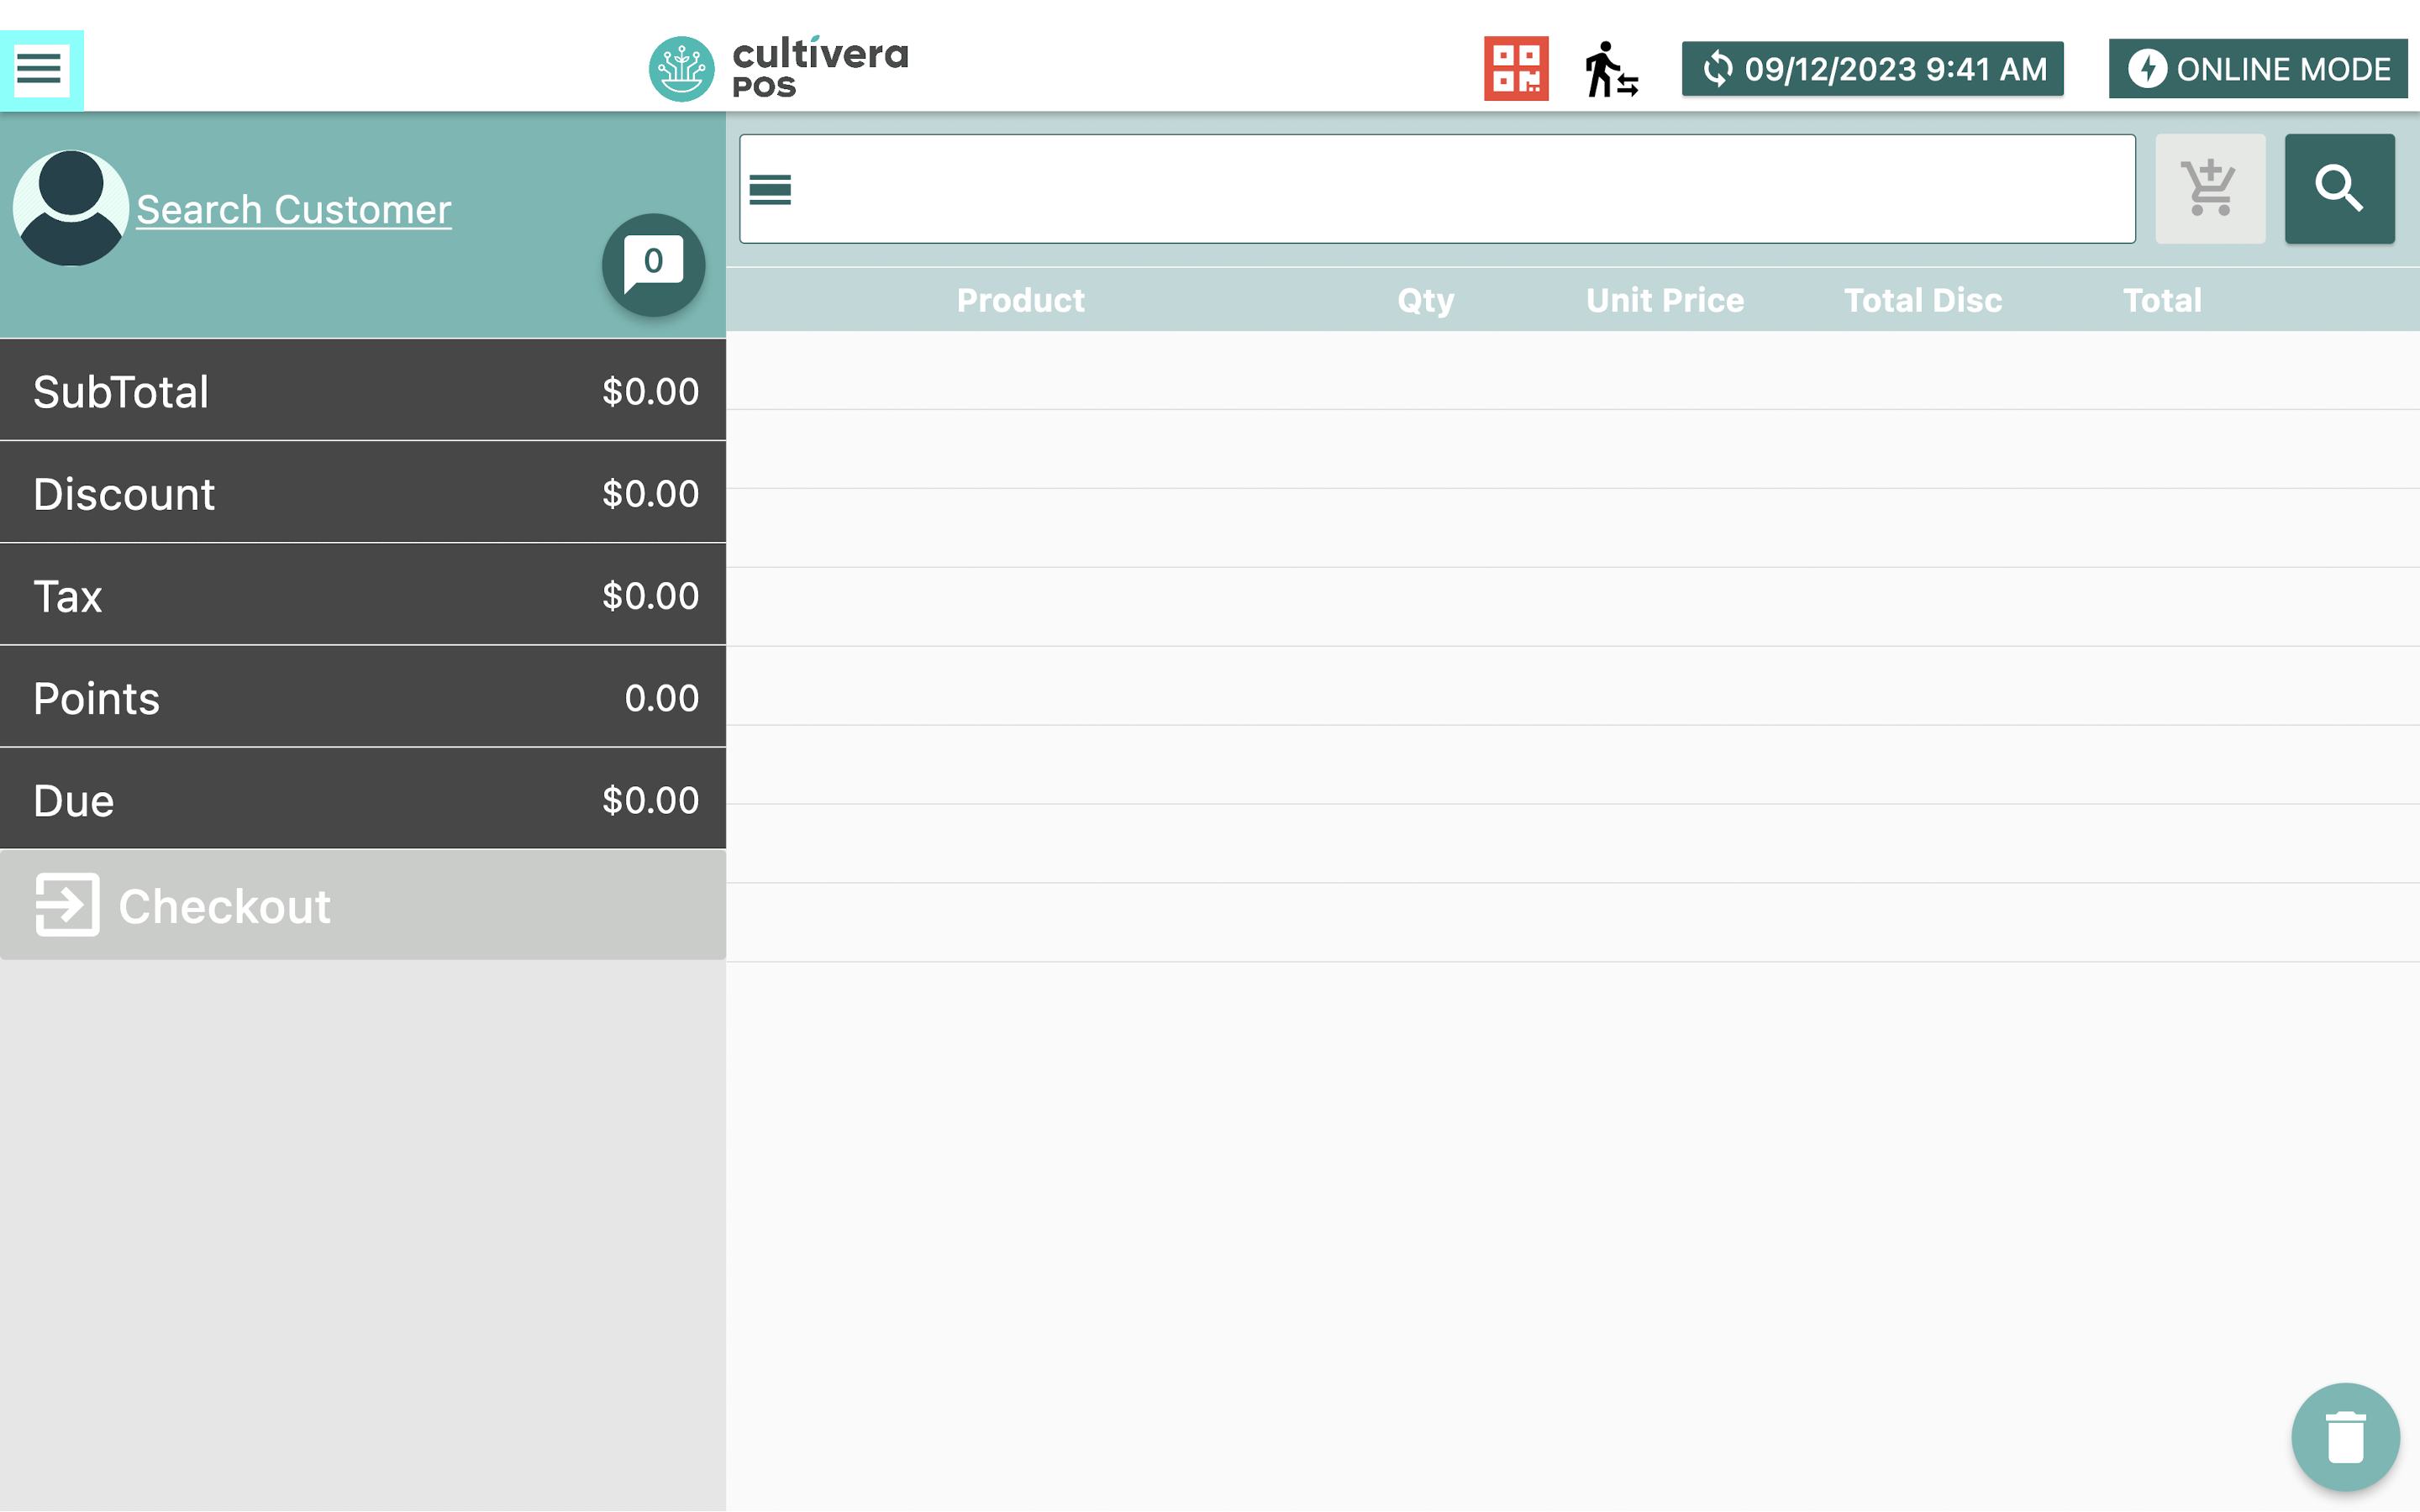
Applying Discounts to an Order
Discounts can be edited and applied both manually and automatically at the Terminal.
- To find the Promotions that have already been created in the Back Office, Select the "Menu" button at the top left corner of the screen.
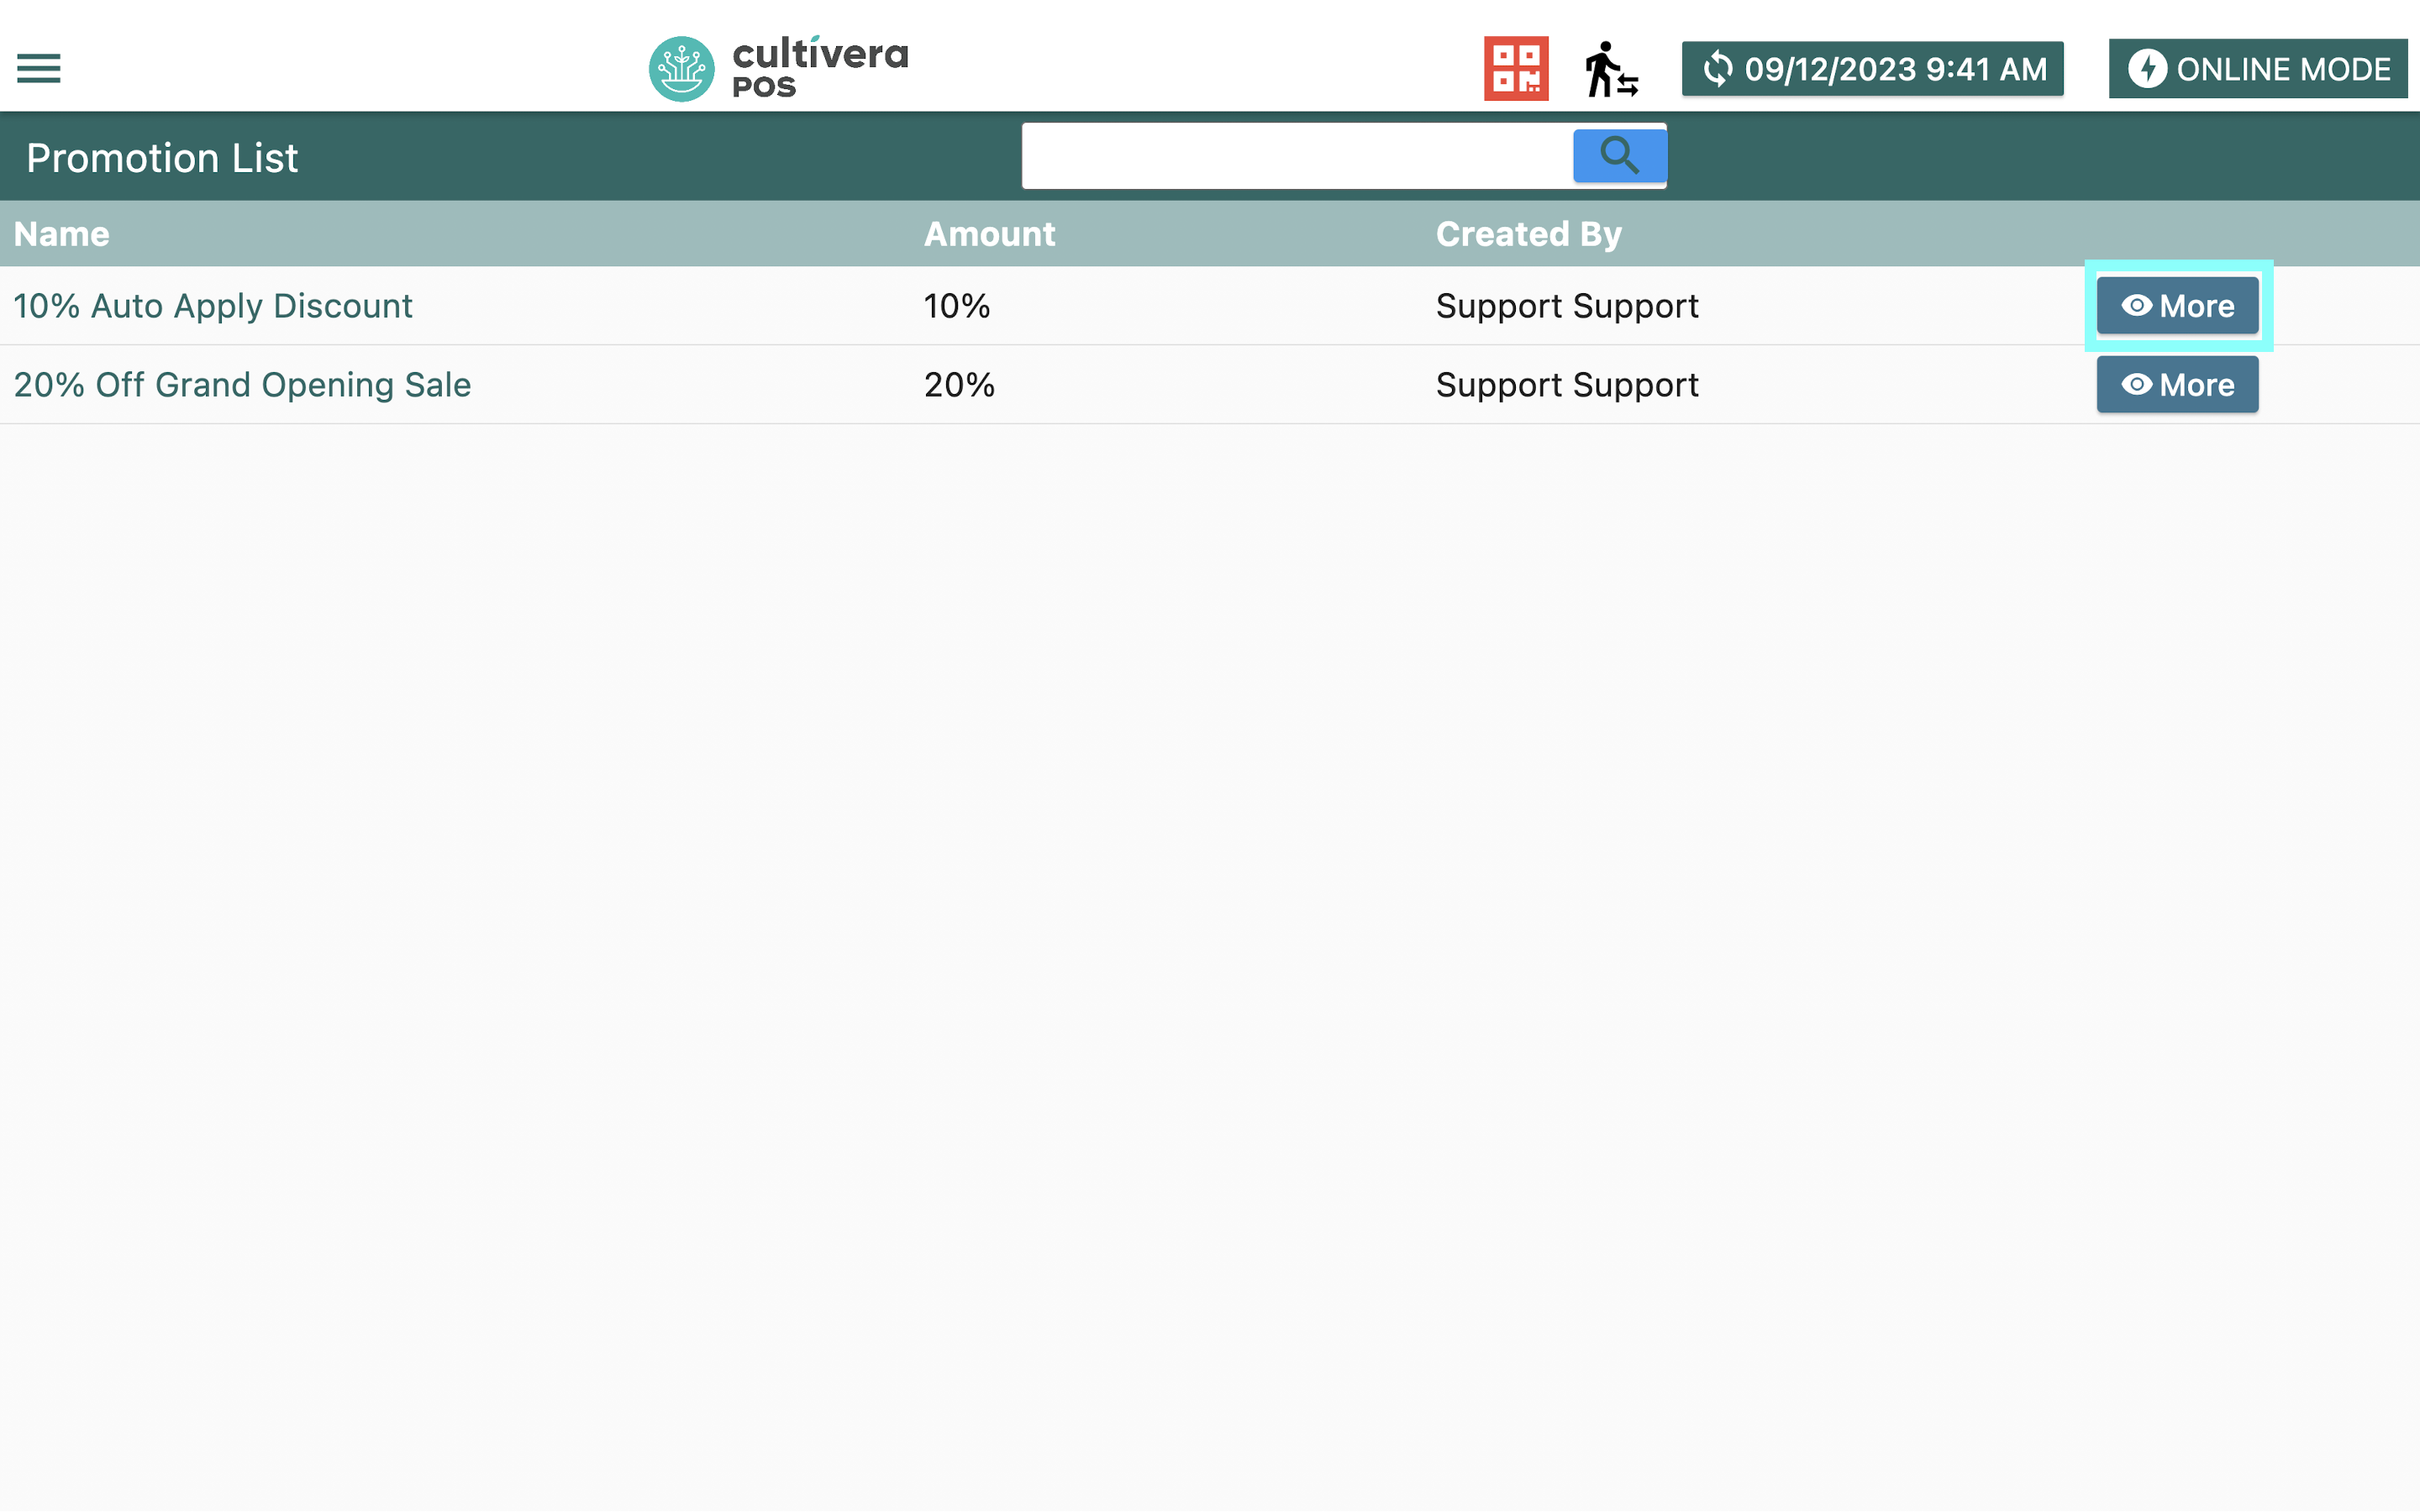
- Select "Promotions" to access the descriptions and discount amounts of any active Promotions.
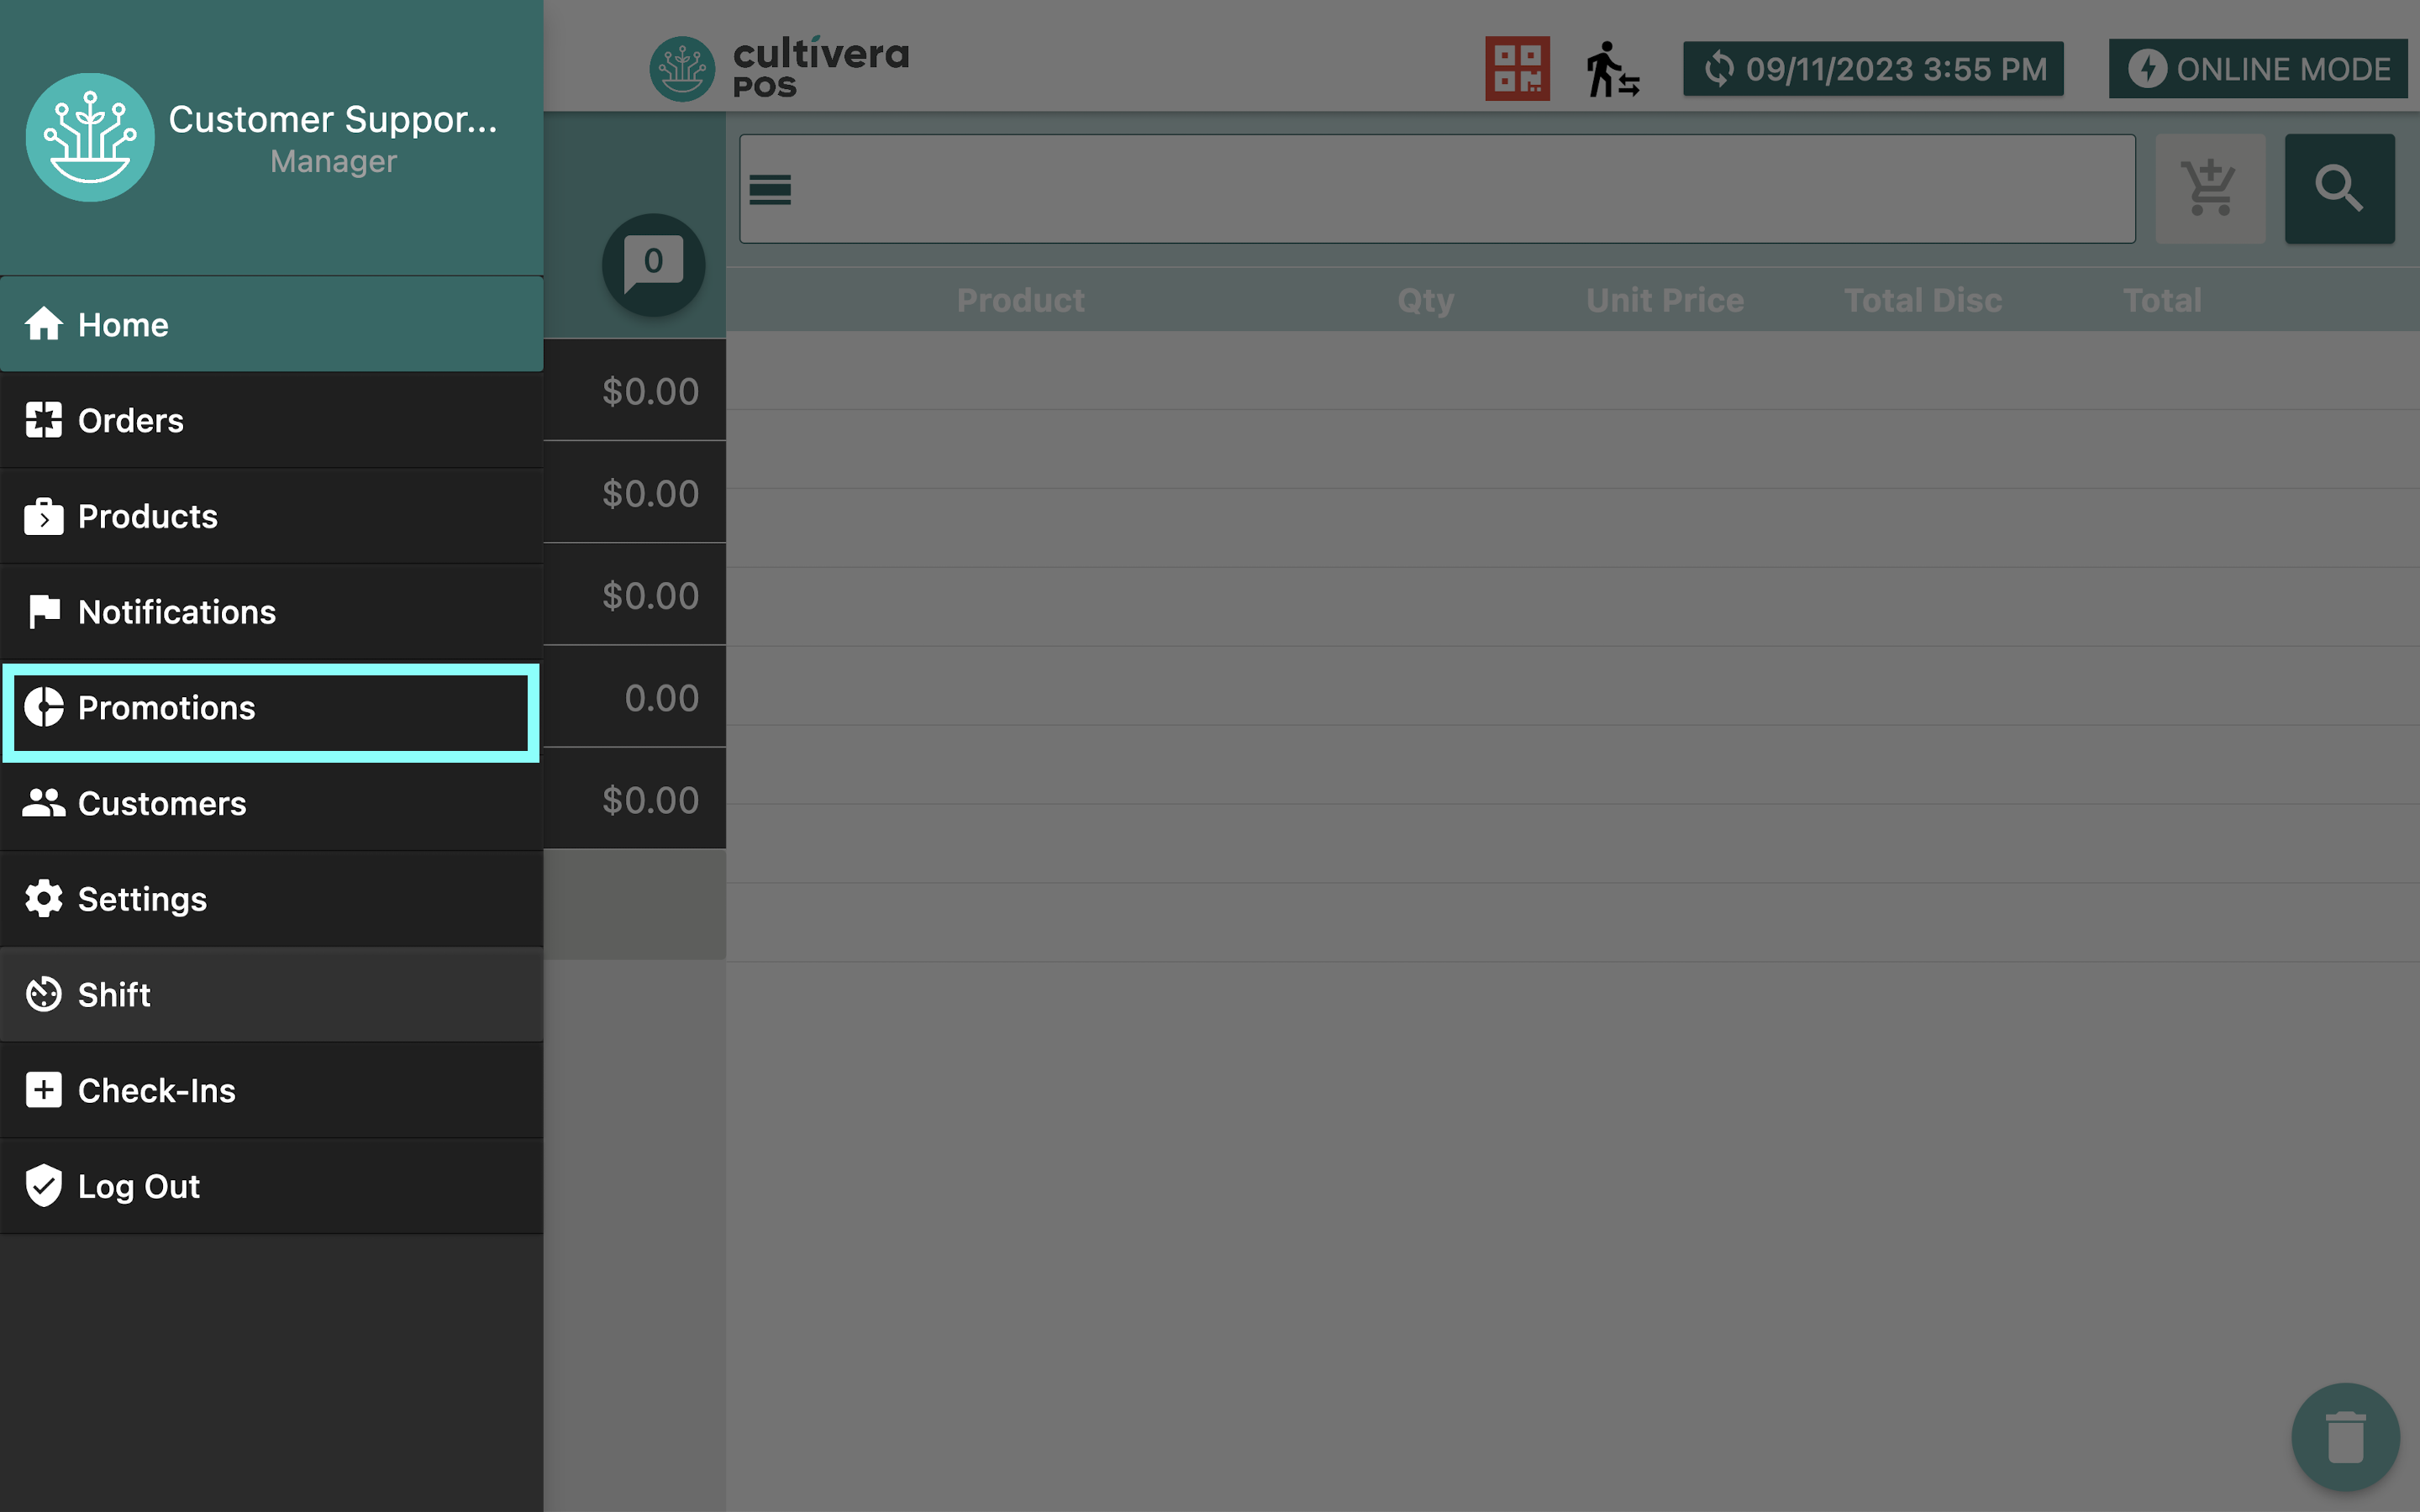
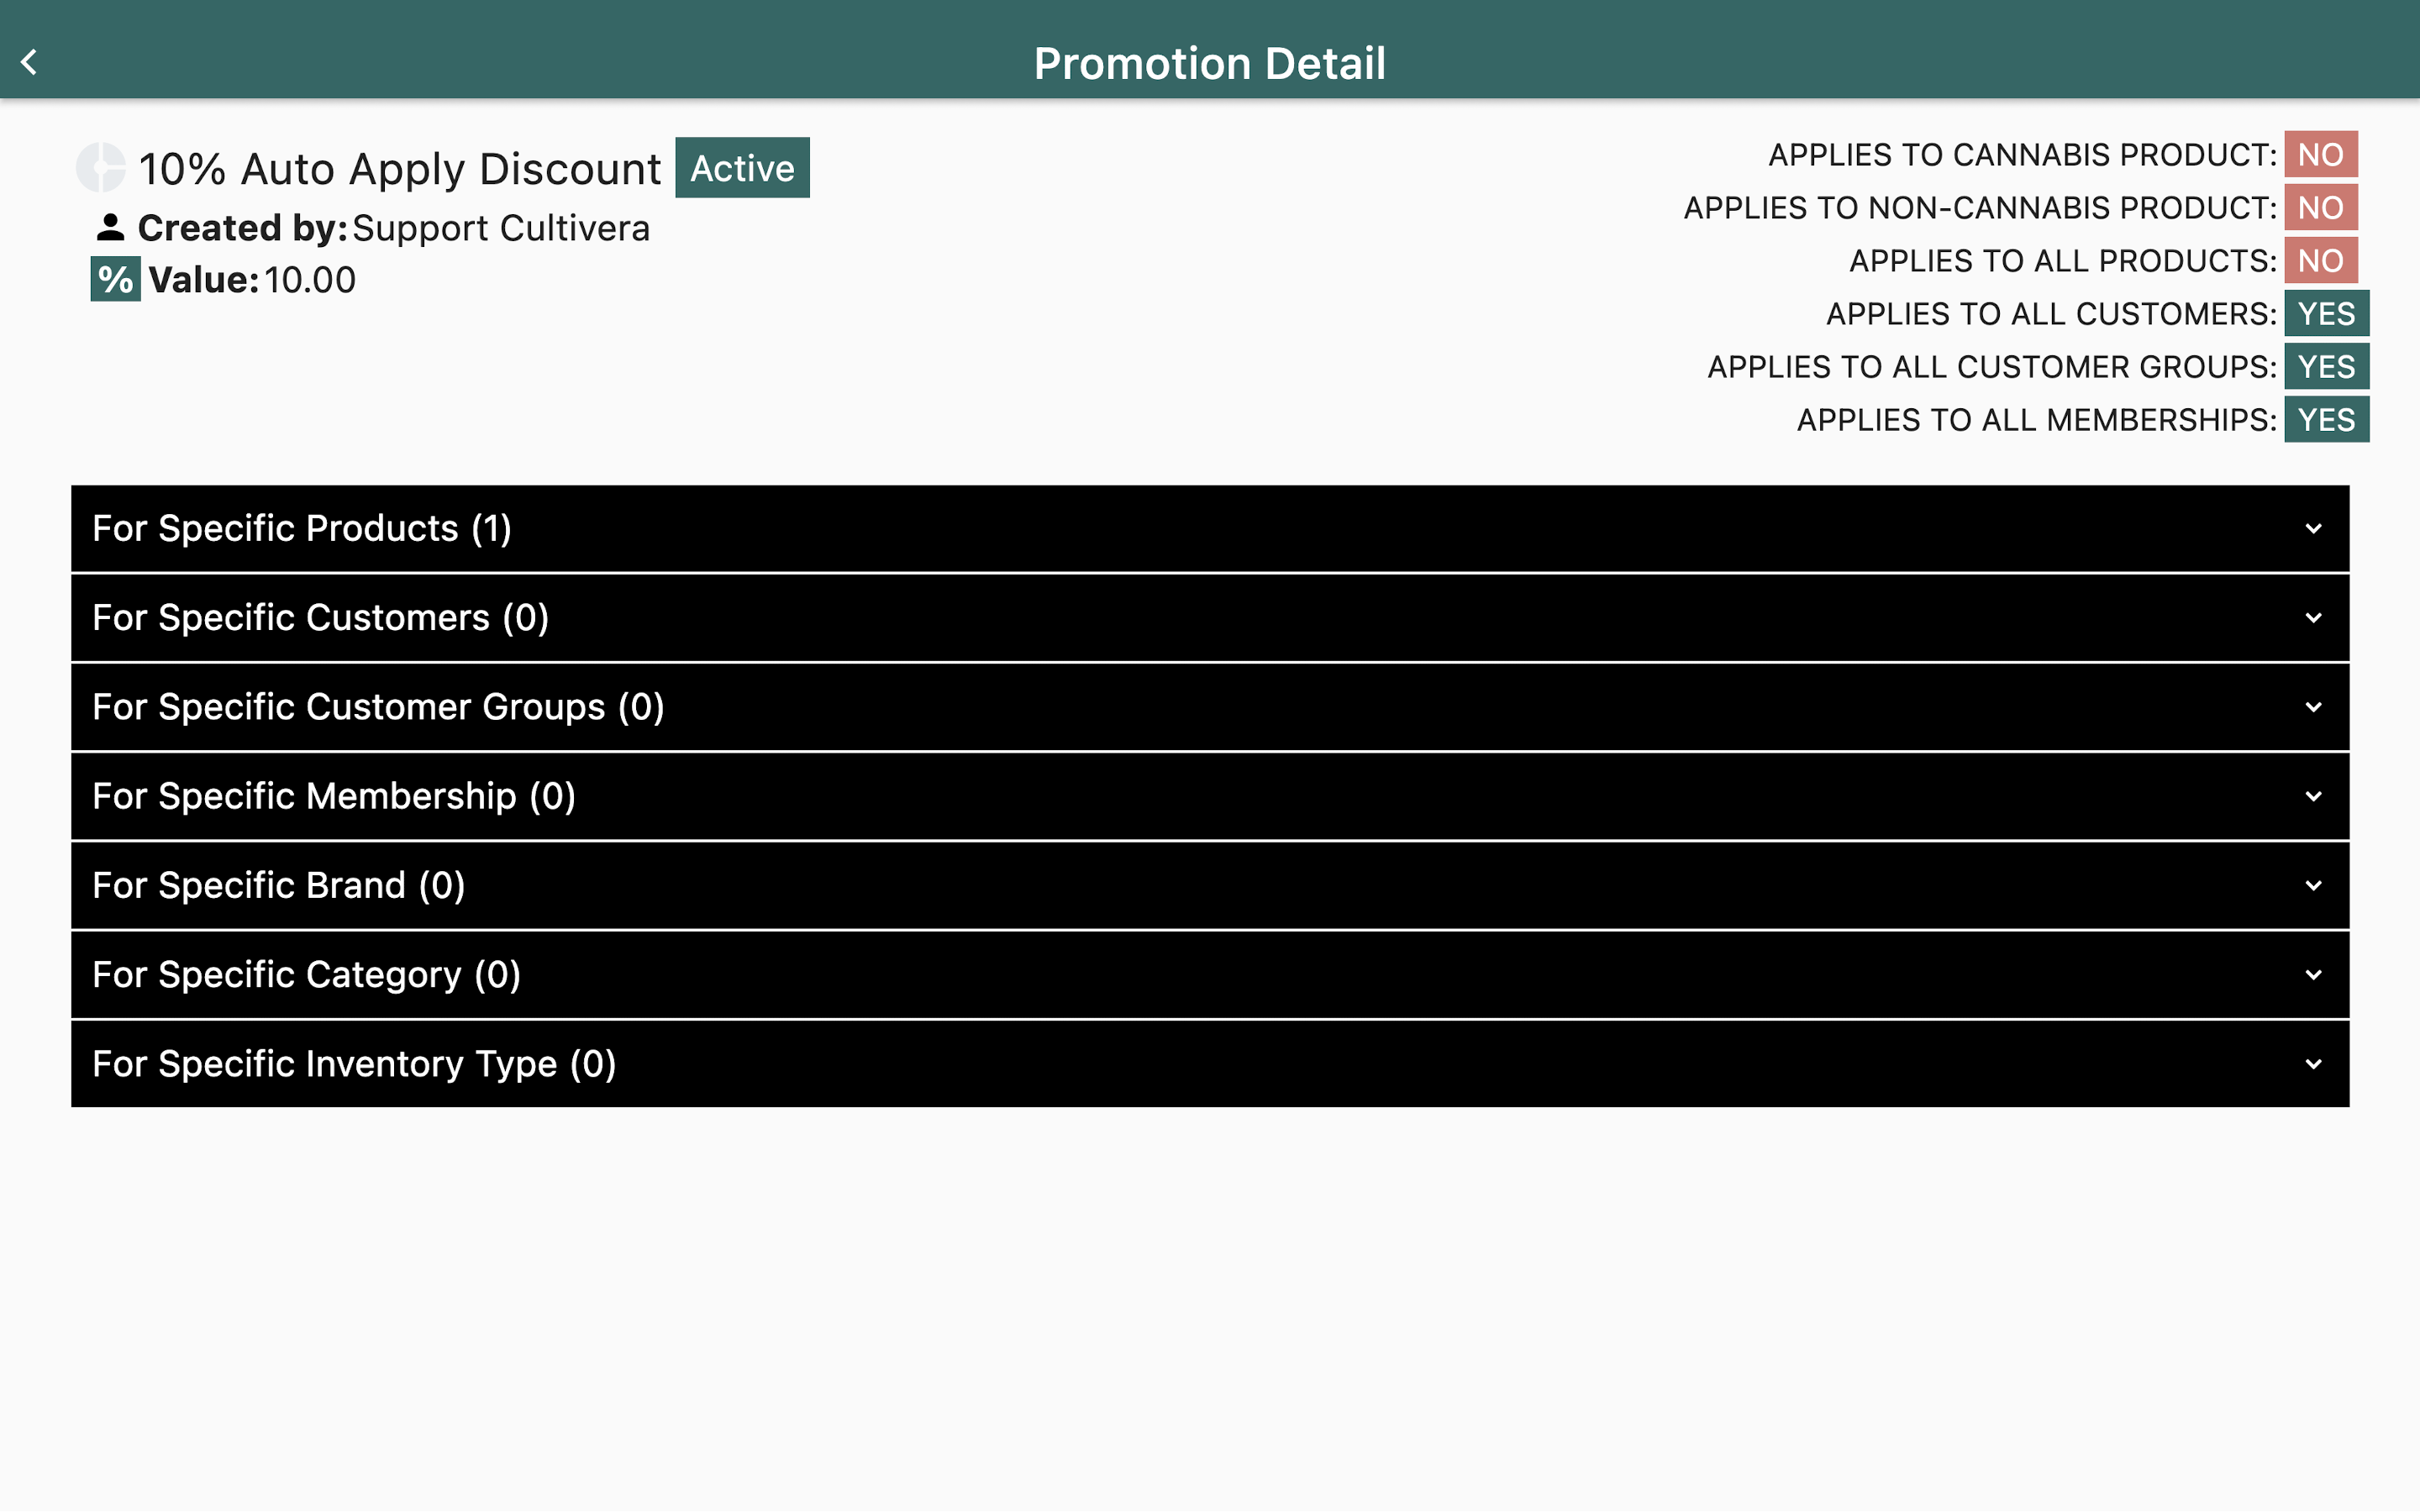
- Select "More" to view Promotion Details such as products or customers assigned to the discount.
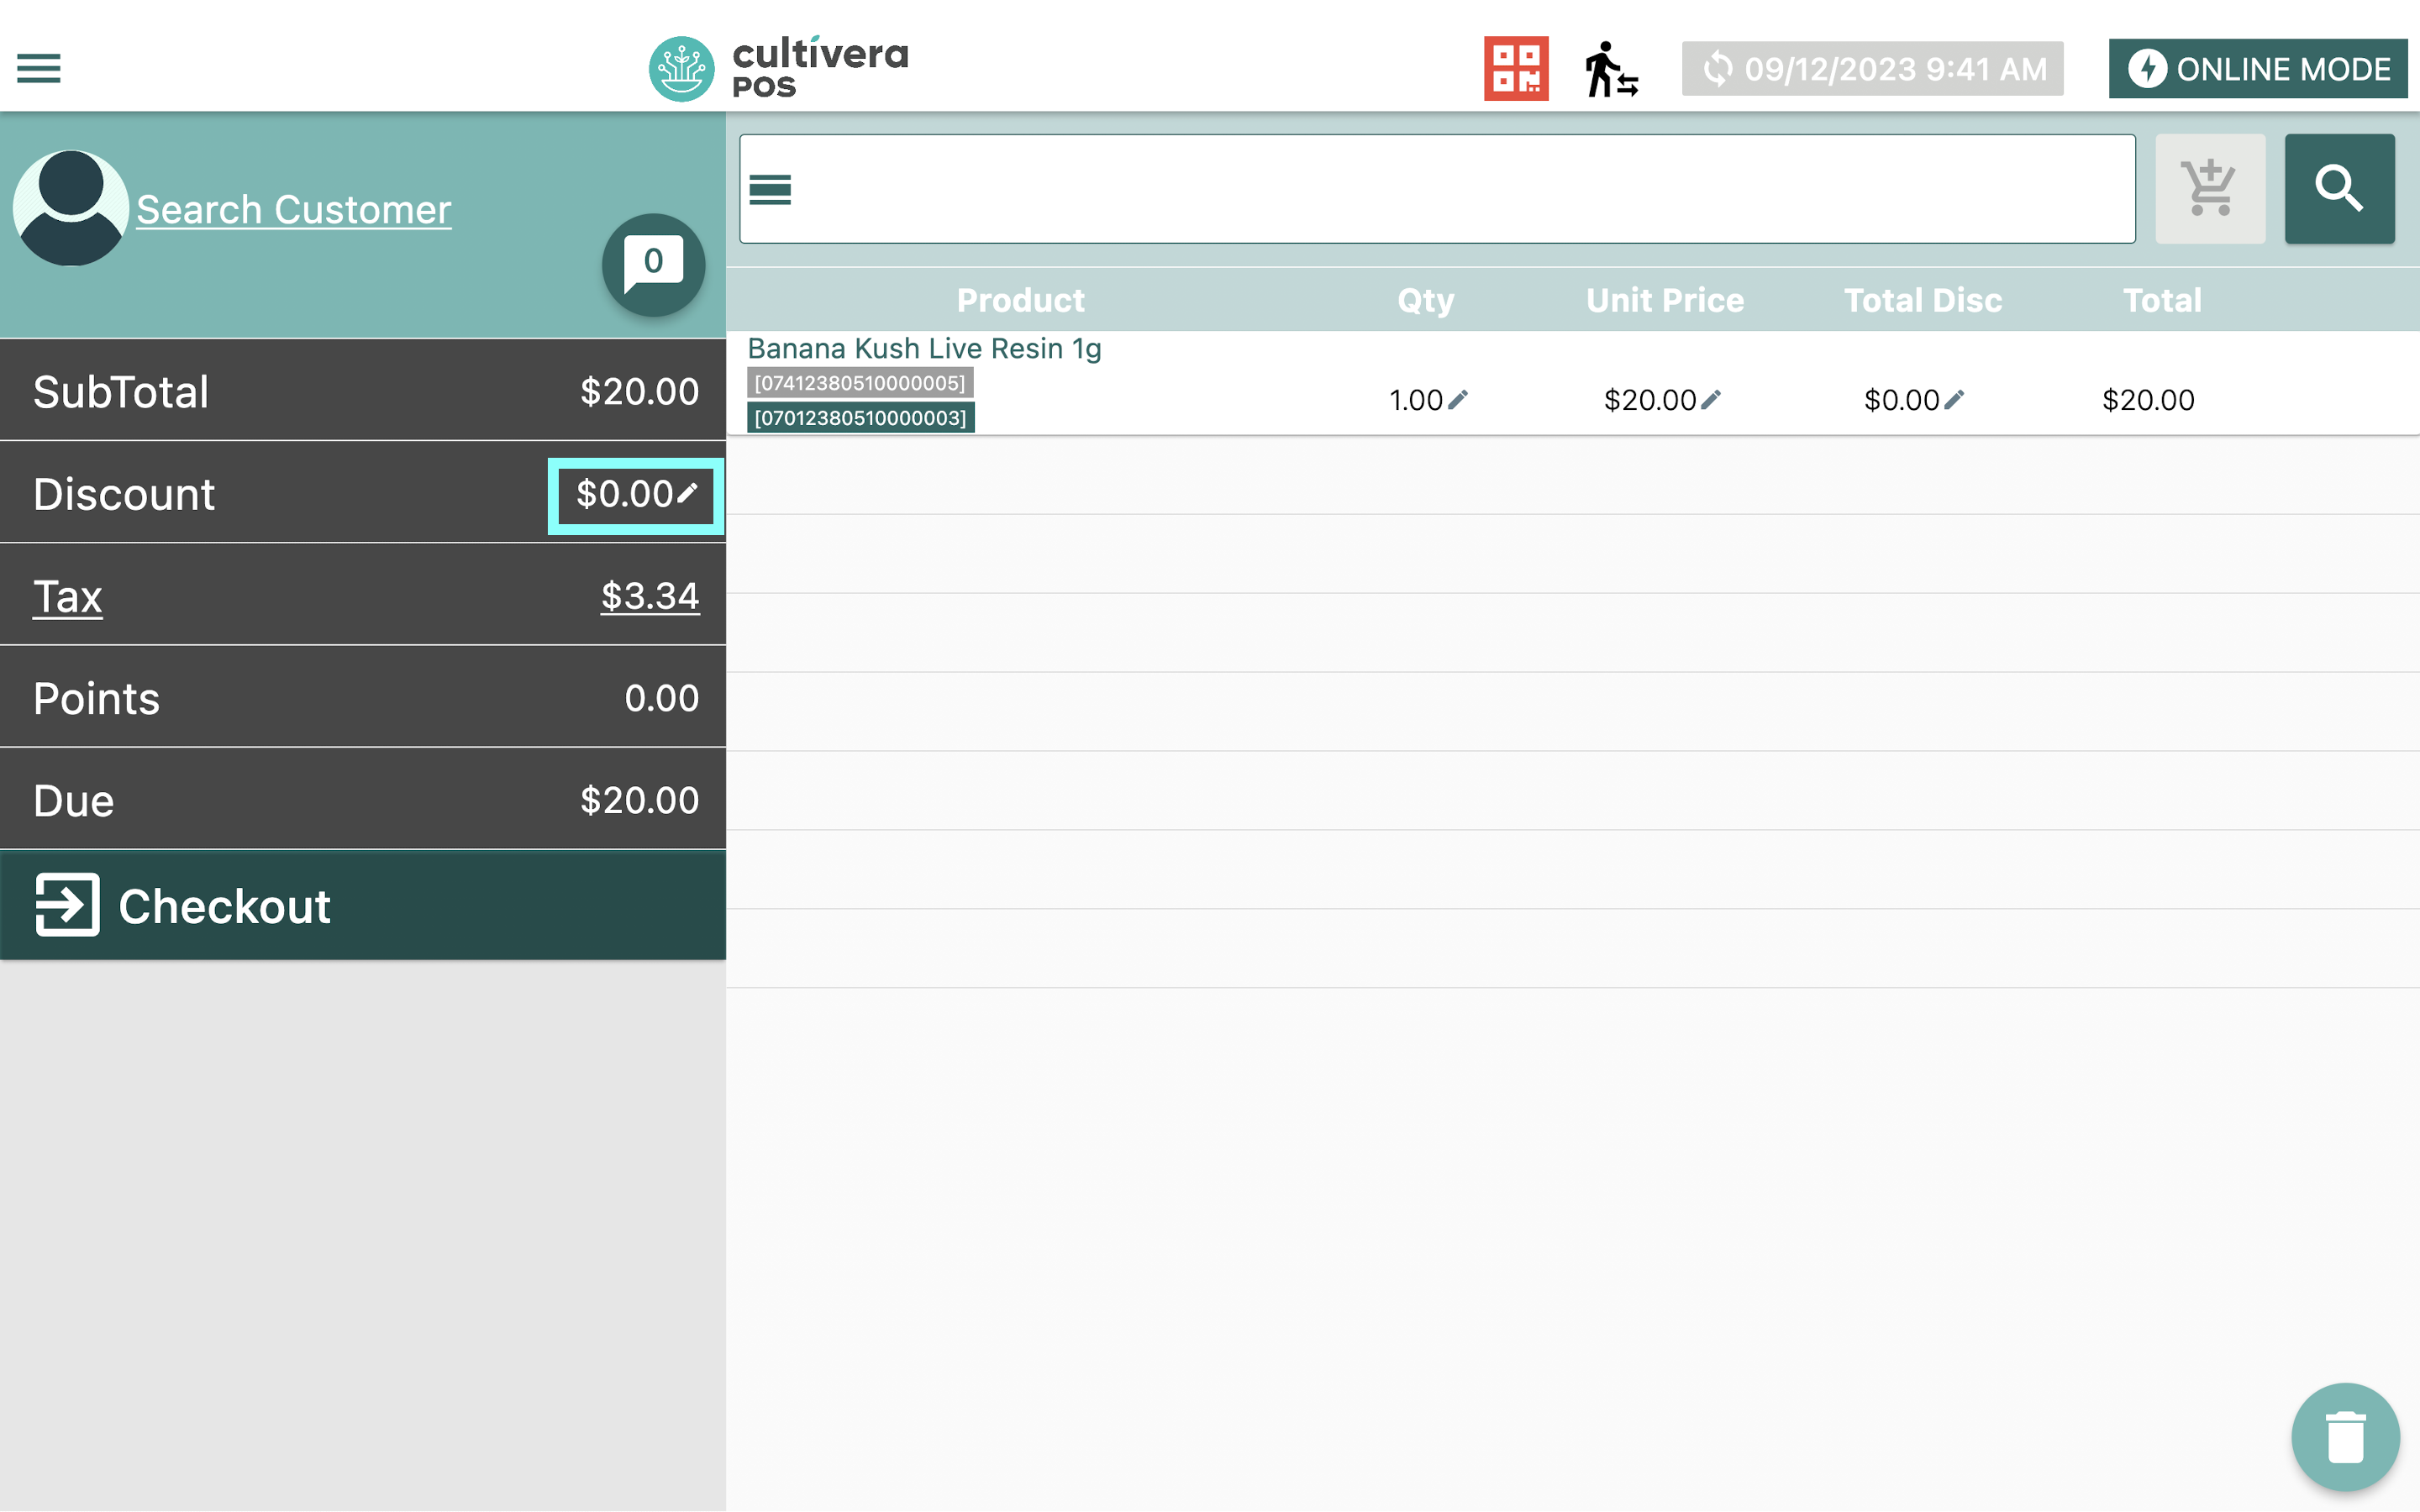
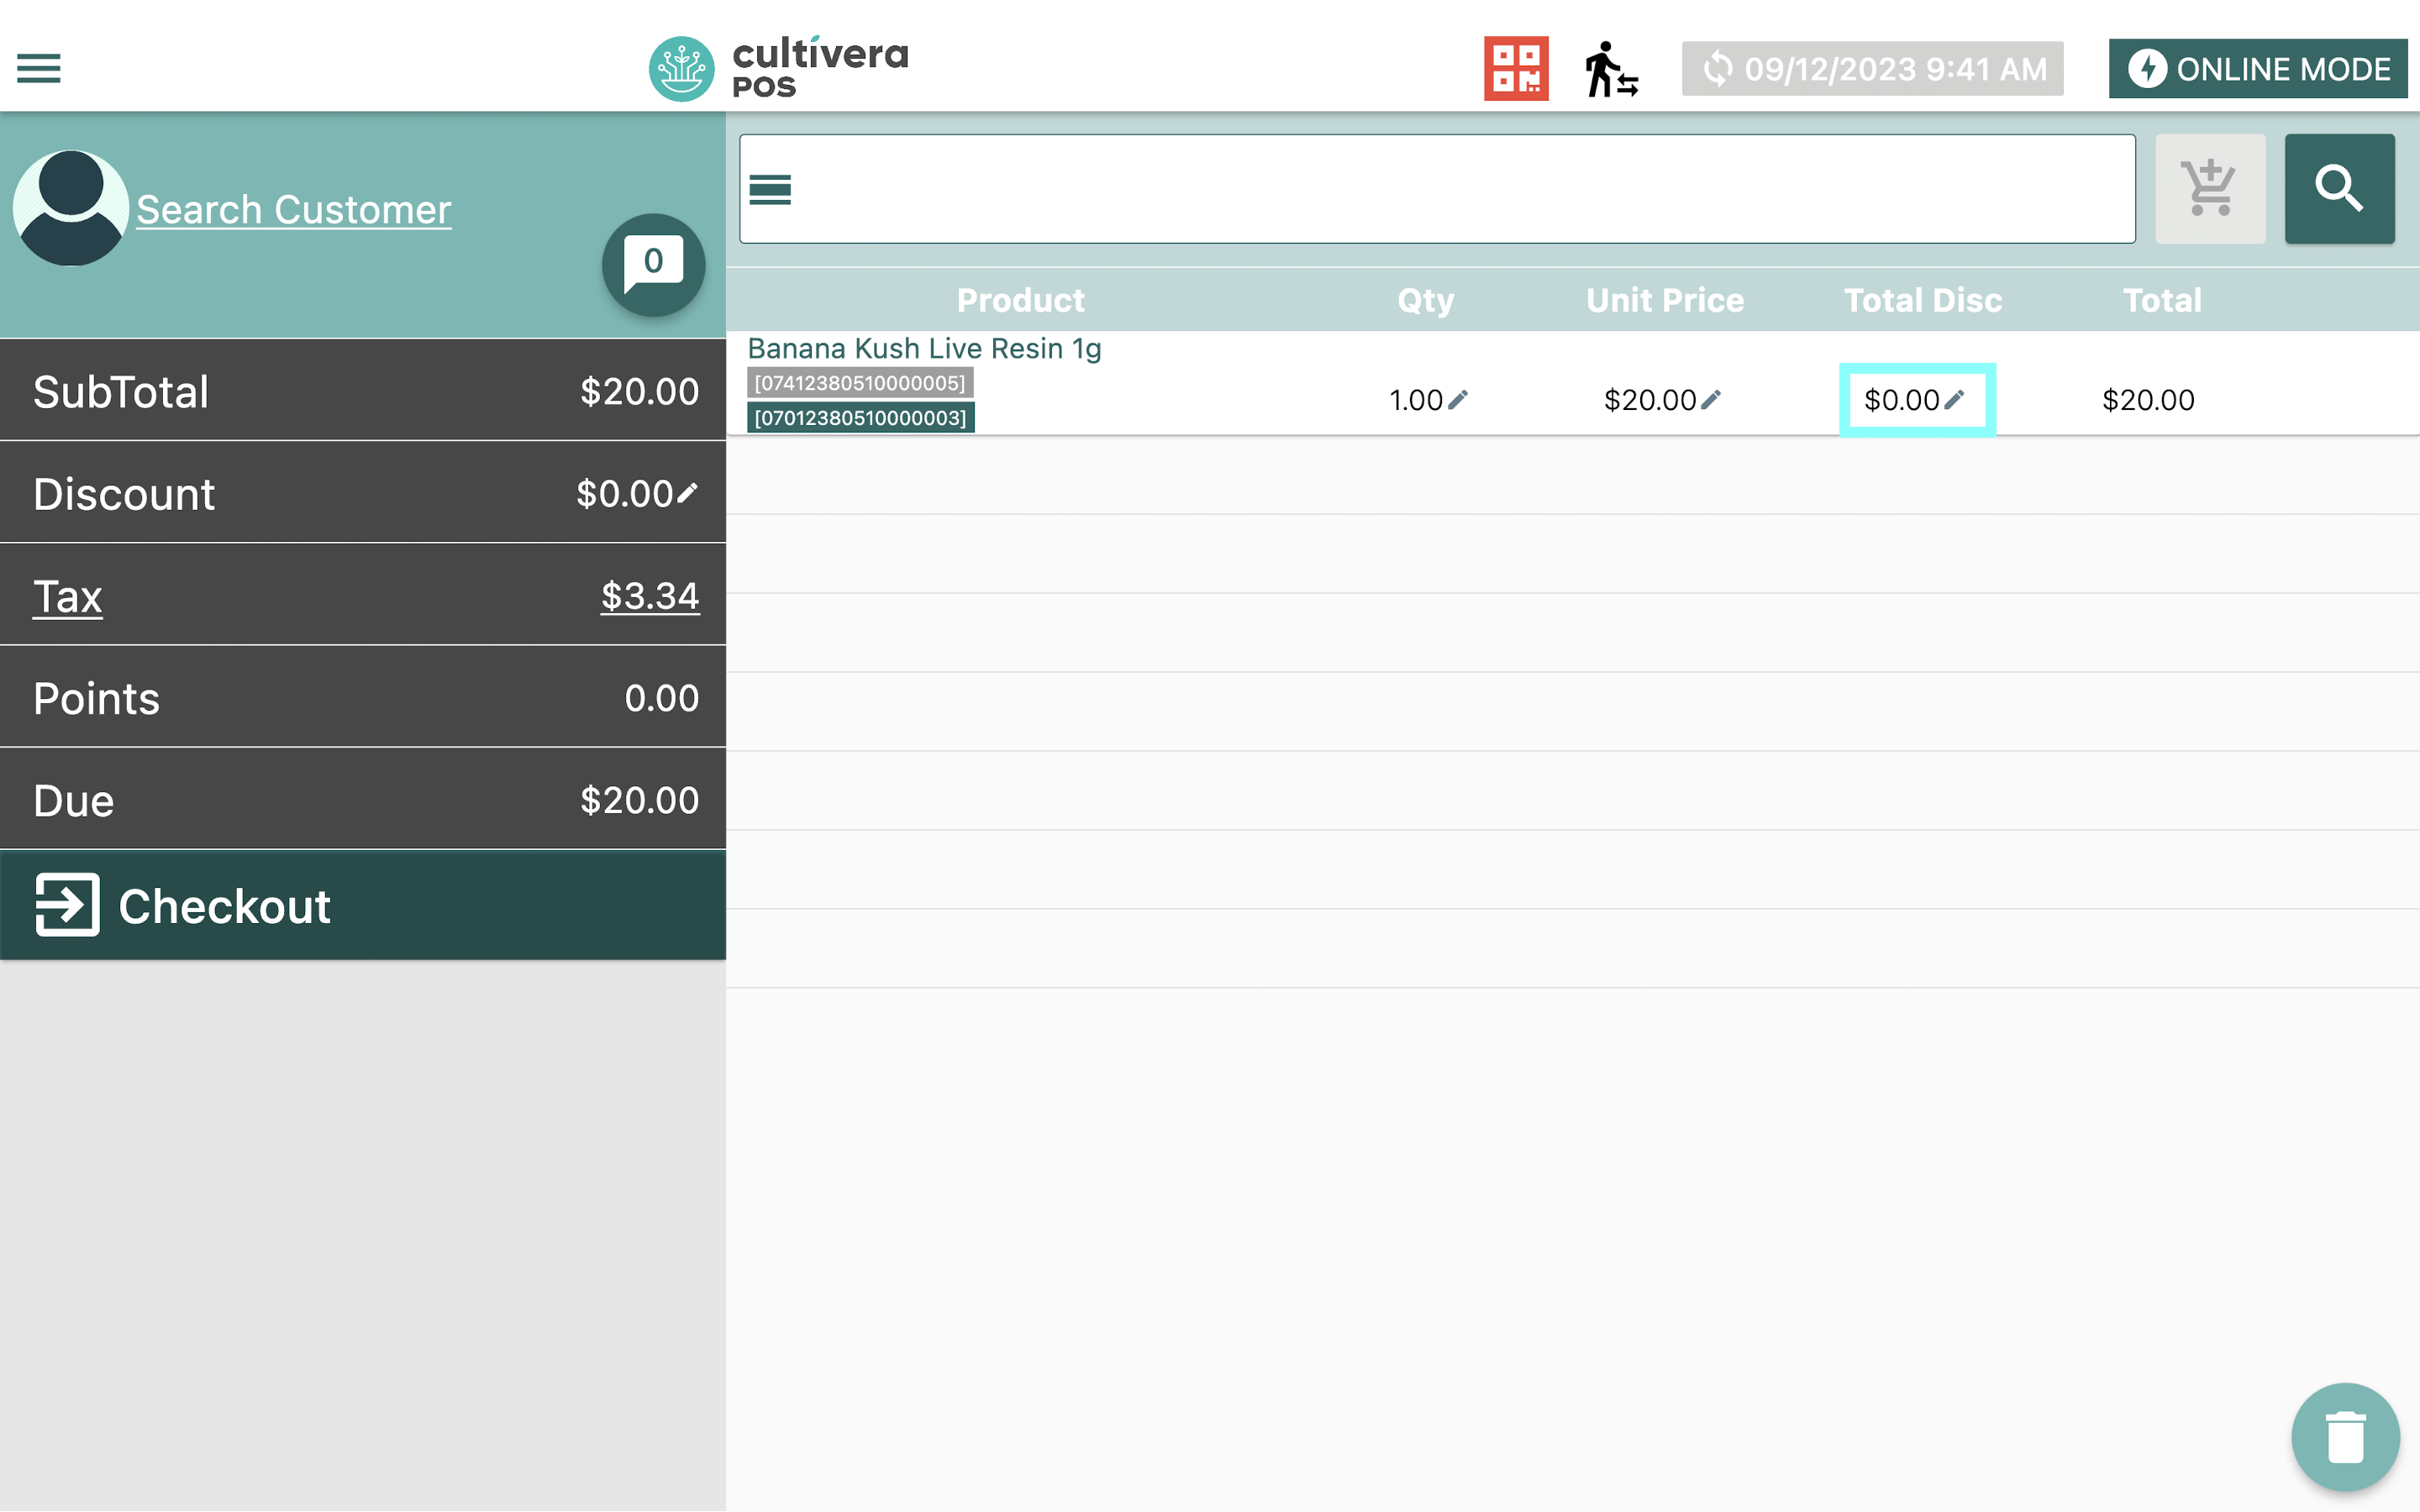
- There are two places to Add and Edit a discount in the cart.
- To Add a discount to the entire cart, Select the "Pencil" icon beside the Discount Total.
- To Add a discount to a single product, Select the "Pencil" icon under the "Total Disc" to apply a discount to that line item only.
- When the "Pencil" icons are selected, the adding/editing Discount Module will appear.
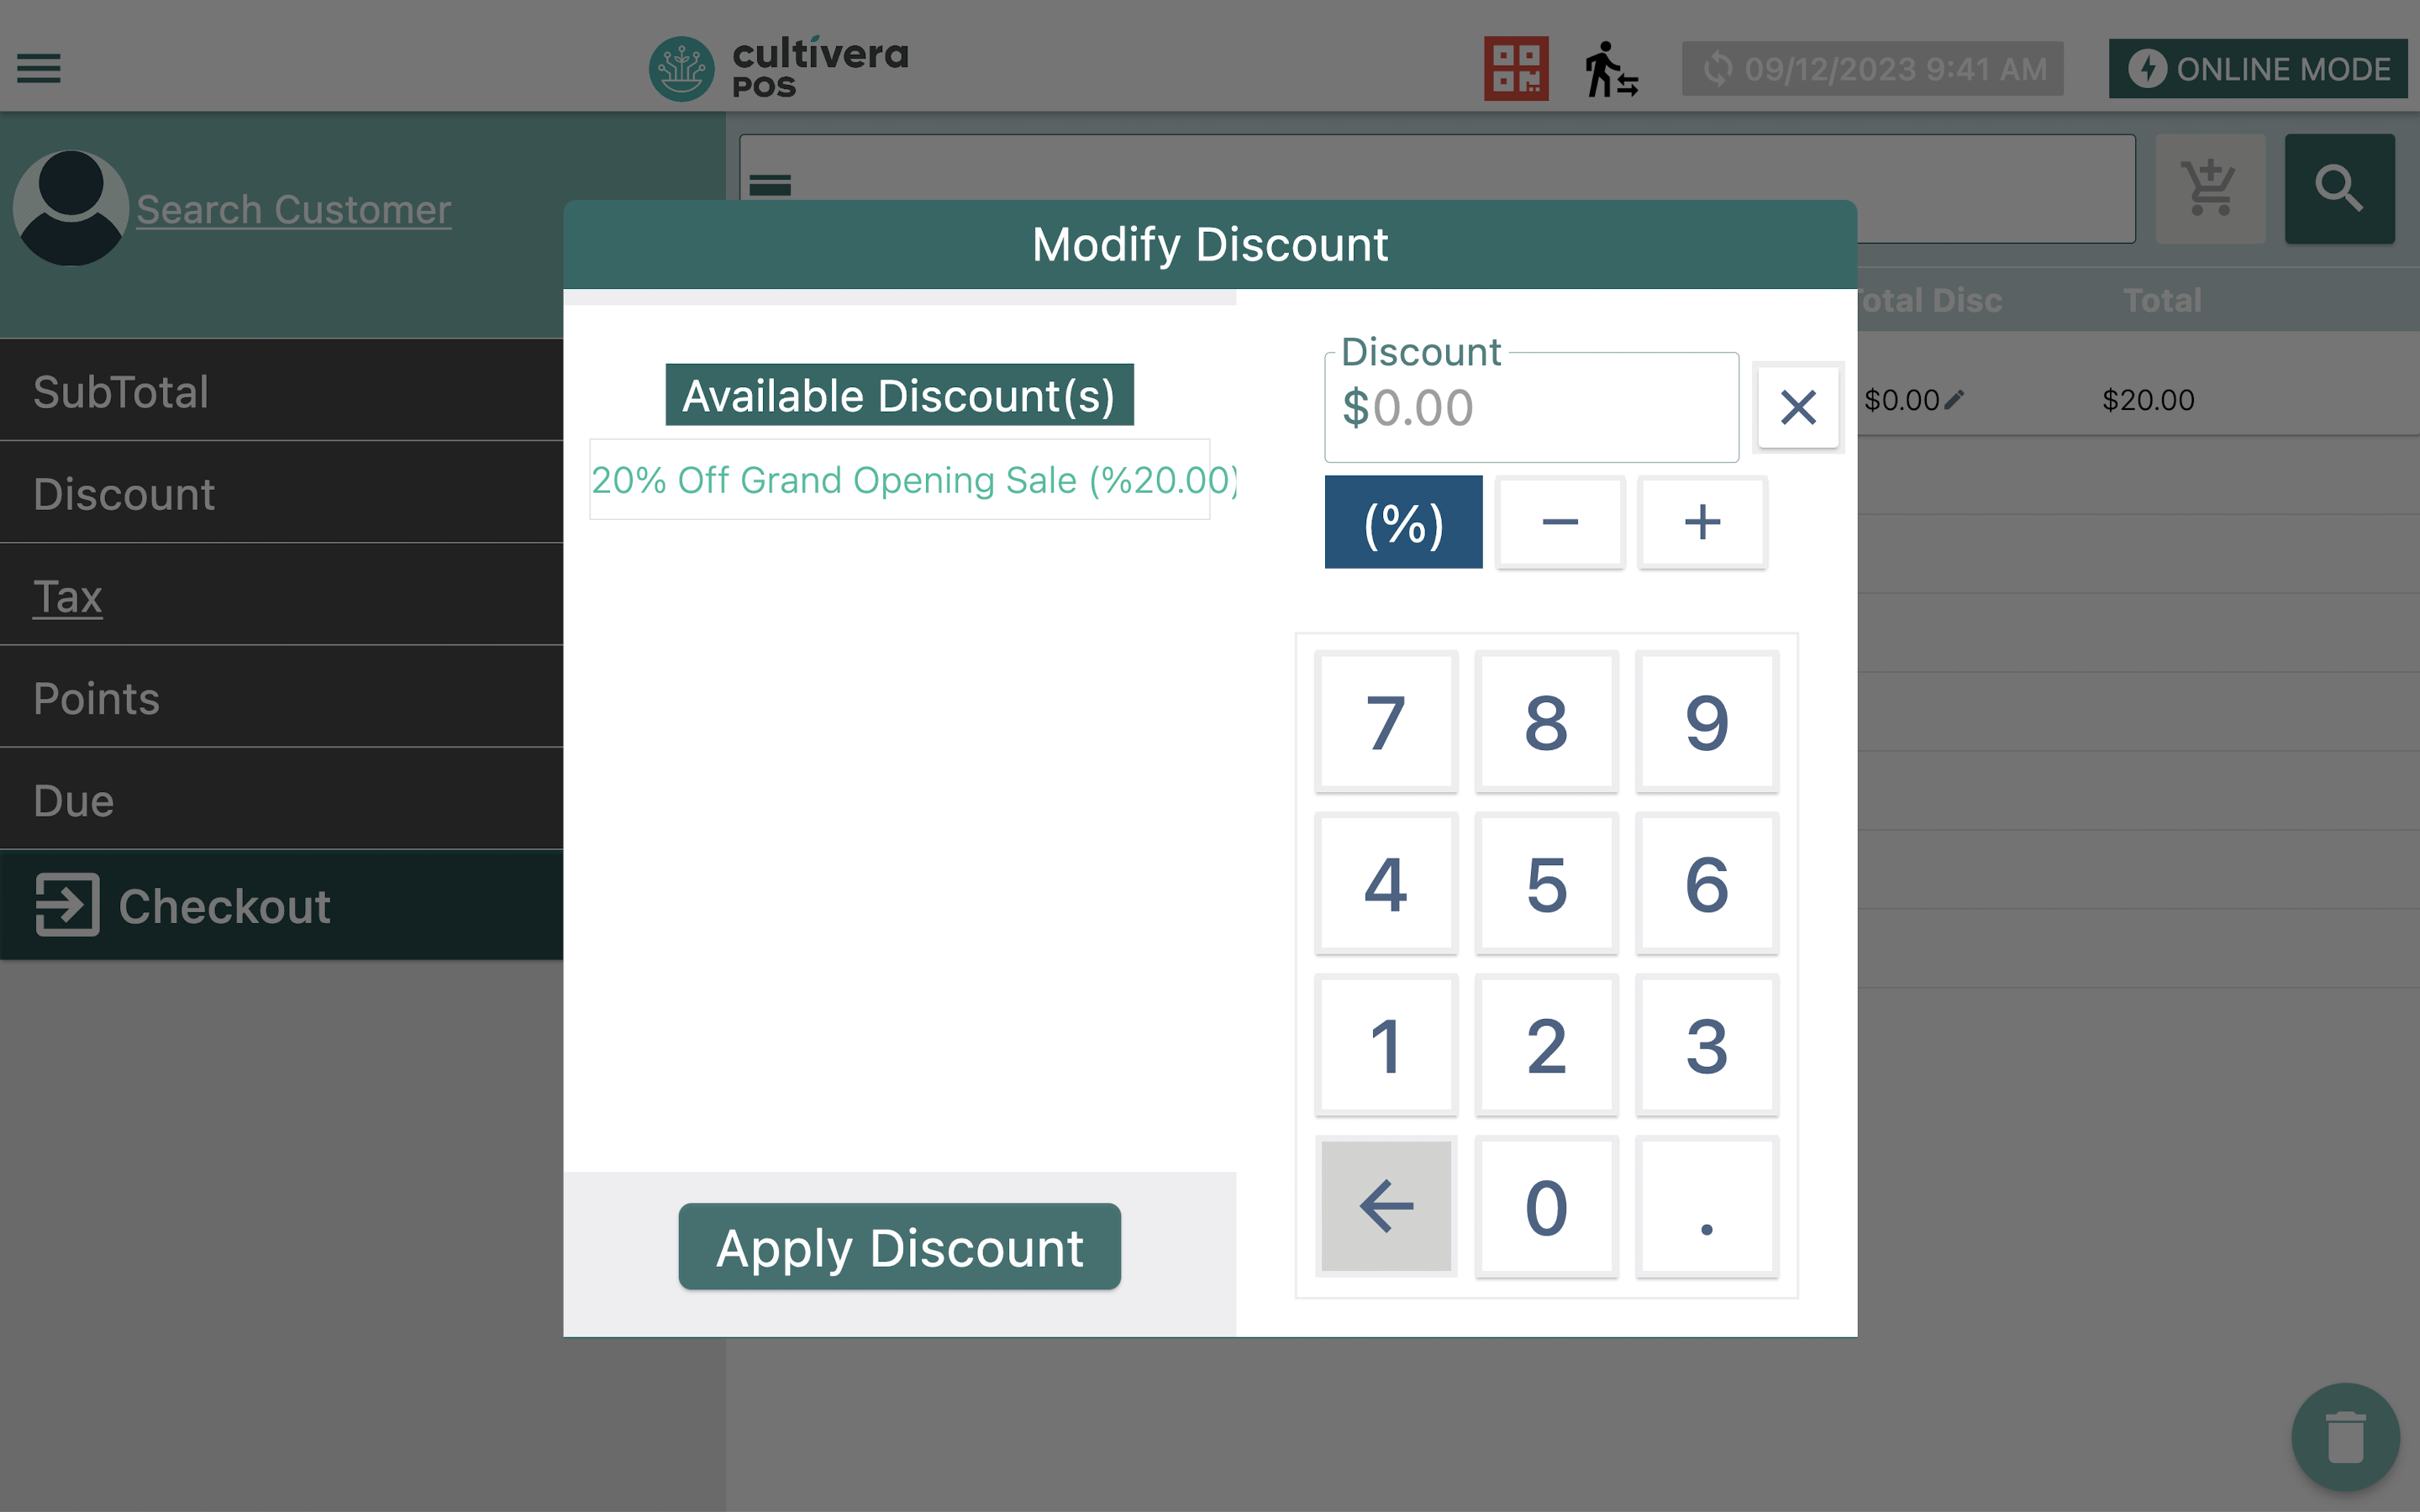
- Input or select the desired discount amount then click "Apply Discount".
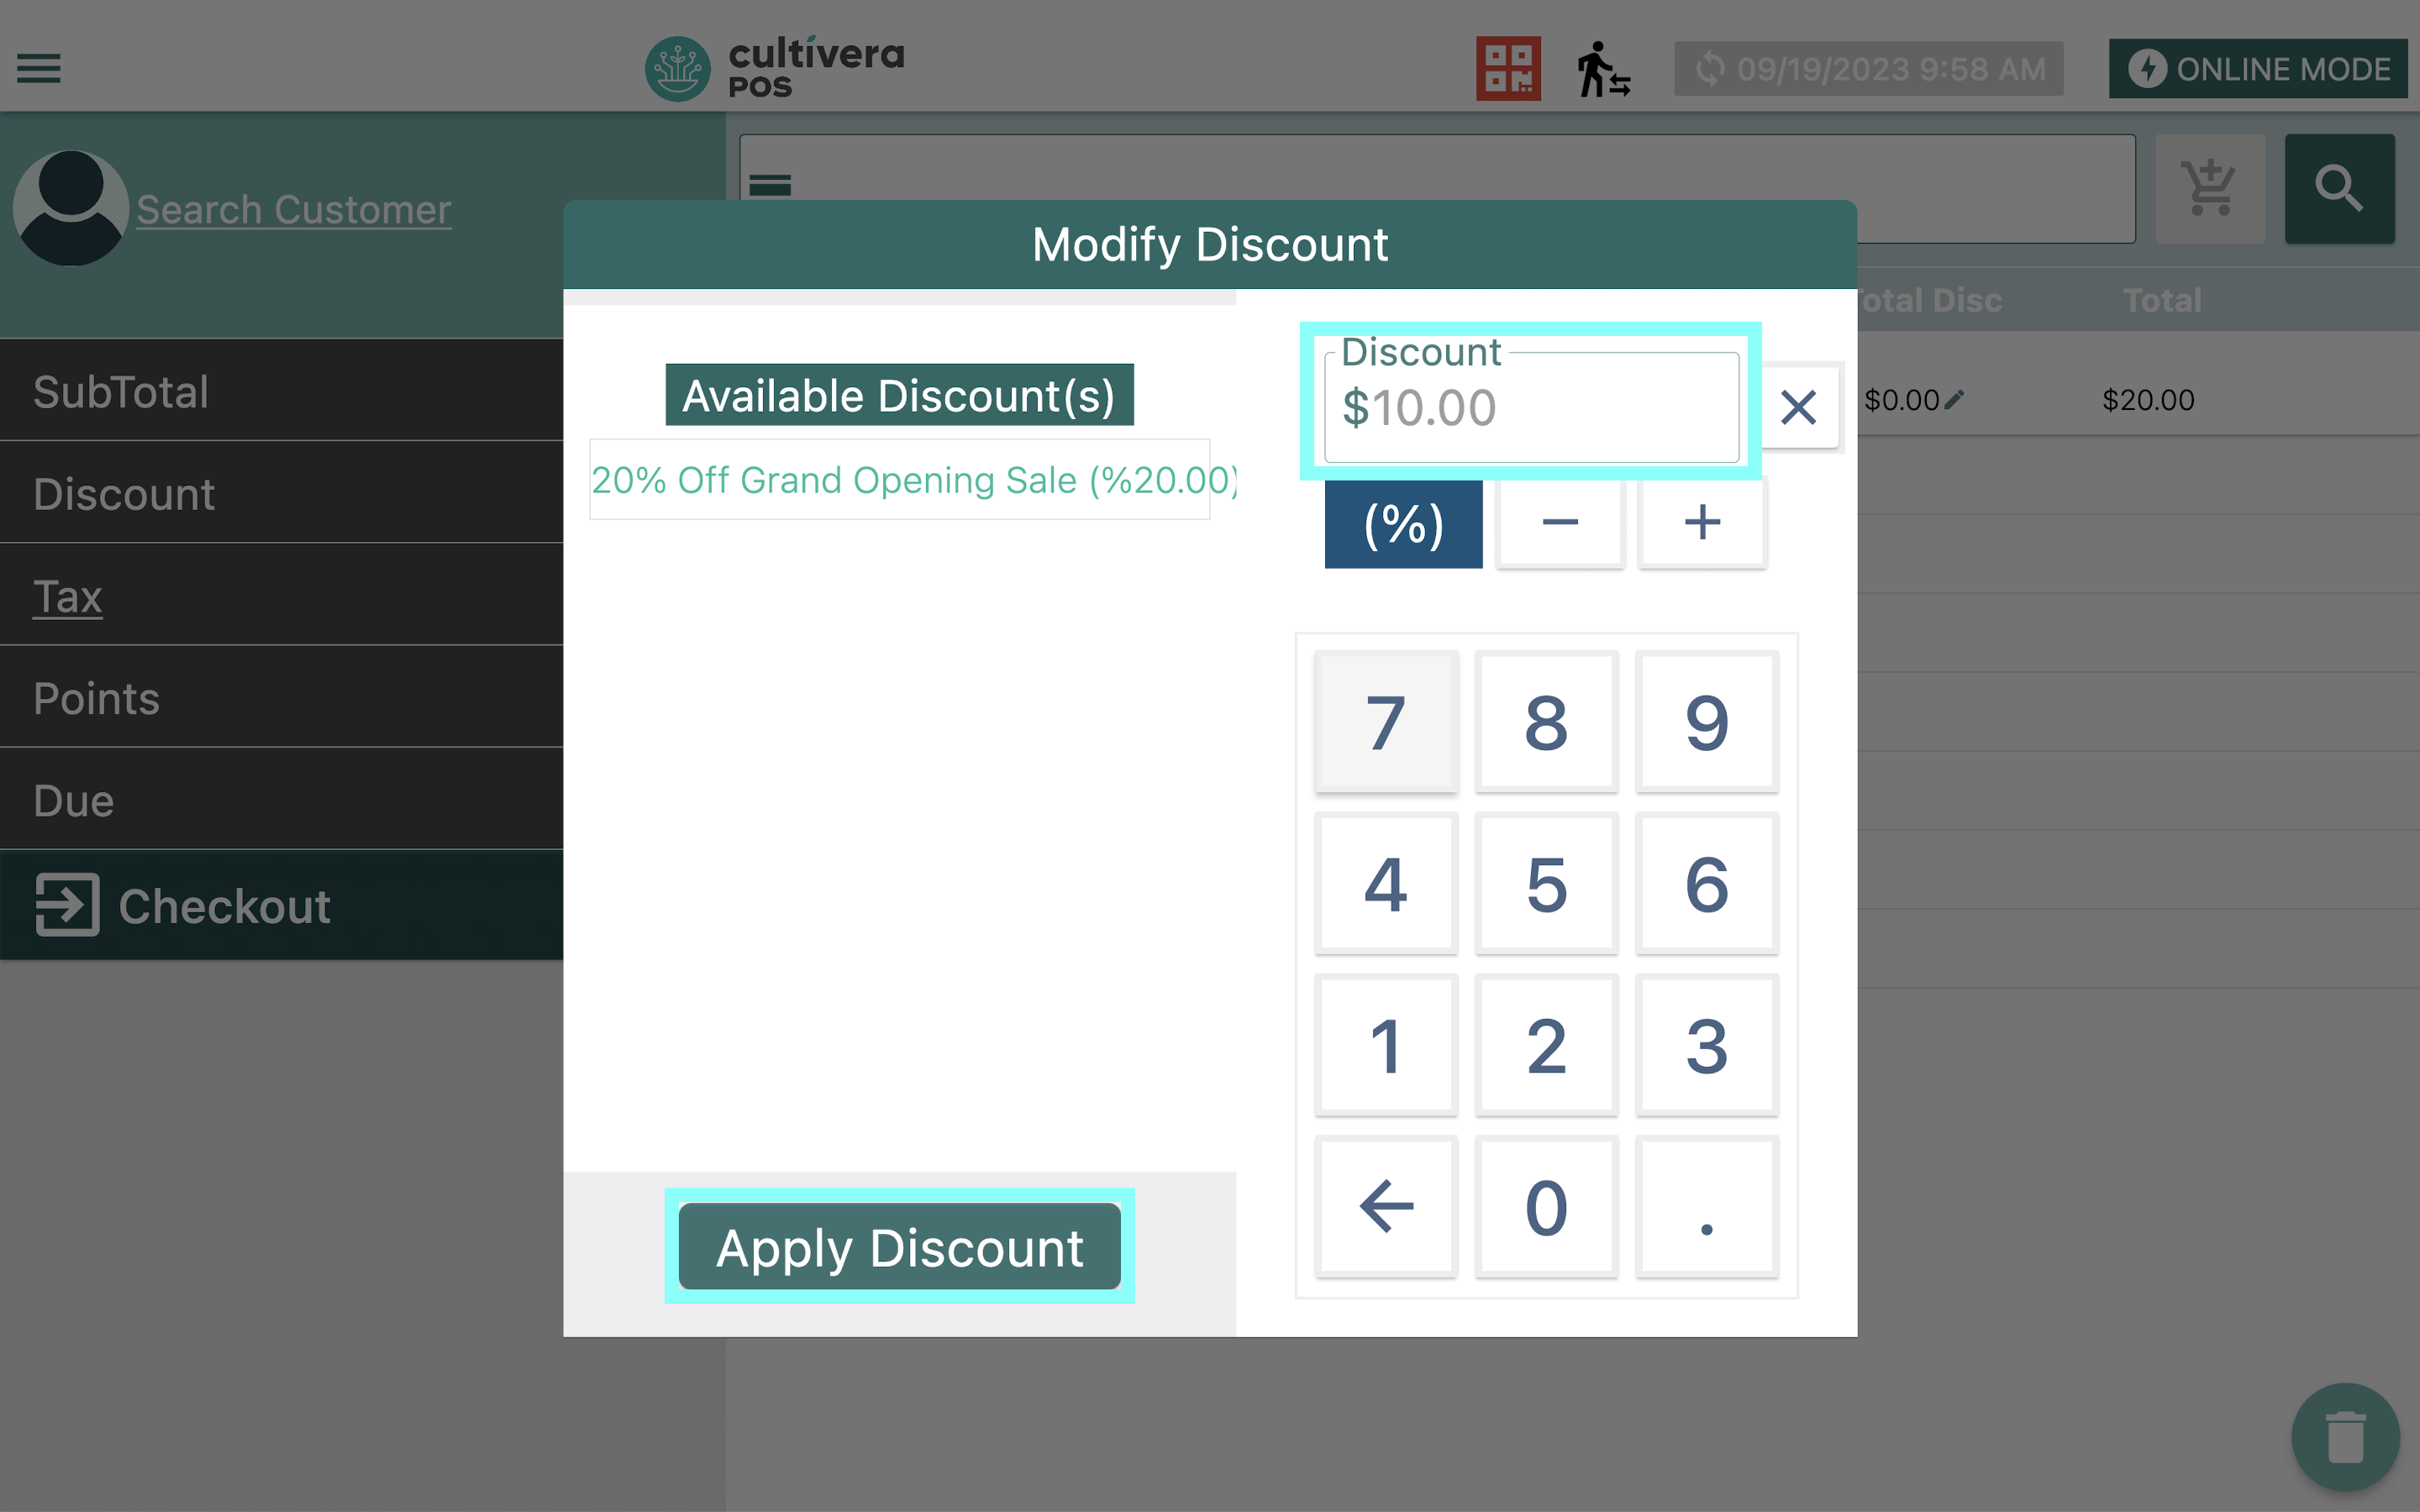 You can switch between dollar amounts off and percentages off by selecting the dark blue "(%)" button on the keypad."Available Discounts" are the preset Promotions that have been created in the Back Office as mentioned above. To apply to the cart, Select the desired preset discount, then click "Apply Discount".
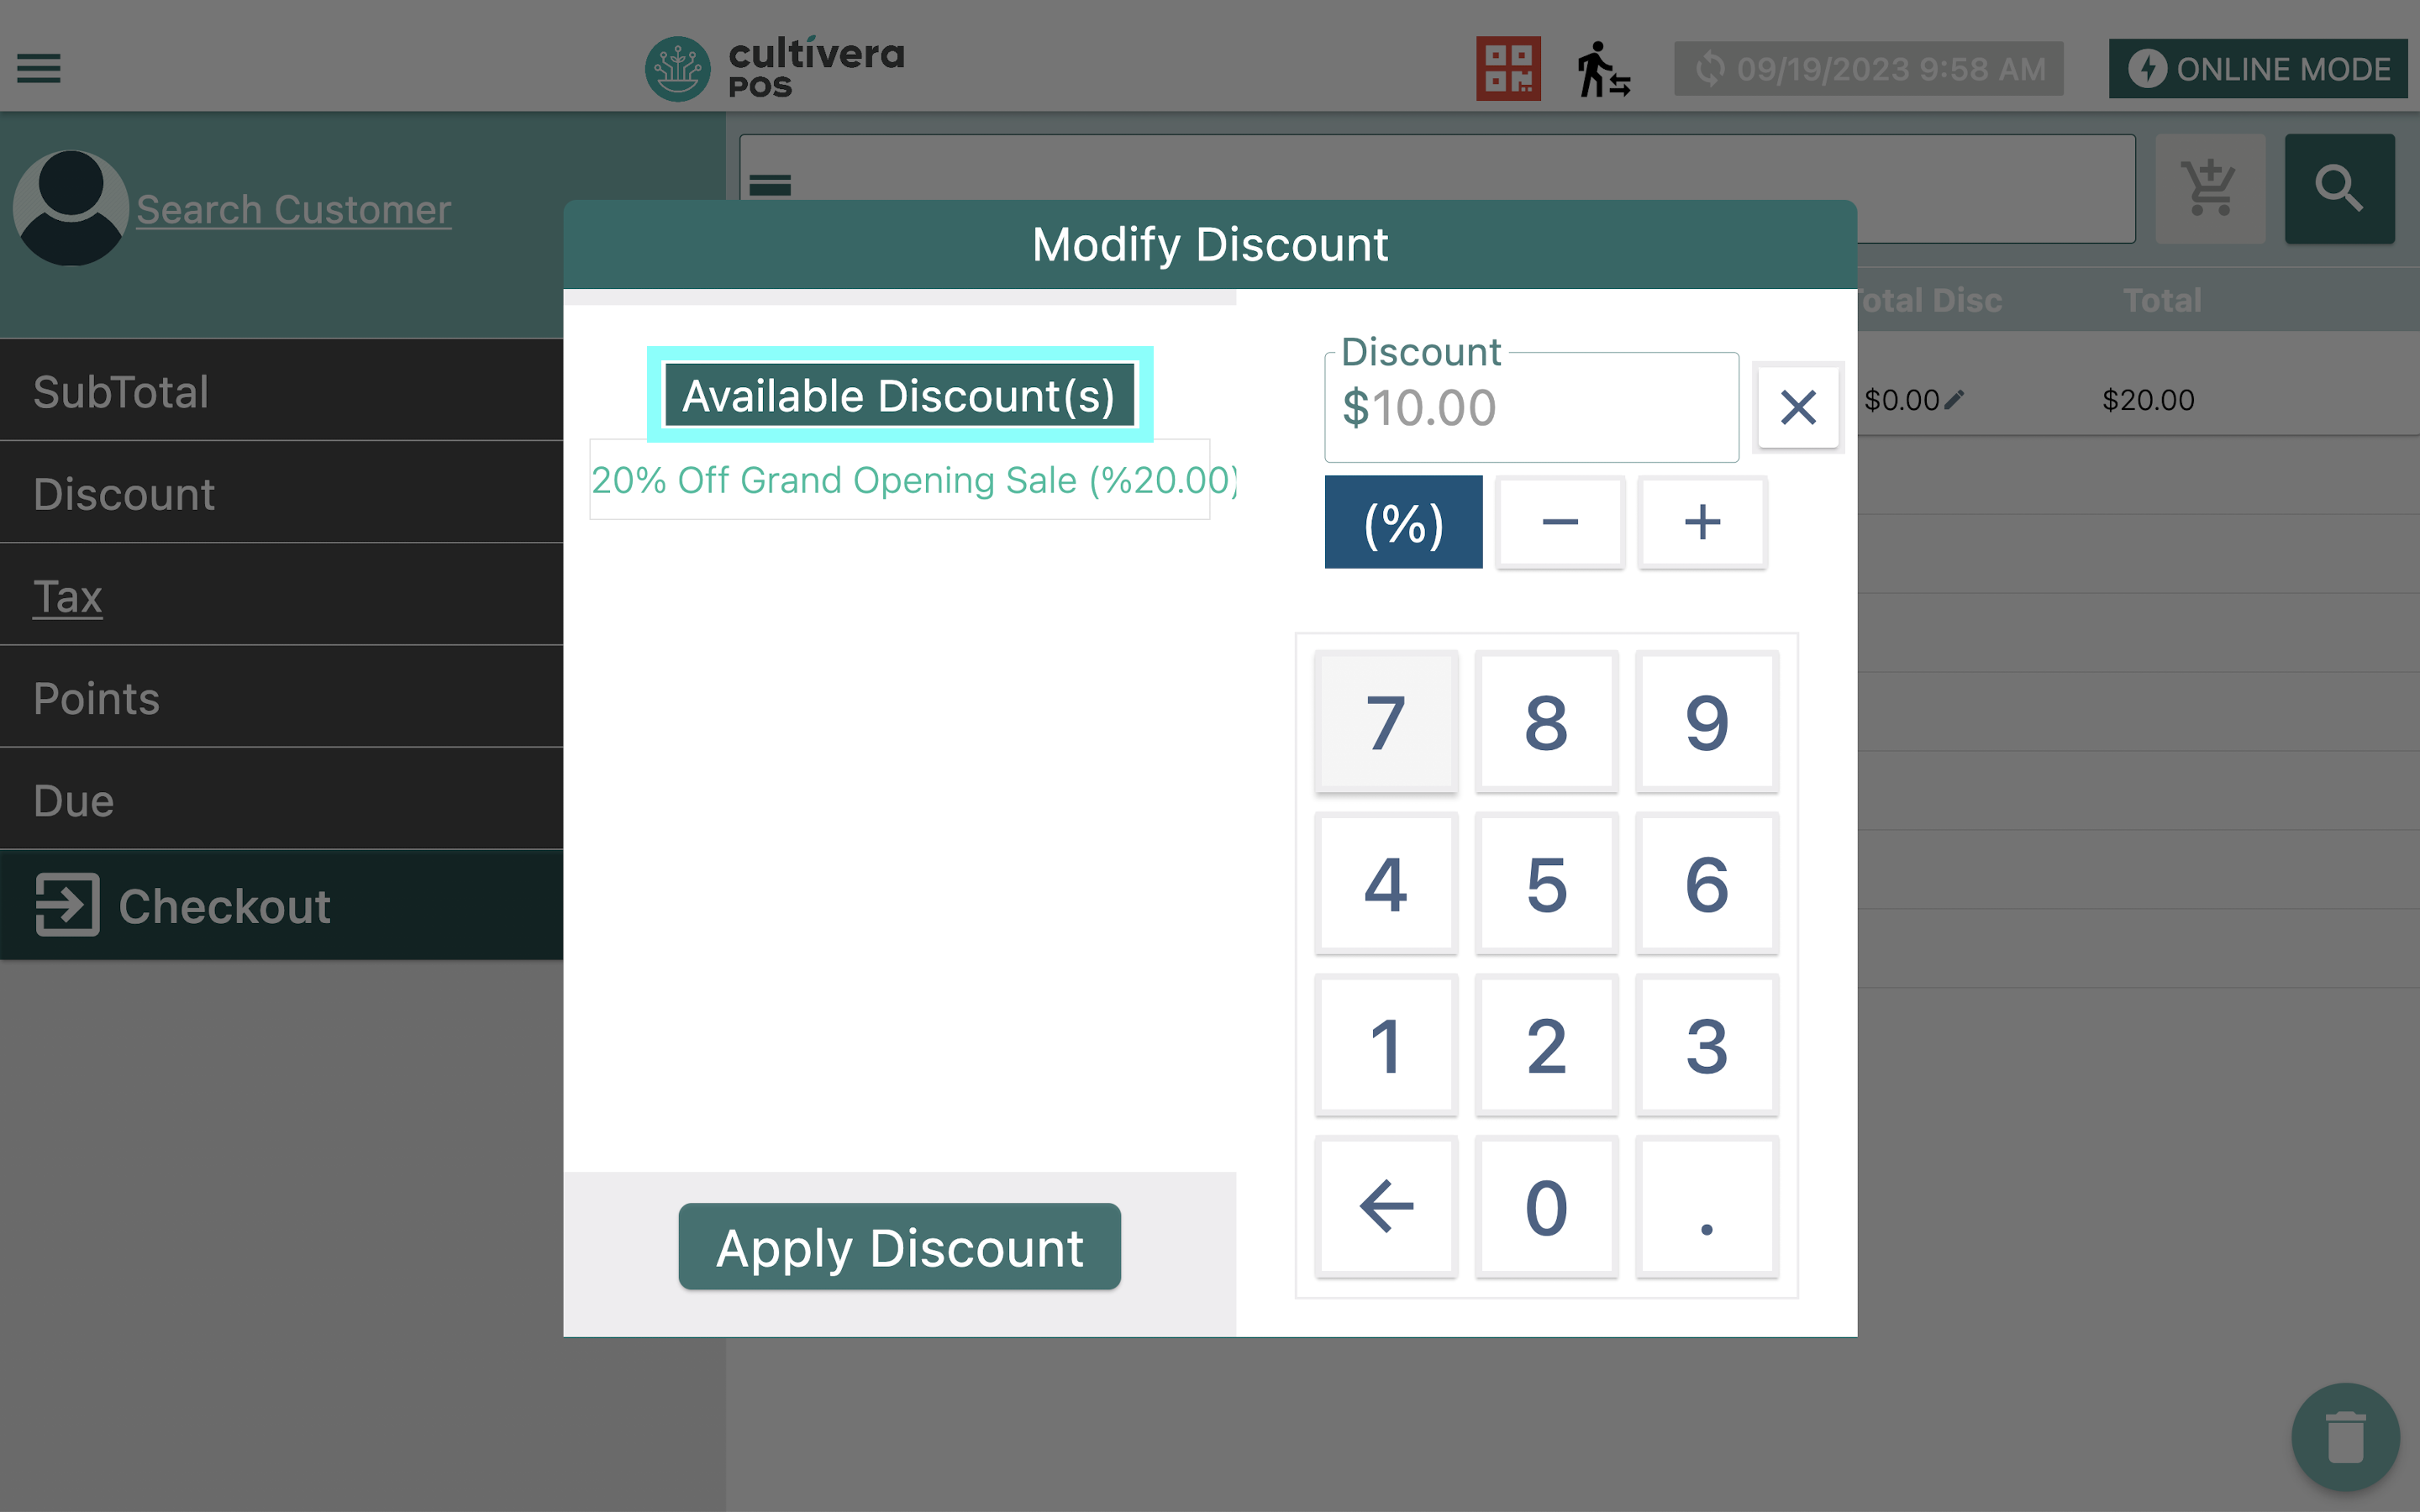
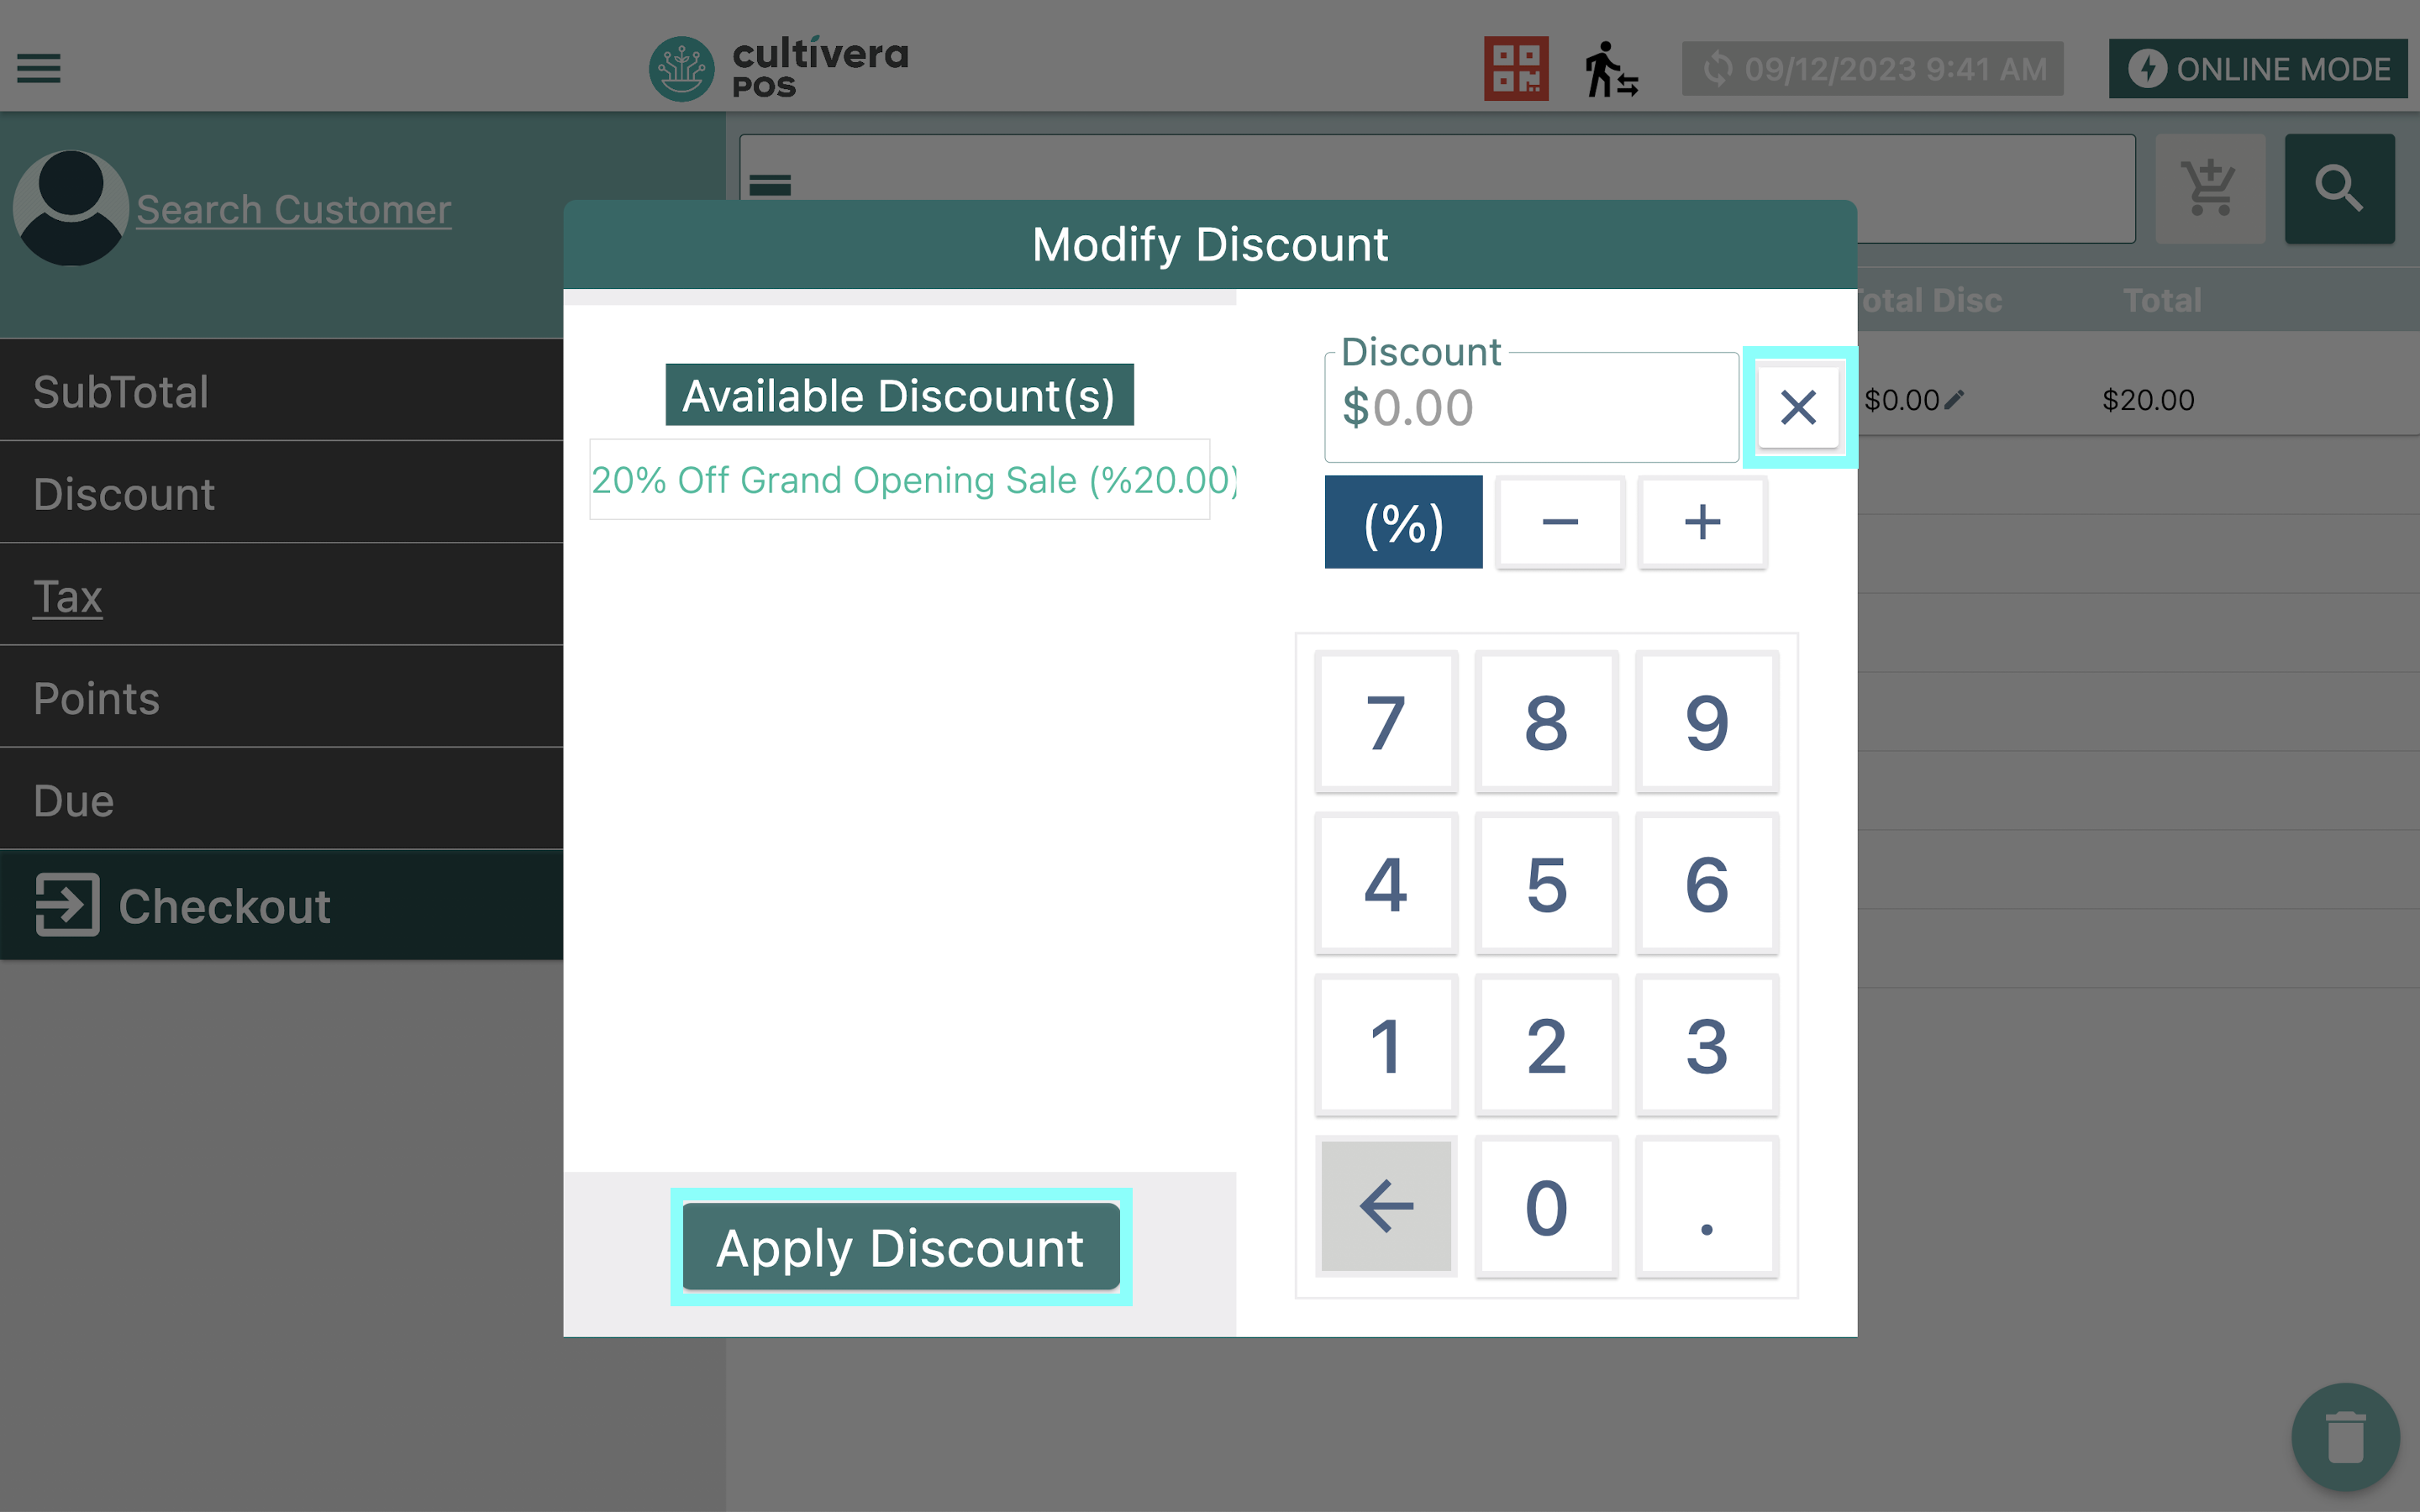
- To Clear an applied discount, Select the "X" button to zero out the discount amount, then click "Apply Discount".
- Discounts that are assigned in the Back Office to a specific product or customer type will automatically appear when products are placed into the cart.
- Example: Customer Lady Ganja has been assigned in the Back Office to the automatic Senior 20% off discount, automatically giving her $4.00 off this cart total.

- To Remove an Automatic Discount, Select the "Pencil" icon, then follow step (4-e) above.
- Example: Customer Lady Ganja has been assigned in the Back Office to the automatic Senior 20% off discount, automatically giving her $4.00 off this cart total.

Applying Loyalty Point Rewards
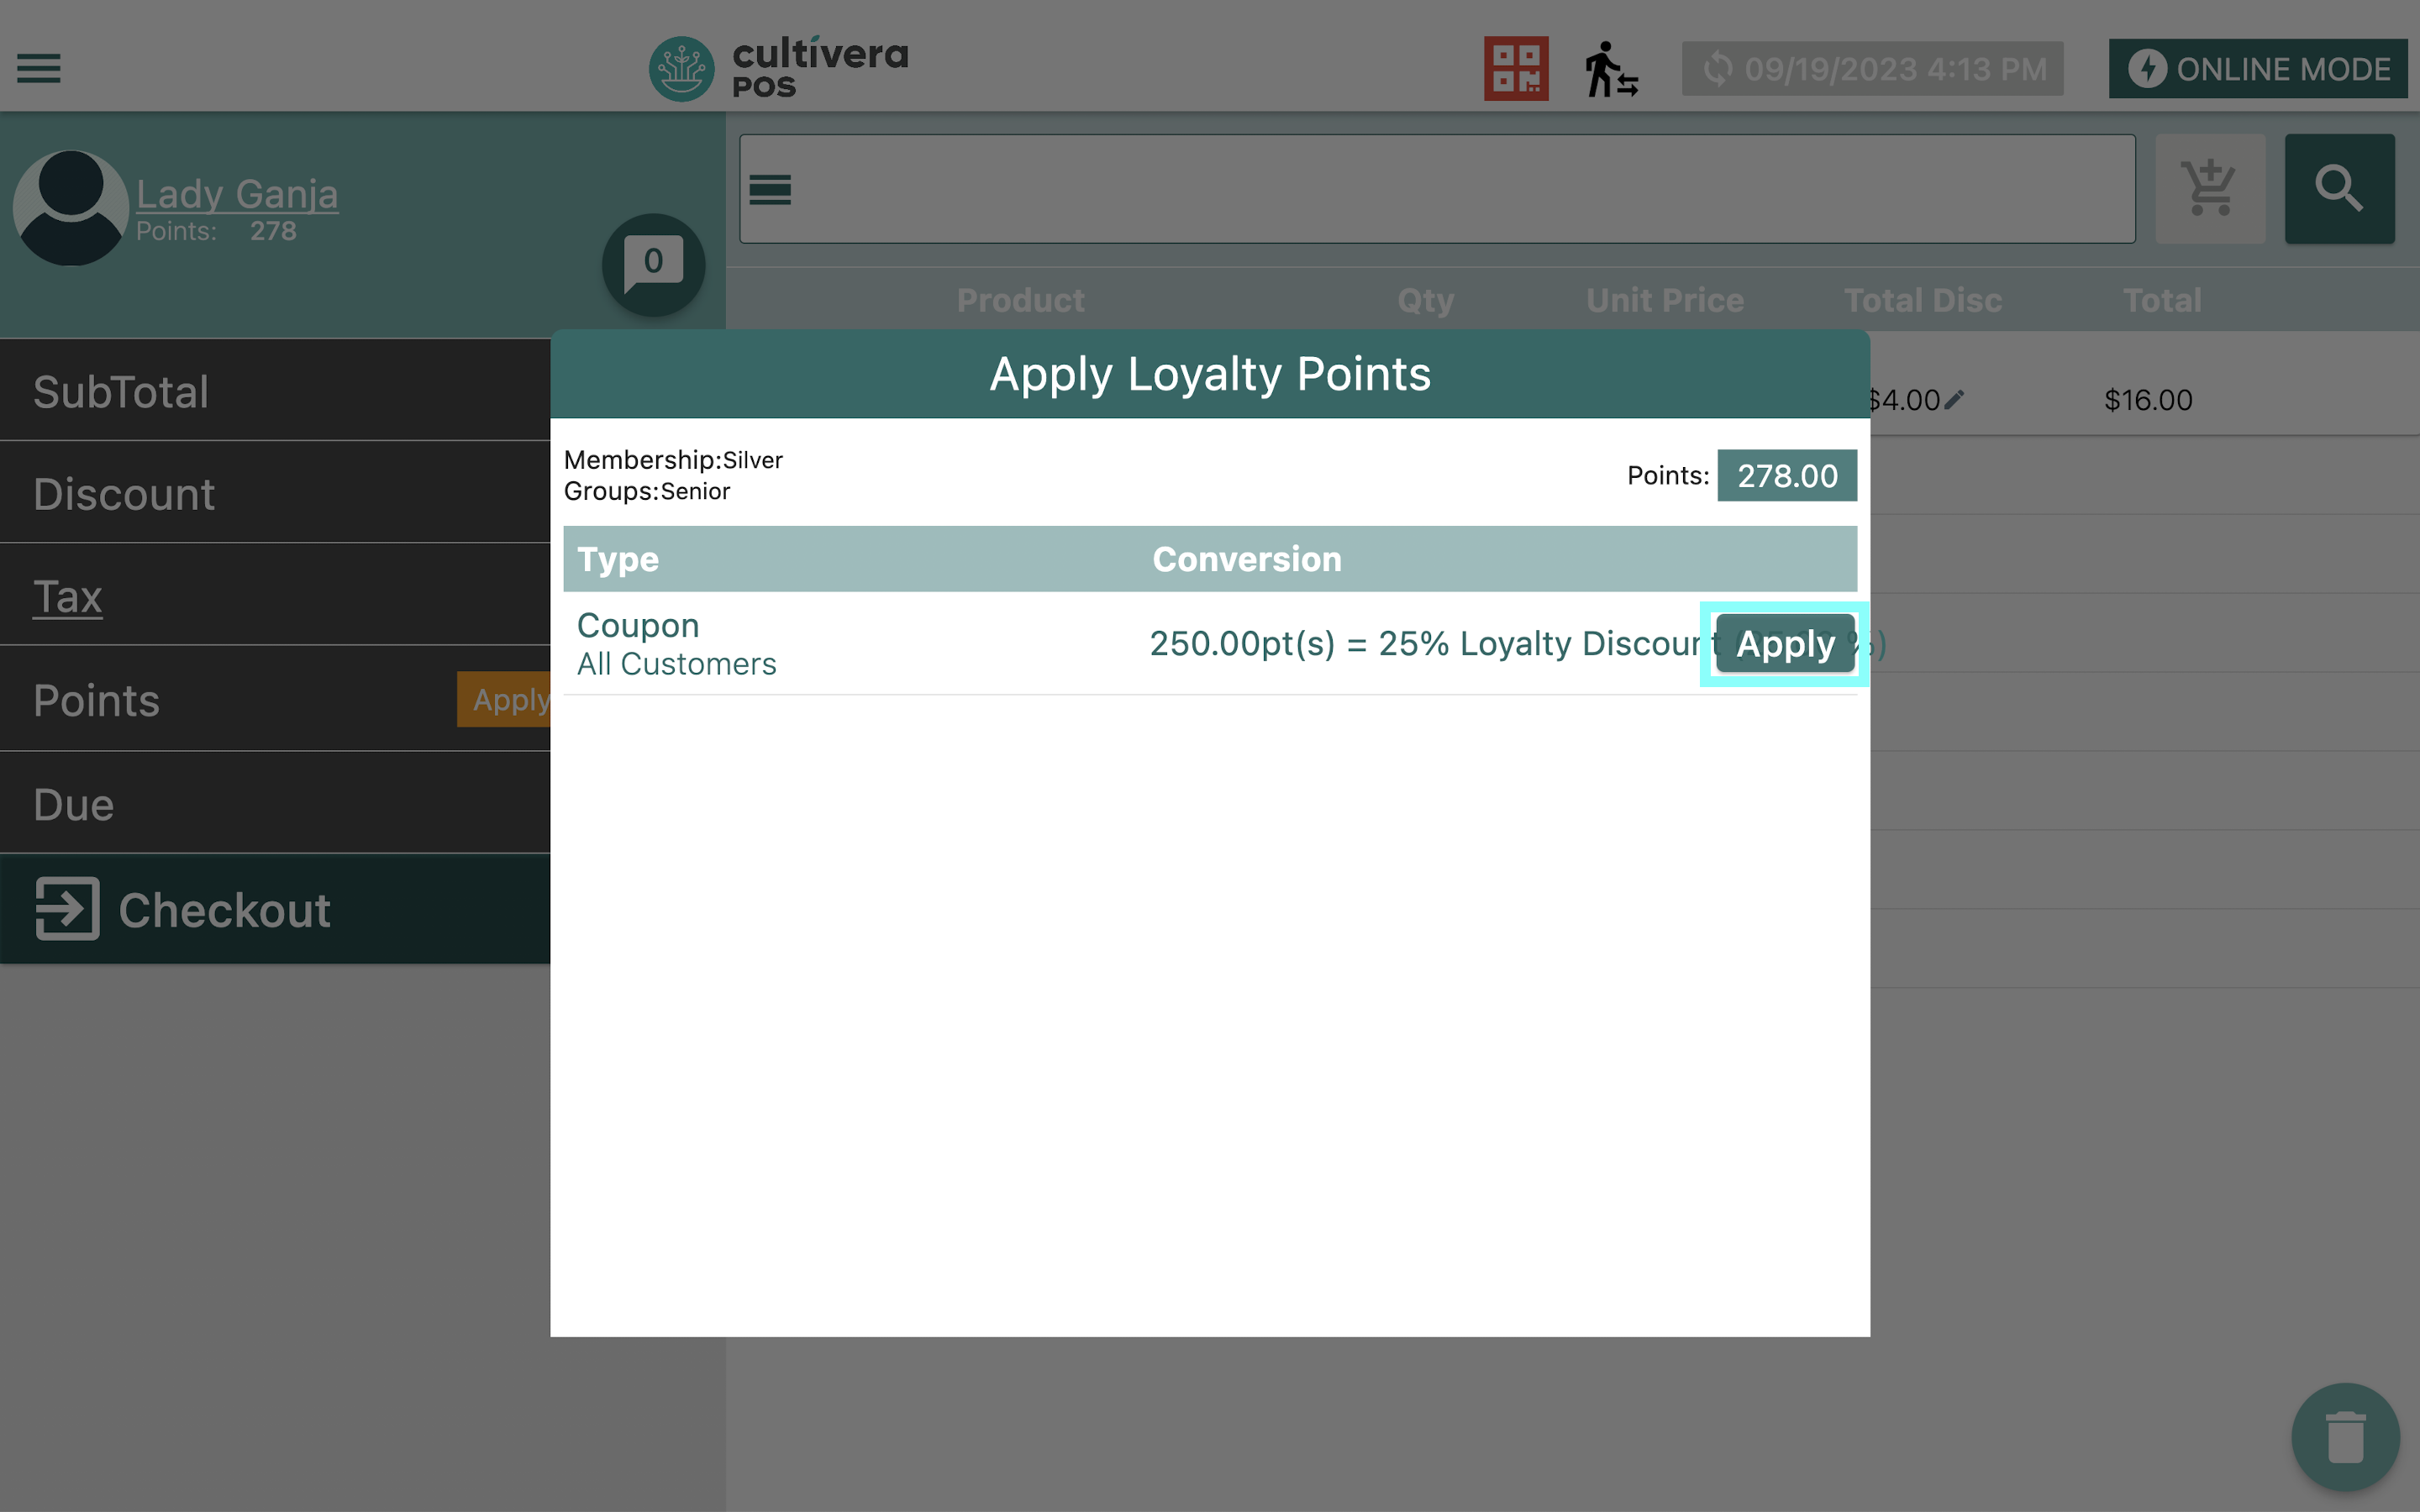
- If a customer wants to apply Loyalty Points to their order, you will see their available "Point" balance below their name in the upper left corner, as well as next to "Points" in the cart.
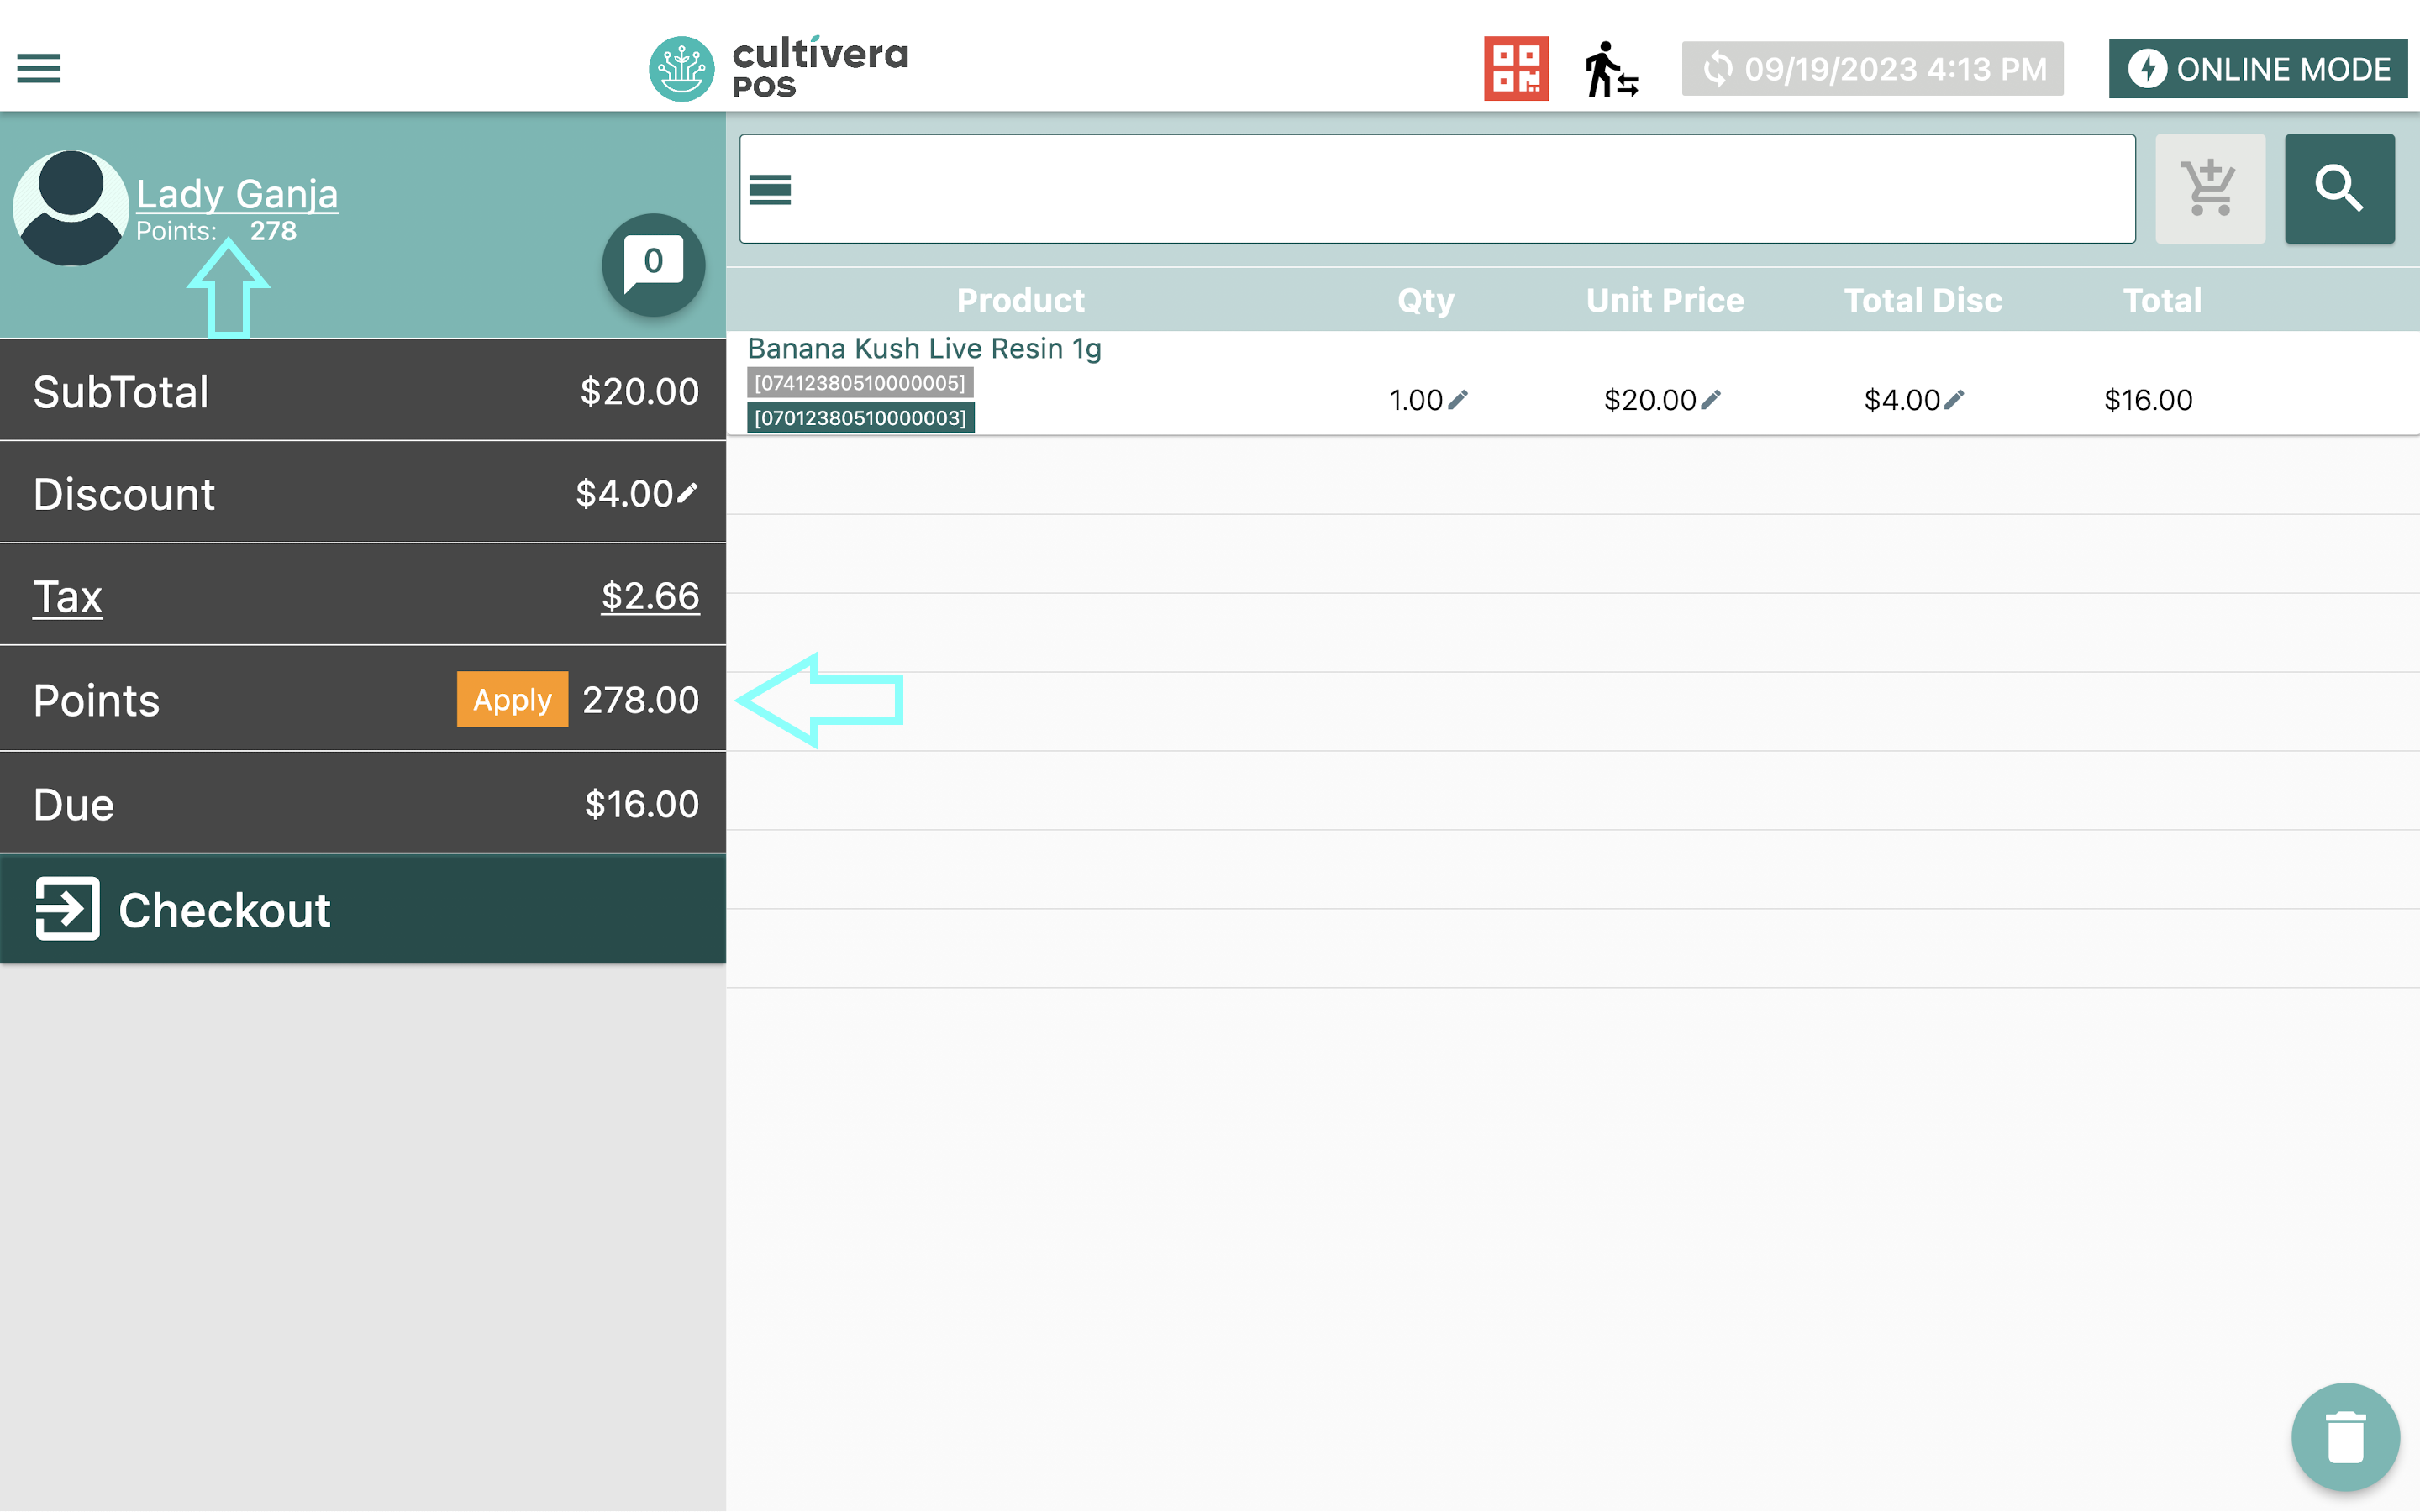
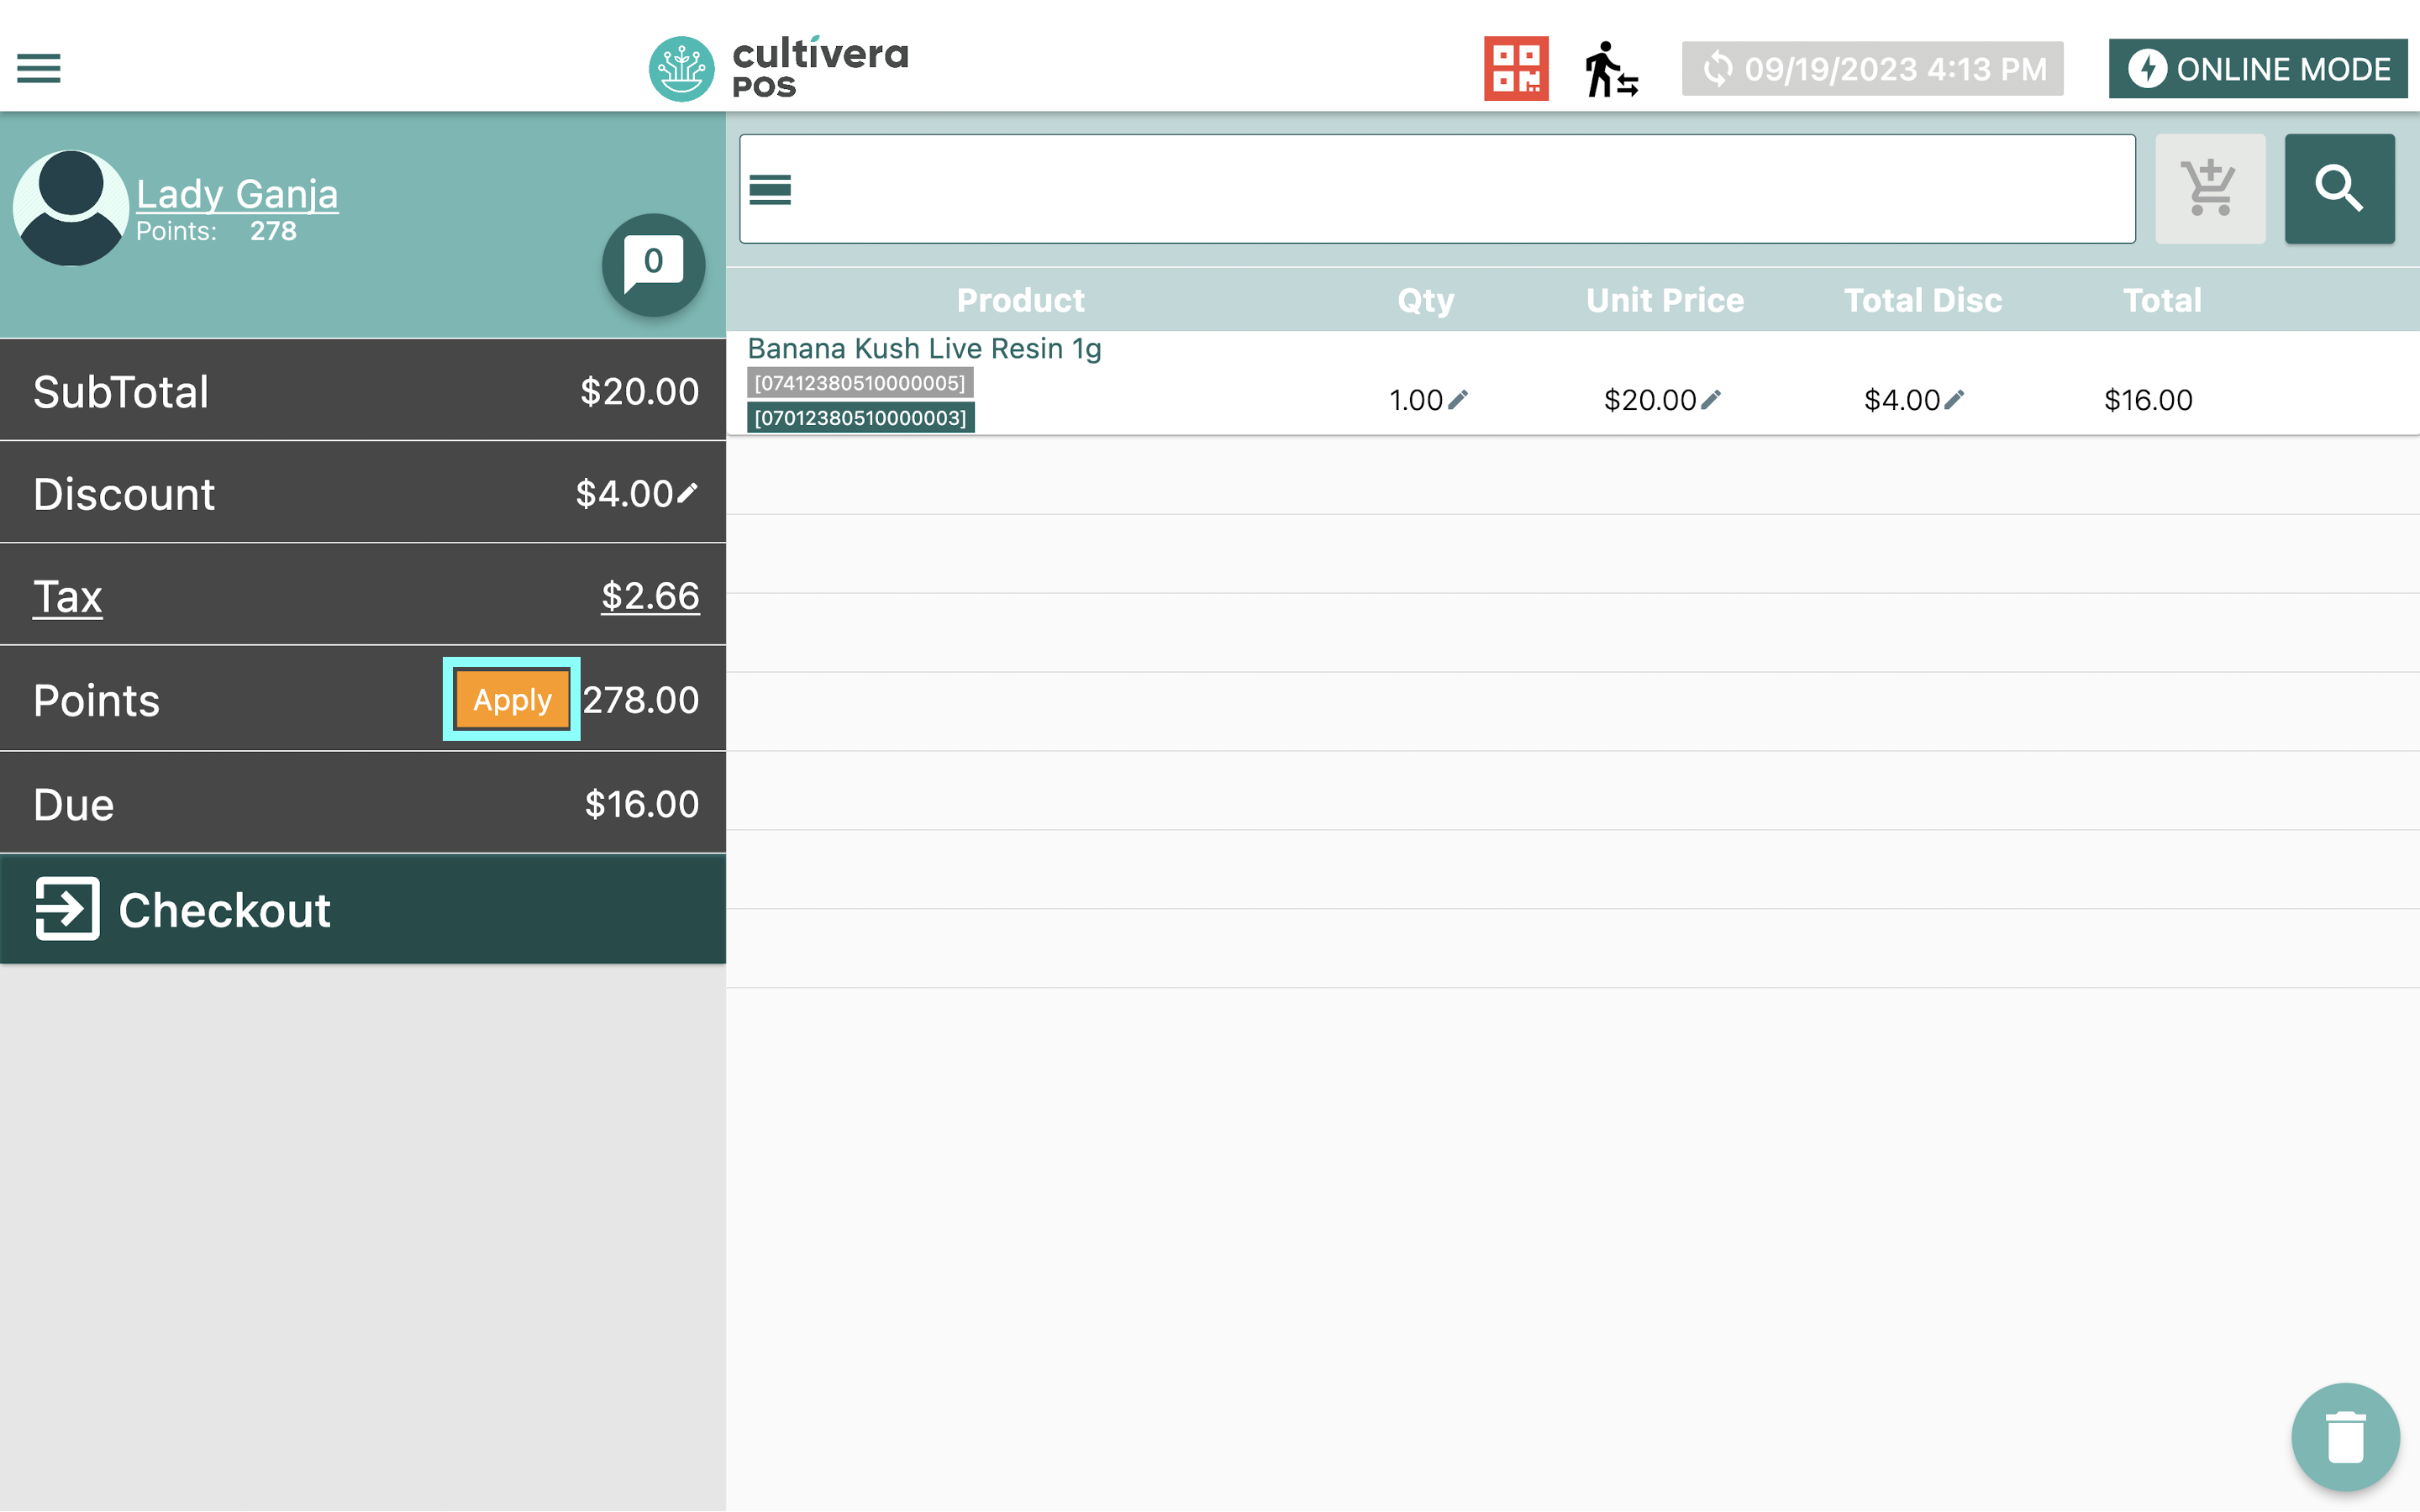
- If a customer has enough Loyalty Points to apply to the order, the orange "Apply" button will appear next to "Points" in the cart. Select "Apply" to bring up the "Apply Loyalty Points" module.
- From here, Select whichever Loyalty Point redemption coupon is applicable, then click "Apply".
- Once applied, the customer's new Loyalty Point balance will be present under their name and next to "Points" in the cart.
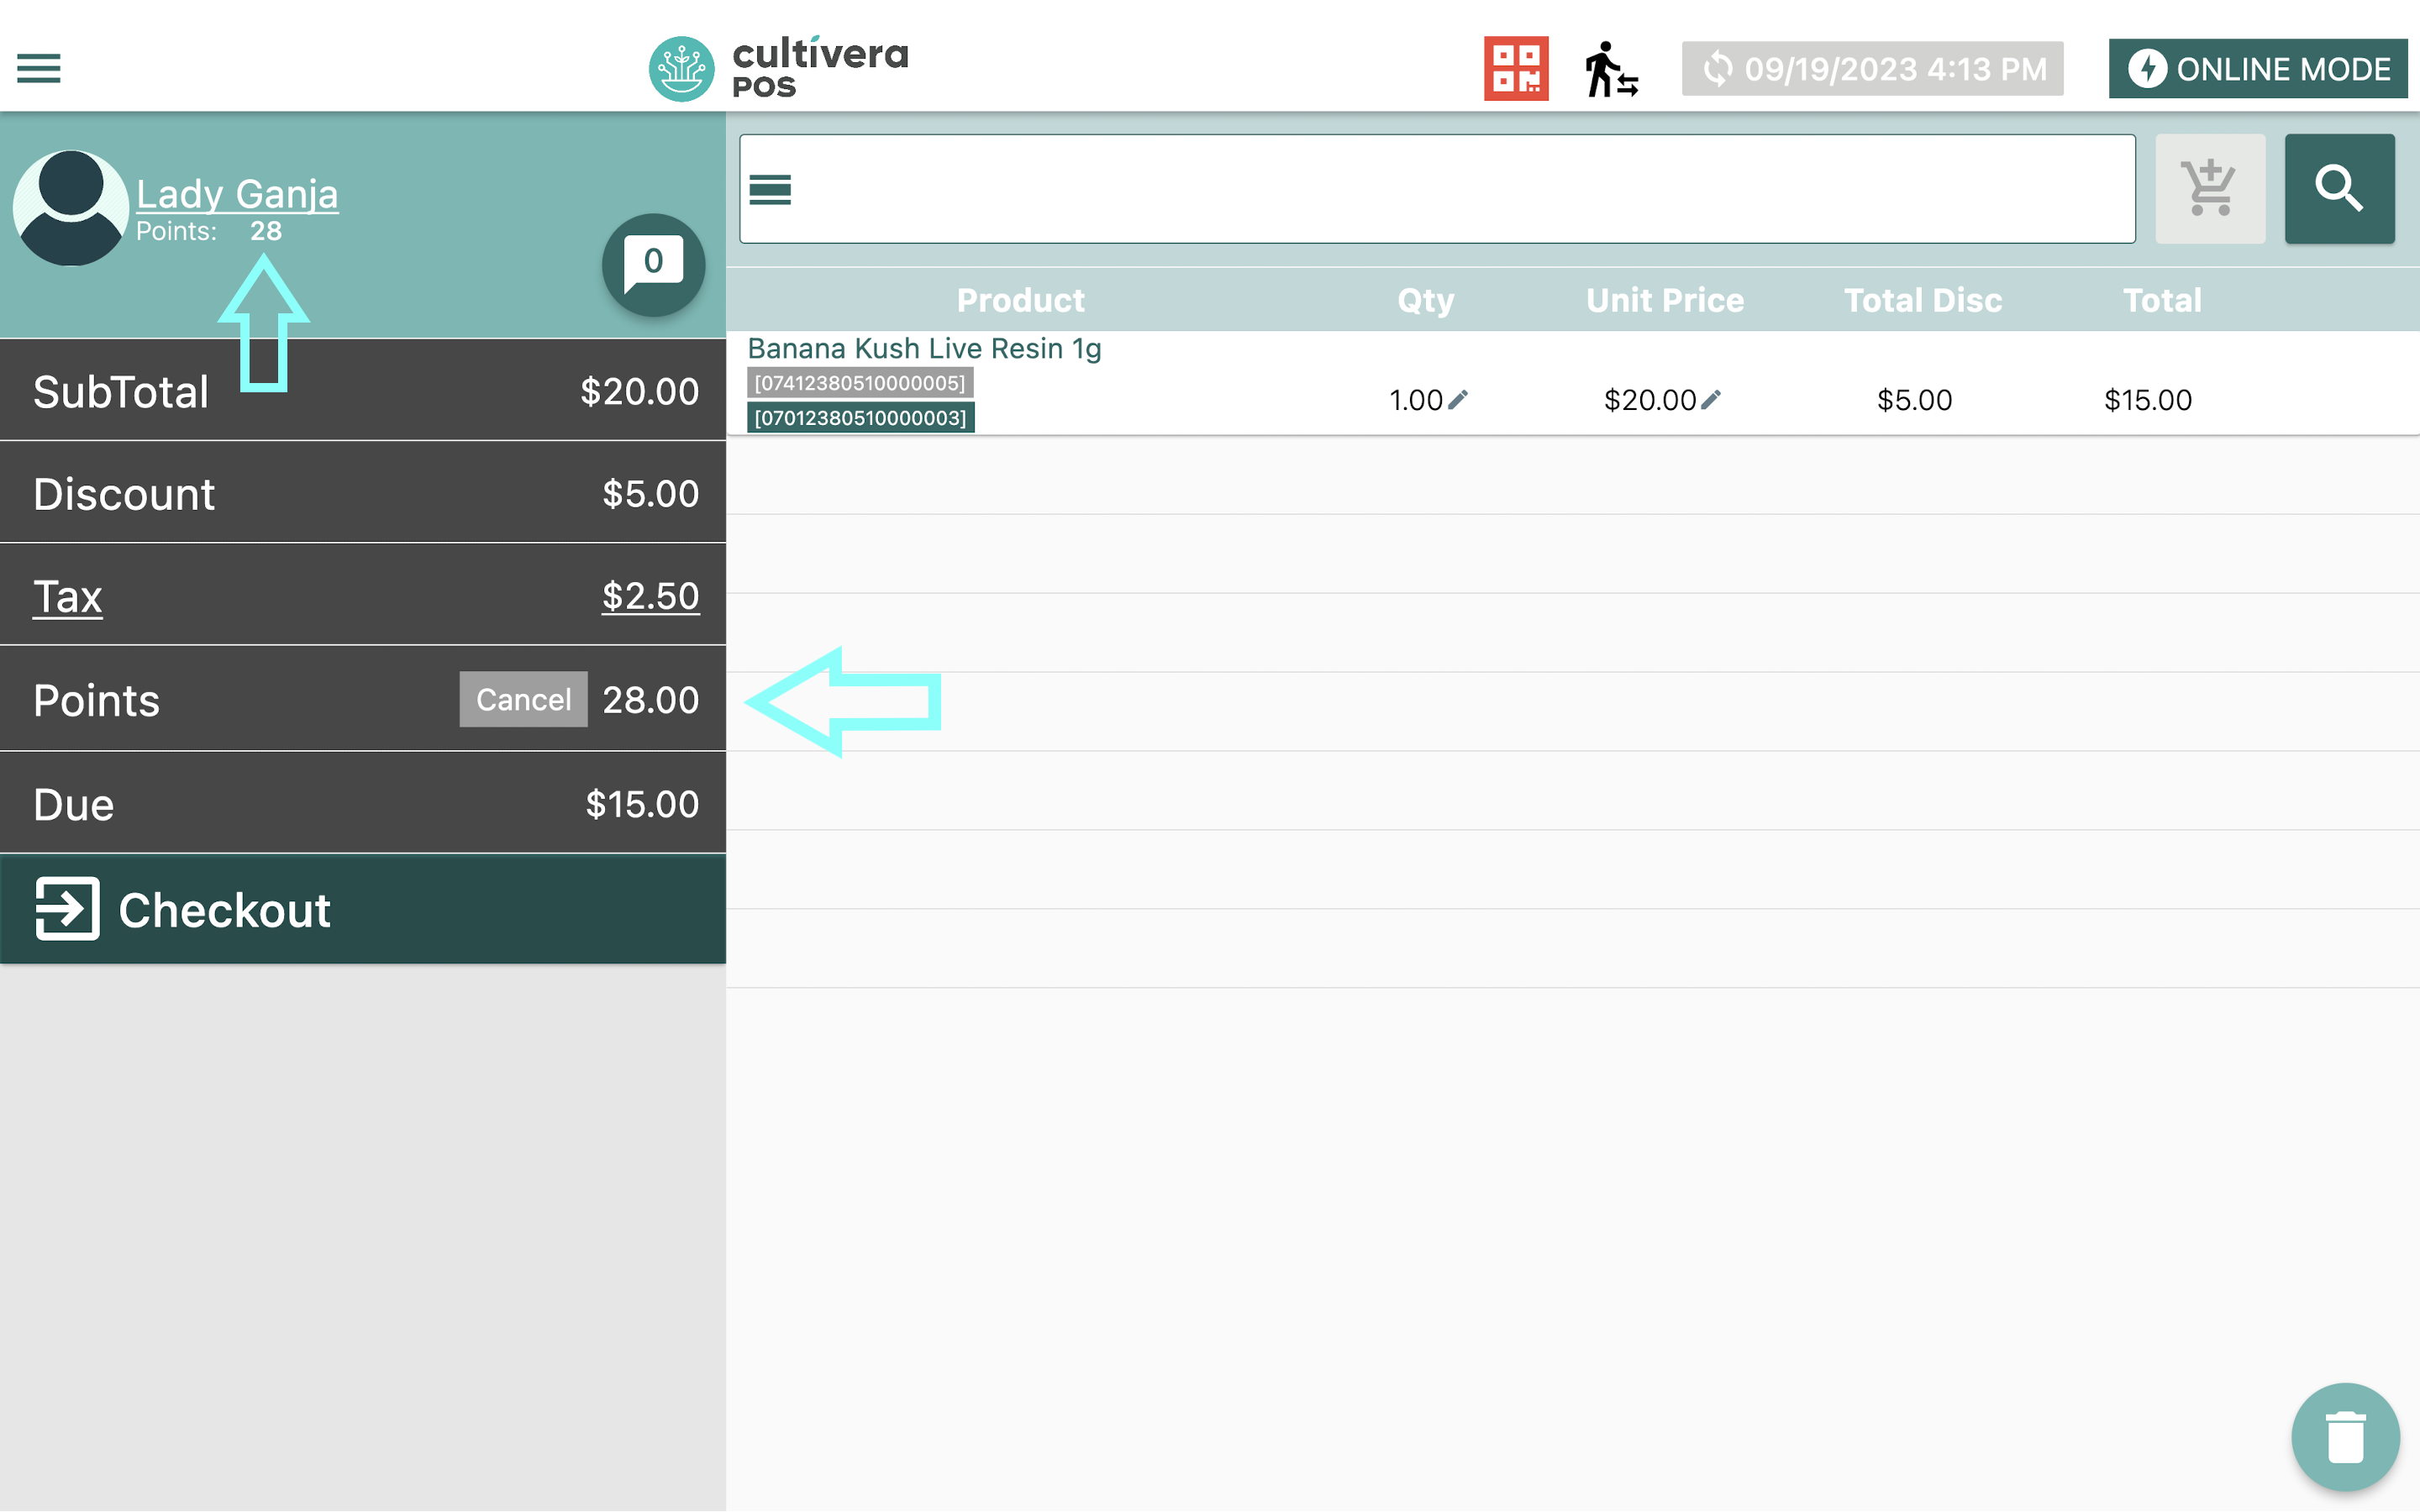
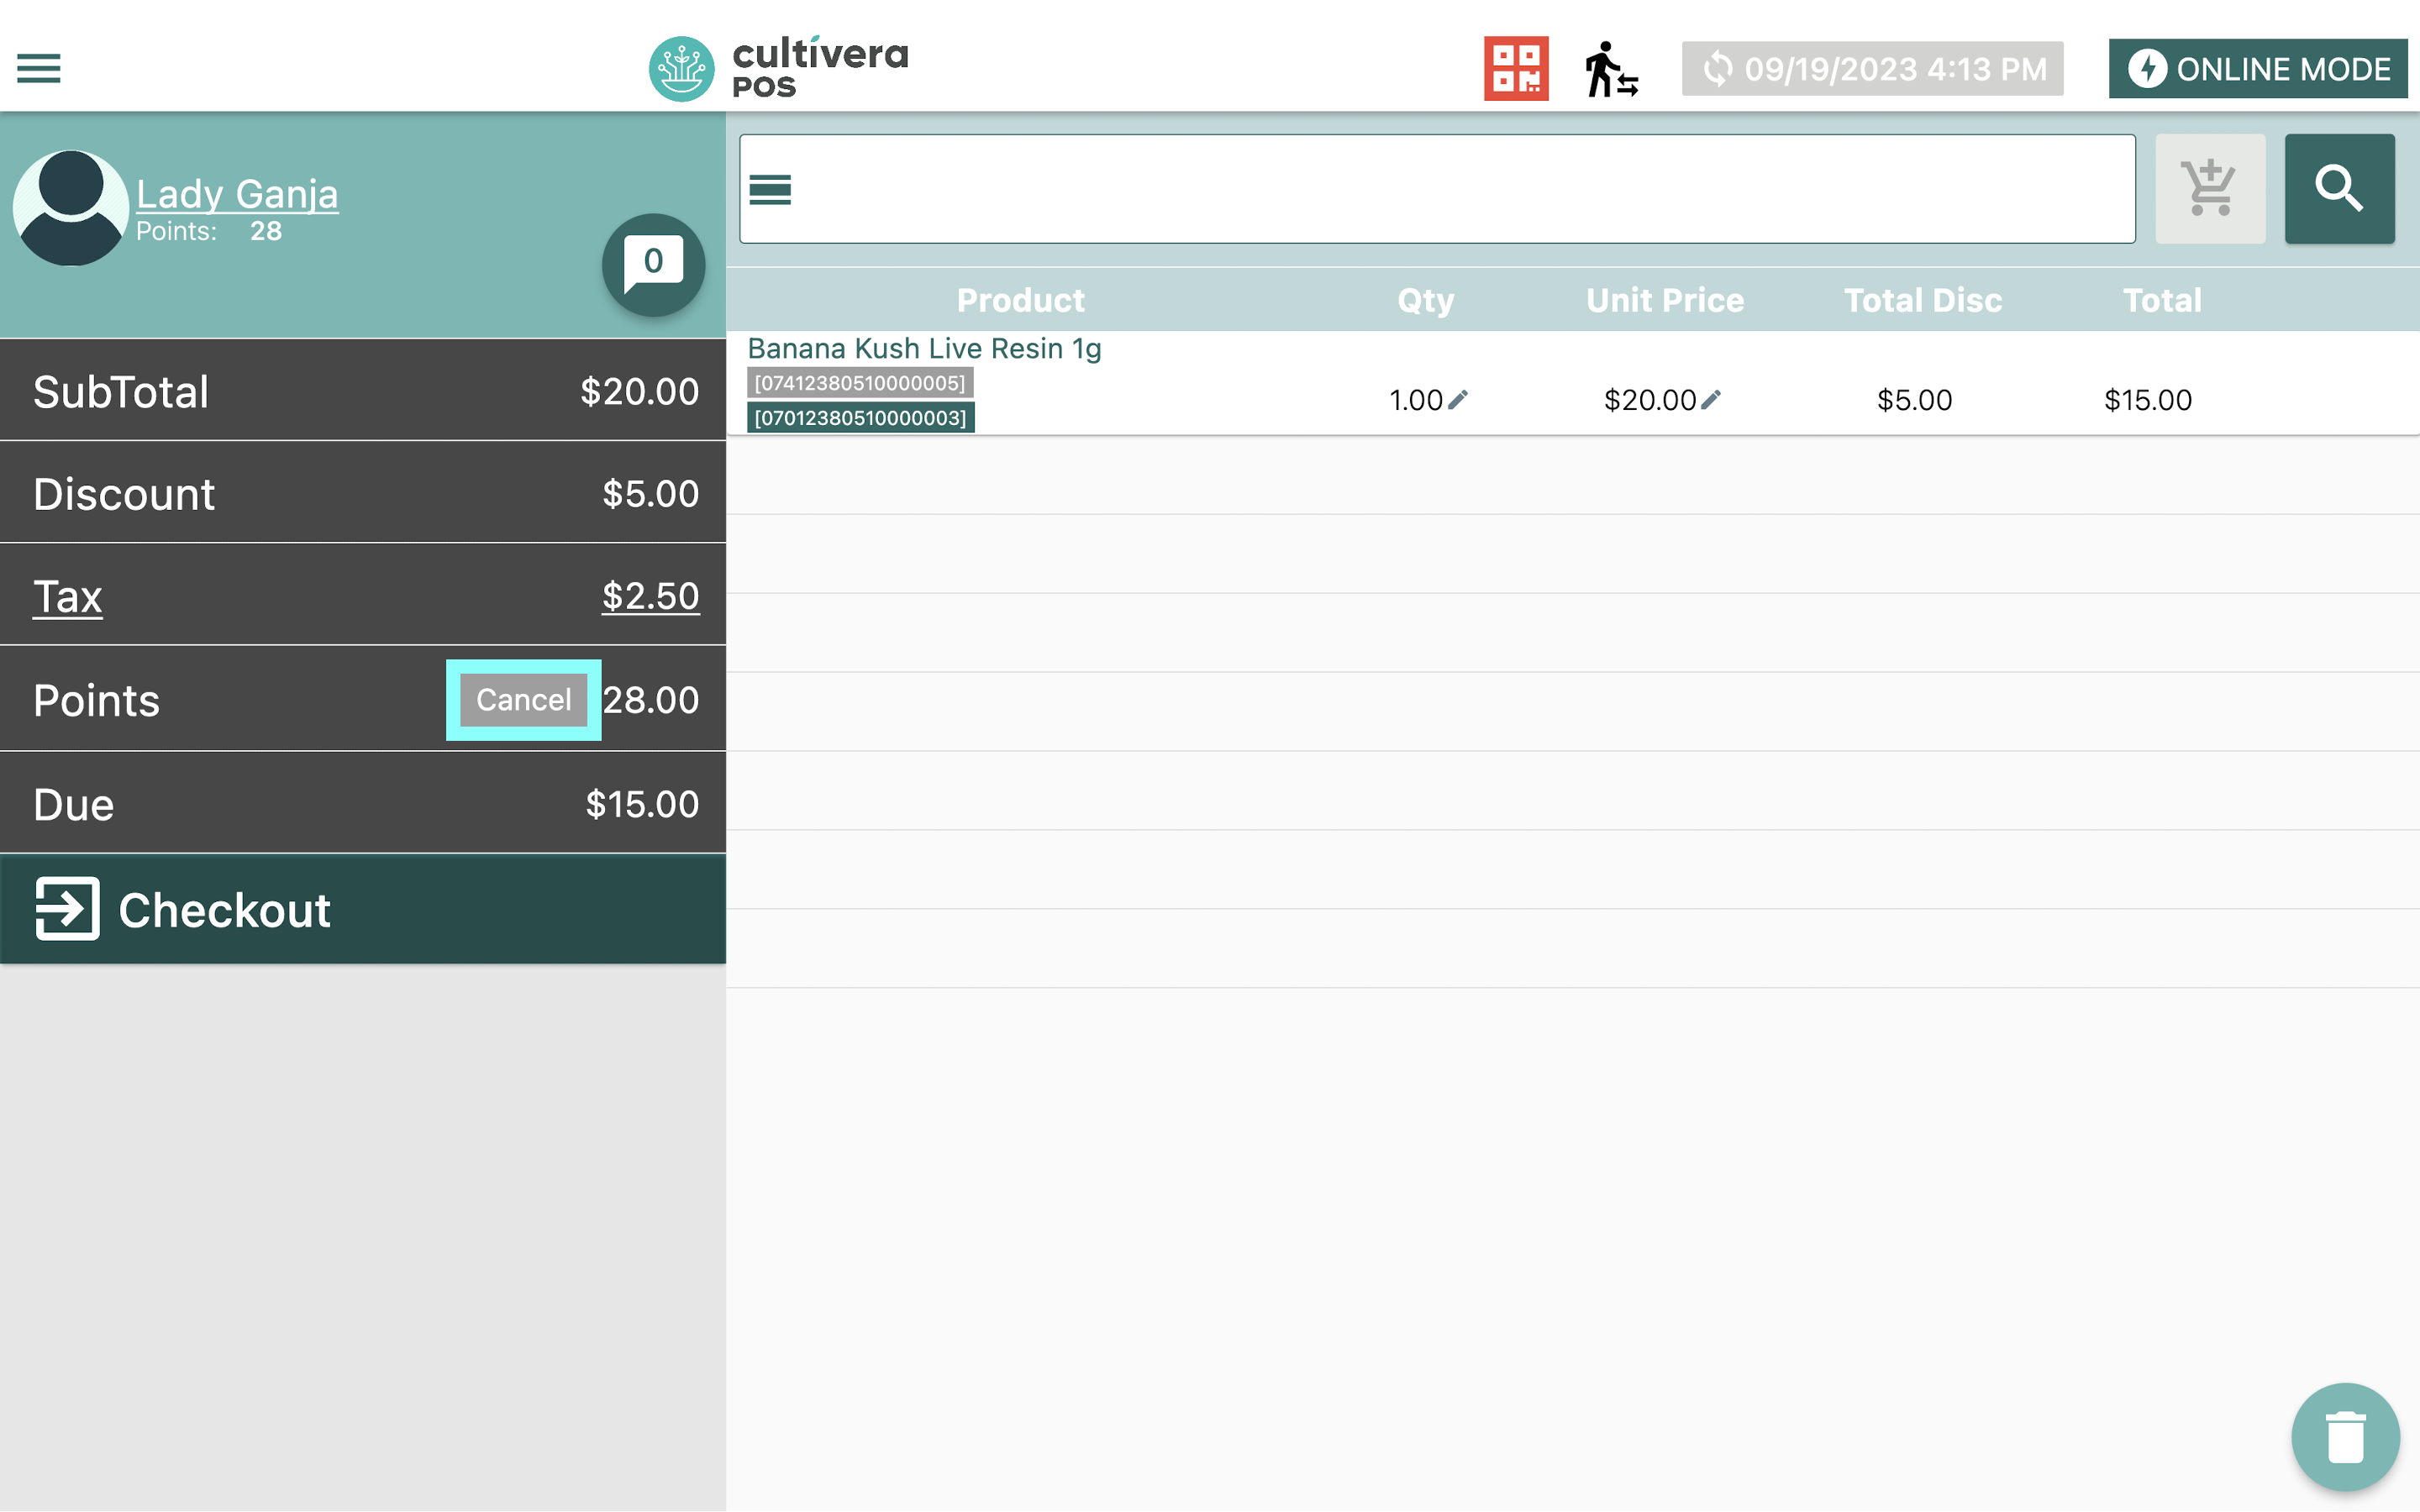
- To Remove applied Loyalty Points from the cart, Select the "Cancel" button next to the remaining point balance.
- If a customer has enough Loyalty Points to apply to the order, the orange "Apply" button will appear next to "Points" in the cart. Select "Apply" to bring up the "Apply Loyalty Points" module.